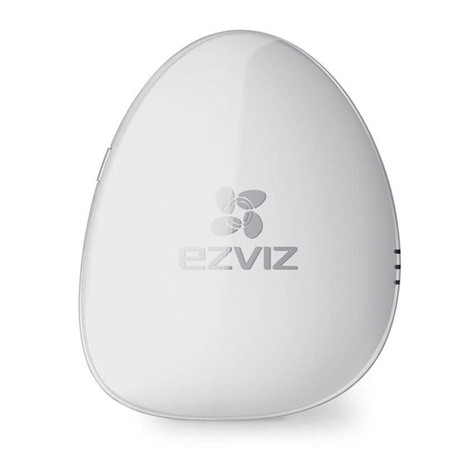
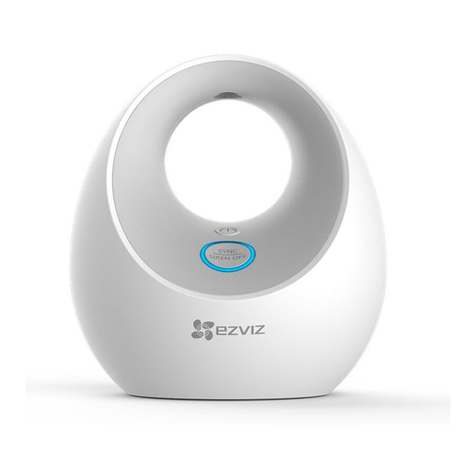
Ezviz Home Sense User manual


COPYRIGHT ©2017 Hangzhou Hikvision Digital Technology Co., Ltd. or its subsidiaries. ALL RIGHTS RESERVED.
About this Manual
The Manual includes instructions for using and managing the product. Pictures, charts, images and all other information
hereinafter are for description and explanation only. The information contained in the Manual is subject to change, without
notice, due to firmware updates or other reasons. Please find the latest version in the ™ website (http://www.
ezvizlife.com).
Any and all information, including, among others, wordings, pictures, graphs are the properties of Hangzhou Hikvision Digital
Technology Co., Ltd. or its subsidiaries (hereinafter referred to be “Hikvision”). This user manual (hereinafter referred to
be “the Manual”) cannot be reproduced, changed, translated, or distributed, partially or wholly, by any means, without the
prior written permission of Hikvision. Unless otherwise stipulated, Hikvision does not make any warranties, guarantees or
representations, express or implied, regarding to the Manual.
Trademarks Acknowledgement
™, ™, and other Hikvision’s trademarks and logos are the properties of Hikvision in various jurisdictions.
Other trademarks and logos mentioned below are the properties of their respective owners.
Legal Disclaimer
TO THE MAXIMUM EXTENT PERMITTED BY APPLICABLE LAW, THE PRODUCT DESCRIBED, WITH ITS HARDWARE, SOFTWARE
AND FIRMWARE, IS PROVIDED “AS IS”, WITH ALL FAULTS AND ERRORS, AND HIKVISION MAKES NO WARRANTIES, EXPRESS
OR IMPLIED, INCLUDING WITHOUT LIMITATION, MERCHANTABILITY, SATISFACTORY QUALITY, FITNESS FOR A PARTICULAR
PURPOSE, AND NON-INFRINGEMENT OF THIRD PARTY. IN NO EVENT WILL HIKVISION, ITS DIRECTORS, OFFICERS, EMPLOYEES,
OR AGENTS BE LIABLE TO YOU FOR ANY SPECIAL, CONSEQUENTIAL, INCIDENTAL, OR INDIRECT DAMAGES, INCLUDING, AMONG
OTHERS, DAMAGES FOR LOSS OF BUSINESS PROFITS, BUSINESS INTERRUPTION, OR LOSS OF DATA OR DOCUMENTATION,
IN CONNECTION WITH THE USE OF THIS PRODUCT, EVEN IF HIKVISION HAS BEEN ADVISED OF THE POSSIBILITY OF SUCH
DAMAGES. TO THE MAXIMUM EXTENT PERMITTED BY APPLICABLE LAW, IN NO EVENT SHALL HIKVISION’S TOTAL LIABILITY FOR
ALL DAMAGES EXCEED THE PURCHASE PRICE THE PRODUCT.
HIKVISION does not undertake any liability for personal injury or property damage, as the result of product interruption or
service termination cause by: a) improper installation or usage other than as requested; b) the protection of national or
public interests; c) Force Majeure; d) yourself or the third party, including not limitation, using any third party’s products,
software, applications, and among others.
REGARDING TO THE PRODUCT WITH INTERNET ACCESS, THE USE OF PRODUCT SHALL BE WHOLLY AT YOUR OWN RISKS.
HIKVISION SHALL NOT TAKE ANY RESPONSIBILITES FOR ABNORMAL OPERATION, PRIVACY LEAKAGE OR OTHER DAMAGES
RESULTING FROM CYBER ATTACK, HACKER ATTACK, VIRUS INSPECTION, OR OTHER INTERNET SECURITY RISKS; HOWEVER,
HIKVISION WILL PROVIDE TIMELY TECHNICAL SUPPORT IF REQUIRED.
SURVEILLANCE LAWS VARY BY JURISDICTION. PLEASE CHECK ALL RELEVANT LAWS IN YOUR JURISDICTION BEFORE USING
THIS PRODUCT IN ORDER TO ENSURE THAT YOUR USE CONFORMS TO THE APPLICABLE LAW. YOU FUTHER AGREE THAT THIS
PRODUCT IS ONLY FOR CIVIL USE, AND HIKVISION SHALL NOT BE LIABLE IN THE EVENT THAT THIS PRODUCT IS USED WITH
ILLEGITIMATE PURPOSES, SUCH AS THIRD PARTY RIGHTS INFRINGEMENT, MEDICAL TREATMENT, SAFETY EQUIPMENT OR
OTHER SITUATIONS WHERE THE PRODUCT FAILURE COULD LEAD TO DEATH OR PERSONAL INJURY, OR WEAPON OF MASS
DESTRUCTION, CHEMINCAL AND BIOLOGICAL WEAPON, NUCLEAR EXPLOSION, AND ANY UNSAFE NUCLEAR ENERGY USES OR
ANTI-HUMANITY USAGES. YOU SHOULD UNDERTAKE ALL RESPONSIBILITIES FOR LOSSES OR DAMAGES RESULTING FROM THE
ABOVE USAGES WHATSOEVER.
IN THE EVENT OF ANY CONFLICTS BETWEEN THE ABOVE AND THE APPLICABLE LAW, THE LATER PREVAILS.

Regulatory Information
EU Conformity Statement
This product and - if applicable - the supplied accessories too are marked with "CE" and comply therefore
with the applicable harmonized European standards listed under the the Radio Equipment Directive
2014/53/EU, the EMC Directive 2014/30/EU, the RoHS Directive 2011/65/EU.
2012/19/EU (WEEE directive): Products marked with this symbol cannot be disposed of as unsorted
municipal waste in the European Union. For proper recycling, return this product to your local supplier
upon the purchase of equivalent new equipment, or dispose of it at designated collection points. For more
information see: www.recyclethis.info.
2006/66/EC and its amendment 2013/56/EU (battery directive): This product contains a battery that
cannot be disposed of as unsorted municipal waste in the European Union. See the product documentation
for specific battery information. The battery is marked with this symbol, which may include lettering to
indicate cadmium (Cd), lead (Pb), or mercury (Hg). For proper recycling, return the battery to your supplier
or to a designated collection point. For more information see: www.recyclethis.info.
Гарантийный срок-1 год
Срок службы-3 года
Производитель:Ханджоу Хиквижн Диджитал Технолоджи(Китай)
Импортер-поставщик в России: ЗАО ''Хиквижн''
Импортер-поставщик в Республике Беларусь:ООО ''Торговый Дом ''АВАНТ-ТЕХНО''
Сайт:www.ezviz.ru
EC DECLARATION OF CONFORMITY
Hereby, Hangzhou Hikvision Digital Technology Co., Ltd. declares that the radio equipment type [CS-A1-32W] is in compliance
with Directive 2014/53/EU.
The full text of the EC DECLARATION OF CONFORMITY is available at the following web link:
http://www.ezvizlife.com/declaration-of-conformity
Due to the product shape and dimension, the name and address of the importer/manufacturer are printed on
the package.
Safety Instruction
CAUTION: THE PRODUCT IS BUILT IN A REPLACEABLE BATTERY. RISK OF EXPLOSION IF BATTERY IS REPLACED
BY AN INCORRECT TYPE. DISPOSE OF USED BATTERIES ACCORDING TO THE INSTRUCTIONS.
SAVE THIS MANUAL FOR FUTURE REFERENCE

1
Operations
Step 1
Preparation
Make sure the following power and environmental requirements are met:
•Power voltage: DC 5V (Micro USB)
•Working temperature: -10°C to 55°C (14°F to 131°F)
•Working humidity: 10% to 90% (non-condensing)
1Starting Alarm Hub
Connect the power adapter to the Alarm Hub using the USB data cable. Plug in the power adapter
to a power socket (or outlet). The white indicator turns on indicating the Alarm Hub is starting, and
then the red indicator turns on when the Alarm Hub is completely powered on.
2Installing the EZVIZ App
- Connect your mobile phone to a Wi-Fi or mobile network.
- Download and install the EZVIZ app by searching the “EZVIZ” in App Store (iOS version) and Google
PlayTM (Android version).
- Start the app and register for an EZVIZ user account following the start-up wizard.
Power Socket
Power Adapter
USB Data Cable

2
Step 2
Quick Settings
1Adding Alarm Hub
- Connect the mobile phone to the 2.4GHz Wi-Fi network.
- Log into the EZVIZ app and scan the QR code on the Alarm Hub to add it to your EZVIZ account.
- Follow the prompts to configure the Alarm Hub Wi-Fi connection.
•Make sure the mobile phone is connected to the 2.4GHz Wi-Fi network and the Alarm Hub
is not connected to any Wi-Fi network, or the connection fail.
•For best result, place your phone no more than 2ft. from the Alarm Hub during the adding
process.
2Completing Configuration
Once the Alarm Hub has successfully connected to the Wi-Fi network, the yellow indicator starts to
blink and a voice prompt "Wi-Fi connected" will be heard from the Alarm Hub.
Press and hold the Alarm Hub Setting button to change or re-configure its Wi-Fi connection.
Complete the configuration using the EZVIZ app.

3
Step 3
Adding Detectors
1Enabling the Adding Detectors Mode
Enable the adding detector mode by quickly pressing the Setting button of the Alarm Hub. The
yellow and red indicators will start to blink. Follow voice prompt.
2Adding Detectors
Bring the detector close to the Alarm Hub (within 2ft) and then press the detector's alarm button
to start the adding process. A voice prompt stating the type and the serial number of the detector
being added (up to 32 detectors are allowed).
……
3Disabling the Adding Detectors Mode
Press the Setting Button again to disable the Adding Detectors Mode after all the detectors are
added.
•The Adding Detectors Mode will be disabled if no operation occurs within 3 minutes.
•The maximum distance between the detectors and the Alarm Hub varies up to 300ft.

4
Appendix
Box Contents
Alarm Hub x1 Remote Control x1 USB Data Cable x1
Quick Start Guide x1 Power Adapter x1
(Power adapter type may vary according to countries.)
Functionality
Irreplaceable Home Guard
Accessible to various EZVIZ wireless detectors and provide a comprehensive protection to
your home.
World’s leading Communication Technology
Convenient security deployment with wireless detectors.
Convenient Network Configuration
One-push Wi-Fi connection (supports ONLY 2.4GHz Wi-Fi).
EZVIZ Cloud P2P Service
Receives and controls alarms on mobile phone and PC.

5
Alarm Hub Basics
Name Description
Power Input Power supply for the device (by USB port).
ALARM LED Indicator Steady Red: The Alarm Hub is in the normal status.
Red Flicker: An alarm occurs.
LINK LED Indicator Yellow Flicker:The Wi-Fi is connected.
Unlit: The Wi-Fi is disconnected.
READY LED Indicator Steady White: The Alarm Hub is powered on (by USB port).
Mounting Hole Hole for hanging the device.
RESET Button Connect the device to the power supply (by USB port). Press and hold the RESET
button with a needle and release until the 3 indicators flicker at the same time
for once. The device restarts and all settings are restored except the connected
detectors and remote control.
Setting Button
Power Input
Speaker
Mounting Hole
RESET Button
LED Indicators
(ALARM, LINK,and READY)

6
Remote Control Basics
Name Description
LED Indicator Flicker when any button is pressed.
Hold down the button for 2 s to send an emergency alarm to the EZVIZ platform.
If anyone is at home or you are going to enter the house, you need to disarm the alarm
system. Press the button to activate the At-Home mode.
When you are at home and still want to feel protected: only the perimeter parts of the
house (doors and windows) are armed. The Sleeping mode is appropriate during the
day or at night. Press the button to activate the Sleeping mode.
If no one is at home, you need to activate the alarm system to protect it from
intruders. The Leaving-Home mode is appropriate. Press the button to activate the
Leaving-Home mode.
Press to turn off the voice prompts.
•The remote control in the package is connected to the A1 by default. Refer to step 3 in the
Operation to connect another remote control to the Alarm Hub if the remote control does not
work normally or you have a new one.
•The above descriptions for arming mode are the default settings. You can customize the
detectors arming status in each arming mode and switch the arming mode in the EZVIZ app.
Emergency Button
At-Home Mode
LED Indicator
Mute
Leaving-Home Mode
Sleeping Mode

7
Troubleshooting
Q: “The device is offline.” or “The device is not registered.” prompts when adding Alarm Hub by EZVIZ
app.
A: 1. Check the Wi-Fi is connected with the Alarm Hub and make sure it’s working.
2. Check whether the yellow indicator flickers; if not, please restart the Alarm Hub and connect to
the Wi-Fi again.
Q: The mobile phone does not detect the alarm when the Alarm Hub is online and alarm occurs.
A: 1. Make sure the EZVIZ app is running on your mobile phone.
2. For Android OS mobile phone, make sure the app is running in the background; and for the iOS,
enable the message push function in “Settings > Notification”.
Q: The status of the detector is displayed as offline on the EZVIZ app.
A: 1. Make sure the Wi-Fi status that the Alarm Hub connected with is normal.
2. Make sure the distance between the detectors and the Alarm Hub is less than 100m and no
barrier is allowed.
3. Make sure the detector’s battery has not been depleted.
Q: The detector can detect the alarm and the Alarm Hub works normally, but no voice prompts.
A: 1. Make sure the distance between the detector and the Alarm Hub is less than 100m and no
barrier is allowed.
2. Adjust the installation position of the Alarm Hub. You’re recommended to install the Alarm Hub
in the center of your house.
3. Make sure the Alarm Hub is not in Mute mode.

8
Fonctionnement
Étape1
Préparation
Assurez-vous que l'environnement et l'alimentation électrique remplissent les conditions ci-dessous.
•Tension d'alimentation: 5Vcc (Micro USB)
•Température de fonctionnement: -10 °C - 55 °C (14 °F - 131 °F)
•Humidité de fonctionnement: 10% - 90% (sans condensation)
1Starting A1
Branchez l'A1 et l'adaptateur électrique avec le câble données USB puis branchez l'adaptateur
secteur dans la prise femelle. Le témoin blanc s'allume pour indiquer que l'A1 démarre; lorsque la
séquence de démarrage est terminée, le témoin rouge s'allume.
2Installation de l'application EZVIZ
- Raccordez votre téléphone portable au réseau Wi-Fi.
- Téléchargez et installez l'application EZVIZ depuis App Store (version iOS) ou Google PlayTM (version
Android).
- Démarrez l'application et ouvrez un compte d'utilisateur EZVIZ en suivant les instructions de
l'assistant.
Prise d'alimentation
Adaptateur électrique
Câble données USB

9
Étape 2
Réglages rapides
1Ajout de l'A1
- Connectez le téléphone portable à un réseau Wi-Fi.
- Ouvrez une session dans l'application EZVIZ et scannez le code QR de l'A1 pour l'ajouter à votre
compte EZVIZ.
- Suivez les indications pour configurer la connexion Wi-Fi de l'A1, par exemple, le SSID (nom sur le
réseau Wi-Fi) et le mot de passe.
•Assurez-vous que le portable est raccordé au réseau Wi-Fi et que l'A1 n'y est pas encore
connecté, sinon la connexion échouera.
•La distance entre l'A1 et le téléphone portable ne doit pas dépasser 50cm.
2Terminer la configuration
Le témoin LINK clignote en jaune lorsque la liaison entre l'A1 et le réseau Wi-Fi (ou le routeur) est
établie.
Maintenez le bouton des réglages enfoncé si vous souhaitez activer la fonction de modification
Wi-Fi. Exemple: la connexion de l'A1 au réseau Wi-Fi (routeur) a échoué et vous devez répéter
l'opération; ou bien vous souhaitez changer de connexion Wi-Fi (pour connecter l'A1 à un
autre réseau Wi-Fi).

10
Étape 3
Ajout de détecteurs
1Activation du mode Ajout de détecteurs
Appuyez sur le bouton des réglages; un message vocal indique que le mode Ajout de détecteurs est
activé. Les témoins jaune et rouge clignotent deux fois par seconde, indiquant que le mode Ajout de
détecteurs est activé.
2Ajout de détecteurs
Approchez le détecteur de l'A1 (moins de 50cm) pour déclencher l'alarme manuellement. Un
message vocal indique le type et le numéro de série du détecteur, indiquant que le détecteur
correspondant a été ajouté (il est possible d'ajouter jusqu'à 32détecteurs).
T
U
R
N
T
O
R
E
M
O
V
E
D
O
N
O
T
P
A
I
N
T
……
3Désactivation du mode Ajout de détecteurs
Appuyez sur le bouton des réglages pour désactiver le mode Ajout de détecteurs lorsque l'opération
est terminée.
•Le mode Ajout de détecteur est désactivé au bout de 3minutes d'inactivité.
•La distance maximale de fonctionnement entre les détecteurs et l'A1 est de 100m (sans
obstacle).

11
Annexe
Contenu de l'emballage
1 A1 1 télécommande 1 câble USB
1 guide de prise en main 1 transformateur électrique
Présentation des fonctions
Un gardien irremplaçable
Accès à divers détecteurs sans fil et protection complète de votre domicile.
Leader mondial dans les technologies de communication
Déploiement pratique d'une solution de sécurité grâce à des détecteurs sans fil.
Facilité de configuration du réseau
Connexion Wi-Fi par simple pression sur un bouton.
Service P2P de cloud EZVIZ
Réception des signaux d'alarme et de télécommande sur un téléphone portable et un PC.

12
A1 Notions de base
Nom Description
Entrée d'alimentation Alimentation électrique de l'appareil (port USB).
Diode témoin ALARM Rouge fixe: L'A1 est dans l'état normal.
Rouge clignotant: une alarme est survenue.
Diode témoin LINK Jaune clignotant: la connexion Wi-Fi est active.
Éteint: La connexion Wi-Fi est inactive.
Diode témoin READY Blanc fixe: L'A1 est alimenté (par le port USB).
Orifice pour support Orifice pour accrocher l'appareil.
Bouton RESET Branchez l'appareil à l'alimentation électrique (port USB). Maintenez la touche
RESET enfoncée à l'aide d'une aiguille puis relâchez-la lorsque les 3témoins
clignotent une fois en même temps. L'appareil redémarre et tous les paramètres
sont restaurés, à l'exception des détecteurs connectés et de la télécommande.
Touche de régla
Entrée
d'alimentation
Haut-parleur
Orifice pour support
Bouton RESET
Diodes témoins
(ALARM, LINK et READY)

13
Présentation de la télécommande
Nom Description
Diode témoin Clignote lorsque vous appuyez sur un bouton.
Appuyez sur le bouton et maintenez-le enfoncé 2 secondes pour envoyer une alarme
d'urgence à la plate-forme EZVIZ.
Si votre domicile est occupé et que vous vous apprêtez à entrer dans la maison, vous
devez désactiver le système d'alarme. Appuyez sur le bouton pour activer le mode À
domicile.
Si vous êtes chez vous et souhaitez quand même vous sentir protégé: seul le périmètre
de la maison (portes et fenêtres) est armé. Le mode Sommeil est utile pendant la
journée ou la nuit pendant que vous dormez. Appuyez sur le bouton pour activer le
mode Sommeil.
Si votre domicile est inoccupé, vous devez activer le système d'alarme pour le protéger
contre les intrus. Dans ce cas, vous pouvez opter pour le mode Hors domicile. Appuyez
sur le bouton pour activer le mode Hors domicile.
Appuyez pour désactiver les messages vocaux.
•Par défaut, la télécommande fournie est connectée à l'A1. Reportez-vous à l'étape3 de la
section Utilisation pour connecter une autre télécommande à l'A1 si la vôtre ne fonctionne pas
normalement ou si elle est nouvelle.
•Le mode d'armement décrit ci-dessus est le mode par défaut. Vous pouvez personnaliser l'état
d'armement des détecteurs dans chaque mode et activer le mode d'armement dans l'application
EZVIZ.
Bouton d’urgence
Mode À domicile
Diode témoin
Son coupé
Mode Hors domicile
Mode Sommeil

14
FAQ
Q: Le message «L'appareil est hors ligne» ou «L'appareil n'est pas enregistré» apparaît lorsque
vous ajoutez l'A1 à partir de l'application EZVIZ.
R: 1. Vérifiez que l'interface Wi-Fi est connectée à l'A1 et qu'elle fonctionne.
2. Vérifiez si l'indicateur jaune clignote; sinon, redémarrez l'A1 et reconnectez-le au réseau Wi-Fi.
Q: Le téléphone portable ne reçoit pas d'alarme lorsque l'A1 est en ligne.
R: 1. Assurez-vous que l'appli EZVIZ est en cours d'exécution sur votre téléphone portable.
2. Sur un téléphone portable Android, assurez-vous que l'application s'exécute en arrière-plan;
sous iOS, activez les notifications push dans «Paramètres > Notification».
Q: L'état du détecteur affiché est hors ligne dans l'application EZVIZ.
R: 1. Vérifiez l'état de la connexion Wi-Fi et que l'A1 connecté est dans l'état normal.
2. Assurez-vous que la distance entre les détecteurs et l'A1 ne dépasse pas 100m et qu'il n'y a
aucun obstacle.
3. Vérifiez que la batterie du détecteur n'est pas épuisée.
Q: Le détecteur peut détecter les alarmes et l'A1 fonctionne normalement, mais sans message vocal.
R: 1. Assurez-vous que la distance entre le détecteur et l'A1 ne dépasse pas 100m et qu'il n'y a
aucun obstacle.
2. Réglez la position d'installation de l'A1. Il est conseillé de l'installer au centre de votre
logement.
3. Assurez-vous que l'A1 n'est pas en mode muet.

15
Funciones
Paso 1
Preparación
Asegúrese de que el entorno y la fuente de alimentación cumplan los requisitos siguientes:
•Voltaje de fuente de alimentación: DC 5 V (Micro USB)
•Temperatura de trabajo: De -10°C a 55°C (de 14°F a 131°F)
•Humedad de trabajo: De 10% a 90% (sin condensación)
1Inicio del A1
Conecte el A1 y el adaptador de corriente con el cable de datos USB y, a continuación, enchufe el
adaptador de corriente a la toma de corriente. El indicador blanco se encenderá, lo que indica que el
A1 se está iniciando. Cuando el A1 se haya iniciado completamente, el indicador se volverá rojo.
2Instalación de la aplicación EZVIZ
- Conecte el teléfono móvil a la red Wi-Fi.
- Descargue la Aplicación Móvil EZVIZ buscando "EZVIZ" en App Store (versión iOS) y Google PlayTM
(versión Android).
- Inicie la aplicación y regístrese para obtener una cuenta de usuario de EZVIZ mediante el asistente
de inicio.
Toma de corriente
Adaptador de corriente
Cable de datos USB

16
Paso 2
Configuración rápida
1Incorporación del A1
- Conecte el teléfono móvil a la red Wi-Fi.
- Inicie sesión en la aplicación EZVIZ y escanee el código QR del A1 para añadirlo a su cuenta de
EZVIZ.
- Siga las indicaciones para configurar la conexión Wi-Fi del A1 como, por ejemplo, el SSID (nombre
de la conexión Wi-Fi) y la contraseña.
•Asegúrese de que el teléfono móvil esté conectado al Wi-Fi y de que el A1 aún no se
haya conectado a ninguna red Wi-Fi, ya que, de no ser así, se puede producir un error de
conexión.
•La distancia entre el A1 y el teléfono móvil no debe ser superior a 50 cm.
2Finalización de la configuración
El indicador de conexión LINK parpadea en amarillo cuando el A1 se ha conectado correctamente a
la red Wi-Fi (del enrutador).
Mantenga pulsado el botón de configuración si desea habilitar la función de modificación de
Wi-Fi. Por ejemplo, el procedimiento para conectar el dispositivo A1 a la red Wi-Fi (enrutador)
no se realiza correctamente y debe repetir la operación o desea cambiar la conexión Wi-Fi (para
conectar el dispositivo A1 a una nueva red Wi-Fi).
Other manuals for Home Sense
1
Table of contents
Languages:
Other Ezviz Security System manuals
Popular Security System manuals by other brands

Honeywell
Honeywell VISTA-128BPT Installation and setup guide

FireAngel
FireAngel Thermoptek WST-630 quick start guide

Netatmo
Netatmo Smart Indoor Siren user guide

FW Murphy
FW Murphy Selectronic S1501 series Installation and operation manual

Tiras
Tiras PRIME 8L installation manua

Avital
Avital Champion Mark II owner's guide