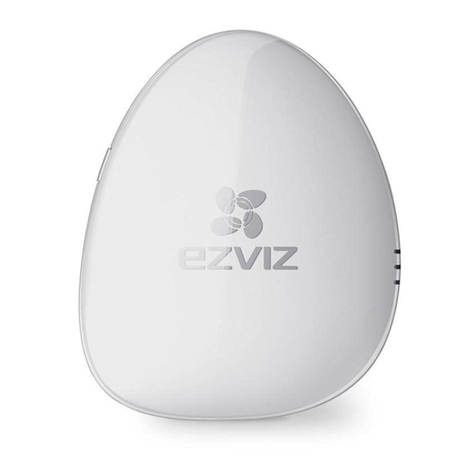
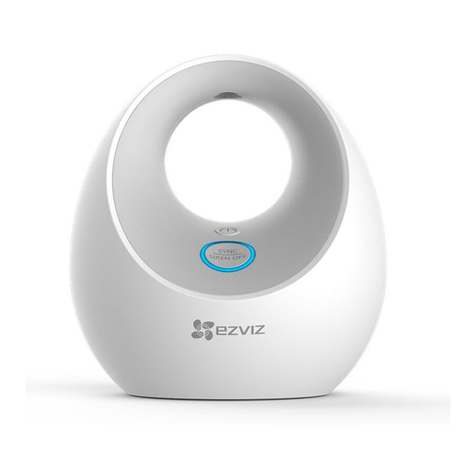
Ezviz T9 User manual


COPYRIGHT © Hangzhou EZVIZ Software Co., Ltd.. ALL RIGHTS RESERVED.
Any and all information, including, among others, wordings, pictures, graphs are the properties of Hangzhou EZVIZ Software
Co., Ltd. (hereinafter referred to as “EZVIZ”). This user manual (hereinafter referred to as “the Manual”) cannot be reproduced,
changed, translated, or distributed, partially or wholly, by any means, without the prior written permission of EZVIZ. Unless
otherwise stipulated, EZVIZ does not make any warranties, guarantees or representations, express or implied, regarding to the
Manual.
About this Manual
The Manual includes instructions for using and managing the product. Pictures, charts, images and all other information
hereinafter are for description and explanation only. The information contained in the Manual is subject to change, without
notice, due to firmware updates or other reasons. Please find the latest version in the ™ website (http://www.
ezvizlife.com).
Revision Record
New release – January, 2019
Trademarks Acknowledgement
™, ™, and other EZVIZ’s trademarks and logos are the properties of EZVIZ in various jurisdictions. Other
trademarks and logos mentioned below are the properties of their respective owners.
Legal Disclaimer
TO THE MAXIMUM EXTENT PERMITTED BY APPLICABLE LAW, THE PRODUCT DESCRIBED, WITH ITS HARDWARE, SOFTWARE AND
FIRMWARE, IS PROVIDED “AS IS”, WITH ALL FAULTS AND ERRORS, AND EZVIZ MAKES NO WARRANTIES, EXPRESS OR IMPLIED,
INCLUDING WITHOUT LIMITATION, MERCHANTABILITY, SATISFACTORY QUALITY, FITNESS FOR A PARTICULAR PURPOSE, AND NON-
INFRINGEMENT OF THIRD PARTY. IN NO EVENT WILL EZVIZ, ITS DIRECTORS, OFFICERS, EMPLOYEES, OR AGENTS BE LIABLE TO
YOU FOR ANY SPECIAL, CONSEQUENTIAL, INCIDENTAL, OR INDIRECT DAMAGES, INCLUDING, AMONG OTHERS, DAMAGES FOR
LOSS OF BUSINESS PROFITS, BUSINESS INTERRUPTION, OR LOSS OF DATA OR DOCUMENTATION, IN CONNECTION WITH THE USE
OF THIS PRODUCT, EVEN IF EZVIZ HAS BEEN ADVISED OF THE POSSIBILITY OF SUCH DAMAGES.
TO THE MAXIMUM EXTENT PERMITTED BY APPLICABLE LAW, IN NO EVENT SHALL EZVIZ’S TOTAL LIABILITY FOR ALL DAMAGES
EXCEED THE ORIGINAL PURCHASE PRICE OF THE PRODUCT.
EZVIZ DOES NOT UNDERTAKE ANY LIABILITY FOR PERSONAL INJURY OR PROPERTY DAMAGE AS THE RESULT OF PRODUCT
INTERRUPTION OR SERVICE TERMINATION CAUSED BY: A) IMPROPER INSTALLATION OR USAGE OTHER THAN AS REQUESTED;
B) THE PROTECTION OF NATIONAL OR PUBLIC INTERESTS; C) FORCE MAJEURE; D) YOURSELF OR THE THIRD PARTY, INCLUDING
WITHOUT LIMITATION, USING ANY THIRD PARTY’S PRODUCTS, SOFTWARE, APPLICATIONS, AND AMONG OTHERS.
REGARDING TO THE PRODUCT WITH INTERNET ACCESS, THE USE OF PRODUCT SHALL BE WHOLLY AT YOUR OWN RISKS. EZVIZ
SHALL NOT TAKE ANY RESPONSIBILITES FOR ABNORMAL OPERATION, PRIVACY LEAKAGE OR OTHER DAMAGES RESULTING FROM
CYBER ATTACK, HACKER ATTACK, VIRUS INSPECTION, OR OTHER INTERNET SECURITY RISKS; HOWEVER, EZVIZ WILL PROVIDE
TIMELY TECHNICAL SUPPORT IF REQUIRED. SURVEILLANCE LAWS AND DATA PROTECTION LAWS VARY BY JURISDICTION.
PLEASE CHECK ALL RELEVANT LAWS IN YOUR JURISDICTION BEFORE USING THIS PRODUCT IN ORDER TO ENSURE THAT YOUR
USE CONFORMS TO THE APPLICABLE LAW. EZVIZ SHALL NOT BE LIABLE IN THE EVENT THAT THIS PRODUCT IS USED WITH

SAVE THIS MANUAL FOR FUTURE REFERENCE
ILLEGITIMATE PURPOSES.
IN THE EVENT OF ANY CONFLICTS BETWEEN THE ABOVE AND THE APPLICABLE LAW, THE LATTER PREVAILS.
Regulatory Information
EU Conformity Statement
This product and - if applicable - the supplied accessories too are marked with "CE" and comply therefore
with the applicable harmonized European standards listed under the Radio Equipment Directive 2014/53/EU,
the EMC Directive 2014/30/EU, the RoHS Directive 2011/65/EU.
2012/19/EU (WEEE directive): Products marked with this symbol cannot be disposed of as unsorted municipal
waste in the European Union. For proper recycling, return this product to your local supplier upon the purchase
of equivalent new equipment, or dispose of it at designated collection points. For more information see: www.
recyclethis.info.
2006/66/EC and its amendment 2013/56/EU (battery directive): This product contains a battery that cannot be
disposed of as unsorted municipal waste in the European Union. See the product documentation for specific
battery information. The battery is marked with this symbol, which may include lettering to indicate cadmium
(Cd), lead (Pb), or mercury (Hg). For proper recycling, return the battery to your supplier or to a designated
collection point. For more information see: www.recyclethis.info.
EC DECLARATION OF CONFORMITY
Hereby, Hangzhou EZVIZ Software Co.,Ltd. declares that the radio equipment type [
CS-T9-A
] is in compliance with Directive
2014/53/EU.
The full text of the EC DECLARATION OF CONFORMITY is available at the following web link:
http://www.ezvizlife.com/declaration-of-conformity.
Safety Instruction
CAUTION: THE PRODUCT IS BUILT IN A REPLACEABLE BATTERY. RISK OF EXPLOSION IF BATTERY IS REPLACED BY AN INCORRECT
TYPE. DISPOSE OF USED BATTERIES ACCORDING TO THE INSTRUCTIONS.
Due to the product shape and dimension, the name and address of the importer/manufacturer are printed on
the package.
Customer Service
For more information, please visit www.ezvizlife.com.
Need help? Contact us:
Telephone: +31 20 204 0128
Technical Inquires Email: support.eu@ezvizlife.com

COPYRIGHT © Hangzhou EZVIZ Software Co., Ltd. ALLE RECHTE VORBEHALTEN.
Alle Informationen, einschließlich Wortlaute, Bilder und Grafiken, jedoch nicht darauf beschränkt, sind das Eigentum von Hangzhou
EZVIZ Software Co., Ltd. (nachstehend als „EZVIZ“ bezeichnet). Dieses Benutzerhandbuch (nachstehend als „das Handbuch“
bezeichnet) darf ohne vorherige schriftliche Genehmigung von EZVIZ weder ganz noch teilweise reproduziert, geändert, übersetzt
oder verbreitet werden. Sofern nicht anderweitig vereinbart, bietet EZVIZ keine ausdrückliche oder implizierte Gewährleistung oder
Garantie bezüglich der Bedienungsanleitung.
Hinweise zu dieser Bedienungsanleitung
Die Bedienungsanleitung beinhaltet Anleitungen zur Verwendung und Verwaltung des Produkts. Bilder, Diagramme, Abbildungen
und alle sonstigen Informationen dienen nur der Beschreibung und Erklärung. Die Änderung der in der Bedienungsanleitung
enthaltenen Informationen ist aufgrund von Firmware-Updates oder aus anderen Gründen vorbehalten. Die aktuelle Version finden
Sie auf der ™ Website (http://www.ezvizlife.com).
Überarbeitungsdatensatz
Neuerscheinung – Januar, 2019
Marken
™, ™ und andere Marken und Logos von EZVIZ sind das Eigentum von EZVIZ in verschiedenen Ländern. Andere
nachstehend erwähnte Marken und Logos stehen im Besitz der entsprechenden Eigentümer.
Haftungsausschluss
SOWEIT GESETZLICH ZULÄSSIG WIRD DAS BESCHRIEBENE PRODUKT MIT SEINER HARDWARE, SOFTWARE UND FIRMWARE OHNE
MÄNGELGEWÄHR, MIT ALLEN FEHLERN UND FEHLFUNKTIONEN GELIEFERT, UND EZVIZ GIBT KEINE AUSDRÜCKLICHEN ODER
IMPLIZIERTEN GARANTIEN, EINSCHLIEßLICH UND OHNE EINSCHRÄNKUNG, DER MARKTFÄHIGKEIT, ZUFRIEDENSTELLENDEN
QUALITÄT, EIGNUNG FÜR EINEN BESTIMMTEN ZWECK UND NICHTVERLETZUNG DER RECHTE DRITTER. AUF KEINEN FALL HAFTEN
EZVIZ, SEINE GESCHÄFTSFÜHRER, ANGESTELLTEN, MITARBEITER ODER PARTNER FÜR BESONDERE, ZUFÄLLIGE, DIREKTE
ODER INDIREKTE SCHÄDEN, EINSCHLIEßLICH, JEDOCH NICHT DARAUF BESCHRÄNKT, VERLUST VON GESCHÄFTSGEWINNEN,
GESCHÄFTSUNTERBRECHUNG ODER VERLUST VON DATEN ODER DOKUMENTATIONEN IN VERBINDUNG MIT DER VERWENDUNG
DIESES PRODUKTS, SELBST WENN EZVIZ ÜBER DIE MÖGLICHKEIT DERARTIGER SCHÄDEN INFORMIERT WAR.
IN DEM NACH GELTENDEM RECHT MAXIMAL ZULÄSSIGEN UMFANG IST DIE GESAMTHAFTUNG VON EZVIZ FÜR ALLE SCHÄDEN IN
KEINEM FALL HÖHER ALS DER URSPRÜNGLICHE KAUFPREIS DES PRODUKTS.
EZVIZ ÜBERNIMMT KEINE HAFTUNG FÜR PERSONEN- ODER SACHSCHÄDEN INFOLGE VON PRODUKTAUSFALL ODER
SERVICEEINSTELLUNG, DIE DURCH: A) UNSACHGEMÄßE INSTALLATION ODER NUTZUNG, DIE NICHT DEN ANFORDERUNGEN
ENTSPRICHT, B) SCHUTZ NATIONALER ODER ÖFFENTLICHER INTERESSEN, C) HÖHERE GEWALT, D) SIE SELBST ODER DRITTE,
EINSCHLIEßLICH, ABER NICHT DARAUF BESCHRÄNKT, DIE VON PRODUKTEN, SOFTWARE, ANWENDUNGEN UND ANDEREN
PRODUKTEN DRITTER VERURSACHT WERDEN.BEZÜGLICH PRODUKTEN MIT INTERNETZUGANG ERFOLGT DIE VERWENDUNG DER
PRODUKTE AUSSCHLIEßLICH AUF EIGENES RISIKO. EZVIZ IST NICHT FÜR ANORMALEN BETRIEB, DATENSCHUTZVERSTÖßE ODER
ANDERE SCHÄDEN AUFGRUND VON CYBERATTACKEN, HACKERANGRIFFEN, VIREN ODER ANDEREN INTERNET-SICHERHEITSRISIKEN
VERANTWORTLICH; EZVIZ BIETET JEDOCH AUF ANFRAGE ZEITGERECHTE TECHNISCHE UNTERSTÜTZUNG. ÜBERWACHUNGS- UND
DATENSCHUTZGESETZE VARIIEREN JE NACH GERICHTSBARKEIT. ÜBERPRÜFEN SIE VOR DER VERWENDUNG DIESES PRODUKTS ALLE

RELEVANTEN GESETZE IN IHRER GERICHTSBARKEIT, UM SICHERZUSTELLEN, DASS IHRE VERWENDUNG GEGEN KEINE GELTENDEN
GESETZE VERSTÖßT. EZVIZ HAFTET NICHT, FALLS DIESES PRODUKT FÜR UNGESETZLICHE ZWECKE VERWENDET WIRD.
FÜR DEN FALL VON WIDERSPRÜCHEN ZWISCHEN DEM VORSTEHENDEN UND DEM GELTENDEN RECHT GILT DAS LETZTERE.
EU-Konformitätserklärung
Dieses Produkt und – ggf. – auch das mitgelieferte Zubehör sind mit „CE“ gekennzeichnet und entsprechen
somit den geltenden harmonisierten europäischen Normen, die unter der Funkgeräterichtlinie 2014/53/EU, der
EMV-Richtlinie 2014/30/EU und der RoHS-Richtlinie 2011/65/EU aufgeführt sind.
2012/19/EU (Elektroaltgeräte-Richtlinie): Produkte, die mit diesem Symbol gekennzeichnet sind, dürfen innerhalb
der Europäischen Union nicht mit dem Hausmüll entsorgt werden. Für korrektes Recycling geben Sie dieses
Produkt an Ihren örtlichen Fachhändler zurück oder entsorgen Sie es an einer der Sammelstellen. Weitere
Informationen finden Sie unter: www.recyclethis.info.
2006/66/EG und deren Änderung 2013/56/EU (Batterie-Richtlinie): Dieses Produkt enthält eine Batterie, die
innerhalb der Europäischen Union nicht mit dem Hausmüll entsorgt werden darf. Siehe Produktdokumentation
für spezifische Hinweise zu Batterien. Die Batterie ist mit diesem Symbol gekennzeichnet, das zusätzlich die
Buchstaben Cd für Cadmium, Pb für Blei oder Hg für Quecksilber enthalten kann. Für korrektes Recycling geben
Sie die Batterie an Ihren örtlichen Fachhändler zurück oder entsorgen Sie sie an einer der Sammelstellen.
Weitere Informationen finden Sie unter: www.recyclethis.info.
EG-KONFORMITÄTSERKLÄRUNG
Hiermit erklärt Hangzhou EZVIZ Software Co., Ltd., dass der Funkgerätetyp [CS-T9-A] mit der Richtlinie 2014/53/EU übereinstimmt.
Der vollständige Text der EU-Konformitätserklärung ist unter folgendem Weblink verfügbar:
http://www.ezvizlife.com/declaration-of-conformity.
Sicherheitshinweis
VORSICHT: EXPLOSIONSGEFAHR, WENN DIE BATTERIE DURCH EINEN FALSCHEN TYP ERSETZT WIRD. ENTSORGEN SIE GEBRAUCHTE
BATTERIEN ENTSPRECHEND DEN ANWEISUNGEN. DER AKKU IST NICHT VOM BENUTZER AUSTAUSCHBAR.
Aufgrund der Produktform und -abmessungen sind Name und Anschrift des Importeurs/Herstellers auf der Verpackung
vermerkt.
Kundendienst
Weitere Informationen erhalten Sie auf www.ezvizlife.com
Benötigen Sie Hilfe? Setzen Sie sich mit uns in Verbindung:
Telefon: (+49) 0 696 640 4321
BEWAHREN SIE DIESES HANDBUCH FÜR SPÄTERES NACHSCHLAGEN AUF

1
Operations
Step 1
Start Home Sense Siren
1Connect the siren to the power adapter with the
power cable.
2Plug the power adapter into the power outlet to
power on the siren. The red indicator lights on
for 2 seconds indicating the siren has started
up.
Step 2
Add to Internet Alarm Hub
The siren must be linked with the Home Sense Alarm Hub and other detectors such as Open/Close and
Motion Detectors. The EZVIZ Home Sense Alarm Hub and detectors are sold separately.
• Option 1 (Recommended) Add by EZVIZ App
1Install the EZVIZ App
- Search for the EZVIZ App in Google PlayTM or APP Store
and install it on your mobile device.
- Open the app and register for an EZVIZ user account.
2Add Siren
Log in the EZVIZ app and scan the device QR code to add
it to the Home Sense Alarm Hub.

2
• Option 2 Add by Operating the Home Sense Alarm Hub
1Enable the “Adding Detectors Mode” of your Home Sense Alarm Hub. Refer to Quick Start Guide of your
Home Sense Alarm Hub for details.
2Bring the siren close to the Alarm Hub (within 2in.) and press the button on siren, the status indicator will
flash a red light once indicating the adding signal is sent.
3The Alarm Hub announces the device type and serial number being added.
4Test the Siren.
- Press the Emergency button on the remote control of the Alarm Hub to trigger an emergency alarm. If
the siren starts to alarm, it has been added to the Internet Alarm Hub successfully.
- Press the Mute button on the remote control of the Alarm Hub to clear the alarm, and stop the siren
sound.
EXPOSURE TO RADIOFREQUENCY RF
The frequency bands and the nominal limits of transmitted power (radiated and/or conducted) applicable to this
radio device are the following:
Band RF 868MHz
Frequency From 867.981MHz to 868.019MHz
Power transmission (EIRP) 10mW
Alarm Hub
Settings Button
Within 50 cm

3
Step 3
Install Siren
1Choose a clean flat surface to install the siren
2Install Siren
Option 1 (Recommended)
Mount the siren to the chosen location using the
supplied foam sticker as illustrated below.
Option 2
Use the supplied screw kit to hang the siren onto
the chosen mounting location.
Basics
Red Indicators
Setting Button
Press Once: Add siren to the Home Sense Alarm Hub
Press and Hold for 1s: Mute
Function
If the connected Alarm Hub receives alarms from other detectors, siren will be triggered and start to alarm.

4
Box Contents
Home Sense Siren with Strobe Light x1 Foam Sticker x1 Screw Kit x1
Power Adapter x1 USB Cable x1 Quick Start Guide x1
Specifications
Power Voltage DC 5V (Micro USB)
Working Current Static: 22mA Maximum: 200mA
Working Environment Indoor
Working Temprature -10°C to 55°C (14°F to 131°F)
Working Humidity 10% to 90%
Storage Temperature -20°C to 70°C (-4°F to 158°F)
Weight 77g
Dimension (H*W*D) 67 mm*33mm*121mm (2.6"*1.3" *4.8")
Alarm Volume 85dB (within 3 m)
Alarm Light Red indicators blink when alarm occurs.
Appendix

5
Betrieb
Schritt 1
Inbetriebnahme des T9
1Schließen Sie den T9 mit dem Netzteil an einer
Steckdose an.
2Schließen Sie das Netzteil an einer Steckdose
an und schalten Sie den T9 ein. Die rote LED
leuchtet zwei Sekunden lang als Hinweis
darauf, dass der T9 eingeschaltet ist.
Schritt 2
Hinzufügen zum Internet-Alarm-Hub
Der T9 sollte in Verbindung mit einem Internet-Alarm-Hub (z.B. A1) und anderen Meldern (wie
Magnetkontakt und IR-Meldern) benutzt werden. Diese sind bei Bedarf separat zu erwerben.
• Option 1 (empfohlen) Hinzufügen per EZVIZ App
1EZVIZ App installieren
- Smartphone mit dem Wi-Fi-Netz verbinden.
- EZVIZ App herunterladen und installieren, indem Sie
„EZVIZ" im App Store (iOS-Version) oder bei Google
PlayTM (Android-Version) suchen.
- Die App starten und ein EZVIZ-Anwenderkonto erstellen.
2Hinzufügen des T9
Melden Sie sich bei der EZVIZ App an und scannen Sie
den QR-Code des Geräts, um es zum Internet-Alarm-Hub
hinzuzufügen.

6
• Option 2 Hinzufügen mittels Internet-Alarm-Hub
1Aktivieren Sie den "Adding Detectors"-Modus am Internet-Alarm-Hub. Einzelheiten enthält die
Schnellstartanleitung zum Internet-Alarm-Hub.
2Bringen Sie den T9 in die Nähe des Internet-Alarm-Hub (weniger als 50cm) und drücken Sie die Taste am
T9. Die roten LEDs blinken einmal als Hinweis darauf, dass das Verbindungssignal gesendet wurde.
3Der Internet-Alarm-Hub gibt eine Voice Guide-Bestätigung bezüglich Meldertyp und Seriennummer aus.
Damit ist der T9 hinzugefügt.
4Sie können das Gerät nach erfolgter Montage testen.
- Drücken Sie die Notalarmtaste an der Fernbedienung des Internet-Alarm-Hub, um einen Notfallalarm
auszulösen. Wenn der T9 den Alarm startet, wurde er erfolgreich zum Internet-Alarm-Hub hinzugefügt.
- Drücken Sie die Stummschalttaste an der Fernbedienung des Internet-Alarm-Hub, um den Alarm zu
löschen. Der T9 stoppt den Alarm.
HOCHFREQUENZBELASTUNG (HF)
Die für dieses Funkgerät geltenden Frequenzbänder und Nenngrenzwerte der Sendeleistung (abgestrahlt und/oder
leitungsgeführt) sind folgende:
Band HF 868 MHz
Frequenz Von 867,981 MHz bis 868,019 MHz
Strahlungsleistung (EIRP) 10 mW
Internet-Alarm-Hub
Einstelltaste
max. 50 cm

7
Schritt 3
Montage des T9
1Wahl des Montageorts
Wählen Sie für die Montage des T9 eine flache und saubere Stelle.
2Montage des T9
Option 1 (empfohlen)
Befestigen Sie den Schaumstoffaufkleber auf der
Rückseite des T9 und kleben Sie den T9 auf die
Montagestelle (siehe Abbildung unten).
Option 2
- Bohren Sie Schraubenlöcher an der Montagestelle.
- Bei einer Betonwand setzen Sie einen Dübel in das
Bohrloch ein.
- Befestigen Sie die Schraube im Loch bzw. im
Dübel.
- Hängen Sie den T9 an der Schraube auf.
Allgemeines
Funktionen
Wenn der angeschlossene Internet-Alarm-Hub Alarme von anderen Meldern empfängt, wird ein Alarm beim T9
ausgelöst.
Rote LEDs
Einstelltaste
Einmal drücken: Melder zum Internet-Alarm-Hub hinzufügen
1 Sekunde lang gedrückt halten: Ton Aus

8
Lieferumfang
T9 x1 Schaumstoffaufkleber x1 Schraubensatz x1
Netzteil x1 USB-Kabel x1 Schnellstartanleitung x1
Technische Daten
Versorgungsspannung 5V DC (Micro USB)
Betriebsstrom Statisch: 22mA Maximal: 200mA
Betriebsumgebung Innen
Betriebstemperatur -10°C bis 55°C
Luftfeuchtigkeit (Betrieb) 10% bis 90%
Lagertemperatur -20°C bis 70°C
Gewicht 77g
Abmessungen (H*B*T) 67mm*33mm*121mm
Alarmlautstärke 85dB (bis 3 m)
Alarm-LED Rote LED blinkt bei Alarmauslösung
Anhang

9
Funciones
Paso 1
Adición del T9
1Conecte el T9 al adaptador de corriente con el
cable de alimentación.
2Enchufe el adaptador de corriente a la toma
de corriente para suministrar alimentación al
T9. El indicador rojo se enciende durante dos
segundos para indicar que se ha iniciado el T9.
Paso 2
Adición a la central de alarmas por Internet
El T9 debe utilizarse junto con una central de alarmas por Internet (como, por ejemplo, el A1) y otros
detectores (como, por ejemplo, los detectores de IR y contacto magnético). Además, estos componentes
deben adquirirse por separado.
• Opción 1 (recomendada) Adición mediante la aplicación EZVIZ
1Instalación de la aplicación EZVIZ
- Conecte el teléfono móvil a la red Wi-Fi.
- Descargue la Aplicación Móvil EZVIZ buscando "EZVIZ" en
App Store (versión iOS) y Google PlayTM (versión Android).
- Inicie la aplicación y regístrese para obtener una cuenta
de usuario de EZVIZ.
2Adición del T9
Inicie sesión en la aplicación y escanee el código QR del
dispositivo para añadirlo a la central de alarmas por Internet.

10
• Opción 2 Adición mediante la central de alarmas por Internet
1Active el modo de adición de detectores en la central de alarmas por Internet. Consulte la Guía de inicio
rápido del centro de alarmas por Internet para obtener información.
2Acerque el T9 al centro de alarmas por Internet (en un área de 50 cm) y pulse el botón del dispositivo; el
indicador rojo parpadea una vez para indicar que se ha enviado la señal de adición.
3La central de alarmas por Internet emitirá un aviso de voz sobre el tipo de dispositivo y el número de
serie, lo que indica que el T9 se ha añadido.
4Puede probar el dispositivo tras la instalación.
- Pulse el botón de emergencia del mando a distancia de la central de alarmas por Internet para activar
una alarma de emergencia. Si el T9 inicia la alarma, esta se ha añadido correctamente a la central de
alarmas por Internet.
- Pulse el botón de silencio del mando a distancia de la central de alarmas por Internet para borrar la
alarma. A continuación, el T9 detendrá la alarma.
EXPOSICIÓN A LA RADIOFRECUENCIA
Las bandas de frecuencia y los límites nominales de la potencia transmitida (radiada y/o conducida) aplicables a
este dispositivo de radio son los siguientes:
Banda RF de 868MHz
Frecuencia De 867.981MHz a 868.019MHz
Transmisión eléctrica (PIRE) 10 mW
Central de alarmas por Internet
Botón de configuración
Dentro 50 cm

11
Paso 3
Instalación del T9
1Selección de una ubicación de instalación
Elija un lugar limpio y plano para instalar el T9.
2Instalación del T9
Opción 1 (recomendada)
Pegue el adhesivo de espuma en la parte posterior
del T9 y fije el dispositivo en el lugar de instalación,
como se muestra en la figura siguiente.
Opción 2
- Perfore un agujero para tornillos en la ubicación
de instalación.
- En las paredes de cemento, introduzca el tornillo
de expansión en el orificio.
- Introduzca el tornillo en el orificio o el orificio de
expansión.
- Cuelgue el T9 en el tornillo fijado.
Conceptos básicos
Funciones
Si la central de alarmas por Internet recibe una alarma de otros detectores, el T9 se activará e iniciará la alarma.
Indicadores rojos
Botón de configuración
Pulsar una vez: Añada el T9 a la central de alarmas por
Internet.
Mantener pulsado durante 1 s: Silencio

12
Contenido del paquete
T9 x1 Adhesivo de espuma x1 Juego de tornillos x1
Adaptador de corriente x1 Cable USB x1 Guía de inicio rápido x1
Especificaciones
Voltaje de fuente de alimentación DC 5 V (Micro USB)
Corriente de trabajo Estático: 22 mA Máximo: 200 mA
Entorno de trabajo Interior
Temperatura de trabajo De -10°C a 55°C (de 14°F a 131°F)
Humedad de trabajo De 10% a 90%
Temperatura de almacenamiento De -20°C a 70°C (de -4°F a 158°F)
Peso 77g
Dimensiones (Al.*An.*Pr.) 67*33*121 mm (2,6*1,3*4,8)
Volumen de alarma 85dB (en un área de 3 m)
Luz de alarma Los indicadores rojos parpadean cuando se produce una alarma.
Apéndice

13
Operations
Étape 1
Démarrage du T9
1Branchez le T9 au transformateur électrique au
moyen du cordon d'alimentation.
2Raccordez le transformateur électrique à une
prise secteur pour alimenter le T9. Le témoin
rouge clignote pendant 2secondes, indiquant
que le T9 a démarré.
Étape 2
Ajout au concentrateur d'alarme Internet
Il convient d'utiliser le T9 conjointement à un concentrateur d'alarme Internet (tel qu'un A1, vendu séparément)
et à d'autres détecteurs (à contact magnétique et IR). Ceux-ci doivent être achetés séparément.
• Option 1 (recommandé) Ajout par l'application EZVIZ
1Installation de l'application EZVIZ
- Raccordez votre téléphone portable au réseau Wi-Fi.
- Téléchargez et installez l'application EZVIZ depuis App
Store (version iOS) ou Google PlayTM (version Android).
- Démarrez l'application et ouvrez un compte d'utilisateur
EZVIZ.
2Ajout de T9
Ouvrez une session dans l'application EZVIZ et scannez
le code QR de l'appareil pour l'ajouter au concentrateur
d'alarme Internet.

14
• Option 2 Ajout en actionnant le concentrateur d'alarme Internet
1Activez le mode Ajout de détecteurs de votre concentrateur d'alarme Internet. Pour plus de précisions sur
le fonctionnement de votre concentrateur d'alarme Internet, reportez-vous au Guide de prise en main.
2Placez le T9 à proximité du concentrateur d'alarme Internet (50cm maxi) puis appuyez sur le bouton; le
témoin rouge clignote une fois, indiquant que le signal d'ajout est envoyé.
3Le concentrateur d'alarme Internet émet un message vocal indiquant que le type de matériel et le n° de
série, signalant que le T9 a été ajouté.
4Vous pouvez tester le matériel après l'installation.
- Pour déclencher une alarme d'urgence, appuyez sur la touche correspondante de la télécommande du
concentrateur d'alarme Internet. Si le T9 déclenche une alarme, cela indique qu'il a bien été ajouté au
concentrateur d'alarme Internet.
- Pour supprimer l'alarme, appuyez sur la touche Muet de la télécommande du concentrateur d'alarme
Internet. Le T9 met alors fin à l'alarme.
EXPOSITION AUX RADIOFRÉQUENCES (RF)
Les bandes de fréquence et les limites nominales de la puissance transmise (rayonnée ou par conduction)
applicable à ce dispositif radio sont les suivantes:
Bande RF 868MHz
Fréquence De 867,981 à 868,019MHz
Puissance transmise (PIRE) 10mW
Concentrateur d'alarme
Internet
Touche de réglage
Moins de 50cm
Other manuals for T9
4
Table of contents
Languages:
Other Ezviz Security System manuals
Popular Security System manuals by other brands

iSmartAlarm
iSmartAlarm Home Security System owner's manual

Klaxon
Klaxon SO4 Series installation instructions

Worx
Worx WA0865 Get started guide

SwissPhone
SwissPhone SOS-Beacon Instruction

Logitech
Logitech Alert 700e Guide System Support Guide

Federal Signal Corporation
Federal Signal Corporation Fireball FB2LEDX Series Installation and maintenance instructions