Ezviz T9C User manual

COPYRIGHT © Hangzhou EZVIZ Software Co., Ltd. ALL RIGHTS RESERVED.
Any and all information, including, among others, wordings, pictures, graphs are the properties of
Hangzhou EZVIZ Software Co., Ltd. (hereinafter referred to as “EZVIZ”). This user manual (hereinafter
referred to as “the Manual”) cannot be reproduced, changed, translated, or distributed, partially or
wholly, by any means, without the prior written permission of EZVIZ. Unless otherwise stipulated,
EZVIZ does not make any warranties, guarantees or representations, express or implied, regarding to
the Manual.
About this Manual
The Manual includes instructions for using and managing the product. Pictures, charts, images and
all other information hereinafter are for description and explanation only. The information contained
in the Manual is subject to change, without notice, due to firmware updates or other reasons. Please
find the latest version in the ™ website (http://www.ezviz.com).
Revision Record
New release – January, 2023
Trademarks Acknowledgement
™, ™, and other EZVIZ’s trademarks and logos are the properties of EZVIZ in various
jurisdictions. Other trademarks and logos mentioned below are the properties of their respective
owners.
Legal Disclaimer
TO THE MAXIMUM EXTENT PERMITTED BY APPLICABLE LAW, THE PRODUCT DESCRIBED, WITH
ITS HARDWARE, SOFTWARE AND FIRMWARE, IS PROVIDED “AS IS”, WITH ALL FAULTS AND ERRORS,
AND EZVIZ MAKES NO WARRANTIES, EXPRESS OR IMPLIED, INCLUDING WITHOUT LIMITATION,
MERCHANTABILITY, SATISFACTORY QUALITY, FITNESS FOR A PARTICULAR PURPOSE, AND
NON-INFRINGEMENT OF THIRD PARTY. IN NO EVENT WILL EZVIZ, ITS DIRECTORS, OFFICERS,
EMPLOYEES, OR AGENTS BE LIABLE TO YOU FOR ANY SPECIAL, CONSEQUENTIAL, INCIDENTAL, OR
INDIRECT DAMAGES, INCLUDING, AMONG OTHERS, DAMAGES FOR LOSS OF BUSINESS PROFITS,
BUSINESS INTERRUPTION, OR LOSS OF DATA OR DOCUMENTATION, IN CONNECTION WITH
THE USE OF THIS PRODUCT, EVEN IF EZVIZ HAS BEEN ADVISED OF THE POSSIBILITY OF SUCH
DAMAGES.
TO THE MAXIMUM EXTENT PERMITTED BY APPLICABLE LAW, IN NO EVENT SHALL EZVIZ’S TOTAL
LIABILITY FOR ALL DAMAGES EXCEED THE ORIGINAL PURCHASE PRICE OF THE PRODUCT.
EZVIZ DOES NOT UNDERTAKE ANY LIABILITY FOR PERSONAL INJURY OR PROPERTY DAMAGE AS
THE RESULT OF PRODUCT INTERRUPTION OR SERVICE TERMINATION CAUSED BY: A) IMPROPER
INSTALLATION OR USAGE OTHER THAN AS REQUESTED; B) THE PROTECTION OF NATIONAL OR
PUBLIC INTERESTS; C) FORCE MAJEURE; D) YOURSELF OR THE THIRD PARTY, INCLUDING WITHOUT
LIMITATION, USING ANY THIRD PARTY’S PRODUCTS, SOFTWARE, APPLICATIONS, AND AMONG
OTHERS.
REGARDING TO THE PRODUCT WITH INTERNET ACCESS, THE USE OF PRODUCT SHALL BE WHOLLY
AT YOUR OWN RISKS. EZVIZ SHALL NOT TAKE ANY RESPONSIBILITES FOR ABNORMAL OPERATION,
PRIVACY LEAKAGE OR OTHER DAMAGES RESULTING FROM CYBER ATTACK, HACKER ATTACK,
VIRUS INSPECTION, OR OTHER INTERNET SECURITY RISKS; HOWEVER, EZVIZ WILL PROVIDE
TIMELY TECHNICAL SUPPORT IF REQUIRED. SURVEILLANCE LAWS AND DATA PROTECTION
LAWS VARY BY JURISDICTION. PLEASE CHECK ALL RELEVANT LAWS IN YOUR JURISDICTION
BEFORE USING THIS PRODUCT IN ORDER TO ENSURE THAT YOUR USE CONFORMS TO THE
APPLICABLE LAW. EZVIZ SHALL NOT BE LIABLE IN THE EVENT THAT THIS PRODUCT IS USED WITH
ILLEGITIMATE PURPOSES.
IN THE EVENT OF ANY CONFLICTS BETWEEN THE ABOVE AND THE APPLICABLE LAW, THE LATTER
PREVAILS.

Table of Contents
Overview ��������������������������������������������������������������������������������������������������1
1� Package Contents ���������������������������������������������������������������������������������������������������������������������������������������� 1
2� Basics ���������������������������������������������������������������������������������������������������������������������������������������������������������� 2
Get the EZVIZ App�������������������������������������������������������������������������������������4
Add Your Siren to EZVIZ����������������������������������������������������������������������������4
Method One: Add by Scanning QR Code������������������������������������������������������������������������������������������������������������� 4
Method Two: Add by the Gateway ���������������������������������������������������������������������������������������������������������������������� 5
Select Appropriate Location����������������������������������������������������������������������7
1� Installation Diagram ������������������������������������������������������������������������������������������������������������������������������������� 7
2� Valid Distance Testing ���������������������������������������������������������������������������������������������������������������������������������� 7
Siren Installation ��������������������������������������������������������������������������������������8
Select Power Supply������������������������������������������������������������������������������������������������������������������������������������������ 8
Install Siren ������������������������������������������������������������������������������������������������������������������������������������������������������� 9
Replace Batteries��������������������������������������������������������������������������������������������������������������������������������������������� 10
Alarm Test ����������������������������������������������������������������������������������������������11
Operations on the EZVIZ App ������������������������������������������������������������������12
1� Live View���������������������������������������������������������������������������������������������������������������������������������������������������� 12
2� Settings������������������������������������������������������������������������������������������������������������������������������������������������������ 13
Intelligent Linkage����������������������������������������������������������������������������������15
Method 1 Automatic device linking ������������������������������������������������������������������������������������������������������������������ 15
Method 2 Manually device linking�������������������������������������������������������������������������������������������������������������������� 15
Maintenance�������������������������������������������������������������������������������������������16
Specification ������������������������������������������������������������������������������������������16
Battery Information ��������������������������������������������������������������������������������17
INFORMATION FOR PRIVATE HOUSEHOLDS �������������������������������������������18

1
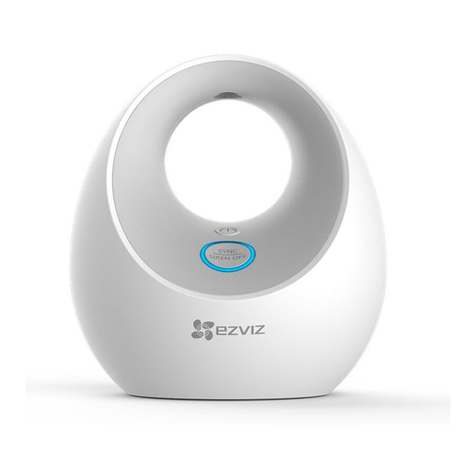
Smart Siren (hereinafter referred to as Siren) is an alerting device with a sound volume of up to
105dB. Equipped with a bright LED indication and pre-installed batteries, Siren can be quickly
installed, set up and operated on EZVIZ App.
The device is set up via EZVIZ App for iOS and Android. The system notices users of all events
through push notifications.
Overview
1� Package Contents
Smart Siren (x1) Mounting Base (x1) Drill Location Template (x1)
Pre-installed CR123A
Battery (x4) Screw Kit (x1) Regulatory
Information (x1) Quick Start Guide (x1)
• All device's appearances are subject to the one you have bought.
• All figures in this user manual are for reference only.

2
2� Basics
LED Indication
Buzzer
Front View
Rubber Layer
Mounting Holes
Wiring Groove
Back View
Mounting Base
External
Power Supply
Connection
Terminal
Buckle
(x4)
Lock Groove
(x4)
Power
Button
Binding
Post

3
Power Button
Press and hold for 2s Power on and enter network configuration mode by default
*After powered on, if the Siren does not connect to the gateway,
itwill be auto-off 3 minutes later.
Press once under standby mode Connected with the gateway well and the current ZigBee signal
refreshed
Disconnected with the gateway and retry to connect
Double tap under standby mode Enter alarm test mode
Press and hold for 5s Restore to factory settings and enter device adding mode
Press and hold for 10s Power off
LED Indication
Fast-flashing red Enter network configuration mode
Fast-flashing red with 3s beep Alarm test mode
Fast-flashing red with alarm sound Intrusion alarm/tamper alarm/motion alarm triggered
Off Power off/standby mode
Buzzer
One beep Power on/enter network configuration mode
Long beep Shutting down
Alarm sound Alarm test works/alarm triggered
Power Port
(If battery supply is not your choice) You can connect the Siren to external power with DC 12V 1A or
above specifications.

4
Get the EZVIZ App
1. Connect your mobile phone to Wi-Fi (suggested).
2. Download and install the EZVIZ app by searching for “EZVIZ” in the App Store or Google PlayTM.
3. Launch the app and register an EZVIZ user account.
EZVIZ App
If you have already used the app, please make sure that it is the latest version. To find out if an
update is available, go to the app store and search for "EZVIZ".
Add Your Siren to EZVIZ
The Siren should be used along with EZVIZ ZigBee Smart Gateway (afterinafter referred to
as "gateway"). Please add gateway to the EZVIZ by referring to the gateway user manual, and
then add the Siren to the gateway.
Method One: Add by Scanning QR Code
1. Log in to your account through EZVIZ app, tap the device adding icon and then the QR code
scanning interface will be displayed.
2. Scan the QR code on the back of the Siren or on the cover of the user manual.
Scan QR Code

5
3. Press and hold the Power Button for 2s (for rst network connection and under Siren shutting
down state) or Press and hold the Power Button of the Siren for 5s (under standby mode) to
make the Siren enter device adding mode, and the LED Indication is fast-ashing red.
4. Add the Siren to the gateway by following the wizard on the App.
5. After successfully add the Siren to App, please create new routine by linking your EZVIZ smart
devices to the Siren for a complete using experience. (For related intelligent linkage operations,
please refer to “Intelligent Linkage“ part in this user manual)
Intelligent linkage is necessary for you to use the Siren, a separate Siren can not provide a complete
alarm service for you.
Method Two: Add by the Gateway
When adding Siren by the gateway, place the Siren as close to the gateway as possible.
1. Press the function key of the gateway once to make the gateway enter device adding mode,
and the LED Indication is in slow-ashing white.

6
2. Press and hold the Power Button for 2s (for rst network connection and under Siren shutting
down state) or Press and hold the Power Button of the Siren for 5s (under standby mode) to
make the Siren enter device adding mode, and the LED Indication is fast-ashing red.
3. There will be a voice prompt reminding you that the Siren has been added to the gateway
automatically, and at the same times, the LED indication is off and you can view the addded
Siren on your EZVIZ App.
• If the LED indication is off and no Siren showed on your App, which means the Siren is failed
to be added to the gateway, please press and hold the Power button for 5s to enter network
configuration mode.
• If you want to delete the Siren, please choose either of the following methods to clear the
matching relationship between the Siren and the gateway:
- Enter detailed page of the Siren on your EZVIZ App and then delete the Siren;
- Press and hold the Power Button of the Siren for 5s until the LED frame is fast-flashing red
to reset and then delete the Siren from the gateway.
4. After successfully added the Siren to your App, please link your EZVIZ smart devices to the
Siren for a complete using experience. (For related intelligent linkage operations, please refer to
“Intelligent Linkage“ part in this user manual)

7
Select Appropriate Location
Installation Cautions
• Recommended install the Siren under the roof.
• To avoid the happenness of dangers, please fix the Siren securely when install it on walls.
• Do not install the Siren near metal objects and mirrors (they can interfere with the RF signal and
cause it to fade).
• To ensure that connection between the gateway and the Siren is stable, please refer to the
following installation diagram and place the gateway near the Siren.
• There should be as fewer metal obstacles and walls as possible between the gateway and the
Siren. Recommended place both of the Siren and gateway near the window or on same floor.
• If you need to link the sub-devices on multiple floors, we recommended you place one gateway for every
floor for a stable connection.
1� Installation Diagram
The location of the siren depends on its remoteness from the gateway, and obstacles hindering the
radio signal transmission: walls, floors, large objects.
For more installation suggestions, please refer to the following figure.
Available Position
Conrming by actual
installation environment
Not recommended Position
Gateway
Siren
2� Valid Distance Testing
After select an installation location, please make sure the Siren is keeping a valid communication
distance with the gateway by doing a signal strength test.
Please open EZVIZ App and enter the device detail page, and then tap Signal Strength on the top
of the page to test signal strength for finding an optimal installation position.

8
Siren Installation
• Before installation, make sure that there the wire insulation is not damaged.
• Be careful to straighten the external power supply wires at the connect exit of the mounting
base to avoid too many wires piling up between the mounting base and the Siren body, so
that affecting the subsequent Siren mounting.
• When leading out the external power supply wires, please adjust the appearance of rubber
layer if there is any edge warp.
• When using external power supply, the Siren is powered on by external supply and the pre-
installed batteries will not work.
Select Power Supply
1. Battery Supply (Recommended)
Four batteries are pre-installed for the Siren.
2. External Power Supply (DC 12 V 1A or above specications)
• Poke the rubber layer of the mounting base through with a needle-like tool (the same size as the
diameter of the external power supply wire) to lead out the external power supply wires;
• Connect external power supply wires to binding post on the back of the Siren.

9
Install Siren
1. Stick the drilling template onto a clean and at wall surface.
2� (For cement wall only) Drill screw holes according to the template, and insert anchors.
3. Install the mounting base according to the mark on both of the drilling template and
mounting base, and then x the mounting base with the screws.
4. Put the Siren into the mounting base and then rotate the Siren clockwise to completely lock the
buckles of the Siren and the lock grooves on the mounting base.

10
5. The installation is nished.
Replace Batteries
If you use battery supply for your Siren and need to replace new batteries, please operate by
following steps:
Before battery replacement, please disable the “Tamper Alarm” and “Alert if Moved” on App
Settings page of Siren, or you can press and hold the Power button for 10s to power off the
Siren, Otherwise a loud alarm may cause discomfort to you.
1. Hold the Siren by your two hands and rotate the Siren anticlockwise to take off the Siren from
the wall.
2. Unscrew 5 screws on the rear cover of the Siren with a screwdriver and then open the rear cover.
3. Take out 4 batteries from the Siren body and then place 4 new CR123A into the battery holders
according to the marks.
4. Close the rear cover of the Siren and tighten the screws.
After new batteries replaced, if the alarm triggered when power on the Siren, please conrm
the following reasons:
• “Tamper alarm” triggered by incomplete assembly, like the rear cover does not install tightly;
• “Alert if moved” triggered by Siren motion.

11
Alarm Test
Note: loud alarm volume may cause discomfort, please be prepared.
After the Siren installation is completed, tap the Alarm Test Button on App, the Siren will trigger
an alarm, the LED indication will fast-flashes red and the buzzer will beep for 3s, which means the
Siren is in good condition.
If you have already link other EZVIZ smart devices, please try to test the related smart device linkage
effects.
If the Siren does not work normally, please do signal testing as much as possible for a more
accurate result, or try to shorten the distance between the gateway and the Siren.

12
Operations on the EZVIZ App
The App interface may be different due to version update, and the interface of the App you
installed on your phone shall prevail.
1� Live View
When you launch the EZVIZ app, you can manage your Siren as needed on the homepage.
Settings
Share
Device Status
Icon Description
Share. Share your device with anyone you want.
Settings. View or change the device settings.
Signal Strength. Tap to test the signal strength of the Siren in current position.
Alarm Test. Tap to test whether the Siren is work normally or not.
Dismiss. Tap to clear the alarm in alarm mode.
Low Power (<10%). Under low power, App message notification is pushed normally.
LED indication will be available and the buzzer is not work for electricity-saving.

13
2� Settings

14
Parameter Description
Device Name Customize the name of your device.
Alarm Settings After enabled, the Siren will work for arming. (Enabled by default)
Alarm Duration You can set different alarm duration from 5s to 180s as you needed.
Alarm Volume Set alarm volume among muted, quiet, loud, very loud.
App Message
Notification You can manage the EZVIZ App notification.
Alert if Moved If enabled, the Siren will send an alert when it is moved. (Disabled by default)
Tamper Alarm If enabled, the Siren will send an alert when it is tampered by someone.
(Enabled by default)
Arming/Disarming
Beeps
If enabled, the siren alerts you with alarm sound when arming and disarming.
(Enabled by default).
LED Indication After enabled, the LED Indication will be on. (Enabled by default).
Power You can see the power supply mode of your Siren.
Intelligent Linkage Create a new intelligent scene with your Siren.
Link Device You can see linked gateway here.
Device Information You can see the device information here.
Share the Device You can share the device to your family members or guests.
Delete Tap to delete the gateway from EZVIZ App.

15
Intelligent Linkage
There are two methods for you to realize an intelligent experience.
Method 1 Automatic device linking
(for Siren adding by scanning QR code) After the Siren is connected to the network successfully, the
intelligent linkage page will be displayed for you.
All supported EZVIZ smart devices on your account will be shown here and you can choose the
devices to be linked directly.
Method 2 Manually device linking
Go to "Settings->Intelligent Linkage" to link new EZVIZ smart devices to your Siren.

16
Maintenance
1.Check the operational capability of the Siren regularly. Clean the Siren body from dust, spider web,
and other contaminants as they appear. Use a soft dry napkin suitable for tech equipment.
2.Do not use any substances containing alcohol, acetone, gasoline, and other active solvents to clean
the Siren.
3.When the battery is low, the security system notices the user.
4.Battery replacement: Please purchase four CR123A in advance. For details, please refer to last
chapter in Siren Installation.
Specication
Parameters Descriptions
Type of notification Sound and light (LEDs)
Communication Mode ZigBee
Sound notification volume 90 dB to 105 dB at a distance of 1 m (adjustable)
Alarm Duration Adjustable from 5s to 180s
Battery 4 × CR123A, 3 V
Battery Service Life
8 years (without alarm under standby mode)
For single alarm duration at 5s, 12 mins(144 times)
alarms can be operated annually.
• High(105dB)5.5 years
• Medium(98dB)6.5 years
• Low(90dB)7 years
Actual battery service life may be changed in terms of the alarm
duration you set and alarm times.
External Supply 12V 0.5A or above specifications
Protection Class IP54
Working Temperature - 30°C~ 60°C
Alert if Moved Support
Tamper Alarm Support
Product Size
(Diameter*height)
Φ 134 mm x H 51.5 mm

17
Battery Information
Removable Lithium ion Battery(CR123A)
Chemical Name Percent of Content CAS No�
Manganese Dioxide 30.0%~39.0% 1313-13-9
Lithium Metal 2.0%~3.5% 7439-93-2
Lithium Perchlorate 1.0%~1.5% 7791-03-9
Lithium Oxalyldifluroborate 1.0%~1.5% 409071-16-5
Propylene Carbonate(PC) 10.0%~11.0% 108-32-7
Dimethoxyethane(DME) 10.0%~11.0% 110-71-4
Acetylene black 2.5%~3.0% 1333-86-4
Graphite 0%~1.0% 7782-42-5
Adhesive 1.5%~2.5% 9002-84-0
polypropylene 0.4%~0.8% 9003-07-0
Nickel-plate < 0.2% 7440-02-0
Aluminium(Al) 4.0%~5.5% 7429-90-5
Polyvinyl chloride(PVC) 2.0%~4.0% 9002-86-2
Hydrargyrum(Hg) < 0.0001% 7439-97-6
Lead(Pb) < 0.0001% 7439-92-1
Cadmium(Cd) < 0.0002% 7440-43-9

18
INFORMATION FOR PRIVATE HOUSEHOLDS
1. Separate collection of waste equipment: Electrical and electronic equipment that has become
waste is referred to as waste equipment. Owners of waste equipment must dispose of it separately
from unsorted municipal waste. In particular, waste equipment does not belong in household waste,
but in special collection and return systems.
2. Batteries and rechargeable batteries as well as lamps: Owners of waste equipment shall, as a rule,
separate waste batteries and rechargeable batteries that are not enclosed in the waste equipment,
which can be removed from the waste equipment without being destroyed, from the waste equipment
before handing them in at a collection point. This does not apply if waste equipment is prepared for
reuse with the participation of a public waste management authority.
3. Options for returning waste equipment: Owners of waste equipment from private households can
return it free of charge to the collection points of the public waste management authorities or to the
take-back points set up by manufacturers or distributors within the meaning of the Electrical and
Electronics Equipment Law. Stores with a sales area of at least 400 m² for electrical and electronic
equipment and those grocery stores with a total sales area of at least 800 m² that offer electrical
and electronic equipment several times a year or on a permanent basis and make it available in
the market are required to take it back. This also applies in the case of distribution using means of
distance communication, if the storage and shipping areas for electrical and electronic equipment
are at least 400 m² or the total storage and shipping areas are at least 800 m². Distributors shall, in
principle, ensure take-back by providing suitable return facilities at a reasonable distance from the
respective end user. The possibility of returning waste equipment free of charge exists for distributors
who are obliged to take it back, among other things, if a new similar device that essentially fulfills the
same functions is delivered to an end user.
4. Privacy Notice: Waste equipment often contains sensitive personal data. This applies in particular
to devices of information and telecommunications technology such as computers and smartphones.
In your own interest, please note that each end user is responsible for deleting the data on the waste
equipment to be disposed of.
5. Meaning of the symbol “crossed-out wheelie bin”: The symbol of a crossed-out wheelie bin
regularly depicted on electrical and electronic equipment indicates that the respective device is to be
collected separately from unsorted municipal waste at the end of its service life.
Table of contents
Other Ezviz Security System manuals
Popular Security System manuals by other brands

Remote Alert
Remote Alert R-Alert quick start guide

Global Fire Equipment
Global Fire Equipment Valkyrie AS Series quick start guide

Permaconn
Permaconn Honeywell V12 Wiring & programming instructions

Baldwin Boxall
Baldwin Boxall BVECASE5BATT Installation details

Response
Response SL2 Installation & operating manual

MEDC
MEDC LD15 UL Technical manual

Evolveo
Evolveo SONIX quick start guide

Magellan
Magellan Paradox 2WPGM instructions

Federal Signal Corporation
Federal Signal Corporation Premium Vision Operation and configuration instructions

DSC
DSC neo HS2016 user manual

Ksenia
Ksenia ergo Quick installation and programming guide

Xirgo
Xirgo XT1520 product manual