Fanvil GA10 User manual

Software Version:2.4.0
Release Date:2021/10/25
GA10&GA11
User Manual

I
Directory
Directory...................................................................................................................................................................I
1 Picture................................................................................................................................................................. III
2 Table....................................................................................................................................................................IV
3 Safety Instruction.................................................................................................................................................1
4 Overview.............................................................................................................................................................. 2
4.1 Overview................................................................................................................................................. 2
5 Install Guide......................................................................................................................................................... 3
5.1 Use external Power Adapter...................................................................................................................3
5.2 Packing Contents.....................................................................................................................................3
5.3 Interface description...............................................................................................................................3
5.4 Device Connection.................................................................................................................................. 4
6 Introduction to the User......................................................................................................................................5
6.1 Web Management.................................................................................................................................. 5
6.2 Network Settings.....................................................................................................................................5
6.2.1 Read the IP..................................................................................................................................5
6.2.2 Set Static IP.................................................................................................................................6
6.3 SIP Configurations................................................................................................................................... 6
6.4 LED...........................................................................................................................................................7
6.5 Voice Menu............................................................................................................................................. 8
7 Basic Function...................................................................................................................................................... 9
7.1 Making Phone Call...................................................................................................................................9
7.2 Call Hold.................................................................................................................................................. 9
7.3 Call Transfer.............................................................................................................................................9
7.3.1 Blind transfer............................................................................................................................... 9
7.3.2 Attended transfer........................................................................................................................ 9
7.4 Conference.............................................................................................................................................. 9
8 Advance Function...............................................................................................................................................11
8.1 IP Direct................................................................................................................................................. 11
8.2 Redial.....................................................................................................................................................11
8.3 Call Back................................................................................................................................................ 11
8.4 Voice Mail..............................................................................................................................................11
9 Web Configurations........................................................................................................................................... 13
9.1 Web Page Authentication..................................................................................................................... 13

II
9.2 System >> Information..........................................................................................................................13
9.3 System >> Account................................................................................................................................14
9.4 System >> Configurations..................................................................................................................... 14
9.5 System >> Upgrade............................................................................................................................... 15
9.6 System >> Auto Provision..................................................................................................................... 17
9.7 System >> Tools.....................................................................................................................................19
9.8 System >> Reboot Phone...................................................................................................................... 19
9.9 Network >> Basic...................................................................................................................................20
9.10 Network >> Service Port..................................................................................................................... 21
9.11 Line >> SIP........................................................................................................................................... 22
9.12 Line >> SIP Hotspot............................................................................................................................. 28
9.13 Line >> Dial Plan.................................................................................................................................. 31
9.14 Line >> Basic Settings.......................................................................................................................... 34
9.15 Line >> RTCP-XR.................................................................................................................................. 35
9.16 Phone settings >> Features.................................................................................................................35
9.17 Phone settings >> Media Settings...................................................................................................... 37
9.18 Phone settings >> Action.................................................................................................................... 38
9.19 Phone settings >> Time/Date............................................................................................................. 39
9.20 Intercom Settings >> Time plan.......................................................................................................... 40
9.21 Phone settings >> Tone.......................................................................................................................41
9.22 Phone settings >> Voice Menu........................................................................................................... 42
9.23 Call List >> Call List.............................................................................................................................. 42
9.24 Call List >> Web Dial............................................................................................................................43
9.25 Call Logs...............................................................................................................................................43
9.26 Security >> Web Filter.........................................................................................................................43
9.27 Security >> Trust Certificates..............................................................................................................44
9.28 Security >> Device Certificates........................................................................................................... 44
9.29 Security >> Firewall............................................................................................................................. 45
9.30 Device Log >> Device Log....................................................................................................................47
10 Trouble Shooting..............................................................................................................................................48
10.1 Get Device System Information..........................................................................................................48
10.2 Reset Device to Factory Default......................................................................................................... 48
10.3 Network Packets Capture................................................................................................................... 48
10.4 Get Log Information............................................................................................................................48
10.5 Common Trouble Cases...................................................................................................................... 49
III
1Picture
Picture 1- web login............................................................................................................................. 5
Picture 2- Line ..................................................................................................................................... 7
Picture 3- Voice mail..........................................................................................................................12
Picture 4- Information........................................................................................................................13
Picture 5- WEB Account................................................................................................................... 14
Picture 6- System Setting................................................................................................................. 14
Picture 7- Upgrade.............................................................................................................................15
Picture 8- Auto provision settings....................................................................................................17
Picture 9- Tools...................................................................................................................................19
Picture 10 - Reboot Phone................................................................................................................ 19
Picture 11 - Network Basic Setting...................................................................................................20
Picture 12 - Service port setting interface.......................................................................................21
Picture 13 - SIP....................................................................................................................................22
Picture 14 - SIP Hotspot................................................................................................................. 29
Picture 15 - SIP hotspot server.........................................................................................................30
Picture 16 - SIP hotspot client...........................................................................................................30
Picture 17 - Dial Plan..........................................................................................................................31
Picture 18 - Custom setting of dial - up rules................................................................................. 32
Picture 19 - Dial rules table (1)...................................................................................................... 33
Picture 20 - Dial rules table (2)...................................................................................................... 33
Picture 21 - Basic Settings................................................................................................................ 34
Picture 22 - Features.......................................................................................................................... 35
Picture 23 - Media Settings............................................................................................................... 37
Picture 24 - Time/Date........................................................................................................................39
Picture 25 - Time Plan........................................................................................................................ 41
Picture 26 - Tone................................................................................................................................. 41
Picture 27 - Voice Menu..................................................................................................................... 42
Picture 28 - Web Filter settings......................................................................................................43
Picture 29 - Web Filter Table..........................................................................................................43
Picture 30 - Trust Certificates............................................................................................................44
Picture 31 - Device Certificates........................................................................................................ 45
Picture 32 - Firewall............................................................................................................................ 45
Picture 33 - Firewall Input rule table................................................................................................ 46
Picture 34 - Delete firewall rules....................................................................................................46

IV
2 Table
Table 1- Interface................................................................................................................................. 3
Table 2- LED......................................................................................................................................... 7
Table 3- Voice Menu............................................................................................................................ 8
Table 4- Firmware upgrade........................................................................................................... 15
Table 5- Auto Provision..................................................................................................................... 17
Table 6- Network Basic Setting........................................................................................................20
Table 7- Service port...................................................................................................................... 21
Table 8- SIP.........................................................................................................................................22
Table 9- SIP Hotspot..........................................................................................................................29
Table 10 - Phone 7 dialing methods.................................................................................................31
Table 11 - Dial - up rule configuration table.................................................................................32
Table 12 - Set the line global configuration on the web page......................................................34
Table 13 - set RTCP-XR.....................................................................................................................35
Table 14 - Common device function Settings on the web page ..........................................36
Table 15 - Audio Settings................................................................................................................... 37
Table 16 - Time/Date...........................................................................................................................39
Table 17 - Network Firewall............................................................................................................ 45
Table 18 - Trouble Cases...................................................................................................................49

1
3 Safety Instruction
Please read the following safety notices before installing or using this unit. They are crucial for the
safe and reliable operation of the device.
Please use the external power supply that is included in the package. Other power supply may
cause damage to the phone and affect the behavior or induce noise.
Before using the external power supply in the package, please check the home power voltage.
Inaccurate power voltage may cause fire and damage.
Please do not damage the power cord. If power cord or plug is impaired, do not use it because it
may cause fire or electric shock.
Do not drop, knock or shake the phone. Rough handling can break internal circuit boards.
This phone is designed for indoor environment. Do not install the device in places where there
is direct sunlight. Also do not put the device on carpets or cushions. It may cause fire or
breakdown.
Before using the product, please confirm that the temperature and humidity of the environment
meet the working requirements of the product.
Avoid wetting the unit with any liquid.
Do not attempt to open it. Non-expert handling of the device could damage it. Consult your
authorized dealer for help, or else it may cause fire, electric shock and breakdown.
Do not use harsh chemicals, cleaning solvents, or strong detergents to clean it. Wipe it with a
soft cloth that has been slightly dampened in a mild soap and water solution.
When lightning, do not touch power plug, it may cause an electric shock.
Do not install this phone in an ill-ventilated place. You are in a situation that could cause bodily
injury. Before you work on any equipment, be aware of the hazards involved with electrical
circuitry and be familiar with standard practices for preventing accidents.

2
4 Overview
4.1 Overview
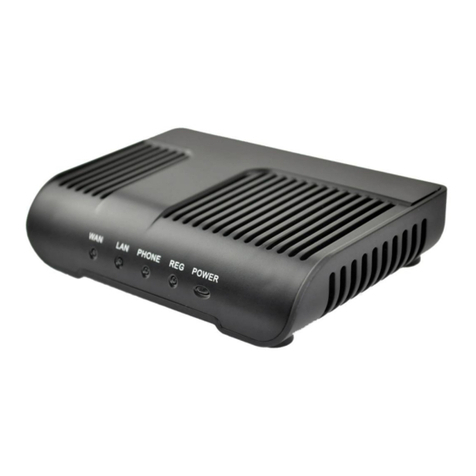
GA10&GA11 is a SIP analog gateway (ATA) with a single FXS port, featuring high-definition
voice, 2 SIP accounts, three-way conference calls, etc.; through the convenient use of VoIP
equipment to transfer analog calls to SIP calls, users are supported to call IP phones with ordinary
analog phones. GA10&GA11 provides individual, enterprise, and operator user ports with a
convenient, stable, and cost-effective communication solution to realize the deployment of VoIP.

3
5 Install Guide
5.1 Use external Power Adapter
Please use the specified power adapter to eature the normal operation of the device.
5.2 Packing Contents
ATA Gateway Ethernet Cable
Quick Installation Guide Power Adapter
5.3 Interface description
Table 1- Interface
Port
Icon
Function
Power
DC 5V IN
Connecting to a power source to the micro-USB
or DC Jack

4
Network
WAN
Connecting to the network.
FXS
FXS
Use RJ11 telephone cable to connect to an
analog phone. (GA10).
Use BT plug telephone cable to connect to an
analog phone. (GA11).
Reset
RST
Restore Default button. When the device is
working properly, if you press this button (6
seconds) with a sharp object (such as a pencil)
until the LED fast twinkling. Restore function will
take effect after you release it.
5.4 Device Connection
Please refer to the following steps to connect your device:
Insert a standard RJ11/ BT plug telephone cable into the FXS port and connect the other end of
the telephone cable to a standard touch-tone analog telephone.
Insert the ethernet cable into the WAN port of the device and connect the other end of the
ethernet cable to an uplink port (a router or a modem, etc.)
Insert the power adapter into the device and connect it to a wall outlet.
The power and ethernet LEDs will be solidly lit when the device and network is ready for use.

5
6 Introduction to the User
6.1 Web Management
Phone can be configured and managed on the web page of the phone. The user needs to enter the
IP address of the phone in the browser at first and open the web page of the phone.
Picture 1- web login
Users must correctly enter the user name and password to log in to the web page. The default user
name and password are "admin". For the specific details of the operation page, please refer to page
9 Web configurations.
6.2 Network Settings
The factory default of the device is DHCP mode. When the device is successfully connected
according to 5.4 Connecting the device, you can obtain or modify the IP address of the device by
connecting to an analog phone.
Support 3 ways to access the Internet:
DHCP
Static IP address
PPPoE
6.2.1 Read the IP
Dial "#*111" on the phone, the device will announce the IP address by voice

6
6.2.2 Set Static IP
The following describes how to set a static IP address for the device.
IP address: 192.168.10.123
Subnet mask: 255.255.255.0
Device address: 192.168.10.1
Primary DNS address: 8.8.8.8
Secondary DNS address: 114*114*114*114
Step 1. Dial #*50 on the phone, input the static IP address 192*168*10*123 to be set after hearing
"Please input", and press # to end after inputting. After finishing, you can hear the prompt of
successful setting.
Step 2. Dial #*51 on the phone, input the device to be set 192*168*10*1 after hearing "Please input",
press # to end after inputting, and you can hear the prompt of successful setting after finishing;
Step 3. Dial #*52 on the phone, input the DNS 8*8*8*8*114*114*114*114 to be set after hearing
"Please input", and press # to end after inputting, and you can Hear the prompt of successful setting;
Step 4. Dial #*53 on the phone, input the subnet mask to be set 255*255*255*0 after hearing
"Please input", press # to end after inputting, and you can hear the setting successful hint;
Step 5. Dial #*100 on the phone, switch to static mode, and use the static IP address set
6.3 SIP Configurations
A line must be configured properly to be able to provide telephony service. The line configuration is
like a virtualized SIM card. Just like a SIM card on a mobile phone, it stores the service provider and
the account information used for registration and authentication. When the device is applied with the
configuration, it will register the device to the service provider with the server’s address and user’s
authentication as stored in the configurations.
The user can conduct line configuration on the interface of the phone or the webpage, and input the
corresponding information at the registered address, registered user name, registered password
and SIP user, display name and registered port respectively, which are provided by the SIP server
administrator.
WEB interface :After logging into the phone page, enter [Line] >> [SIP] and select SIP Line for
configuration, click apply to complete registration after configuration, as shown below:

7
Picture 2- Line
6.4 LED
Table 2- LED
Type
LED light
LED status
Power light
Steady red
Connect the power supply
Light off
Not connected to power supply
Network indicator
light
Steady green
Connect to normal
Green light flash
Network anomaly
Light off
Unconnected network cable
FXS port indicator
Steady green
Calling/alerting/talking
Green light flash
MWI
Light off
Standby
Registration indicator
light
Steady green
Registration success
Green light flash
Registration failed
Light off
Unregistered

8
6.5 Voice Menu
Table 3- Voice Menu
Effect
Instruction
Describe
Start Reboot
#****
Reboot the device
Enable Static Mode
#*100
Modify the network mode to gorgeous mode
Enable DHCP Mode
#*101
Modify the network mode to dynamic mode
Enable PPPOE Mode
#*102
Modify the network mode to PPPOE mode
Read WAN IP
#*111
Read IP address
Read Phone Number
#*222
Read the registered phone number
Set WAN IP Addr
#*50
Set the IP address of the WAN port
Set WAN Gateway
#*51
Set up WAN port equipment
Set WAN DNS
#*52
Set the DNS of the WAN port
Set WAN Subnet Mask
#*53
Set the subnet mask of the WAN port
Disabled Call Forward
#*90
Use as a forward function
Busy Call Forward
#*91
Allow forward on busy, when the device is busy,
forward to the set number
No Ans Call Forward
#*92
Busy forwarding is allowed, when there is no
one on the device, it will be forwarded to the set
number
Always Call Forward
#*93
Enable unconditional forwarding, the device
always forwards to the set number
Voice Mail
#*86
Broadcast the number of unread messages
Call Back
#*87
Call the last number called
Redial
#*88
Call a missed number
DND ON
#*94
Enable Do Not Disturb, all numbers will not be
able to call in after activation
DND OFF
#*95
Turn off Do Not Disturb
Blind Transfer
#*27
Blind transfer operation
Attended Transfer
#*28
Attendance transfer operation
Conference (Conf)
#*29
Perform meeting operations

9
7 Basic Function
7.1 Making Phone Call
Step 1. Off hook the analog phone
Step 2. Enter the number and wait 5 seconds
Step 3. Enter the number and press #
7.2 Call Hold
Step 1. Off hook the analog phone
Step 2. Enter the number and press #
Step 3. Press the flash button of the analog phone to hold the call. Press again to release
the call, If the analog phone does not have the Flash button, you can use switch hook.
7.3 Call Transfer
7.3.1 Blind transfer
Step 1. Set up a call between user A and user B
Step 2. User A presses the Flash key or switch hook to hold the call between user A and
User B
Step 3. Enter #*27 + C and press # to dial user C's number
Step 4. User A hangs up, user B sets up a call with user C
7.3.2 Attended transfer
Step 1. Set up a call between user A and user B
Step 2. User A presses the Flash key or switch hook to hold the call between user A and
User B
Step 3. Enter #*28 + C and press # to dial user C's number
Step 4. User C picks up, user A sets up a call with user C
Step 5. User A presses the Flash key or switch hook, user B sets up a call with user C
7.4 Conference
The device supports conference. Suppose user A and user B are on a call, and user A
invites user C to join the conference. The following describes how to implement the
function of conference.
Start a conference
Step 1. User A makes a call with user B.
Step 2. User A presses the Flash key or lightly presses the hook of the phone to hold the

10
call between A and B.
Step 3. Enter #*29 + C, and press # to dial user C's number.
Step 4. User C picks up the phone.
Step 5. User A presses Flash key or lightly presses the hook of the phone. At this time,
users A, B, and C establish a conference call.
Cancel the conference
If user C is invited to the conference after answering the call, user A can press Flash key
or lightly press the hook to remove user C from the conference.
End the conference
During the conference, if one party hangs up the call (not including user A), the other two
users can continue the conversation.
If user A hangs up the phone, the conference ends and returns to standby status.

11
8 Advance Function
8.1 IP Direct
Step 1. Off hook the Analog phone
Step 2. Input the dialed the IP address,such as: 192*168*10*111
Step 3. Press "#" button to call out
8.2 Redial
Redial the last dialed number
Step 1. Off hook the Analog phone
Step 2. Input"#*88"
Step 3. Press"#" button to call out
8.3 Call Back
Dial the last unanswered number
Step 1. Off hook the Analog phone
Step 2. Input"#*87"
Step 3. Press "#" button to call out
8.4 Voice Mail
Enable to Subscribe for Voice Message in the Web GUI page and set the Voice
Message Number. When there is a Voice message, the indicator of the FXS interface
flashes green quickly.

12
Picture 3- Voice mail
Off hook the analog phone and input the preset Voice Message Number to listen to the
Voice Message according to the prompt
Off hook the Analog phone and Press "#*86" to check if there is a Voice Message

13
9Web Configurations
9.1 Web Page Authentication
The user can log into the web page of the phone to manage the user's phone
information and operate the phone. Users must provide the correct user name and
password to log in.
9.2 System >> Information
Picture 4- Information
User can get the system information of the device in this page including,
Model
Hardware
Software
Uptime
MEMInfo
System time
And summarization of network status,
Network Mode
MAC Address
IP
Subnet Mask
Default Gateway
Besides, summarization of SIP account status,
SIP User
SIP account status (Registered / Unapplied / Trying / Timeout )

14
9.3 System >> Account
Picture 5- WEB Account
On this page the user can change the password for the login page.
Users with administrator rights can also add or delete users, manage users, and set
permissions and passwords for new users.
9.4 System >> Configurations
Picture 6- System Setting
On this page, users with administrator privileges can view, export, or import the phone
configuration, or restore the phone to factory Settings.

15
Clear Configurations
Select the module in the configuration file to clear.
SIP: account configuration.
AUTOPROVISION: automatically upgrades the configuration
TR069:TR069 related configuration
MMI: MMI module, including authentication user information, web access protocol, etc.
Clear Tables
Select the local data table to be cleared, all selected by default.
Clear ETC
Select the etc to be cleared, all selected by default
Reset Phone
The phone data will be cleared, including configuration and database tables.
9.5 System >> Upgrade
Picture 7- Upgrade
Table 4 - Firmware upgrade
Parameter
Description
Upgrade server
Enable Auto Upgrade
Enable automatic upgrade. If there is a new version txt
and new software firmware on the server, phone will
show a prompt upgrade message after Update Interval.
Upgrade Server Address1
Set available upgrade server address.
Upgrade Server Address2
Set available upgrade server address.
Update Interval
Set Update Interval.
Firmware Information
Current Software Version
It will show Current Software Version.
This manual suits for next models
1
Table of contents
Other Fanvil Gateway manuals

Fanvil
Fanvil G100S User manual

Fanvil
Fanvil PA2S Installation and user guide

Fanvil
Fanvil G200S User manual

Fanvil
Fanvil A1 User manual

Fanvil
Fanvil PA2S User manual

Fanvil
Fanvil PA2S Installation and user guide

Fanvil
Fanvil PA2S User manual

Fanvil
Fanvil PA3 User manual

Fanvil
Fanvil PA3 User manual

Fanvil
Fanvil PA2 User manual
Popular Gateway manuals by other brands

Everynet
Everynet CloudCell 4G installation manual

Hyperion
Hyperion HYP-GTW-G2 installation guide

BreezeCOM
BreezeCOM BreezeACCESS II SU-R Series installation manual

BEC
BEC Ultimum 8900AX quick start guide

National Instruments
National Instruments 9792 USER GUIDE AND SPECIFICATIONS

Elvaco
Elvaco CMe2100 G3 Quick manual