FAR RAC 181 User manual

RAC 181
- TRANSLATION OF ORIGINAL INSTRUCTIONS
HYDROPNEUMATIC RIVETING TOOL
FOR RIVETS Ø 2,4 ÷ Ø 6
( Ø 6 ALU ONLY )
INSTRUCTIONS FOR USE - SPARE PARTS
GB
RAC 181
RAC 181
www.air-allied.com.au
Air & Allied Sales (Pacific) Pty Ltd
www.air-allied.com.au
DATE 04-2017 REVISION-01

Far S.r.l. - Giacomo Generali
(Chairman of the Board of Directors)
Quarto Inferiore, 23-03-2016
Via Giovanni XXIII No. 2, herewith
DECLARES
on its sole responsability that the riveting machine
Type: RAC 181 - Hydropneumatic tool Application: for rivets diam.
2,4-6 (6 aluminium only)
whichistheobjectofthisdeclarationcomplieswiththebasic
safety requirements estabilished in the law decree Leg. D.
17/2010 of Machinery Directive 2006/42/CE acknowledge
and subsequent amendments and integrations.
The person who is authorized to create the technical brochure is
(BO), via Giovanni XXIII n. 2.
.............................................
GB
Air & Allied Sales (Pacific) Pty Ltd
www.air-allied.com.au

SPARE PARTS .......................................17
ACCESSORIES ......................................20
GB
GB
GENERAL NOTES AND USE ..................4
GB
INSTRUCTIONS FOR USE ......................8
GB
RAC 181
RAC 181
Air & Allied Sales (Pacific) Pty Ltd
www.air-allied.com.au

4
GB
GENERAL NOTES AND USE
The tool must be used for rivets diam. 2,4 - 6 mm.
Diam 6 mm only in aluminium.
The RAC 181 oil pneumatic system assures more power than the pneumatic system used for other models.
reduction in the problems due to the wear and tear of the components, therefore, there will be an increase in
reliability. The technical solutions adopted reduce the dimensions and the weight of the tool which, for these
reasons, make it very handy. The possibilities of leakage from the oil-dynamic system are eliminated by some
sealed gaskets, solve this problem.
RAC 181
RAC 181
Air & Allied Sales (Pacific) Pty Ltd
www.air-allied.com.au

6
Ø3,1
11,2
Ø2,7
10
1
1
Ø C = 1,43 717006 B = 13
71345507
Ø A = 8,3
710859
Ø C = 1,7 ÷ 2,1 717001 B = 13
71345507
Ø A = 8,3
710859
Ø C = 2,15 ÷ 2,4 717002 B = 13
71345507
Ø A = 8,3
710859
Ø C = 2,6 717003 B = 13
71345507
Ø A = 8,3
710859
Ø C = 2,9 ÷ 3 717004 B = 13
71345507
Ø A = 8,3
710859
Ø C = 3,5 717005 B = 13
71345507
Ø A = 8,3
710859
TAMP Acc. Ø 3,2
Ø C = 2,1
717002 B = 13
71345507
Ø A = 8,3
710859
TAMP Acc. Ø 4
Ø C = 2,6
717003 B = 13
71345507
Ø A = 8,3
710859
B
ØA
Ø1,9
7
Ø3,4
12,5
Ø2,7
10
Ø C
Ø3,1
11,2
Ø2,25
8,5
14
Ø 4
Air & Allied Sales (Pacific) Pty Ltd
www.air-allied.com.au
DATE 04-2017 REVISION-01

7
RAC 181
RAC 181
TAMP Acc. Ø 4,8
Ø C = 2,9
717004 B = 13
71345507
Ø A = 8,3
710859
MULTIFAR Inox. Ø 3,2
Ø C = 2,15
717002 B = 13
71345507
Ø A = 8,3
710859
MULTIFAR Inox. Ø 4
Ø C = 2,6
717003 B = 13
71345507
Ø A = 8,3
710859
MULTIFAR Inox. Ø 4,8
Ø C = 3,2
717004 B = 13
71345507
Ø A = 8,3
710859
Ø C = 1,80 ÷ 2,15 717001 B = 13
71345507
Ø A = 8,3
710859
Ø C = 2,6 717003 B = 13
71345507
Ø A = 8,3
710859
Ø C = 3,2 717004 B = 13
71345507
Ø A = 8,3
710859
Ø C = 3,4 717005 B = 13
71345507
Ø A = 8,3
710859
B
ØA
1
1
1
Ø3,4
12,5
Ø3,4
12,5
Ø3,1
11,2
Ø2,7
10
1
Ø3,4
12,5
Ø C
Ø2,25
8,5
Ø3,1
11,2
14
Ø 4
Air & Allied Sales (Pacific) Pty Ltd
www.air-allied.com.au
DATE 04-2017 REVISION-01

GB
8
RAC 181
Company name and
address
Lot number
Designation of the tool
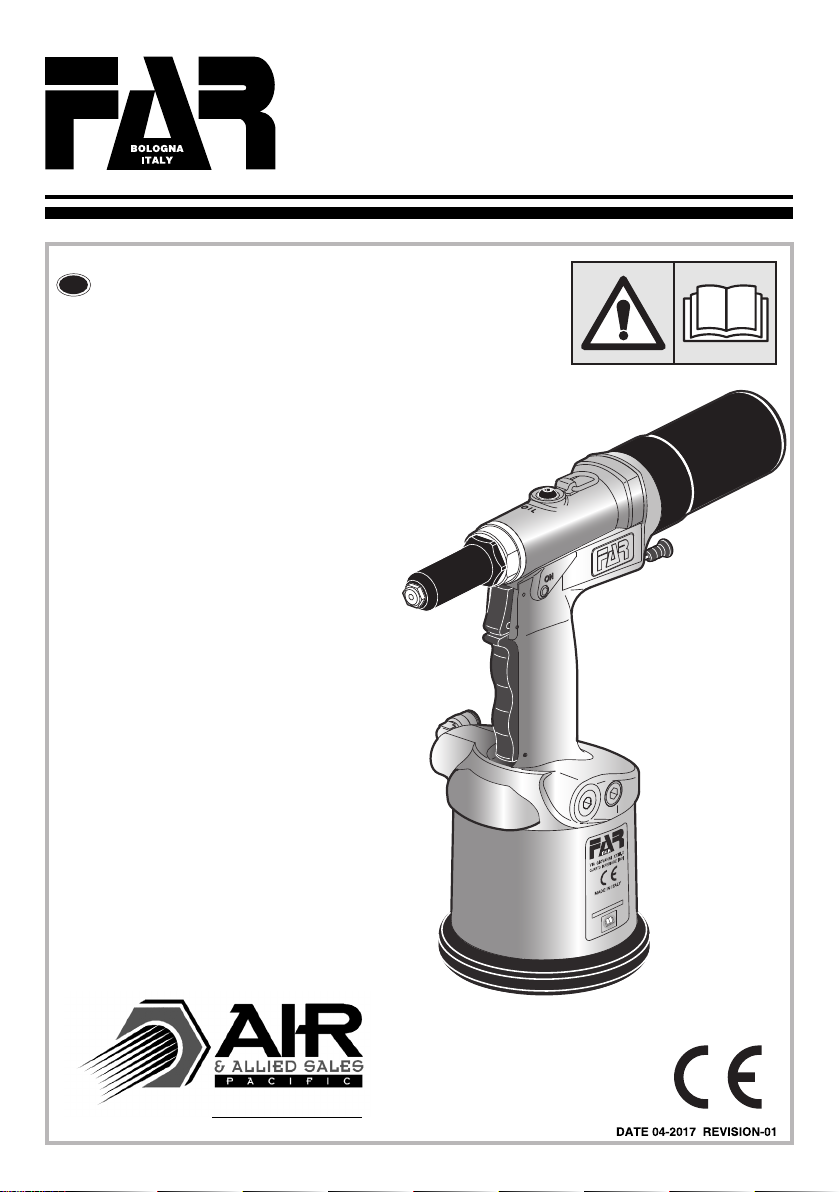
TOOL IDENTIFICATION
The riveting tool RAC 181 is identified from a marking that
showscompanynameandaddressofmanufacturer,designation
of the tool, CE. Always refer to the information on the riveting
tool when requesting technical service.
INSTRUCTIONS FOR USE I
INDEX
GUARANTEE ............................................................................. 14
SAFETY MEASURES AND REQUIREMENTS........................14
TOOL IDENTIFICATION .......................................................14
TECHNICAL DATA ...............................................................15
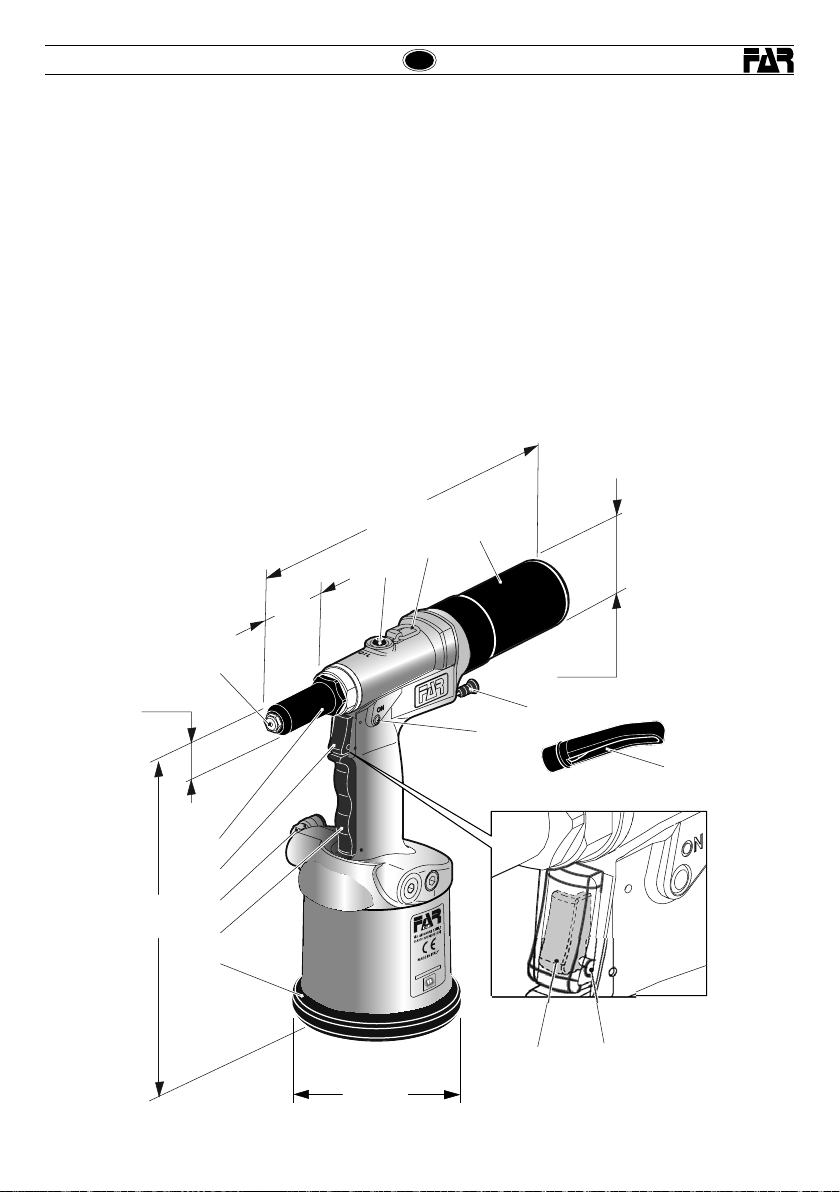
MAIN COMPONENTS..........................................................15
HOW TO USE YOUR RIVETING TOOL.................................16
MAINTENANCE AND CHANGE OF SIZE...............................18
TOOPING UP THE OIL-DYNAMIC CIRCUIT.........................19
DISPOSAL OF THE RIVETING TOOL ......................................... 19
SAFETY MEASURES AND REQUIREMENTS
CAUTION!!!
All the operations must be done in conformity
with the safety requirements, in order to avoid
any consequence for your and other people’s
security and to allow the best tool work way.
• Read the instructions carefully before using the tool.
•For all maintenance and/or repairs please contact
FAR s.r.l. authorized service centers and use only
original spare parts. FAR s.r.l. may not be held liable
for damages from defective parts caused by failure
to observe what above mentioned (EEC directive
85/374).
The list of the service centres is available on our website
http://www.far.bo.it ( Organization )
• The tool must be used only by expert workers.
• A protective visor and gloves must be put on when using
the tool.
• Use equipment recommended in the maintenance chapter
to do any maintenance and/or regulation of the tool.
• For topping up the oil, we suggest using only fluids in
accordance with the features specified in this working book.
• If any drop of oil touches your skin, you must wash with
water and alkaline soap.
• The tool can be carried and we suggest putting it into its box
after using.
• The tool needs a thorough six-monthly overhaul.
• Repairing and cleaning operations must be done when the
tool is not fed.
• If it is possible, we suggest a safety balancer.
• If the A-weighted emission sound pressure level is more
than 70 dB (A), proper hearing protections have to be worn
(anti-noise headset, etc.).
• The workbench and the work surface must be always clean
and tidy. Messiness could cause injury to persons.
• Do not allow unauthorized persons to use the working tools.
• Make sure that the compressed air feeding hoses are properly
sized for their use.
• Do not carry the connected tool by pulling the hose. The pipe
must be far from any heating sources or from cutting parts.
• Keep the tools in good conditions; do not remove either safety
parts or silencers.
• After repair and/or adjustment operation, make sure to remove
the adjusting spanners.
• Before disconnecting the compressed air hose from the tool
make sure that there is no pressure in the hose.
• These instructions must be carefully followed.
GUARANTEE
FAR riveting tools are covered by a 12-month warranty. The
tool warranty period starts on the date of delivery to the
buyer, as specified in the relevant document. The warranty
covers the user/buyer provided that the tool is purchased
through an authorized dealer and only if it is used for the
purposes for which it was conceived. The warranty shall
not be valid if the tool is not used or maintained as specified
in the instruction and maintenance handbook. In the event
of defects or failures, FAR S.r.l. shall undertake solely to
repair and/or replace the components it judges to be faulty.
RAC 181
RAC 181
Air & Allied Sales (Pacific) Pty Ltd
www.air-allied.com.au

9
GB
Ø 23
Ø 50
57
295
A
D
MO
BC
I
L
H
F
G
E
270
N
Ø 115
T
RAC 181
TECHNICAL DATA
• Working pressure .................................................. 6,5 BAR
• Min. int. Dia. of the compressed
air feeding hose .................................... min. dia. = 8 mm
• Air consumption per cycle .........................................5,1 Nl
• Maximum force ..........................................6 BAR - 10500 N
• Weight ....................................................................1,60 Kg
• Working temperature.............................................-5°/+50°
• Root mean square in total acceleration frequency (Ac)
to which the arms are subjected.........................< 2,5 m/s2
• A-weighted emission sound pressure level .................81 dBA
• Peak C-weighted instantaneous sound pressure .....< 130 dBC
• A-Weighted sound power...........................................92 dBA
AIR FEED
The air feed must be free from foreign bodies and humidity
in order to protect the tool from premature wear and tear of
the components in movement, therefore we suggest to use a
lubrificator group for compressed air.
MAIN COMPONENTS
A)........................................................................Oil tank plug
B)............................................................Balancer connection
C)....................................................................Nails container
D)..................................................... ON / OFF Button suction
E) .......................................................Rubber protective base
F) ............................................... Compressed air connection
G)................................................................... Suction control
H) ...................................................... Tensile strenght button
I)..........................................................Sleeve carrying nozzle
L) ................................................................................. Nozzle
M).................................................. Suction Device always on
N)...................................................................................... Pin
O)................................................................Insertion pin hole
T) .......................................................................... Nails baffle
RAC 181
RAC 181
Air & Allied Sales (Pacific) Pty Ltd
www.air-allied.com.au

GB
10
WARNING!
Beforeusingthetoolitis absolutelynecessaryto
fit the nails container (C), or the nails baffle (T).
HOW TO USE YOUR RIVETING TOOL
Controlled suction (factory settings) (pic. f1-f2)
Fromthe"ON"positionensurethatthebutton(D)ispositionedas
in the picture (pic. f1), ie towards the inside of the riveting tool.
The suction starts pressing the lever (G) as shown in the
picture (pic. f2).
Suction OFF (pic. f3-f4-f5)
From the "OFF" position, through the provided pin (N), push in
the button (D), as shown in the picture (pic. f3).
In this setup, the nail comes out from the front by gravity or
from the back of the tool by tilting it, as per picture (pic. f4-f5).
D
D
G
f1
f2
f5
f4
f3
N
RAC 181
RAC 181
Air & Allied Sales (Pacific) Pty Ltd
www.air-allied.com.au

11
GB
G
N
N
NM
M
C
f6
f7
f10
f9
f8
Suction always ON (pic. f6-f7-f8-f9-f10)
From the "ON" position, with the supplied pin (N), push the selector (D) towards the inside of the riveting tool, as in the picture (pic.
f6). Press and hold the lever (G) and, at the same time , push in the locking device (M) (pic. f7-f8). To return to the controlled suction
press the locking device (M) on the opposite side (pic. f9).
When the nail container (C) is full, do not operate the riveter, unscrew the container (C) and empty it (pic. f10).
PLEASE DISPOSE OF NAILS CAREFULLY!
WARNING: When the riveting tool is used in the absence of nails tank (C), it is essential to fit the baffle (T) and the relative reduction
(S) (pic. F12), in order to avoid injury to the operator and / or persons close to him.
DN
RAC 181
RAC 181
Air & Allied Sales (Pacific) Pty Ltd
www.air-allied.com.au

GB
12
To assemble the baffle (T) proceed as follows: remove the nails tank (C) (pic. F10) as well as the cover (R), assemble the reduction
(S) on the connector and insert the baffle (T) with a slight pressure.
ST
R
f11
f12
RAC 181
RAC 181
Air & Allied Sales (Pacific) Pty Ltd
www.air-allied.com.au

13
GB
In case you want to convey the pieces of sheared nails inside a container, pull out the baffle (T) and the relative reduction (S)
from the tool.
Connect the riveter with a pipe ø 10 x 8 (C) by inserting it on the fitting.
CAUTION: the radius of curvature of the pipe must not be less than 300 mm, as shown in (pic. f14).
ST
f13
f14
R. min. 300
RAC 181
RAC 181
Air & Allied Sales (Pacific) Pty Ltd
www.air-allied.com.au

GB
14
Q
P
11 mm
16 mm
P
27 mm
I
WARNING!
Disconnect air feed when performing those operations.
MAINTENANCE AND CHANGE OF SIZE (pic. f15-f16-f17-f18))
The prolonged use of the riveting tool can cause the slipping of the clamps on the nail because of the impurities. For this reason,
it is necessary to lubricate the clamps after cleaning. However, if clamps are worn out and their proper functioning compromised,
they must be replaced. First remove the head which carries the nozzle (I), by means of a standard spanner of 27 mm. Then, by
using two standard spanners of 11 mm and 16 mm, remove the cone (P) and extract the clamps (Q).
Whenreplacing thenozzle (L),use theproper suppliedwrench andscrew theremoved nozzle init inorder toavoid losingthe nozzle.
f15 f17
f16 f18
L
RAC 181
RAC 181
Air & Allied Sales (Pacific) Pty Ltd
www.air-allied.com.au

15
GB
TOPPING UP OIL IN THE HYDRAULIC CIRCUIT (pic. f19)
Topping up the oil in thehydraulic circuitis necessary after a long
period of work, when there is a reduction of the riveter stroke.
Then proceed as follows: riveting tool on standby but fed and in
a vertical position, remove the cap (A) using the allen wrench 4
mm., remove also the nozzle (L) with the provided key. When
doing this operation use extreme caution to prevent oil spills.
Screw the oil container (Z), previously filled with commercial
hydraulic oil HLP 32 cSt, into the place of the cap (A).
By keeping the riveting tool vertically, press the trigger several
timesuntiltheriveterendsto makebubblesfrom the oilcontainer
(Z). It means that the oil filling has been fully achieved.
With the riveter still vertical and fed, unscrew the oil container
(Z) and then proceed by placing the cap (A).
WARNING: it is very important to follow the about mentioned
instructionsanduseglovesand protectionglassesor protective
visors. If you need to empty fully the hydraulic circuit, you must
put the oil in a suitable container and contact a Company that
is authorized to discharge any waste.
f19
ATTENTION!
Before disconnecting the compressed air hose,
make sure that it is not under pressure!
ATTENTION: Make sure that the oil filler cap ( A )
is tightened at a torque corresponding to min. 5
Nm ÷ Max. 8 Nm.
We recommend to use oil HLP 32 cSt or similars.
DISPOSAL OF THE RIVETING TOOL
Follow the prescriptions of the national laws for disposing of the riveting tool.
After disconnecting the tool from the pneumatic system, disassemble and split all the components according to
the material: steel, aluminium, plastic material, etc.
Then proceed to scrap the materials in accordance with current laws.
A
Z
L
min. 5 Nm
MAX 8 Nm
RAC 181
RAC 181
Air & Allied Sales (Pacific) Pty Ltd
www.air-allied.com.au

17
GB
KIT
No. CODE Q.ty DESCRIPTION
KIT A 740821 Anti-extrusion ring kit
KIT B 74000030 Pneumatic piston kit
KIT C 74000081 Gaskets kit
KIT D 74000088 Cone holder kit
KIT F 74000078 Dampener kit
KIT G 741702 Plate kit
KIT H 74000079 Lever kit
KIT I 74000080 Coil kit
KIT L 74000084 Valve kit
KIT M 74000086 Kit back connector
KIT It indicates that the part is sold in kits consisting of different
parts in different quantities.
01 72000146 1 Handgrip
02 71346099 1 Coil
03 71346285 1 Valve cap
04 710376 2 Gasket OR 2-009
05 72000144 2 Push-button unit
06 72A00043 1 Push-button
07 713390 4 Gasket OR 2-007
08 72000154 1 Pneumatic cylinder
09 72000143 1 Hydraulic cylinder
10 711730 1 Gasket OR 2-119
11 71346103 1 Hydraulic piston
12 710917 1 Gasket OR 2-118
13 711974 1 Seeger ring JV 22
14 710901 1 Gasket B-102070
15 710908 1 Washer
16 710577 1 Gasket B-086055
17 71346101 1 Front connector
18 710300 1 Gasket OR 020
19 710579 1 Gasket OR 2-113
20 711729 1 Gasket OR 2-024
21 710102 1 Gasket OR 113
22 710859 1 Clamps holding cone
23 710555 1 Washer 400-004-4490
24 71C01278 1 Screw TBCE M6 x 6 ISO 7380
25 71346060 1 Sleeve carrying nozzle
26 717004 1 Nozzle for rivet ø 4,8 Cu / Steel
27 710853 1 Spring
28 710849 1 Clamps opener
29 71345507 3 High-performance clamps
30M 71346200 1 Cover M
31 711706 1 Nails container
32 711336 2 Gasket OR 2-114
33 711357 1 Wrench kit
34 71346098 1 Flange
35 71346096 1 Rod
36 71346171 1 Silencer
37 71C00297 1 Gasket OR 6-700
38 71346106 1 Ring nut
39 71C01297 1 Gasket OR 2-043
40 71C01296 1 Seeger ring ø 100 UNI 7437
41 71346085 1 Rubber protective base
42 71346094 1 Tube ø 8 x 7
43 711337 1 Gasket OR 2-021
44 71346084 1 Rubber protective base
45 716377 1 Connector 6522 - ø 10 - 1/4"
46 71C01022 1 Cap 1/4"
47 71346107 1 Balancer hook
48 711732 2 Gasket OR 2-118
49 71346168 1 Bafe
50 710350 4 Gasket OR 2-109
51 717001 1 Nozzle for rivet ø 2,5 ÷ 3,4
52 717002 1 Nozzle for rivet ø 4
53 717003 1 Nozzle for rivet ø 4,8 All.
54 717005 1 Nozzle for rivet ø 6 / 6,4
55 717006 1 Nozzle for rivet ø 2,4
56 72A00053 1 Oil container assembly
57 712329 1 Reduction
58 71345212 1 Nails bafe
No. CODE Q.ty DESCRIPTION KIT
RAC 181
RAC 181
Air & Allied Sales (Pacific) Pty Ltd
www.air-allied.com.au
DATE 04-2017 REVISION-01

18
GB
RAC 181
KIT H
KIT G
5
5
18 28 27 212925 2226
17 19 2012 15 13
14 11 4850
16
23 24 47
9
31
32
10
1
7
6
57 58
77
45
46
KIT H
KIT D
KIT A
36
4
37
4
49
8
KIT I
23
38
43
48
KIT C
42
39
34
40
41
44
KIT B
KIT F
50
51 555452 53
33 56
KIT A
KIT L
KIT L
KIT M
KIT M
30 M
35
32
• SPARE PARTS •
RAC 181
RAC 181
Air & Allied Sales (Pacific) Pty Ltd
www.air-allied.com.au
DATE 04-2017 REVISION-01

19
KIT G
KIT I
KIT D
KIT A KIT B
KIT H KIT L
KIT M
KIT F
KIT C
• SPARE PARTS •
GB
RAC 181
RAC 181
Air & Allied Sales (Pacific) Pty Ltd
www.air-allied.com.au
DATE 04-2017 REVISION-01

20
130 mm 210 mm
35 mm 60 mm
16 mm
16 mm
U1
18 mm
U2
12 mm
EXTENDED HEADS -
EXTENDED HEADS WITH REDUCED SECTION- -
EXTENDED NOZZLES -
- ACCESSORIES -
GB
RAC 181
RAC 181
Air & Allied Sales (Pacific) Pty Ltd
www.air-allied.com.au
DATE 04-2017 REVISION-01
Other manuals for RAC 181
2
Table of contents
Other FAR Tools manuals
Popular Tools manuals by other brands

RED ROOSTER
RED ROOSTER RRI-BIM15T manual

Dynabrade
Dynabrade 40600 Safety, operation and maintenance instructions

Bosch
Bosch 0 986 613 670 Original instructions

Beechcfaft
Beechcfaft Bonanza D35 1994 Pilot's operating handbook and faa approved airplane flight manual

Beta
Beta 960KPC Operation manual and instructions

resideo
resideo Braukmann EA122A quick start guide