Felix Storch 2.0 User manual

Instruction manual
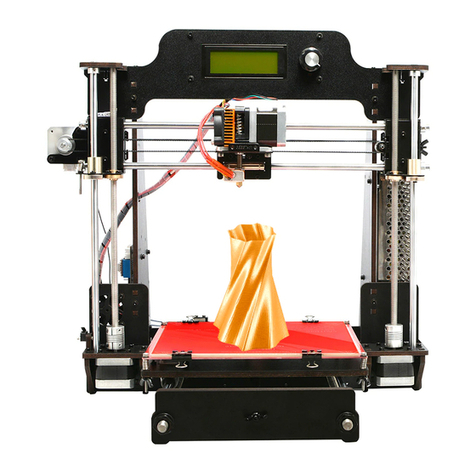
Felix 2.0, 3d printer-kit
Version2 –12-April-2013
Copyright Information
This document contains proprietary information that is protected by copyright. No part of this document may be photocopied, reproduced, or translated
to another language without the prior written consent of FELIXrobotics.
FelixRobotics
Wapendragervlinder 17
3544DL Utrecht
Netherlands
Copyright © 2013 FELIXrobotics.

1CONTENTS
2Introduction............................................................................................................................................................................................................................................... 4
3Specifications ............................................................................................................................................................................................................................................ 5
4Required toolset........................................................................................................................................................................................................................................ 6
5Required skills........................................................................................................................................................................................................................................... 7
6Important note.......................................................................................................................................................................................................................................... 7
7Module 1: Frame (time: 10-30 minutes).............................................................................................................................................................................................. 8
8Module 2: Z-axis (time: 45-90 min.)..................................................................................................................................................................................................12
9Module 3: The Extruder (time: 30-90 min.).......................................................................................................................................................................................18
10 Module 3: The X-axis (time: 30-60 min.)...........................................................................................................................................................................................24
11 Module 5: Table (time: 1-2 hours) ......................................................................................................................................................................................................29
12 Module 6: Y-axis (time: 10-30 min.)...................................................................................................................................................................................................31
13 Module 7: Electronics (time: 2-4 hrs.).................................................................................................................................................................................................36
13.1 Mount the powersupply. .........................................................................................................................................................................................................38
13.2 Guide wires.................................................................................................................................................................................................................................40
13.3 Connect all wires to the electronics board............................................................................................................................................................................42
14 Finishing touches (time: 30-45 min.)..................................................................................................................................................................................................45
15 Calibration of table (5-15 mins) ..........................................................................................................................................................................................................47
16 Making printer ready for operation. (30 –60 mins) .......................................................................................................................................................................48
16.1 Printer preparation....................................................................................................................................................................................................................48
16.2 Printer software –Repetier-Host...........................................................................................................................................................................................49
16.3 Calibrate the Z-direction/ Connect to printer......................................................................................................................................................................50
16.4 OPTIONAL: Firmware installation .........................................................................................................................................................................................55
17 It’s time for printing! (15- 30mins)......................................................................................................................................................................................................57
18 Quest to high quality printing..............................................................................................................................................................................................................59

18.1 Thermodynamics.......................................................................................................................................................................................................................59
18.2 Mechanics...................................................................................................................................................................................................................................59
18.3 Software......................................................................................................................................................................................................................................59
19 FAQ ...........................................................................................................................................................................................................................................................60
20 Terms Of Service.....................................................................................................................................................................................................................................61
21 BOM Felix 2.0..........................................................................................................................................................................................................................................64

2INTRODUCTION
First of all thank you choosing FELIXprinters! To get your Felix printer up and running as fast
and painless as possible please follow this manual carefully. When things are unclear or if you
looking on our forum and get yourself a forum account. You will benefit from the ability to get
downloadable and printable upgrades for your printer. Also it is a great source to obtain more
knowledge about your printer and printing in general.
Depending on your skills this kit will take approximately 4-12 hours to assemble and to make
your first print. Please read the manual carefully and follow it step by step. Please don’t make
any shortcuts unless you know what you’re doing. It’s better to spend a few minutes extra on
reading, than to wait a week for new parts.
The manual is build up as follows: Each module starts with a short introduction. After that a Bill
of Materials (BOM) is presented. The BOM doesn’t contain the small bolts and nuts, because for
the assembly of the printer the assortment box of bolts and nuts is required. Further to not bloat
the manual, a picture of each part is only displayed in the complete BOM of the printer. This can
be found in the Supplement at the end of the manual.
Before starting the build of your printer, it’s recommended to check if all parts are present by
comparing it with the bill of materials.

3SPECIFICATIONS
Printing
Electrical
Print Technology
Fused Filament Fabrication
AC input:
100-240V, 50-60 Hz
Build Volume
25.5 x 20.5 x 23.5 cm
Power Requirements
12V DC, 15 Amps
Print Quality
Extreme
High
Medium
Low
50 microns
100 microns
250 microns
320 microns
Connectivity
USB
Postioning Precision
XY: 13 microns
Z: 0.4 microns
Filament Diameter
1.75 mm
Mechanical
Nozzle Diameter
0.35 mm
Chassis
Aluminum profiles
Build platform
Aluminum plate
Software
XY Bearings
Linear ball bearings
Software Bundle:
RepetierHost + Skeinforge/SFACT
Z bearing
Linear ball bearings
File Types:
.STL
Stepper Motors
1.8 deg angle
1/16 micro-stepping
Supports:
Windows, XP and newer
Linux (Ubuntu 12.04+)
Mac OS X [10.6/10.7/10.8]
Physical Dimensions
Weight
7.5kg
Shipping Weight
11 kg
Shipping Box
50x30x30 cm, DIY kit
50x50x60 cm, Assembled unit
Temperature
Ambient operating temperature
15-32 ˚C [60 –90 ˚F]
Storage temperature
0 –32 ˚C
Warmup time
Heated bed (60 degC)
3 min
Nozzle (200degC)
1 min

4REQUIRED TOOLSET
The following tools are minimally required to assemble and use the Felix printer
Wrenches 7 and 13mm
Tweezers. (included in kit)
Nippers.
Caliper
Allen Key set. IMPORTANT: they
need to be preferably long and
have a round head at the end.
Pliers
Drill with a variable speed. When
plastic parts need to be drilled out,
it should be done with care
Level
Drill bits 4, 5mm
Hammer
Wire stripper, recommended
Detergent (Spirit, Acetone, Alcohol)

5REQUIRED SKILLS
The following skills are required to put the Felix printer together:
-Basic soldering skills
-Skills to assemble a mechanical construction
-Technical insight
-Common sense
If you lack any of these skills or are unsure please get help from someone who can guide you or do this for you
6IMPORTANT NOTE
To save paper the flow of the document is built up as follows:
First words at beginning of chapter1
Column 1
Column 2

7MODULE 1: FRAME (TIME: 10-30 MINUTES)
Required for this module
Tools
-Allen key set
-Level reference surface
-Level
Parts
-Bag with description ‘frame module’.
-Aluminum beams.
The goal of this module is to create the frame on the right. Try to make everything as perpendicular as possible to each other. Let surfaces align as good as
possible. A good idea is to use a level tool.
BOM for frame module
Part
Amount
40x40x400 profile, incl 2xM8
1
40x40x400 profile, incl 1xM8, 1xD7
2
40x40x400 profile, incl 3xD7
1
80x40x440 incl work
1
40x40 protective caps
4
80x40 protective caps
1
frame connector set
6
handle incl protective cap
1
hex sockethead bolt M6x1(or M8, depends on the used
handle type)
2
t-slot nut - 8 ST M6 (or M8, depends on the used handle
type)
2
t-slot nut - 8 ST M4
15
dampning feet
6
strip for putting away cable pieces of 40 cm
2
Collect the parts shown above. Notice the holes in the beams.
To make it understandable, the beams are described as follows:
Beam 1: 40x40x400mm beam, has 3 drilled holes
Beam 2: 40x40x400mm beam, has 1 drilled hole and one thread at the
far end of the beam
Beam 3: 40x40x400mm beam, has 2 threads at the far ends.
Beam 4: 80x40x440mm beam has one drilled hole and one thread at
the bottom.
Some of the beams have a screw thread on the far ends of the beam.
These are present for the frame connectors.
Overview of frame module
1
2
3
4

Take beam 4 and 1. They must be connected as oriented in the above
picture.
Screw the frame connectors in the bottom of beam 4 as indicated in
the figure. Then slide beam 4 onto beam 1.
Slide beam 4 in position. On the side of beam 1 where the hex-key is
positioned there are two drilled holes. Tighten the frame connectors by
sticking the hex-key through the holes. Do not fix it too tight because
fine-tuning/leveling is needed later on.
Slide one of the two beams number 2 onto beam 1. Watch the
orientation of the drilled hole.
Turn the frame and fix beam 2 onto beam 1. Again not too tight.

Take beam 3. Screw both frame connectors on the far-ends. Slide it
onto beam 2 and tighten it.
Take beam 2 again and screw the frame connector on it’s far end. Then
slid it on beam 3 as indicated on the picture.
Next try to slide it also on beam 4.
Thighten the screws, again not too tight.
Now it is time for fine-tuning. Try to get every beam as level as
possible. Also align the beams as good as possible. See an example in
the picture below

When all the beams are aligned and leveled, it is time to firmly tighten
the frame connectors.
Get the protective caps and mount them carefully with a hammer
Put the damping feet underneath the frame near the edge
The handle should be mounted in the final stages of assembly.
Topview of frame

8MODULE 2: Z-AXIS (TIME: 45-90 MIN.)
Note: Most holes are designed to minimize the need for any post processing, like filing and drilling. Sometimes, however the bolts will not fit smoothly
and it therefore needs to be drilled out slightly. Required drill sizes can be 3, 4 and 5mm.
BOM Z-axis
Part description
Amount
Hiwin lineair ball bearing set -
HGW15CC1R300Z0
1
Trapezium spindle + bronze nut
1
motor nema 17
2
z-spindelmount bottom - v2
1
pulley_motor_HTD
1
z-axis-motor-bracket_v10_F2
1
z_axis_carrier_pt1_v15_F2_0
1
z_axis_carrier_pt2_v11_F2_0
1
optosensor
2
small bearing
4
z-axis-limitswitch_vane_v6_F2_0
1
Get the parts indicated in the list above.
IMPORTANT: DO NOT let the cart of
the linear bearing go off the rail.
There are small balls in there which
might fall out when the cart rolls of
the rail.
Place the frame on a table let the back face of the wide beam rest on the
table surface.

Put three
t_slot nut - 8 ST M4
in the frame as indicated in the picture
above.
Put some tape on the far edge of the rail to prevent the cart from sliding
off.
First mount the linear guide loosely onto the frame with M4x20 bolts.
Then mount the
z-axis-motor-bracket_v10_F2
onto the frame, indicated
above with m4x20 bolts and important use small washers.
Put the motor in place and guide the wires through the hole
Before mounting the motor make sure the wires are orientated as above
Mount a motor with the m3x8 CSK (countersunk head) bolts.
Motor wires
M4x20 bolt + small washer
Make sure part touches frame

Start to align the z-axis guide. Push the bottom side against the printed
part. Measure the distance of the edge as indicated above. The distance
should be 12mm.
Mount the z_axis_carrier_pt2_v11_F2_0 onto the cart with two M5x16
bolts. Don’t forget to place the m5 washers. Mount a motor onto the
plastic part. IMPORTANT: match the orientation of the wires according
to the picture.
Mount the 2 bearings.
Order from right to left.
M4x25 bolt, 2x small bearing, small washer, plastic part, small washer,
M4 self locking nut.
Then insert 2x m4 selflocking nuts besides the just mounted rolls into
the plastic part as shown in the picture above.
12mm

On the bottom insert the bronze nut into the plastic part.
Take the
z_axis_carrier_pt1_v15_F2_0
part and slide it as indicated on
the picture above onto the already mounted plastic part.
As indicated screw on both sides m4x20 bolts into the part to clamp the
2 big plastic parts together.
Mount the big part onto the cart of the linear bearing with M5x16 bolts,
don’t forget the M5 washers!
Put a piece of the supplied double side tape underneath 2 opto-sensors

Mount the opto-sensors with the small Philips head screws. (Depending
on the delivered batch it could be bronze or stainless steel screws)
Place the pulley upside down on the motorshaft. The distance of the
bottom of the pulley to the faceplate of the motor should be 1-2mm.
Take the z-axis_limitswitchvane and slide the nut into the slot. On top
screw in an m4x20 bolt. Don’t screw it all the way in, let the tip of the
bolt touch the flange as indicated in the picture.
Mount the z-axis-limitswitch vane with an m4x20 bolt + washer. The
bracket should be approx. 1cm from the top of the rail. This is the
adjusting mechanism for the z-axis height and will be covered later for
finetuning.
Distance pulley to motorface = 1-2mm
M4x20 bolt
M4 thin nut

CAREFULLY Screw in the z-axis spindle from the top until it reaches the
motor and place the z-axis assembly in the middle. Make sure the brass
nut is inside the z-axis carrier assembly.
NOTE: It is important not to force the spindle in because when it is not
straight anymore it will affect print-quality.
Congratulations, you’ve finished the z-axis module.

9MODULE 3: THE EXTRUDER (TIME: 30-90 MIN.)
Collect the following tools
-Allen key set
-Large file
-Drill 4mm
BOM Extruder
Part description
Amount
Extru_base_v9_F1_5
1
Extru_base_pt2_v5_F1_5
1
Extru_base_pt4_F1_5
1
Extru_arm_v5_F_1_5
1
Extru_airduct_v2
1
motor nema 17
1
Fan 40x40x10mm
2
small bearing
1
extruder_insert_piece
1
We need the above printed parts
We will create small sub assemblies and then join them together
Get the extu_arm part and clean out the hole with a 4mm drill as shown
above slowly.

Insert a thin nut m4 as shown above. Before doing that clean the hole out
a little and insert the nut.
Mount parts onto the extruder arm:
From right to left. M4x20 bolt, 2x small washer, bearing, small washer,
plastic part, thin nut.
Mount the extruder wheel onto the motor with the little set-screw from
the bag of the extruder wheel. The set-screw should not stick out more
then 0.5mm, because it might then scrape the surrounding plastic parts..
NOTE 1: sometimes the tolerances of the extruder wheel are tight. It is very
difficult to get it on the motor-axle. DO NOT force it on there, but try to
drill out the hole with a 5mm drill, until it fits smoothly on the motor-shaft.

Insert the m4 self locking nuts into the hexagon holes of the
extru_base_pt4, use an m4x20 bolt including washer as indicated above.
Make sure the wires match and also the orientation of the sticker on the
fan. The fan blows out air at the side of the sticker.
Take the extru_base_pt2 and drill out the hole with a 4mm drill as shown
above.
Mount the motor onto the extru_base_pt2 part displayed above and
match the orientation of the wires.
Table of contents
Other Felix Storch 3D Printer manuals

Felix Storch
Felix Storch Pro L User manual
Felix Storch
Felix Storch 3.2 User manual
Felix Storch
Felix Storch Pro 3 User manual
Felix Storch
Felix Storch 3.1 Single User manual

Felix Storch
Felix Storch Pro 3 L User manual
Felix Storch
Felix Storch Pro BIOprinter User manual
Felix Storch
Felix Storch Tec 4.0 to Tec 4.1 Upgrade Kit Quick start guide

Felix Storch
Felix Storch Pro L Series User manual

Felix Storch
Felix Storch FELIXFOOD 3D User manual

Felix Storch
Felix Storch Pro 3 User manual
