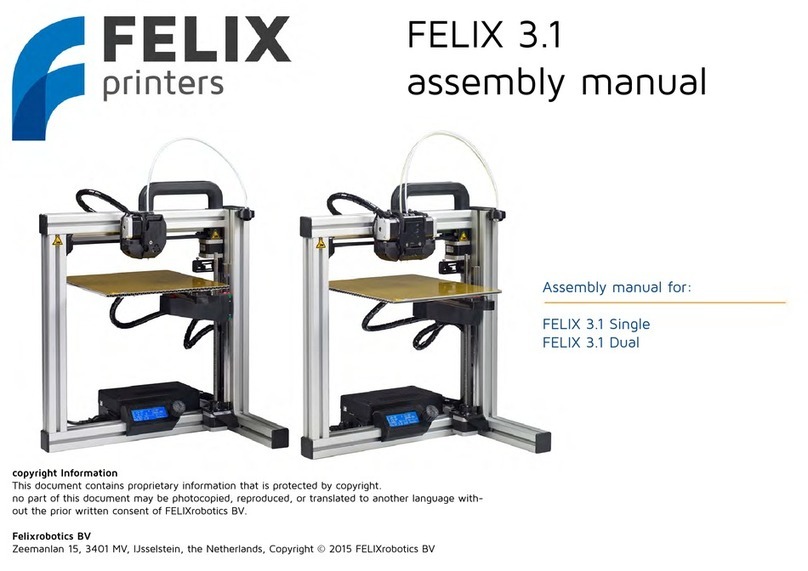
Felix Storch 3.2 User manual

Assembly Manual
16 December 2021
1
FELIX 3.2
www.FELIXprinters.com
Introduction
1Introduction
Dear Customer,
Thank you for choosing FELIXprinters!
To get your Felix 3D printer up and running as fast and painlessly as
possible please follow this manual carefully. Please don’t take any
shortcuts. It’s better to spend a few minutes extra on reading, than to
wait a week for new parts.
When things are unclear or if you have any remarks or tips, please
contact us:
Website: www.felixprinters.com/support
Email: support@felixprinters.com
Telephone: +31 (0)30 30 31 387
Address: Zeemanlaan 15, 3401MV IJsselstein, The Netherlands
We also recommend looking on our forum and getting yourself a forum
account. You will benefit from the ability to get downloadable and
printable upgrades for your printer. Also it is a great source to obtain
and share knowledge about your 3D printer and 3D printing in general.
Have fun building!
Kind regards,
FELIXprinters
2Contents
1Introduction...................................................................................................................................1
3Required Tools ............................................................................................................................2
4Frame assembly ........................................................................................................................3
5Z-axis ..................................................................................................................................................5
6X-axis ................................................................................................................................................. 8
7Y-axis ................................................................................................................................................12
8Extruder assembly .................................................................................................................16
8.1 For Single head assembly ......................................................................................16
9Extruder assembly .................................................................................................................19
9.1 For Dual head assembly..........................................................................................19
10 Wiring.............................................................................................................................................22
11 Upload Firmware ...................................................................................................................27
12 Functional Test ........................................................................................................................28
13 Finishing Touches .................................................................................................................30
14 Checklist .......................................................................................................................................32
15 Bill Of Materials........................................................................................................................34
15.1FELIX 3.2 DIY Kit - Base parts - 105 014.1 ......................................................34
15.2 FELIX 3.2 Single to Dual Upgrade Kit - 105 031.0...................................38
15.3 Set Plastic parts Felix 3.2 - 105 047.1................................................................39

Assembly Manual
16 December 2021
3
FELIX 3.2
www.FELIXprinters.com
Frame assembly
4Frame assembly
30 minutes
Tools:
1
(1x) Profile 4
(2x) Bolt M8 x 20
(2x Frame Connector
Tools
2
(1x) Profile 1
3
:
4
(1x) Profile 4
(1x) Bolt M8 x 20
(1x) Frame Connector
5
5
5
!! Hole !!
!! Hole !!
!! Hole !!
!! Hole !!
!! Hole !!
160mm
!! Hole !!
!! Hole !!
!! Hole !!

Assembly Manual
16 December 2021
4
FELIX 3.2
www.FELIXprinters.com
Frame assembly
6
(1x) Profile 2
(1x) Bolt M8 x 20
(1x Frame Connector
Tools
7
8
(1x) Profile 3
(2x) Bolt M8 x 20
(2x Frame Connector
9
:
10
Make sure the profiles are
properly aligned. If not
untighten the screws and
re-adjust the profiles
11
(4x) End Cap Square
(1x) End Cap Rectangle
5
!! Hole !!

Assembly Manual
16 December 2021
5
FELIX 3.2
www.FELIXprinters.com
Z-axis
5Z-axis
45 minutes
Tools:
12
Example –Insert T-Nut:
Insert the nut into the slot
Tools
13
Example –Insert T-Nut:
Insert the key into the threaded
hole and rotate the nut into
position
14
(4x) CSK Bolt M3 x 8
(1x) Motor
(1x) Z-Axis Motor Bracket
:
15
(1x) Cable Stepper Z
16
(1x) Motor Assembly
(2x) T-Nut M4
(2x) Bolt M4 x 20
(2x) Small Washer M4
Tools:
2
1.5
2
3
4
3

Assembly Manual
16 December 2021
6
FELIX 3.2
www.FELIXprinters.com
Z-axis
17
(3x) T-Nut M4
Tools
18
(3x) M4 x 20
(1x) Linear Guide HGW15
Tools:
19
(1x) Z-axis lift
(1x) Hexagon Nut
20
(2x) Bolt M4 x 40
(2x) Locknut M4
:
21
(4x) Bearing
(2x) Bolt M4 x 25
(2x) Small Washer M4
22
2
4 cm
16 cm
28 cm
!! Don’t let the Carriage run of the Rail !!
3
!! Washer !!
!! Washer !!
!! Remove Bolts after pulling Locknuts into Z-Axis Lift !!
16 cm
12 mm

Assembly Manual
16 December 2021
7
FELIX 3.2
www.FELIXprinters.com
Z-axis
23
(1x) Z-Axis Lift Assembly
(4x) Bolt M5 x 16
(4x) Small Washer M5
Tools
24
(1x) Motor
(1x) Pulley
(1x) Set Screw M3 x 6
(1x) Cable Stepper Y
Tools:
25
(1x) Cable Stepper Y
26
(1x) Motor
(4x) CSK Bolt M3 x 8
Tools:
27
(1x) Spindle
Tools
28
(1x) Set screw M3 x 6
Note: use a high quality and sharp
1.5mm allen key to properly fix the
spindle of the motor
Tools:
4
!! Make sure the flat side of the Motor
Axle is perpendicular to the set screw !!
1.5
!! Apply Grease to the spindle.!!
!! Make sure the hexagon
Nut stays in its socket !!
!! Tighten in a crosswise pattern !!
1
2
3
4
!! Make sure the flat side of the motor
axle is perpendicular to the set screw
!!
2
1.5
Distance between motor
face and pulley is 1.5mm

Assembly Manual
16 December 2021
8
FELIX 3.2
www.FELIXprinters.com
X-axis
6X-axis
60 minutes
Tools:
29
(1x) T-Nut M4
Tools
30
(2x) Bearing
(1x) Small Washer M4
(1x)X-axis Belt mount
(1x) Bolt M4 x 40
Tools
31
(1x) Belt
:
32
(1x) X-axis belt mount
assembly
Tools
33
(1x) T-Nut M4
Tools
2
1.5
2
3
2.5
,
-
+
!! Washer !!
1
2
3
3
2
1
2
3

Assembly Manual
16 December 2021
9
FELIX 3.2
www.FELIXprinters.com
X-axis
34
(1x) Bolt M4 x 16
(1x) Small Washer M4
Tools
35
(1x) T-Nut M4
Tools:
36
(1x) Bolt M4 x 16
(1x Small Washer M4
(1x) X-axis Motor Bracket
37
(2x) T-hammer nut M3
Tools:
38
(1x) Linear Guide MGN 12
39
(2x) Bolt M3 x 12
(1x) Linear Guide MGN12
Tools:
3
2
!! Reposition the safety plugs as shown.!!
2
2.5
!! Distance between edge of rail and beam
= 14mm.!!

Assembly Manual
16 December 2021
10
FELIX 3.2
www.FELIXprinters.com
X-axis
40
Tools
41
(1x) Motor
(1x) Pulley
(1x) Set screw M3 x 6
Tools:
42
(1x) Cable Stepper X
43
(1x) Motor Assembly
(4x) CSK Bolt M3 x 8
Tools:
44
(2x) Small Screw 2.2 x 8
(1x) Opto Sensor X
Tools:
45
(4x) CSK M3 x 6
(1x) Extru Base
Tools:
2.5
2
2
2
!! Tighten in a crosswise pattern!!
!! Make sure to position the Rail against X-
axis belt mount.!!
+
1
3
2
4
Distance between motor
face and pulley is 1.5mm

Assembly Manual
16 December 2021
11
FELIX 3.2
www.FELIXprinters.com
X-axis
46
Tools
47
Tools:
48
49
(1x) Tension bracketl
(1x) Square nut M4
Tools:
50
(1x) Tension bracket assembly
(1x) Bolt M4 x 25
Tools:
51
Tools:
!! Use a screwdriver to push the
belt completely into the socket !!
2.5
2cm
-
1
2
3
-
!! Use a screwdriver to push the belt
completely into the socket !!
Move the carriage to the center of the rail. Tighten the belt using the
size 3 hexagon key until the belts can barely touch eachother when
pressing them together.!!

Assembly Manual
16 December 2021
12
FELIX 3.2
www.FELIXprinters.com
Y-axis
7Y-axis
30 minutes
Tools:
52
(4x) Small Screw 2.2 x 8
(2x) Thin Nut M4
(2x) Opto Sensor Y/Z
Tools
53
(4x) Bolt M3 X 16
(4x) Locknut M3
(4x) Small washer M3
(1x) Y-stage bracket Pt.1
(1x) Y-stage bracket Pt.2
(1x) Linear Guide MGN12
Tools
54
(2x) Bolt M3 x 12
(1x) Y-Stage bracket
55
(1x) Tension Bracket
(1x) Bolt M4 x 25
(1x) Square Nut M4
Tools
56
(4x) Bolt M3 x 16
(4x) Small Washer M3
(1x) Y-stage Assembly
Tools
2
3
2.5
,
-
+
3
2.5
1
2
2.5
5.5
5.5
+
(4x) Screw 2.2
!! (2x) Thin Nut m4
!!
!! Endswitch Vane !!
!! Don’t let the Carriage run of the rail !!
2
1
3
4

Assembly Manual
16 December 2021
13
FELIX 3.2
www.FELIXprinters.com
Y-axis
57
(1x Belt
Tools
58
Tools:
59
Tools:
60
(1x) Build Platform
(1x) Short wire sleeve
Tools:
61
(2x) Knurled thumb screw
(2x) Set screw m4 x 30
(2x) Thin nut M4
Tools:
62
Fix the set screw into the
thumb screw. Put m4 thin
nut onto the set screw.
Tools:
2.5
3
-
1
2
3
-
!! Use the screwdriver to push the belt completely into the socket !!
3
-
2cm
!! Use the screwdriver to push the belt completely into the socket !!
Tensioning the belt:
Move the y-axis completely to one end. Tighten the belt using the
size 3 hexagon key until the belt can barely touch the rail of the y-
axis.
2x
2x

Assembly Manual
16 December 2021
14
FELIX 3.2
www.FELIXprinters.com
Y-axis
63
Lock the set screw by fixing the nut
onto the thumb screw.
While fixing the nut keep set screw in
place with allen key.
64
(2x) Thumb screw
(2x) Spring
(1x) Build platform assembly
Tools:
65
(2x) Cable tie
Tools:
66
(1x) Bolt M4 x 12
(1x) Spring
Tools:
67
(1x) Cable ties for mounting
cables on z bracket.
Tools:
68
(1x) Cable ties for mounting
cables on z-bracket.
Tools:
-
!! Give the cable enough slack and tighten the cable tie !!
2x
!! Repeat for front and rear thumbscrew !!
!! Tighten this bolt again at the end of the thread !!
End to end 25cm
3
!! Give the cable enough slack and tighten
the cable ties.!
7
2

Assembly Manual
16 December 2021
15
FELIX 3.2
www.FELIXprinters.com
Y-axis
69
(1x) Flexible buildplate
Clean thoroughly to remove any
grease of the plate
Tools:
70
(1x) Flexible build plate
Place the buildplate on the build platform
!! Remove the buildplate when the
statusbar displays B: 55C and
degrease the surface with Alcohol !!

Assembly Manual
16 December 2021
16
FELIX 3.2
www.FELIXprinters.com
Extruder assembly
8Extruder assembly
8.1 For Single head assembly
Incase you have a dual head printer -> GOTO next
chapter
60 minutes
Tools:
71
(1x) Bolt M4x12
(2x) Large washer M4
(1x) Spring
(1x) Thin nut M4
Tools
72
(1x) Extruder arm pt1
(1x) Extruder arm pt2
(1x) Bearing
Tools
73
(1x) Extruder wheel
(1x) Set-screw M3x4
!Make sure the flat side of the
axle is perpendicular to the
set screw!
:
74
(1x) Extruder L shaped
bracket
(2x) Thin square nut M4
Tools
75
(1x) Extruder L shaped
bracket
(3x) Bolt M3x30
Tools
1.5 mm distance!
3
1.5
2
3
2.5
,
-
+
2
1.5
2
7
!TIP! You can hold the square
nut in place by temporary
placing the M4x40 bolt
!Make sure the stepper
connector is facing to
correct way!

Assembly Manual
16 December 2021
17
FELIX 3.2
www.FELIXprinters.com
Extruder assembly
76
(1x) Cable guide bracket
(1x) Countersunk M3x6
:
77
(1x) Extruder hot-end clamp
(1x) Fan
!Make sure the fan wires are
oriented correctly!
Tools
78
(1x) Extruder airduct
(3x) Bolt M4x20
(3x) Thin nut M4
Tools
79
(1x) Hot-end assembly
!Make sure the cables are
facing towards you!
80
Assemble the two sub-
assemblies.
Tools
81
(1x) Bolt M4x40
Tools
!Make sure the bolt
is loose and not
tightened!
!Make sure
the fan label
is facing to
the hotends!
3
2
7
3
7

Assembly Manual
16 December 2021
19
FELIX 3.2
www.FELIXprinters.com
Extruder assembly
9Extruder assembly
9.1 For Dual head assembly
60 minutes
Tools:
86
(1x) Bolt M4x12
(2x) Large washer M4
(1x) Spring
(1x) Thin nut M4
Tools
87
(1x) Extruder arm pt1
(1x) Extruder arm pt2
(1x) Bearing
Tools
88
(1x) Extruder wheel
(1x) Set-screw M3x4
!Make sure the flat side of the
axle is perpendicular to the
set screw!
:
89
(1x) Extruder L shaped
bracket
(3x) Bolt M3x16
Tools
90
(1x) Extruder L shaped
bracket
(3x) Bolt M3x16
Tools
1.5 mm distance!
3
1.5
2
3
2.5
,
-
+
2
1.5
2
!TIP! You can hold the square
nut in place by temporary
placing the M4x40 bolt
!Make sure the
stepper connector is
facing to correct way!
2x
2x
2x
!Make sure the
stepper connector is
facing to correct way!
2
Table of contents
Other Felix Storch 3D Printer manuals
Felix Storch
Felix Storch Pro 3 User manual

Felix Storch
Felix Storch Pro 3 User manual

Felix Storch
Felix Storch Pro L Series User manual
Felix Storch
Felix Storch 2.0 User manual

Felix Storch
Felix Storch Food 1.5 User manual
Felix Storch
Felix Storch Pro BIOprinter User manual

Felix Storch
Felix Storch Pro L Series User manual

Felix Storch
Felix Storch Pro L User manual
Felix Storch
Felix Storch Tec 4.0 to Tec 4.1 Upgrade Kit Quick start guide

Felix Storch
Felix Storch Pro L Series User manual


