manuals.online logo
Brands
  1. Home
  2. •
  3. Brands
  4. •
  5. Fermax
  6. •
  7. Intercom System
  8. •
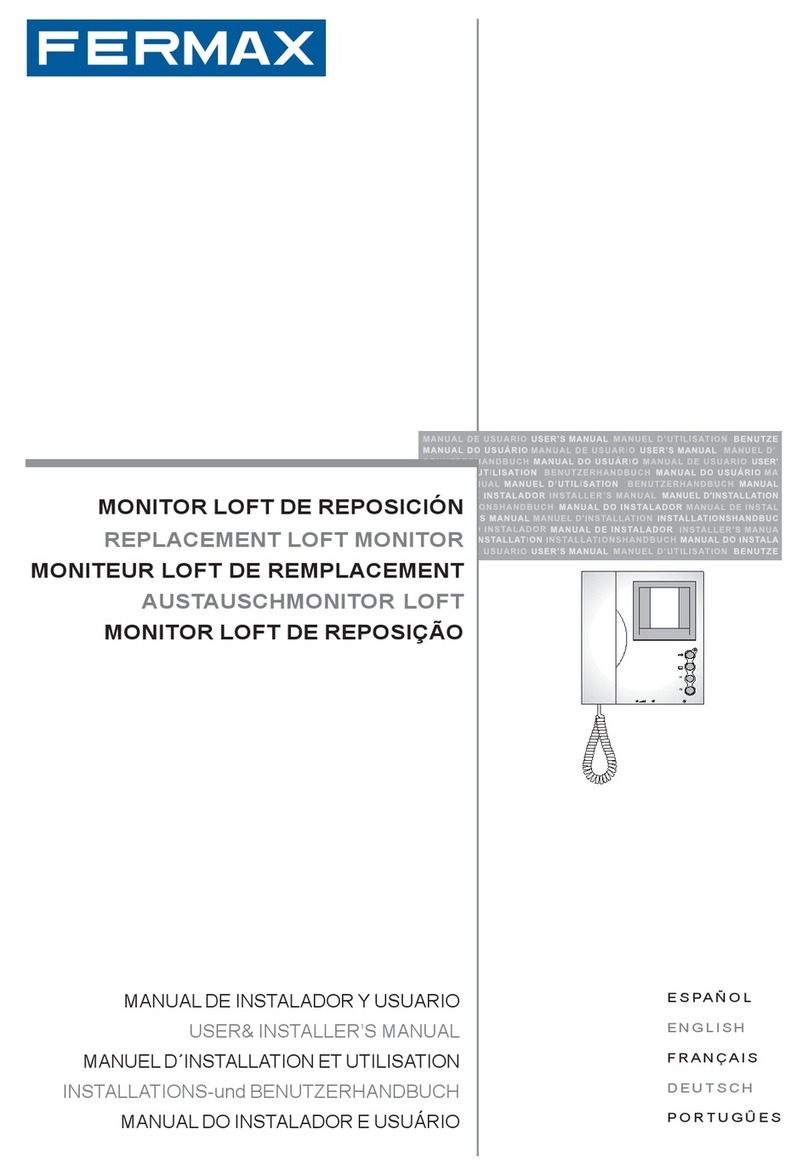
  9. Fermax LOFT VDS User manual

Fermax LOFT VDS User manual

E
Español ....2
EN
English ....2
F
Français ....2
D
Deutsch ....2
P
Português ....7
IT
Italiano ....7
R
РУССКИЙ ....7
Cod 94956d V03_09
Monitor - Moniteur
LL
LL
LOFTOFT
OFTOFT
OFT
VDSVDS
VDSVDS
VDS
Pag 2
LED
F2
F1
E
EN
F
D
Color (sólo en monitor color)
Colour (only in colour monitor)
Couleur (uniquement sur écran couleur)
Farbe (nur bei Farbbildschirm)
Contraste
Contrast
Contraste
Kontrast
Brillo
Brightness
Luminosité
Helligkeit
E
EN
F
D
Led Indicador monitor encendido
Powered monitor indicator LED
Voyant lumineux moniteur en marche
LED-Anzeige Monitor eingeschaltet
LED
Apagado
Off
Arrêt
Ausgeschaltet
Encendido con volumen Medio
On, low call volume
Marche, volume d’appel moyen
Eingeschaltet/ mittlere Lautstärke
Encendido con volumen Alto
On, full volume
Marche volume complet
Eingeschaltet/ maximale Lautstärke
E
EN
F
D
Funciones Adicionales. (Asignadas por el instalador).
Additional Functions. (Assigned by Installer).
Fonctions supplémentaires. (Assignées par l’installateur)
Zusatzfunktionen. (Festgelegt durch den Installateur).
F2
F1
Autoencendido y Selección Cámara Principal/Secundaria (función disponible según tipo de instalación).
Manual On Switch and Main/Secondary Camera Selection (function available depending on the
installation’s type)
Autoinsertion et sélection caméra principale/secondaire (Fonction disponible selon le type d’installation)
Eigenstart Auswahl Hauptkamera/Nebenkamera (Funktion verfügbar je nach Installationstyp)
E
EN
F
D
E
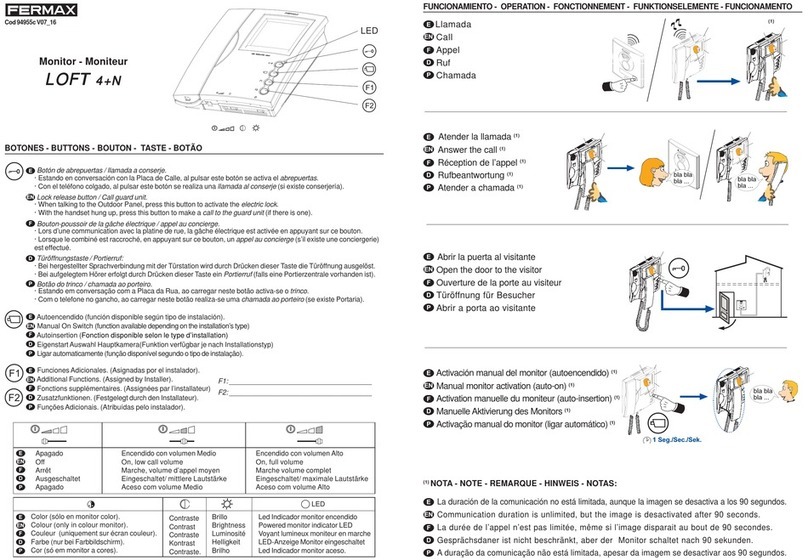
Botón de abrepuertas / llamada a conserje.
· Estando en conversación con la Placa de Calle, al pulsar este botón se activa el abrepuertas.
· Con el teléfono colgado, al pulsar este botón se realiza una llamada al conserje (si existe conserjería).
EN
Lock release button / Call guard unit.
· When talking to the Outdoor Panel, press this button to activate the electric lock.
· With the handset hung up, press this button to make a call to the guard unit (if there is one).
F
Bouton-poussoir de la gâche électrique / appel au concierge.
· Lors d’une communication avec la platine de rue, la gâche électrique est activée en appuyant sur ce bouton.
· Lorsque le combiné est raccroché, en appuyant sur ce bouton, un appel au concierge (s’il existe une
conciergerie) est effectué.
D
Türöffnungstaste / Portierruf:
· Bei hergestellter Sprachverbindung mit der Türstation wird durch Drücken dieser Taste die Türöffnung ausgelöst.
· Bei aufgelegtem Hörer erfolgt durch Drücken dieser Taste ein Portierruf (falls eine Portierzentrale vorhanden ist).
Monitor - Moniteur
LL
LL
LOFTOFT
OFTOFT
OFT
VDSVDS
VDSVDS
VDS
BOTONES - BUTTONS - BOUTON - TASTE - BOTÃO
E
Español
EN
English
F
Français
D
Deutsch
F1: ____________________________________________________________________
F2: ____________________________________________________________________
Pag 3
CAM 2
2º
¸
1 Seg./Sec./Sek.
CAM 1
1º
¸
1 Seg./Sec./Sek.
CAM 1
3º
¸
1 Seg./Sec./Sek.
CAM 2
4º
¸
1 Seg./Sec./Sek.
. . .
CAM 1
HIGH RESOLUTION
CCD CAMERA
PAN &TILT
HIGH RESOLUTION
CCD CAMERA
PAN &TILT
HIGH RESOLUTION
CCD CAMERA
PAN &TILT
HIGH RESOLUTION
CCD CAMERA
PAN &TILT
HIGH RESOLUTION
CCD CAMERA
PAN &TILT
CAM 2
CAM 2CAM 1
¸
30 Seg./Sec./Sek.
¸¸
ax. 90
Seg./Sec./Sek.
bla bla
bla ...
1 Seg./Sec./Sek.
• Activación manual del monitor (autoencendido)
Manual monitor activation (auto-on)
Activation manuelle du moniteur (auto-insertion)
Manuelle Aktivierung des Monitors
HIGH RESOLUTION
CCD CAMERA
PAN & TILT
¸
ax. 30
Seg./Sec./Sek.
HIGH RESOLUTION
CCD CAMERA
PAN &TILT
HIGH RESOLUTION
CCD CAMERA
PAN & TILT
¸
ax. 90 Seg./Sec./Sek.
bla bla
bla ...
bla bla
bla ...
•Autoencendido CAM2
CAM2 activation
Auto insertion CAM2
CAM 2 Aktivierung
•Llamada
Call
Appel
Ruf
•Abrir la puerta al visitante
Open the door to the visitor
Ouverture de la porte au visiteur
Türöffnung für Besucher
•Atender la llamada
Answer the call
Réception de l’appel
Rufbeantwortung
E
EN
F
D
E
EN
F
D
E
EN
F
D
E
EN
F
D
E
EN
F
D
FUNCIONAMIENTO - OPERATION - FONCTIONNEMENT - FUNKTIONSELEMENTE - FUNCIONAMENTO
Pag 4
Montaje - Assembly - Montage - Einbau Desmontaje - Disassembly - Démontage - Ansbau
1.60m
1
2
3
4
90
1
2
5.25 feet
INSTALACIÓN - INSTALLATION - INSTALLATION - BEFESTIGUNG
CONEXIONES - CONNECTIONS - CONEXIONES - VERBINDUNGEN
2 OUTPUTS VIDEO DISTRIBUTOR
DISTRIBUIDOR VIDEO 2 SALIDAS
V
5
V
1
M+18
75
M
R1
34
+
V
2
REF.2448
6
VM M
(-)
L
+
-
R
CT
+
M
V
M
V
F1
T
A
L
-
F2
CN1
L+
-
CT
+
M
V
M
V
F1
T
A
L
-
F2
CN1
P1 P1
L+
-
CT
+
M
V
M
V
F1
T
A
L
-
F2
CN1
MV
2 OUTPUTS VIDEO DISTRIBUTOR
DISTRIBUIDOR VIDEO 2 SALIDAS
V
5
V
1
M
+18
75
M
R1
34
+
V
2
REF.2448
6
VM M
(-)
L
+-
R
CT
+
M
V
M
V
F1
T
A
L
-
F2
CN1
M
V
P1 P1
Pag 5
E
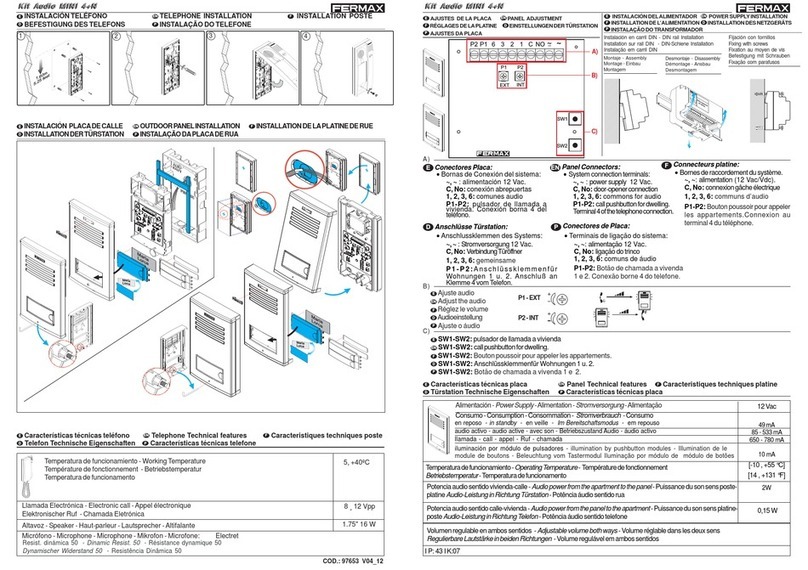
L: datos y audio.
+, -: alimentación (18 Vdc).
V: vivo (coaxial - video).
M: malla (coaxial - video).
Ct: activación telecamara (10 Vdc).
T, -: pulsador de llamada puerta vivienda (P1).
A, +: conexión Prolongador de llamada ref 2040,...
F1, F2: Funciones adicionales (salida negativo «-»).
Corriente máxima por pulsador F1,F2: 50mA a 12Vdc.
EN
L: data & audio.
+, -: power supply (18 Vdc).
V: live (coaxial - video).
M: shield (coaxial - video).
Ct: camera activation (10 Vdc).
T, -: call pushbutton at the apartment’s door (P1).
A, +: extension Call connection ref. 2040,...
F1, F2:Additional functions (negative output).
Maximum current per pussbutton F1, F2: 50mA with 12Vdc.
F
L: données et audio.
+, - : alimentation (18 Vcc).
V: vif (coaxial - video).
M: maille (coaxial - video).
Ct: activation caméra (10 Vdc).
T, -: poussoir d’appel sur la porte du logement (P1).
A, +: connexion Prolongateur d'appel ref 2040,...
F1, F2: Fonctions supplémentaires (sortie négatif).
Courrant maximum du bouton-poussoir F1,F2: 50mA a 12Vdc.
D
L: Daten und Audio.
+, - : Stromversorgung (18 Vdc).
V: Kern (Koaxial - video).
M: Schirm (koaxial - video).
Ct: Aktivierung der Kamera (10 Vdc).
T, -: Ruftaste an der Wohnungstür (P1).
A, +:Anschluss Anruferweiterungsmodul.
F1, F2: Zusatzfunktionen (Negativausgang).
Maximale Strömmung pro Taster F1, F2: 50mA mit 12Vdc.
1.Con el monitor conectado pulse el botón de programación. Se oirá un sonido de confirmación.
2.Pulse el botón de llamada a vivienda. De nuevo se produce confirmación.
* El monitor no funcionará mientras no haya sido programado.
1.With the monitor connected, press the programming button. You will hear a confirmation tone.
2. Press the house call button. Confirmation tone is heard again.
* The monitor will not work until it has been programmed.
1.
Une fois le moniteur branché, appuyez sur le bouton de programmation. Une tonalité de confirmation sera émise.
2.
Pressez le le bouton d’appel à l’appartement
.
Une tonalité de confirmation est à nouveau émise.
* Le moniteur ne fonctionne pas tant qu’il n’a pas été programmé.
1.
Drücken Sie die Programmiertaste bei angeschlossenem Monitor. Der Vorgang wird durch einen Signalton bestätigt.
2.Drücken Sie die Ruftaste zur Wohnung. Der Vor-gang wird erneut durch einen Signalton bestätigt.
* Der Monitor ist nicht betriebsbereit, wenn er zuvor nicht programmiert wurde.
E
EN
F
D
PROGRAMACIÓN - PROGRAMMING - PROGRAMNATION - PROGRAMMIERUNG
< 2 min
HIGH RESOLUTION
HIGH RESOLUTION
CCD CAMERA
CCD CAMERA
PAN & TIL
AN & TIL
T
21
i
123
6
45
9
78
A0
HIGH RESOLUTION
CCD CAMERA
PAN & TILT
Pag 6
1. Con el monitor conectado pulsar el botón de programación (se oirá un tono de confirmación).
2. Una vez en modo programación, pulsar el botón « » para seleccionar secuencialmente los
tonos disponibles. Cada vez que se pulsa el botón « », se escucha el tono seleccionado.
Una vez seleccionado el tono de llamada, dejar el monitor en reposo y transcurridos 10 segundos
sale de programación.
1.With the monitor connected, press the programming button. You will hear a confirmation tone.
2. Once in programming mode, press the « » button to sequentially select the available tones.
Each time the « » button is pressed, the selected tone is heard.
Once the call tone has been selected, leave the monitor on standby and, after 10 seconds, exit
programming mode.
1.
Une fois le moniteur branché, appuyez sur le bouton de programmation. Une tonalité de
confirmation sera émise.
2. Une fois en mode programmation, appuyez sur la touche « » afin de sélectionner une par
une les tonalités disponibles. Chaque fois que vous appuierez sur la touche « », vous
pourrez entendre la tonalité sélectionnée.
Après avoir sélectionné la tonalité d’appel, laissez le moniteur en veille. Au bout de 10 secondes,
il quittera le mode programmation.
1. Drücken Sie die Programmiertaste bei angeschlossenem Monitor. Der Vorgang wird durch einen
Signalton bestätigt.
2. Wenn Sie sich im Programmiermodus befinden, drücken Sie die Taste « » um die verfügbaren
Töne nacheinander auszuwählen. Drücken Sie die Taste « », um den gerade ausgewählten
Ton ausgegeben.
Sobald Sie einen Rufton ausgewählt haben, lassen Sie den Monitor im Bereitschaftsmodus und
verlassen nach zehn Sekunden den Programmiermodus.
E
EN
F
D
SELECCIÓN TONO DE LLAMADA - SELECTING THE CALL TONE
SÉLECTION DE LA TONALITÉ D’APPEL - AUSWAHL DES RUFTONS
21
Pag 7
8 mA
400 mA
Alimentación - Power Supply - Alimentation - Stromversorgung
Consumo - Consumption - Consommation - Stromverbrauch
Temperatura de funcionamiento - Operating Temperature
Température de fonctionnement - Betriebstemperatur
Tubo de imagen - Image Tube -Tube cathodique - Bildröhre - Tubo de imagem
Resolución - Resolution - Résolution - Auflösung
Dimensiones - Dimensions - Dimensions - Massangaben:
18 Vdc
en reposo - in standby - au repos - Im Bereitschaftsmodus
audio + video
[5 , +60 °C]
[41, +140ºF]
Pantalla Plana . 4" Diagonal (100 mm) - Flat screen. 4" Diagonal (100 mm)
Écran plat. 4 pouces diagonal (100 mm) - Flachbildschirm 4 Zoll Diagonale (100 mm)
221x203x61 (mm)
8,7” x 7,9” x 2,4”
(Alto x Ancho x Prof. - Height x Width x Depth - Hauteur x largeur x prof - Höhe x Breite x Tiefe)
B/N - B/W
N/B - S/W
12 mA
650 mA
Color - Colour
Couleur - Farbe
B/N - B/W
N/B - S/W
Color - Colour - Couleur - Farbe TFT 3,5”
B/N - B/W
N/B - S/W
Color - Colour
Couleur - Farbe
Señal de video - Video signal - Signal vidéo - Videosignal - Sinal de vídeo
Señal compuesta 1 Vpp 75 Ω, 7 Mhz .- Composed signal 1 Vpp 75
Ω,
7 Mhz.
Signal composé 1 Vpp 75Ω, 7 Mhz. - Zusammengesetztes signal 1 Vpp 75
Ω
, 7 Mhz.
Humedad - Humidity - Humidité - relative Luftfeuchtigkeit [0,90%]
Hor.: 450 Line TV
Ver.: 250 Line TV
Hor.: 480 Line TV
Ver.: 234 Line TV
Pag 8
P
Botão do trinco / chamada ao porteiro.
· Estando em conversação com a Placa da Rua, ao carregar neste botão activa-se o trinco.
· Com o telefone no gancho, ao carregar neste botão realiza-se uma chamada ao porteiro (se existe
Portaria).
IT
Pulsante per aprire la porta / chiamata al portiere.
· Durante la conversazione con il citofono, premendo questo pulsante si apre la porta.
· Col citofono appesoal monitor, premendo lo stesso pulsante si realizza una chiamata al portiere (si
esiste una portineria).
R
Кнопка открытия запирающего механизма / вызов консьержа.
· Во время разговора с человеком, находящимся у вызывной панели, при нажатии этой кнопки
включается запирающий механизм.
· Если при повешенной трубке нажать эту кнопку, то будет сделан вызов консьержа (при
наличии комнаты консьержа).
Apagado
Espento
Выключено
Aceso com volume Medio
Acesso con volume medio
Включено со средней громкостью звука
Aceso com volume Alto
Acesso con volume Alto
Включено с высокой громкостью звука
P
IT
R
Cor (só em monitor a cores).
Colore (solo nel modello a colori).
Цвет (только для цветных мониторов)
Contraste
Contrasto
Контрастность
Brilho
Brillantezza
Яркость
P
IT
R
Led Indicador monitor aceso
Led Indicatore monitor acesso
Индикатор включения монитора
LED - Индикатор
Funções Adicionais. (Atribuídas pelo instalador).
Funzioni addizionali (Assegnate dall’ installatore).
Дополнительные функции. (Задаются при установке).
P
IT
R
Ligar automaticamente e Selecção Câmara Principal/Secundária (função disponível segundo o tipo de
instalação).
Autoaccensione e selezione Camera Principale/Secondaria (funzione disponibile a swconda de
installatore)
Включение монитора и выбор главной/вспомогательной камеры (зависит от типа установки).
P
IT
R
P
Português
IT
Italiano
R
РУССКИЙ
РУССКИЙ
F2
F1
LED
F2
F1
Monitor - Moniteur
LL
LL
LOFTOFT
OFTOFT
OFT
VDSVDS
VDSVDS
VDS
BOTÃO - PULSANTI - КНОПКИ
F1: ____________________________________________________________________
F2: ____________________________________________________________________
Pag 9
CAM 2
2º
¸
1 Seg./Sec./Sek.
CAM 1
1º
¸
1 Seg./Sec./Sek.
CAM 1
3º
¸
1 Seg./Sec./Sek.
CAM 2
4º
¸
1 Seg./Sec./Sek.
. . .
CAM 1
HIGH RESOLUTION
CCD CAMERA
PAN &TILT
HIGH RESOLUTION
CCD CAMERA
PAN &TILT
HIGH RESOLUTION
CCD CAMERA
PAN &TILT
HIGH RESOLUTION
CCD CAMERA
PAN &TILT
HIGH RESOLUTION
CCD CAMERA
PAN &TILT
CAM 2
CAM 2CAM 1
¸
30 Seg./Sec./Sek.
¸¸
ax. 90
Seg./Sec./Sek.
bla bla
bla ...
1 Seg./Sec./Sek.
• Activação manual do monitor (ligar automático)
• Attivazione manuale del monitor (autoaccensione)
• Ручное включение монитора (автовключение)
FUNCIONAMENTO - FUNZIONAMENTO - ПОРЯДОК РАБОТЫ
HIGH RESOLUTION
CCD CAMERA
PAN & TILT
¸
ax. 30
Seg./Sec./Sek.
HIGH RESOLUTION
CCD CAMERA
PAN &TILT
HIGH RESOLUTION
CCD CAMERA
PAN & TILT
¸
ax. 90 Seg./Sec./Sek.
bla bla
bla ...
bla bla
bla ...
•Activação CAM2
Attivazione CAM 2
Автовключение CAM2
•Chamada
•Chiamata
•Вызов
•Abrir a porta ao visitante
•Aprire la porta al visitante
•Открытие двери посетителю
•Atender a chamada
Rispondere alla chiamata
Ответ на вызов
P
IT
R
P
IT
R
P
IT
R
P
IT
R
P
IT
R
Segundos (Seg)
Segundos (Seg)
Секунды (сек.)
max. 30 - макс. 30
Seg./Sec./Sek./сек.
max. 90 Seg./Sec./Sek.- макс. 90 сек.
1 Seg./Sec./Sek./
сек.
1 Seg./Sec./Sek./сек. 1 Seg./Sec./Sek./сек. 1 Seg./Sec./Sek./сек. 1 Seg./Sec./Sek./сек.
Pag 10
Desmontagem - Smontaggio - ДемонтажMontagem - Montaggio - Монтаж
1.60m
1
2
3
4
90
1
2
INSTALAÇÃO - INSTALLAZIONE - УСТАНОВКА
CONEXIONES - CONNECTIONS - CONEXIONES - VERBINDUNGEN
2 OUTPUTS VIDEO DISTRIBUTOR
DISTRIBUIDOR VIDEO 2 SALIDAS
V
5
V
1
M+18
75
M
R1
34
+
V
2
REF.2448
6
VM M
(-)
L
+
-
R
CT
+
M
V
M
V
F1
T
A
L
-
F2
CN1
L+
-
CT
+
M
V
M
V
F1
T
A
L
-
F2
CN1
P1 P1
L+
-
CT
+
M
V
M
V
F1
T
A
L
-
F2
CN1
MV
2 OUTPUTS VIDEO DISTRIBUTOR
DISTRIBUIDOR VIDEO 2 SALIDAS
V
5
V
1
M
+18
75
M
R1
34
+
V
2
REF.2448
6
VM M
(-)
L
+-
R
CT
+
M
V
M
V
F1
T
A
L
-
F2
CN1
M
V
P1 P1
Pag 11
1. Com o monitor ligado carregue no botão de programação. Ouve-se um som de confirmação.
2.Carregue no botão de chamada da vivenda. Ouve-se um "bip" de confirmação.
* O monitor não funciona enquanto não tiver sido programado.
1.Con il monitor collegato premere il pulsante della programmazione.Si ascolterá un suono di
conferma.
2.Prema il pulsante della chiamata all’appartamento. Di nuovo si produce una conferma.
* IL monitor non funzionerá se non é estato programmato.
1.При включенном мониторе нажмите кнопку программирования.
Раздастся сигнал подтверждения.
2.Нажмите кнопку вызова квартиры. Снова раздастся сигнал подтверждения.
* Монитор не будет работать, пока он не будет запрограммирован.
P
IT
R
PROGRAMAÇÃO - PROGRAMMAZIONE - ПРОГРАММИРОВАНИЕ
< 2 min. - мин.
HIGH RESOLUTION
HIGH RESOLUTION
CCD CAMERA
CCD CAMERA
PAN & TIL
AN & TIL
T
21
i
123
6
45
9
78
A0
HIGH RESOLUTION
CCD CAMERA
PAN & TILT
IT
L: dati e audio.
+, -: alimentazione (18 Vdc).
V: anima (coassiale - video).
M: schermo (coassiale - video).
Ct: attivazione telecamera (10 Vdc).
T, -: Pulsante campanello porta appartamento (P1).
A, +: connessione Prolongatore di chiamata ref 2040,...
F1, F2:Funzioni supplementari (uscita negativo «-»).
Corrente massima mediante pulsante F1,F2: 50mA a 12Vdc.
R
L: данные и аудио.
+, -: питание (18 В пост. тока).
V: центральная жила (коаксиал – видео).
M: оплетка (коаксиал – видео).
Ct: включение камеры (10 В пост. тока).
T, -: Кнопка вызова квартиры (P1).
A, +: подключение Дополнительного звонка арт. 2040,...
F1, F2: Дополнительные функции (отрицательный вывод «-»).
Максимальный ток на кнопку F1,F2: 50мА при 12В пост. тока.
P
L: dados e áudio.
+, - : alimentação (18 Vdc).
V: vivo (coaxial - video)
M: malha (coaxial - video)
Ct: activação telecâmara (10 Vdc).
T,-: botão de chamada na porta do apartamento (P1).
A,+: ligaçao Prolongador de chamada ref 2040...
F1, F2: Funções adicionais (saída negativo «-»).
Corrente máxima por botão F1,F2: 50mA a 12Vdc.
Pag 12
SELECÇÃO DO SOM DE CHAMADA - SELEZIONE DEL TONO DI CHIAMATA - ВЫБОР ТОНА ВЫЗОВА
21
1. Com o monitor ligado premir o botão de programação. Ouve-se um som de confirmação.
2. Uma vez no modo de programação, premir o botão « », para seleccionar sequencialmente
os sons disponíveis. De cada vez que se prime o botão « », ouve-se o som seleccionado.
Uma vez seleccionado o som de chamada, deixar o monitor em repouso que, passados 10
segundos, sai da programação.
1.Con il monitor collegato premere il pulsante della programmazione.Si ascolterá un suono di conferma.
2. In modalità programmazione, premere il pulsante « » per selezionare in sequenza i toni
disponibili. A ciascuna pressione del pulsante « », sarà possibile ascoltare il tono selezionato.
Una volta selezionato il tono di chiamata, lasciare il display in stand-by, quindi, trascorsi 10 secondi,
il sistema esce dalla modalità di programmazione.
1.При включенном мониторе нажмите кнопку программирования.
Раздастся сигнал подтверждения.
2.После входа в режим программирования последовательно нажимать кнопку « » для
выбора имеющихся тонов вызова. При каждом нажатии кнопки « » будет раздаваться
выбранный тон вызова.
После выбора тона вызова по истечении 10 секунд монитор выйдет из режима
программирования.
P
IT
R
8 mA
400 mA
Alimentação - Alimentazione - Питание
Consumo - Consumo - Потребляемая мощность
Temperatura de funcionamento - Temperatura di funzionamento
Рабочая температура
Tubo de imagem - Tubo della imagene - Кинескоп
Resolução - Resoluzione - Разрешение
em repouso - in riposo - в режиме ожидания
audio + video - audio + video - аудио + видео
Ecrã Plano. 4" Diagonal (100 mm) - Schermo Piatto . 4" Diagonal (100 mm)
Плоский экран. Диагональ 4" (100 мм)
P/N - B/N
Ч/Б
12 mA
650 mA
Cor - Colori
Цветной
дисплей
B/N - B/N
Ч/Б
Cor - Colori - Цветной дисплей TFT 3,5”
P/N - B/N
Ч/Б
Cor - Colori
Цветной дисплей
Sinal de vídeo - Segnale video - Видеосигнал
Humidade - Humedad - Влажность [0,90%]
Hor.: 450 Line TV / Гор.: 450 строк ТВ
Ver.: 250 Line TV / Верт.: 250 строкТВ
Hor.: 480 Line TV / Гор.: 480 строк ТВ
Ver.: 234 Line TV / Верт.: 234 строк ТВ
[5 , +60 °C]
18 Vdc
Dimensões - Dimensioni - Габариты 221x203x61 (mm)
(Altura x Largura x Prof. - Altezza x Larghezza x Profonditá. - Высота х ширина х глубина)
Sinal composto 1 Vpp 75 Ω,7 Mhz. - Segnal composta 1 Vpp 75 Ω, 7 Mhz.
Композитный видеосигнал 1 Vpp 75 ом, 7 МГц.

Other manuals for LOFT VDS

3

Other Fermax Intercom System manuals

Fermax BUS 3 PALACE User manual

Fermax

Fermax BUS 3 PALACE User manual

Fermax AUDIO 4+n KIT Series User manual

Fermax

Fermax AUDIO 4+n KIT Series User manual

Fermax MARINE Series User guide

Fermax

Fermax MARINE Series User guide

Fermax 1-2L Bus2 Audio Kit Instruction Manual

Fermax

Fermax 1-2L Bus2 Audio Kit Instruction Manual

Fermax LOFT BUS2 User guide

Fermax

Fermax LOFT BUS2 User guide

Fermax Kit Audio MINI 4+N User manual

Fermax

Fermax Kit Audio MINI 4+N User manual

Fermax FVI-7008 KIT User manual

Fermax

Fermax FVI-7008 KIT User manual

Fermax DUOX MARINE 9788 User guide

Fermax

Fermax DUOX MARINE 9788 User guide

Fermax 1 WAY VDS CITY AUDIO KITS Instruction Manual

Fermax

Fermax 1 WAY VDS CITY AUDIO KITS Instruction Manual

Fermax Skyline ADS User guide

Fermax

Fermax Skyline ADS User guide

Fermax 1102 User manual

Fermax

Fermax 1102 User manual

Fermax 6553 User manual

Fermax

Fermax 6553 User manual

Fermax LOFT 4+N User manual

Fermax

Fermax LOFT 4+N User manual

Fermax iloft User manual

Fermax

Fermax iloft User manual

Fermax SMILE 3.5" Monitor User manual

Fermax

Fermax SMILE 3.5" Monitor User manual

Fermax DUOX PLUS VEO MONITOR User manual

Fermax

Fermax DUOX PLUS VEO MONITOR User manual

Fermax CM-204 User manual

Fermax

Fermax CM-204 User manual

Fermax LOFT 4+N User manual

Fermax

Fermax LOFT 4+N User manual

Fermax VIDEO KIT NEOX 2 WIRES-2 MONITORS User manual

Fermax

Fermax VIDEO KIT NEOX 2 WIRES-2 MONITORS User manual

Fermax MEET 1455 User guide

Fermax

Fermax MEET 1455 User guide

Fermax VIDEOMEMORY 128 DIGITAL User manual

Fermax

Fermax VIDEOMEMORY 128 DIGITAL User manual

Fermax DUOX PLUS WIFI VEO XS MONITOR User guide

Fermax

Fermax DUOX PLUS WIFI VEO XS MONITOR User guide

Fermax Loft Instruction Manual

Fermax

Fermax Loft Instruction Manual

Fermax DUOX plus iLOFT 3450 User manual

Fermax

Fermax DUOX plus iLOFT 3450 User manual

Popular Intercom System manuals by other brands

KOCOM KLP-420 series manual

KOCOM

KOCOM KLP-420 series manual

Eclipse V12LD user guide

Eclipse

Eclipse V12LD user guide

2N Helios IP Uni installation manual

2N

2N Helios IP Uni installation manual

Aristel AN1404 Quick installation guide

Aristel

Aristel AN1404 Quick installation guide

Tador DR-500 installation guide

Tador

Tador DR-500 installation guide

Marmitek Doorguard 100 user manual

Marmitek

Marmitek Doorguard 100 user manual

Vidos Duo S1102A user manual

Vidos

Vidos Duo S1102A user manual

Aiphone Tenant IXG Series Operation manual

Aiphone

Aiphone Tenant IXG Series Operation manual

ASL INTERCOM PS 6379 Mk2 user manual

ASL INTERCOM

ASL INTERCOM PS 6379 Mk2 user manual

iseeBell CA10FC instructions

iseeBell

iseeBell CA10FC instructions

Bticino Terraneo 332704 instruction sheet

Bticino

Bticino Terraneo 332704 instruction sheet

Aiphone GM-1MD Operation manual

Aiphone

Aiphone GM-1MD Operation manual

Fasttel FLEXRING manual

Fasttel

Fasttel FLEXRING manual

ARMTEL CCS-IP2 user manual

ARMTEL

ARMTEL CCS-IP2 user manual

Intercom System HFX-700B Quick reference guide

Intercom System

Intercom System HFX-700B Quick reference guide

AMX MET-ECOM installation guide

AMX

AMX MET-ECOM installation guide

Omnicall ONE user manual

Omnicall

Omnicall ONE user manual

Federal Signal Corporation 310LD-MV Installation and service instructions

Federal Signal Corporation

Federal Signal Corporation 310LD-MV Installation and service instructions

manuals.online logo
manuals.online logoBrands
  • About & Mission
  • Contact us
  • Privacy Policy
  • Terms and Conditions

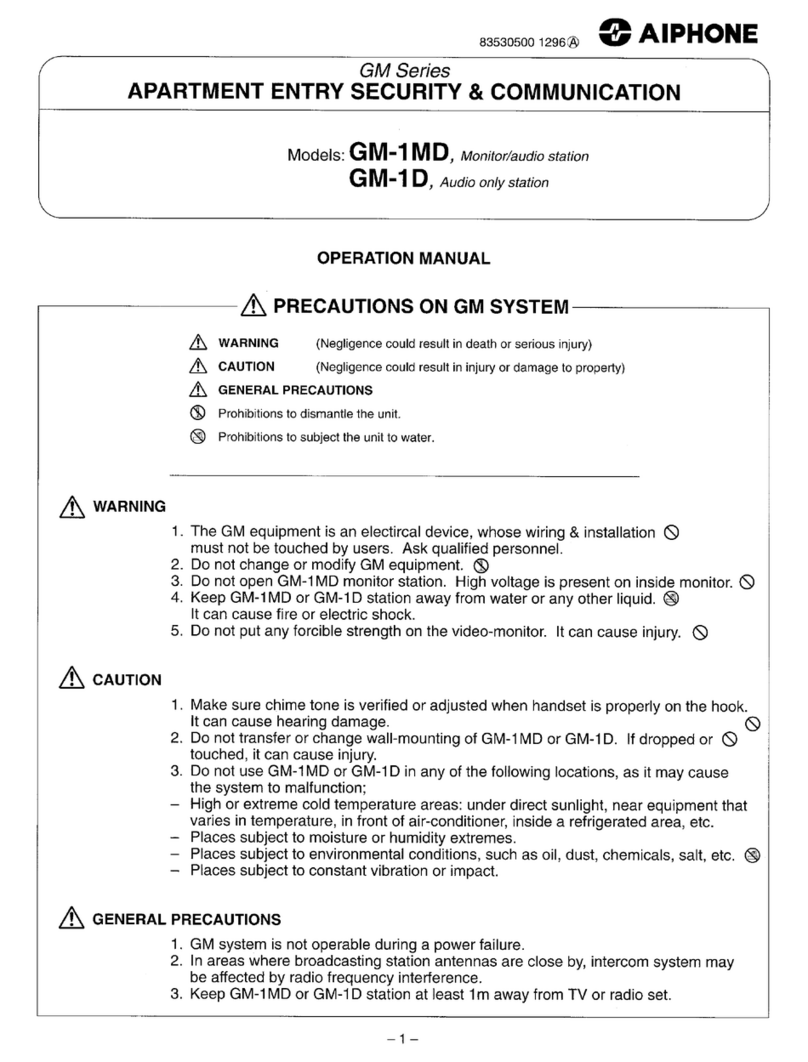
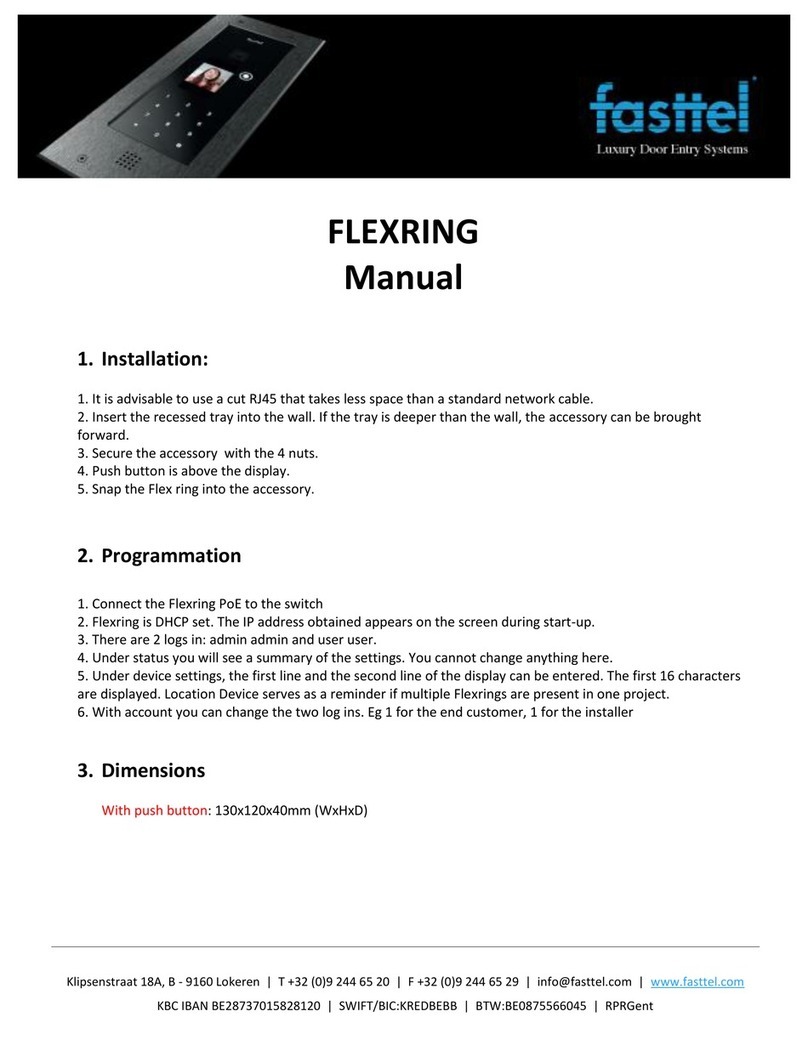
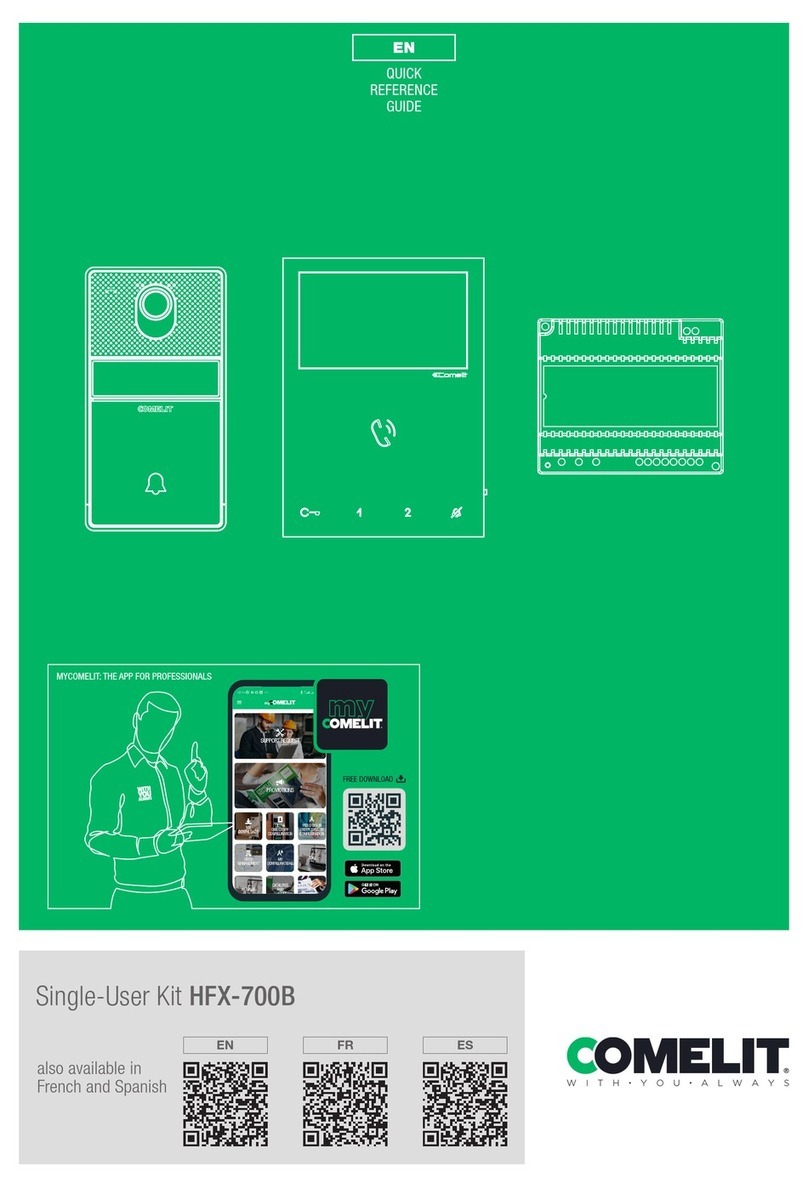
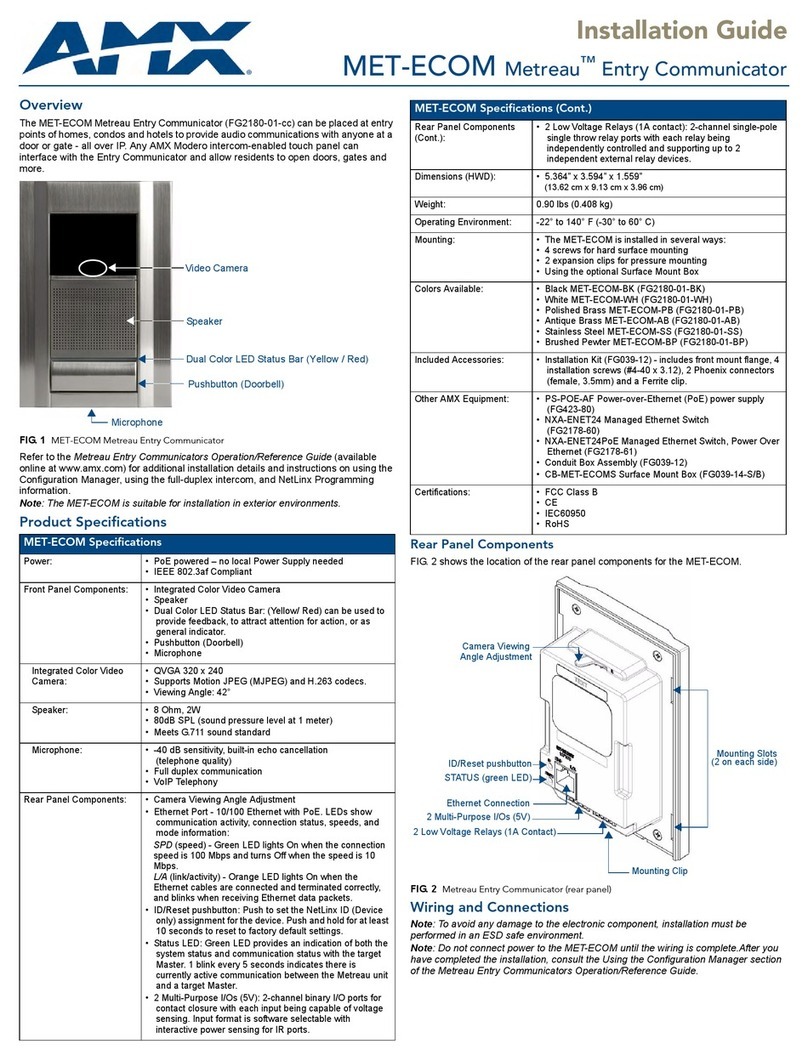
Copyright 2025 Manuals.Online. All Rights Reserved.