manuals.online logo
Brands
  1. Home
  2. •
  3. Brands
  4. •
  5. Fisher-Price
  6. •
  7. Baby Swing
  8. •
  9. Fisher-Price FBR80 User manual

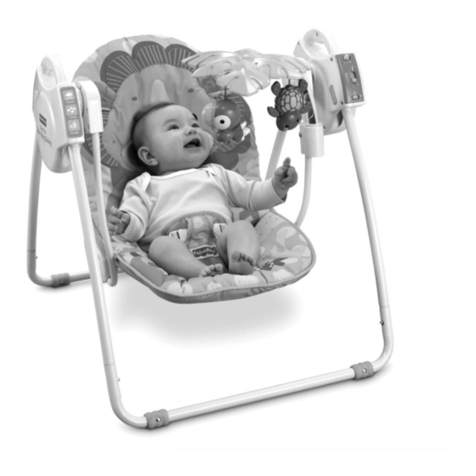
Fisher-Price FBR80 User manual

Other Fisher-Price Baby Swing manuals

Fisher-Price N6020 User manual

Fisher-Price

Fisher-Price N6020 User manual

Fisher-Price Y5708 User manual

Fisher-Price

Fisher-Price Y5708 User manual

Fisher-Price HBD27 Quick setup guide

Fisher-Price

Fisher-Price HBD27 Quick setup guide

Fisher-Price C5858 User manual

Fisher-Price

Fisher-Price C5858 User manual

Fisher-Price BFH06 User manual

Fisher-Price

Fisher-Price BFH06 User manual

Fisher-Price V7597 User manual

Fisher-Price

Fisher-Price V7597 User manual

Fisher-Price 79595 User manual

Fisher-Price

Fisher-Price 79595 User manual

Fisher-Price DELUXE TAKE-ALONG 79618 User manual

Fisher-Price

Fisher-Price DELUXE TAKE-ALONG 79618 User manual

Fisher-Price Y8641 User manual

Fisher-Price

Fisher-Price Y8641 User manual

Fisher-Price Y9422 User manual

Fisher-Price

Fisher-Price Y9422 User manual

Fisher-Price HBT17 Quick setup guide

Fisher-Price

Fisher-Price HBT17 Quick setup guide

Fisher-Price FFJ00 User manual

Fisher-Price

Fisher-Price FFJ00 User manual

Fisher-Price FLG91 User manual

Fisher-Price

Fisher-Price FLG91 User manual

Fisher-Price V3394 User manual

Fisher-Price

Fisher-Price V3394 User manual

Fisher-Price GYN85 User manual

Fisher-Price

Fisher-Price GYN85 User manual

Fisher-Price W9507 User manual

Fisher-Price

Fisher-Price W9507 User manual

Fisher-Price G8661 User manual

Fisher-Price

Fisher-Price G8661 User manual

Fisher-Price Aquarium Take-Along Swing User manual

Fisher-Price

Fisher-Price Aquarium Take-Along Swing User manual

Fisher-Price P0098 User manual

Fisher-Price

Fisher-Price P0098 User manual

Fisher-Price N9278 User manual

Fisher-Price

Fisher-Price N9278 User manual

Fisher-Price HBM78 User manual

Fisher-Price

Fisher-Price HBM78 User manual

Fisher-Price DELUXE TAKE-ALONG 79618 User manual

Fisher-Price

Fisher-Price DELUXE TAKE-ALONG 79618 User manual

Fisher-Price GKH31 User manual

Fisher-Price

Fisher-Price GKH31 User manual

Fisher-Price P0098 User manual

Fisher-Price

Fisher-Price P0098 User manual

Popular Baby Swing manuals by other brands

Hudora Comfort INSTRUCTIONS ON ASSEMBLY AND USE

Hudora

Hudora Comfort INSTRUCTIONS ON ASSEMBLY AND USE

stilum patis2 Mounting instructions

stilum

stilum patis2 Mounting instructions

highwood Lehigh Porch Swing Assembly guide

highwood

highwood Lehigh Porch Swing Assembly guide

Graco OASIS owner's manual

Graco

Graco OASIS owner's manual

stilum seta Maintenance instructions

stilum

stilum seta Maintenance instructions

stilum simius2 Maintenance instructions

stilum

stilum simius2 Maintenance instructions

Central Park 5629033 manual

Central Park

Central Park 5629033 manual

Canvas BAFFIN 088-2292-4 Assembly instructions

Canvas

Canvas BAFFIN 088-2292-4 Assembly instructions

ABC Design Kiddie Ride On Instructions for use

ABC Design

ABC Design Kiddie Ride On Instructions for use

TP Pirate Boat TP903 Instructions for assembly, maintenance and safe use

TP

TP Pirate Boat TP903 Instructions for assembly, maintenance and safe use

Clas Ohlson 31-5722 quick start guide

Clas Ohlson

Clas Ohlson 31-5722 quick start guide

AOODOR 800-052 Assembly & instruction manual

AOODOR

AOODOR 800-052 Assembly & instruction manual

Sunjoy L-GZ330PCO-1 manual

Sunjoy

Sunjoy L-GZ330PCO-1 manual

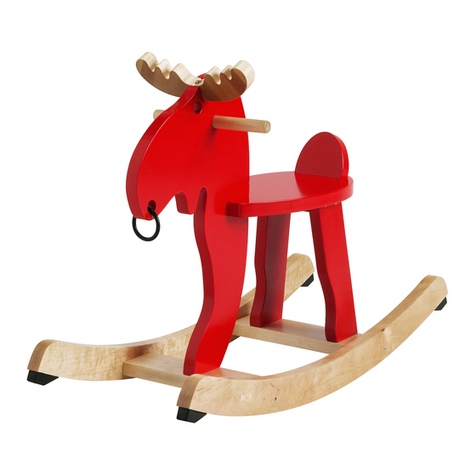
IKEA EKORRE manual

IKEA

IKEA EKORRE manual

HearthSong Air Rider Assembly and installation instructions

HearthSong

HearthSong Air Rider Assembly and installation instructions

sobex KOALA Installation & user manual

sobex

sobex KOALA Installation & user manual

HearthSong 729829 Safety and assembly instructions

HearthSong

HearthSong 729829 Safety and assembly instructions

Plantation SLAT PORCH SWING 850 instructions

Plantation

Plantation SLAT PORCH SWING 850 instructions

manuals.online logo
manuals.online logoBrands
  • About & Mission
  • Contact us
  • Privacy Policy
  • Terms and Conditions

Copyright 2025 Manuals.Online. All Rights Reserved.

1
FBR80
fisher-price.ca
IMPORTANT! Keep these instructions for
future reference. Please read these instructions
before assembly and use of this product.
• Adult assembly is required. Assembly
instructions on back side of this sheet.
• Requires one D (LR20) alkaline battery
(not included) for soothing unit.
• Tool required for battery installation: Phillips
screwdriver (not included).
• Product features and decorations may vary
from photographs.
IMPORTANT! Conserver ce mode d’emploi
pour s’y référer en cas de besoin. Lire
attentivement ce mode d’emploi avant
d’assembler et d’utiliser le produit.
• Assemblage par un adulte requis.
Les instructions d’assemblage se trouvent
au verso.
• L’unité de vibrations fonctionne avec une pile
alcaline D (LR20), non incluse.
• Outil requis pour l’installation de la pile : un
tournevis cruciforme (non inclus).
• Les caractéristiques et les décorations du
produit peuvent varier par rapport aux
illustrations.
FBR80
IMPORTANT
!
Ke
ep
these instructions
f
or IMPORTANT
!
Conserver ce mo
d
e
d
’e
mp
l
oi
2
WARNING: Failure to follow these
warnings and the instructions could
result in serious injury or death.
• Protect the environment by not disposing of this product with household waste
(2012/19/EU). Check your local authority for recycling advice and facilities.
• FALL HAZARD:
To prevent falls, stop using the product when infant:
- Begins to roll over or
- Can pull up on sides (approximately 5 months).
• ALWAYS use the restraint system.
• SUFFOCATION HAZARD
- Infants have suffocated:
- On added pillows, blankets and extra padding.
- Use ONLY the pad provided by Fisher-Price. NEVER place extra padding under
or beside infant.
• ALWAYS place child on back to sleep.
• Strings can cause strangulation! NEVER place items with a string around a child’s
neck such as hood strings or pacifier cords. NEVER suspend strings over product
or attach strings to toys.
• NEVER place product near a window where cords from blinds or drapes can
strangle a child.
• Always provide the supervision necessary for the continued safety of your child.
• Never leave child unattended.
3
ATTENTION : Suivre ces
avertissements et le mode d’emploi
an d’éviter des blessures
graves ou la mort.
• Protéger l’environnement en ne jetant pas ce produit avec les ordures ménagères
(2012/19/EU). Consulter la municipalité pour obtenir des conseils sur le recyclage et
connaître les centres de dépôt de la région.
• DANGER DE CHUTE :
Pour éviter les chutes, cesser d’utiliser le produit lorsque l’enfant :
- Commence à se retourner ou
- Peut se lever en s’aidant des côtés (environ 5 mois).
• TOUJOURS utiliser le système de retenue.
• DANGER D’ÉTOUFFEMENT
- Des bébés se sont déjà étouffés :
- Sur des oreillers, des couvertures ou des objets rembourrés supplémentaires.
- Utiliser SEULEMENT le coussin fourni par Fisher-Price. NE JAMAIS ajouter un
objet rembourré sous l’enfant ou à ses côtés.
• TOUJOURS placer l’enfant sur le dos pour dormir.
• Les ficelles constituent un risque de strangulation! NE JAMAIS placer des objets
avec une ficelle autour du cou de l’enfant, telles les ficelles d’une capuche ou
d’une sucette. NE JAMAIS suspendre des ficelles au-dessus du produit ou
attacher des ficelles aux jouets.
• NE JAMAIS placer le produit à proximité d’une fenêtre car l’enfant pourrait
s’étrangler avec les cordes des rideaux ou des stores.
• Toujours exercer une surveillance adéquate pour s’assurer de la sécurité
de l’enfant.
• Ne jamais laisser l’enfant sans surveillance.
4
©2016 Mattel. All Rights Reserved. Tous droits réservés. FBR80-2B70
PRINTED IN CHINA/IMPRIMÉ EN CHINE 1101180377-2LB
Soothing Unit
Unité de vibrations
• Make sure your child is properly secured in
the seat.
• Slide the power switch to: Vibrations or
Off .
IMPORTANT! Low battery power may
cause this product to operate erratically: no
vibrations and the product may not turn off.
Remove and discard the battery and replace
with a new D (LR20) alkaline battery.
• S’assurer que l’enfant est bien attaché dans
le siège.
• Mettre l’interrupteur à : Vibrations ou
Arrêt .
IMPORTANT! Si la pile est faible, il se peut
que les vibrations ne fonctionnent pas ou que
le produit ne s’éteigne pas. Retirer et jeter la
pile, et la remplacer par une pile alcaline
D (LR20) neuve.
CANADA
Mattel Canada Inc., 6155 Freemont Blvd.,
Mississauga, Ontario L5R 3W2.
1-800-432-5437
5
Waist Belt
Waist Belt
Courroie
Courroie
abdominale
abdominale
Waist Belt
Waist Belt
Courroie
Courroie
abdominale
abdominale
Restraint Pad
Coussinet de retenue
Securing Your Child Comment installer l’enfant
1
2LOOSEN
DESSERRER
TIGHTEN
SERRER
• Place your child in the seat.
• Position the restraint pad between your
child’s legs.
• Fasten both waist belts to the restraint pad.
Make sure you hear a “click” on both sides.
• Tighten each waist belt so that the restraint
system is snug against your child. Please
refer to the next section for instructions to
tighten the waist belts.
• Check to be sure the restraint system is
securely attached by pulling it away from
your child. The restraint system should
remain attached.
• Mettre l’enfant dans le siège.
• Placer le coussinet de retenue entre les
jambes de l’enfant.
• Attacher les deux courroies abdominales au
coussinet de retenue. S’assurer d’entendre
un clic de chaque côté.
• Serrer chaque courroie abdominale de sorte
que le système de retenue soit bien ajusté
contre l’enfant. Pour serrer les courroies
abdominales, consulter les instructions dans
la section suivante.
• Tirer sur le système de retenue pour vérifier
qu’il est bien fixé. Le système de retenue
doit demeurer attaché.
• To tighten the waist belts:
• Feed the anchored end of the waist belt up
through the buckle to form a loop A. Pull
the free end of the waist belt B.
• To loosen the waist belts:
• Feed the free end of the waist belt up
through the buckle to form a loop A.
Enlarge the loop by pulling on the end of the
loop toward the buckle. Pull the anchored
end of the waist belt to shorten the free end
of the waist belt B.
• Pour serrer les courroies abdominales :
• Glisser l’extrémité fixe de la courroie
abdominale dans le passant de façon à former
une boucle A. Tirer sur l’extrémité libre de la
courroie abdominale B.
• Pour desserrer les courroies abdominales :
• Glisser l’extrémité libre de la courroie
abdominale dans le passant de façon à former
une boucle A. Agrandir la boucle en tirant
sur son extrémité, vers le passant. Tirer sur
l’extrémité fixe de la courroie abdominale pour
raccourcir l’extrémité libre B.
6
Preventing Baby’s Head from Flattening
Prévenir le risque d’aplatissement de la tête de bébé
Pediatricians and child health organizations
agree that healthy babies should be placed
on their backs to sleep for naps and at
nighttime, to reduce the risk of Sudden Infant
Death Syndrome (SIDS). But babies who are
always on their backs can sometimes develop
flat spots on their head (plagiocephaly).
Most cases of positional plagiocephaly can
be prevented (and sometimes corrected) by
repositioning your baby to relieve pressure on
the back of the head. Here are some tips and
techniques from the experts to keep in mind
as you care for your baby:
• Change the location of your baby’s crib in
the room, so she has to look in different
directions to see the door, or the window,
or interesting things going on around her.
• When your baby is awake, provide
opportunities for adult-supervised “tummy
time” play. Playing on his tummy helps
take the pressure off the back of his head,
which will help prevent flat spots from
developing. Tummy time play also helps your
baby’s head, neck and shoulder muscles get
stronger as part of normal development.
• Try tummy time two or three times a day,
for short periods of time, until your baby
gets used to being on her tummy. Once your
baby begins to enjoy this position, try longer
periods of time or increase the frequency of
tummy time play.
• Help your baby avoid resting his head in
the same position all the time by frequently
changing the direction he lies in the crib. For
example, have your baby’s feet point toward
one end of the crib for a few days, and then
change the position so his feet point toward the
other end of the crib. This will encourage your
baby to turn and look in different directions.
• Try to minimize the amount of time your
baby spends in car seats, carriers and
bouncy seats while awake.
• Lastly, make sure you enjoy lots of “cuddle
time” with your baby by holding her upright
over your shoulder.
• For additional information on positional
plagiocephaly and the benefits of tummy
time play for your baby, speak with your
pediatrician or family physician.
National Institute of Health (NIH) Eunice Kennedy
Shriver National Institute of Child Health and
Human Development
7
Les pédiatres et les organismes de santé
pour enfants s’accordent sur le fait que les
bébés en santé doivent être placés sur le
dos pendant la sieste et pendant la nuit afin
de réduire le risque de syndrome de mort
subite du nourrisson (SMSN). Mais les bébés
qui restent tout le temps sur le dos peuvent
développer de légers aplatissements à l’arrière
du crâne (plagiocéphalie). La plupart des cas
de plagiocéphalie positionnelle peuvent être
évités (et parfois corrigés) en repositionnant
l’enfant afin de soulager la pression exercée
à l’arrière du crâne. Voici quelques conseils
et techniques de la part de spécialistes qui
peuvent vous aider :
• Déplacez le berceau de votre enfant dans
la chambre de façon à l’amener à regarder
dans différentes directions pour voir la
porte, la fenêtre ou d’autres éléments qui
attirent son attention.
• Lorsque votre enfant est réveillé, essayez
de l’amener à jouer sur le ventre en votre
compagnie. Jouer sur le ventre aide à réduire
la pression exercée à l’arrière de la tête, ce
qui évitera le risque d’aplatissements. Le jeu
sur le ventre aide également à renforcer les
muscles de la tête, du cou et des épaules
dans le cadre d’un développement normal.
• Essayez le jeu sur le ventre deux à trois
fois par jour, pendant de courtes périodes,
jusqu’à ce que votre enfant s’habitue à être
sur le ventre. Une fois que votre enfant
commence à apprécier cette position,
essayez des périodes de jeu plus longues ou
augmentez la fréquence de jeu.
• Aidez votre enfant à ne pas reposer sa tête
toujours dans la même position en changeant
fréquemment sa position dans le berceau.
Vous pouvez par exemple placer les pieds
de votre enfant à une extrémité du berceau
pendant quelques jours puis changer de sens
et placer ses pieds vers l’autre extrémité.
Cela encourage votre enfant à se tourner et
à regarder dans différentes directions.
• Essayez de réduire le temps que votre bébé
passe dans les sièges d’auto, les porte-bébés
et les sièges oscillants lorsqu’il est éveillé.
• Enfin, passez le plus de temps possible
à câliner votre enfant en lui tenant la tête
bien droite contre votre épaule.
• Pour de plus amples renseignements sur
la plagiocéphalie positionnelle et les
avantages de laisser bébé jouer sur le
ventre, adressez-vous à votre pédiatre
ou médecin de famille.
Institut national de santé Eunice Kennedy Shriver, Institut
national de la santé infantile et du développement humain
Preventing Baby’s Head from Flattening
Prévenir le risque d’aplatissement de la tête de bébé
8
To Remove the Pad
Pour enlever le coussin
Unfasten
Retirer
Unbuckle
Détacher
• Unbuckle the restraint system. Unfasten the
pad button holes from the liner brackets.
• Unbuckle the straps on the pad. Pull the pad
off the fasteners. Pull the restraint system
down through the slots in the pad. Remove
the pad from the liner.
• To replace the pad, follow the
assembly instructions.
• Détacher le système de retenue. Retirer les
boutonnières des fixations du cadre.
• Détacher les lanières du coussin. Tirer sur
le coussin pour le retirer des attaches. Faire
passer les courroies du système de retenue
dans les fentes du coussin. Enlever le coussin
du cadre.
• Pour remettre le coussin, suivre les
instructions d’assemblage.
• To remove the canopy stays, slide each
canopy stay out of the button holes in the
canopy sleeves.
• Pour enlever les tiges de fixation du dais, faire
glisser chaque tige hors des boutonnières.
• To replace the canopy stays, slide each stay
through the button holes Ain each side of
the pad B.
• Fit the free end of each stay into the end of
the canopy sleeves C.
• Pour remettre les tiges de fixation, faire
glisser chaque tige dans les boutonnières A
de chaque côté du coussin B.
• Fixer l’extrémité libre de chaque tige dans le
bout des ourlets C.
Canopy Stays
Tiges de fixation
C
AB
Canopy Stays
Canopy Stays
Tiges de fixation
Tiges de fixation
9
Assembly
Assemblage
Assembled Parts
Éléments à assembler
Liner
Cadre
2 Base Tubes
2 tubes de la base
2 Hubs
2 pivots
Infant Support
Support pour bébé
Pad
Coussin
IMPORTANT! Before assembly and each use,
inspect this product for damaged hardware,
loose joints, missing parts or sharp edges. Do
not use the product if any parts are missing,
damaged or broken. Do not use accessories or
replacement parts other than those approved
by the manufacturer.
Hint: You may need the help of another adult
to steady the product during assembly
steps 1-4.
IMPORTANT! Avant l’assemblage et avant
chaque utilisation, vérifier qu’aucune pièce
n’est endommagée ou manquante, que les
fixations sont bien serrées et qu’aucun bord
n’est tranchant. Ne pas utiliser le produit si
des pièces manquent ou sont endommagées.
Ne pas utiliser d’accessoires ou de pièces de
rechange autres que ceux approuvés par
le fabricant.
Remarque : L’aide d’un autre adulte peut être
nécessaire pour stabiliser le produit lors des
étapes 1 à 4.
10
1
3
2
Hub
Pivot
Base Tube
Tube de la base
Hub Tubes
Tubes des pivots
• Fit the end of one of the base tubes into
a tube on one of the hubs, as shown.
Hint: Each hub is designed to fit on the base
tubes one way. If one of the hub tubes does
not seem to fit, try the other tube.
• Insérer l’extrémité d’un des tubes de la base
dans le tube d’un des pivots, comme illustré.
Remarque : Chaque pivot se fixe d’une seule
façon dans les tubes de la base. Si un tube du
pivot ne semble pas s’insérer correctement,
essayer l’autre tube.
• Fit the other end of the base tube into
a tube on the remaining hub, as shown.
• Insérer l’autre extrémité du tube de la base
dans le tube de l’autre pivot, comme illustré.
• Fit the ends of the remaining base tube into
the free ends of the hub tubes.
Hint: Each hub is designed to fit onto the
base one way. If either base tube does not
seem to fit, turn the base tube around and
try again!
• Insérer les extrémités de l’autre tube de la
base dans les autres tubes des pivots.
Remarque : Chaque pivot se fixe d’une seule
façon dans la base. Si un des tubes de la base
ne semble pas s’insérer correctement, essayer
dans l’autre sens.
Assembly Assemblage