manuals.online logo
Brands
  1. Home
  2. •
  3. Brands
  4. •
  5. Fisher-Price
  6. •
  7. Toy
  8. •
  9. Fisher-Price Y6591 User manual

Fisher-Price Y6591 User manual

1
Y6591
fisher-price.com
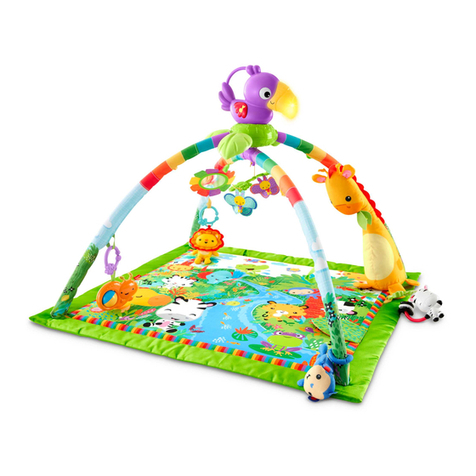
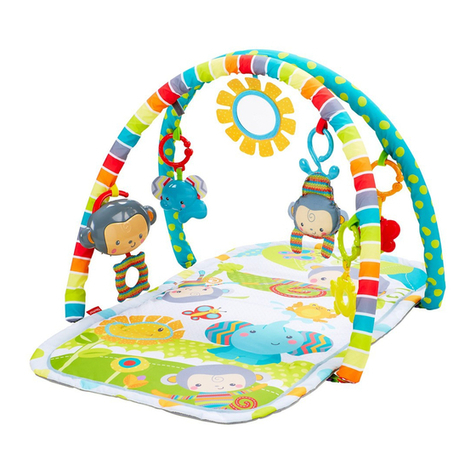
Kick & Play
Jeu sur le dos
Sit & Play
Jeu assis
Crawl-Through
Jeu à quatre pattes
2
To prevent entanglement injury, never place gym in a crib or
playpen. Never add strings, ties or other products to the gym.
Pour éviter tout risque d’étranglement, ne jamais placer le
produit dans un berceau ou un parc. Ne jamais ajouter des
ficelles, des attaches ou tout autre objet au produit.
• Please keep this instruction sheet
for future reference, as it contains
important information.
• Requires three button cell LR44
batteries (included).
• Adult assembly is required. Tool
required for battery replacement:
Phillips screwdriver (not included).
WARNING AVERTISSEMENT
• Conserver ce mode d’emploi pour s’y
référer en cas de besoin car il contient
des informations importantes.
• Fonctionne avec trois piles boutons
LR44 (fournies).
• Assemblage par un adulte requis.
Outil requis pour remplacer les piles :
un tournevis cruciforme (non fourni).
Consumer Information
Renseignements pour les consommateurs
Mattel Canada Inc., 6155 Freemont Blvd.,
Mississauga, Ontario L5R 3W2.
1-800-432-5437
© Disney
©2013 Mattel. All Rights Reserved. Tous droits réservés. ® and ™ designate U.S. trademarks of Mattel,
except as noted. ® et ™ désignent des marques de Mattel aux États-Unis, sauf indication contraire.
PRINTED IN CHINA/IMPRIMÉ EN CHINE Y6591pr-0820
3
• Slide the small tube through the
sleeve in the end of the mat.
• Insérer le petit tube dans l’ourlet
à l’extrémité du tapis.
1
Small Tube
Petit tube
Mat Sleeve
Ourlet du tapis
Parts Pièces
Mat
Tapis
3 Hanging Toys
3 jouets à accrocher
Electronic Sun Toy
Jouet électronique (soleil)
2 Bases
2 bases
2 Tubes (Small and Large)
2 tubes (petit et grand)
Kick & Play Setup
Installation -
Jeu sur le dos
4
Kick & Play Setup
Installation - Jeu sur le dos
• Fit the ends of the small tube into the
sockets in the bases.
Hint: The tube is designed to fit one
way. If it does not seem to fit, remove
it from the mat sleeve. Then, insert the
other end of the tube into the same
opening in the mat sleeve.
• Insérer les extrémités du petit tube
dans les ouvertures des bases.
Remarque : Le tube s’insère uniquement
dans un sens. S’il ne semble pas
s’insérer correctement, le retirer de
l’ourlet. Puis, insérer l’autre extrémité du
tube dans le même ourlet du tapis.
• Fit the “T” end of the four straps on
the sides of the mat through the slots
in the bases. Pull up on the mat to be
sure it is secured to the bases.
• Insérer l’extrémité en T des quatre
lanières, situées de chaque côté du
tapis, dans les fentes des bases. Tirer
sur le tapis pour s’assurer qu’il est
bien fixé aux bases.
Sockets
Ouvertures
Base
Base
Base
Base
2
Mat Straps
Mat Straps
Lanières
Lanières
du tapis
du tapis
3
5
4
• Fit the link on the electronic sun toy
to the strap on the mat for kick and
play fun!
• Fit the link on each toy to the straps
on the large tube.
• Accrocher le jouet électronique
(soleil) à la lanière du tapis pour que
bébé joue sur le dos.
• Accrocher les autres jouets aux
lanières du grand tube.
• Fit the ends of the large tube into the
base sockets.
Hint: The tube is designed to fit one
way. If it does not seem to fit, turn it
around and try again.
• Insérer les extrémités du grand tube
dans les ouvertures des bases.
Remarque : Le tube s’insère
uniquement dans un sens. S’il ne
semble pas s’insérer correctement,
essayer dans l’autre sens.
Large Tube
Grand tube
5
Kick & Play Setup
Installation - Jeu sur le dos
6
1
Sit & Play and Crawl-Through Setup
Installation - Jeu assis et à quatre pattes
• Fit the ends of the small tube into the
sockets in the bases.
Hint: The tube is designed to fit one
way. If it does not seem to fit, turn it
around and try again.
• Insérer les extrémités du petit tube
dans les ouvertures des bases.
Remarque : Le tube s’insère
uniquement dans un sens. S’il ne
semble pas s’insérer correctement,
essayer dans l’autre sens.
• Fit the “T” end of the four straps on
the sides of the mat through the slots
in the bases. Pull up on the mat to be
sure it is secured to the bases.
• Insérer l’extrémité en T des quatre
lanières, situées de chaque côté du
tapis, dans les fentes des bases. Tirer
sur le tapis pour s’assurer qu’il est
bien fixé aux bases.
Small Tube
Petit tube
Bases
Bases
Mat Straps
Mat Straps
Lanières
Lanières
du tapis
du tapis
2
7
3
• Fit the link on each hanging toy to the
straps on the tubes.
• Accrocher les jouets aux lanières
des tubes.
• Fit the ends of the large tube into the
sockets in the bases.
Hint: The tube is designed to fit one
way. If it does not seem to fit, turn it
around and try again.
• Insérer les extrémités du grand tube
dans les ouvertures des bases.
Remarque : Le tube s’insère
uniquement dans un sens. S’il ne
semble pas s’insérer correctement,
essayer dans l’autre sens.
Large Tube
Grand tube
Sit & Play and Crawl-Through Setup
Installation - Jeu assis et à quatre pattes
4
8
Battery Replacement
Remplacement
des piles
Music, Lights
& Giggles!
Musique, lumières
et rires!
• Loosen the screws in the battery
compartment door with a Phillips
screwdriver and remove the door.
• Remove the exhausted batteries and
dispose properly.
• Insert three new button cell LR44
alkaline batteries.
• Replace the battery compartment
door and tighten the screws. Do
not over-tighten.
• If this toy begins to operate erratically,
you may need to reset the electronics.
Slide the power switch off and back on.
• When sounds or light become faint or
stop, it’s time for an adult to change
the batteries.
• Slide the power switch on the
electronic toy to ON or OFF .
• Mettre l’interrupteur du jouet
électronique à MARCHE ou
ARRÊT .
1,5V x 3
LR44 or equivalent
Piles LR44 ou équivalentes
Power Switch
Interrupteur
Bat at sun toy for music & giggles!
Faire balancer le soleil pour activer
la musique et les rires!
9
• Desserrer les vis du compartiment
des piles avec un tournevis
cruciforme et enlever le couvercle.
• Retirer les piles usées et les jeter
dans un conteneur prévu à cet usage.
• Insérer trois piles boutons (LR44)
alcalines neuves.
• Remettre le couvercle et serrer les
vis. Ne pas trop serrer.
• Si le produit ne fonctionne pas
correctement, il peut être nécessaire
de réinitialiser le système électronique.
Pour ce faire, éteindre le produit puis
le remettre en marche.
• Lorsque les sons ou les lumières
faiblissent ou s’arrêtent, il est temps
pour un adulte de changer les piles.
Battery Safety Information
In exceptional circumstances, batteries
may leak fluids that can cause
a chemical burn injury or ruin your
product. To avoid battery leakage:
• Do not mix old and new batteries
or batteries of different types:
alkaline, standard (carbon-zinc) or
rechargeable (nickel-cadmium).
• Insert batteries as indicated inside the
battery compartment.
• Remove batteries during long periods
of non-use. Always remove exhausted
batteries from the product. Dispose
of batteries safely. Do not dispose of
this product in a fire. The batteries
inside may explode or leak.
• Never short-circuit the battery terminals.
• Use only batteries of the same or
equivalent type, as recommended.
• Do not charge non-rechargeable
batteries.
• Remove rechargeable batteries from
the product before charging.
• If removable, rechargeable batteries
are used, they are only to be charged
under adult supervision.
Mises en garde au sujet des piles
Lors de circonstances exceptionnelles,
des substances liquides peuvent s’écouler
des piles et provoquer des brûlures
chimiques ou endommager le produit.
Pour éviter que les piles ne coulent :
• Ne pas mélanger des piles usées
avec des piles neuves ou différents
types de piles : alcalines, standard
(carbone-zinc) ou rechargeables
(nickel-cadmium).
• Insérer les piles dans le sens indiqué
à l’intérieur du compartiment.
• Enlever les piles lorsque le produit
n’est pas utilisé pendant une longue
période. Ne jamais laisser des piles
usées dans le produit. Jeter les piles
usées dans un conteneur réservé
à cet usage. Ne pas jeter ce produit
au feu. Les piles incluses pourraient
exploser ou couler.
• Ne jamais court-circuiter les bornes
des piles.
• Utiliser uniquement des piles de
même type ou de type équivalent,
comme conseillé.
• Ne pas recharger des piles
non rechargeables.
• Les piles rechargeables doivent être
retirées du produit avant de
les charger.
• En cas d’utilisation de piles
rechargeables, celles-ci ne doivent
être chargées que sous la surveillance
d’un adulte.
Battery Replacement Remplacement des piles
10
• Protect the environment by not
disposing of this product with
household waste (2002/96/EC).
Check your local authority for
recycling advice and facilities.
• Protéger l’environnement en ne
jetant pas ce produit avec les ordures
ménagères (2002/96/EC). Consulter
la municipalité pour obtenir des
conseils sur le recyclage et connaître
les centres de dépôt de la région.
ICES-003
This Class B digital apparatus complies
with Canadian ICES-003. Operation is
subject to the following two conditions:
(1) this device may not cause harmful
interference and (2) this device must
accept any interference received,
including interference that may cause
undesired operation.
NMB-003
Cet appareil numérique de la classe
B est conforme à la norme NMB-003
du Canada. L’utilisation de ce dispositif
est autorisée seulement aux conditions
suivantes : (1) il ne doit pas produire
de brouillage et (2) l’utilisateur du
dispositif doit être prêt à accepter tout
brouillage radioélectrique reçu, même
si ce brouillage est susceptible de
compromettre le fonctionnement
du dispositif.
Consumer Information
Renseignements pour les consommateurs
• Machine wash the mat in cold water
on the gentle cycle. Do not use
bleach. Tumble dry on low heat.
• Surface wash the tubes, toys and
supports with a mild cleaning
solution and damp cloth. Do not
use bleach. Rinse clean to remove
residue. Do not immerse the
electronic toy.
• Laver le tapis en machine à l’eau
froide, au cycle délicat. Ne pas utiliser
de javellisant. Sécher en machine
à basse température.
• Essuyer la surface des tubes, des
jouets et des supports avec une
solution nettoyante douce et un
chiffon humide. Ne pas utiliser de
javellisant. Rincer avec de l’eau pour
enlever tout résidu. Ne pas plonger le
jouet électronique dans l’eau.

Other manuals for Y6591

1

Other Fisher-Price Toy manuals

Fisher-Price Shake 'n Go J3987 User manual

Fisher-Price

Fisher-Price Shake 'n Go J3987 User manual

Fisher-Price B4251 User manual

Fisher-Price

Fisher-Price B4251 User manual

Fisher-Price Little People Lil' Movers Race Track H6993 User manual

Fisher-Price

Fisher-Price Little People Lil' Movers Race Track H6993 User manual

Fisher-Price GTK08 User manual

Fisher-Price

Fisher-Price GTK08 User manual

Fisher-Price Musical Scoop Coupe User manual

Fisher-Price

Fisher-Price Musical Scoop Coupe User manual

Fisher-Price FIREROCK 73610 Use and care manual

Fisher-Price

Fisher-Price FIREROCK 73610 Use and care manual

Fisher-Price HNL37 User manual

Fisher-Price

Fisher-Price HNL37 User manual

Fisher-Price VOICE TECH RESCUE HEROES Jake Justice Police Officer... User manual

Fisher-Price

Fisher-Price VOICE TECH RESCUE HEROES Jake Justice Police Officer... User manual

Fisher-Price Y8194 User manual

Fisher-Price

Fisher-Price Y8194 User manual

Fisher-Price R8639 User manual

Fisher-Price

Fisher-Price R8639 User manual

Fisher-Price A TO Z LEARNING ZOO J0134 User manual

Fisher-Price

Fisher-Price A TO Z LEARNING ZOO J0134 User manual

Fisher-Price 77206 User manual

Fisher-Price

Fisher-Price 77206 User manual

Fisher-Price Y9854 User manual

Fisher-Price

Fisher-Price Y9854 User manual

Fisher-Price Y6965 User manual

Fisher-Price

Fisher-Price Y6965 User manual

Fisher-Price BUBBLE MOWER H8910 User manual

Fisher-Price

Fisher-Price BUBBLE MOWER H8910 User manual

Fisher-Price CDC11 User manual

Fisher-Price

Fisher-Price CDC11 User manual

Fisher-Price CREATIVE COASTER 72690 User manual

Fisher-Price

Fisher-Price CREATIVE COASTER 72690 User manual

Fisher-Price LittlePeople M7119 User manual

Fisher-Price

Fisher-Price LittlePeople M7119 User manual

Fisher-Price Bigfoot the Monster User manual

Fisher-Price

Fisher-Price Bigfoot the Monster User manual

Fisher-Price 72723 User manual

Fisher-Price

Fisher-Price 72723 User manual

Fisher-Price Shake N' Go! Flyers User manual

Fisher-Price

Fisher-Price Shake N' Go! Flyers User manual

Fisher-Price P4494 User manual

Fisher-Price

Fisher-Price P4494 User manual

Fisher-Price Imaginext System C6998 User manual

Fisher-Price

Fisher-Price Imaginext System C6998 User manual

Fisher-Price iXL User manual

Fisher-Price

Fisher-Price iXL User manual

Popular Toy manuals by other brands

Eduard 73477 manual

Eduard

Eduard 73477 manual

Tiger Electronics LAZER TAG Deluxe 1 Player System 71970 instructions

Tiger Electronics

Tiger Electronics LAZER TAG Deluxe 1 Player System 71970 instructions

goki 14148 Instructions for assembly

goki

goki 14148 Instructions for assembly

LeapFrog Rainbow Lights Ladybird Parents' guide

LeapFrog

LeapFrog Rainbow Lights Ladybird Parents' guide

Eduard Il-2 landing flaps quick start guide

Eduard

Eduard Il-2 landing flaps quick start guide

VTech Baby Lights & Stripes Zebra Parents' guide

VTech Baby

VTech Baby Lights & Stripes Zebra Parents' guide

LeapFrog LeapStory Parents' guide

LeapFrog

LeapFrog LeapStory Parents' guide

marklin Speisewagens user manual

marklin

marklin Speisewagens user manual

Trix 1100 Series manual

Trix

Trix 1100 Series manual

Kayoba 012303 operating instructions

Kayoba

Kayoba 012303 operating instructions

Eduard P-61B interior manual

Eduard

Eduard P-61B interior manual

REVELL B-25J MITCHELL manual

REVELL

REVELL B-25J MITCHELL manual

Faller 130485 manual

Faller

Faller 130485 manual

Mattel Barbie M8608-0920G2 instructions

Mattel

Mattel Barbie M8608-0920G2 instructions

FLITE TEST STEM MILITARY TRANSPORT EP AIRPLANE manual

FLITE TEST STEM

FLITE TEST STEM MILITARY TRANSPORT EP AIRPLANE manual

Hornby CLASS A4 Operating and maintenance instructions

Hornby

Hornby CLASS A4 Operating and maintenance instructions

RC Factory Storm manual

RC Factory

RC Factory Storm manual

Black Horse Model Edge 540-V3 Instruction manual book

Black Horse Model

Black Horse Model Edge 540-V3 Instruction manual book

manuals.online logo
manuals.online logoBrands
  • About & Mission
  • Contact us
  • Privacy Policy
  • Terms and Conditions

Copyright 2025 Manuals.Online. All Rights Reserved.