manuals.online logo
Brands
  1. Home
  2. •
  3. Brands
  4. •
  5. Fujikura
  6. •
  7. Welding System
  8. •
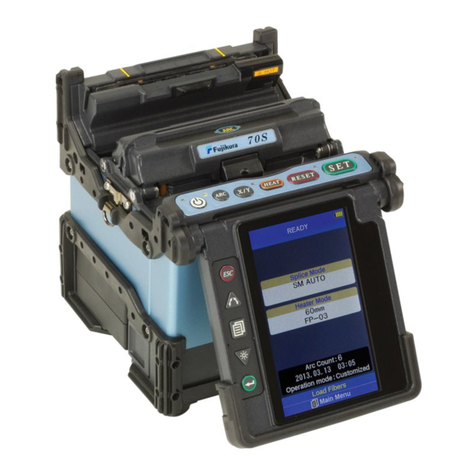
  9. Fujikura 19S+ User manual

Fujikura 19S+ User manual

•
•
•
•
•
•
•
•
•
•
Turning splicer ON
Confirming splice, heater and operation modes
Cleaning coating or sheath of fiber
Placing protection sleeve over fiber
Cleaning fiber
Cleaving fiber
Loading fiber onto splicer
Splicing start automatically
Removing spliced fiber
Centering protection sleeve in tube heater
Heating start automatically
Completed
Stripping fiber
Centering spliced point in tube heater
Visual inspection on LCD during splice
Splice Operation
250μm
900μm
Cleave Length
* Hold the fiber at edge of splicer body.
1~3mm
13mm
5~16mm
**Pull
*Hold
Marking
When splicing only standard SM fibers (ITU-T G.652),
“SM AUTO” mode is recommended.
When splicing different types of fibers, “AUTO” mode is
recommended, but splice speed is slow.
Splicing speed of “SM FAST” mode is fast, but periodical
Arc calibration is required.
1/5”~2/3” 3/64”~1/8”
1/2”
When splicer indicates following message, splice loss may be high
“Arc discharge is not stable. Electrodes should be stabilized to reform the arc discharge.”
Load prepared SM fibers onto splicer in order to stabilize electrodes. After completeing it, re-splice fibers.
When an altitude changes drastically, stabilizing elctrodes must be excecuted before splicing.
Note
Fusion Splicer 19S+/80S+Quick Reference Guide
Use only 99% or better purity
alcohol.
Do not allow the cleaved fiber
ends to touch anything or
become contaminated.
Place the fiber end between
V-groove edge and Electrode
center.
Make sure the stripped fiber is
free of coating debris or
contamination.
** Apply tension to the fiber until heater
holds the fiber.
5~16mm
1/5”~2/3”
ON/OFF Key
AC Adapter
X/Y Key
ARC Key
SET Key
HEAT Key RESET Key
LED Turning ON
Press key until green LED turns on.
Turning OFF
Press key until red LED turns on.
ESCAPE Key
MENU Key
ENTER Key
Return to previous screen
Enter of value
Open Main Menu
Go to next page
UP/DOWN Key
Move cursor
Change value
Input power : DC12V
Use only supplied DC power cord.
Input power : AC100-240V, 50-60Hz
Use only supplied AC power cord.
Connect to ground with ground terminal
of AC power cord.
When using a AC power generator,
check output voltage periodically
with a circuit tester.
DC operationAC operation
AC Input
DC Input
Battery Pack
How to recharge Battery Pack
ADC-18
BTR-09
DCC-18
Rechage by DC is also possible
Note
How to use Keypad
Power Supply
AC cord
Connect AC adapter (ADC-18) and battery pack (BTR-09)
with battery recharge cord (DCC-18).
Do not stack battery pack on top of AC adapter while
recharging.
Recharging temperature : 0~40°C (32~104°F)
How to check remaining capacity
Confirm power saving function is working when using battery pack
Open/Close Key
Fusion Splicer 19S+/80S+Quick Reference Guide
Power ON/OFF
·
Operation of a
Wind Protector
·Arc
·Stop and back
to Ready
·
Switch X/Y images
·Execute Splice
·
Heat Cancel
Operation of a lid
·
·
·
·
·
·
·
·
·
·
·
·
·
·
♦
♦
♦
V-grooves
Clean bottom of V-groove with a thin cotton
swab moistened with alcohol.
Remove excess alcohol from V-grooves
with a clean dry swab.
Use a cleaved fiber end-face to dislodge.
Fiber Clamp Chips Fiber Cleaver
Objective Lens
When lens is dirty, clean it.
Caution of cleaning
Do not contact the electrode tips.
Use only 99% or better purity of alcohol.
Electrodes
When “Replace electrodes” message appears, or when the tip is damaged, replace
electrodes.
Execute [Replace Electrodes] in Maintenance Menu.
Exchange for a new electrode the old electrode currently attached to equipment.
Use attached screw driver (SD-01).
Remove the old electrode
Install new electrode
Loosen screws
Tighten screws
Electrode holder
Remove the electrode cover
Place the electrode cover
Load prepared fibers onto the splicer.
Execute [Stabilized Electrodes]
[Arc Calibration] is executed.
Replace Electrodes
Cleaning before Splice Operation
Fusion Splicer 19S+/80S+Quick Reference Guide
•
•
•
•
•
Clean rubber pads.
Clean rubber anvil.
Clean blade.
•
•
•
•
•
•
•
•
•
Error Message Reason Solution
Too Long Fiber
The fiber end-face is placed on the
electrode centerline, or beyond it.
The cleave length (bare fiber part) is too
long
Dust or dirt is on the objective lens.
Press , and set the fiber end-face between the
electrode centerline and the V-groove edge.
Confirm the setting position of the stripped fiber end on
the fiber cleaver. Check the cleave length.
Execute the [Dust Check]. Clean the lens when dust or
dirt exists.
Too Dusty
Fiber
Dust or dirt is on the fiber surface.
Dust or dirt is on the objective lens.
[Cleaning Arc] time is too short or “OFF.”
Splicing indistinct core fibers with the
SM or DS modes.
[Align] is set to “Core” to splice
indistinct core fibers when using other
splice modes.
[Focus] is incorrectly set when using
other splice modes. The fiber end-face is
placed on the electrode centerline, or
beyond it.
Completely prepare the fiber again (strip, clean and
cleave).
Execute the [Dust Check]. Clean the lens if dust or dirt
exists.
Set the [Cleaning Arc] time to “150ms.” When splicing
carbon coated fibers, set to “200ms.”
Use the MM mode to splice indistinct core fibers (i.e.
MM fiber).
Set [Align] to “Clad” to splice indistinct core fibers (i.e.
MM fiber).
Set [Focus] to “Edge” to splice indistinct core fibers
(i.e. MM fiber). To splice distinct core fibers, “Auto” or
the correct focus value should be entered.
ZL/ZR Motor
Overrun
The fiber is set too far back and does not
reach the splice point.
The fiber is not set correctly at the
bottom of the V-groove. The fiber is not
located in the Camera’s field of view.
The cleave length (bare fiber part) is too
short.
Press , re-position the fiber again with the
end-face closer to the electrodes.
Press , and set the fiber again to seat it correctly
at the bottom of the V-groove.
Confirm the setting position of the stripped fiber end on
the fiber cleaver. Check the cleave length.
Large Cleave
Angle
Bad fiber end-face.
[Cleave Limit] is set too low
Check the condition of the fiber cleaver. If the blade is
worn, rotate the blade to a new position.
Increase the [Cleave Limit] to an adequate limit.
Cleave Shape
NG Bad fiber end-face. Check the condition of the fiber cleaver. If the blade is
worn, rotate the blade to a new position.
Ways of solution of an Error
Fusion Splicer 19S+/80S+Quick Reference Guide
•
•
•
•
•
•
•
•
•
•
•
•
•
•
•
•
•
•
•
•
•
•
•
•
•
•
•
•
•
•
RESET
RESET
RESET
•
•
•
•
•
•
•
•
•
•
Turning splicer ON
Confirming splice, heater and operation modes
Cleaning coating or sheath of fiber
Placing protection sleeve over fiber
Cleaning fiber
Cleaving fiber
Loading fiber onto splicer
Splicing start automatically
Removing spliced fiber
Centering protection sleeve in tube heater
Heating start automatically
Completed
Stripping fiber
Centering spliced point in tube heater
Visual inspection on LCD during splice
Splice Operation
250μm
900μm
Cleave Length
* Hold the fiber at edge of splicer body.
1~3mm
13mm
5~16mm
**Pull
*Hold
Marking
When splicing only standard SM fibers (ITU-T G.652),
“SM AUTO” mode is recommended.
When splicing different types of fibers, “AUTO” mode is
recommended, but splice speed is slow.
Splicing speed of “SM FAST” mode is fast, but periodical
Arc calibration is required.
1/5”~2/3” 3/64”~1/8”
1/2”
When splicer indicates following message, splice loss may be high
“Arc discharge is not stable. Electrodes should be stabilized to reform the arc discharge.”
Load prepared SM fibers onto splicer in order to stabilize electrodes. After completeing it, re-splice fibers.
When an altitude changes drastically, stabilizing elctrodes must be excecuted before splicing.
Note
Fusion Splicer 19S+/80S+Quick Reference Guide
Use only 99% or better purity
alcohol.
Do not allow the cleaved fiber
ends to touch anything or
become contaminated.
Place the fiber end between
V-groove edge and Electrode
center.
Make sure the stripped fiber is
free of coating debris or
contamination.
** Apply tension to the fiber until heater
holds the fiber.
5~16mm
1/5”~2/3”

This manual suits for next models

1

Other Fujikura Welding System manuals

Fujikura FSR-02 Assembly instructions

Fujikura

Fujikura FSR-02 Assembly instructions

Fujikura 90S User manual

Fujikura

Fujikura 90S User manual

Fujikura FSM-40S User manual

Fujikura

Fujikura FSM-40S User manual

Fujikura 90S User manual

Fujikura

Fujikura 90S User manual

Fujikura CB-08 User manual

Fujikura

Fujikura CB-08 User manual

Fujikura 62S User manual

Fujikura

Fujikura 62S User manual

Fujikura QRG-02 User manual

Fujikura

Fujikura QRG-02 User manual

Fujikura 70S User manual

Fujikura

Fujikura 70S User manual

Fujikura KSP75-FP-005468 User manual

Fujikura

Fujikura KSP75-FP-005468 User manual

Fujikura FSM-60S User manual

Fujikura

Fujikura FSM-60S User manual

Fujikura FSM-50S User manual

Fujikura

Fujikura FSM-50S User manual

Popular Welding System manuals by other brands

ESAB AristoFeed 30 4 Series Service manual

ESAB

ESAB AristoFeed 30 4 Series Service manual

Rtech C-MIG 315 Operation instructions

Rtech

Rtech C-MIG 315 Operation instructions

FRO­NIUS TPS 270i C quick guide

FRO­NIUS

FRO­NIUS TPS 270i C quick guide

FRO­NIUS TransTig 1600 Operating instructions/spare parts list

FRO­NIUS

FRO­NIUS TransTig 1600 Operating instructions/spare parts list

Uni-Mig KUMJRRW205MIG operating manual

Uni-Mig

Uni-Mig KUMJRRW205MIG operating manual

FRO­NIUS TransPocket 3500 CC Remote operating instructions

FRO­NIUS

FRO­NIUS TransPocket 3500 CC Remote operating instructions

Vanguard CPW 125-4-S Series Operation and maintenance manual

Vanguard

Vanguard CPW 125-4-S Series Operation and maintenance manual

PROPOINT 180 MULTI-PROCESS MIG-ARC-TIG WELDER user manual

PROPOINT

PROPOINT 180 MULTI-PROCESS MIG-ARC-TIG WELDER user manual

FRO­NIUS LaserHybrid Series operating instructions

FRO­NIUS

FRO­NIUS LaserHybrid Series operating instructions

Fytech FYMIG200L-2 instruction manual

Fytech

Fytech FYMIG200L-2 instruction manual

BOSSCO TIG 200HF operating manual

BOSSCO

BOSSCO TIG 200HF operating manual

Pro-tec AMC Series manual

Pro-tec

Pro-tec AMC Series manual

Elektron MULTISPOT M80 operating instructions

Elektron

Elektron MULTISPOT M80 operating instructions

FRO­NIUS PlasmaModule 10 operating instructions

FRO­NIUS

FRO­NIUS PlasmaModule 10 operating instructions

FRO­NIUS THP 120 - 300 SH Service manual

FRO­NIUS

FRO­NIUS THP 120 - 300 SH Service manual

TIP TIG Hot Wire Unit Technical manual

TIP TIG

TIP TIG Hot Wire Unit Technical manual

Truweld TWP-2 Operation manual

Truweld

Truweld TWP-2 Operation manual

Fire Power MST 140i Service manual

Fire Power

Fire Power MST 140i Service manual

manuals.online logo
manuals.online logoBrands
  • About & Mission
  • Contact us
  • Privacy Policy
  • Terms and Conditions

Copyright 2025 Manuals.Online. All Rights Reserved.