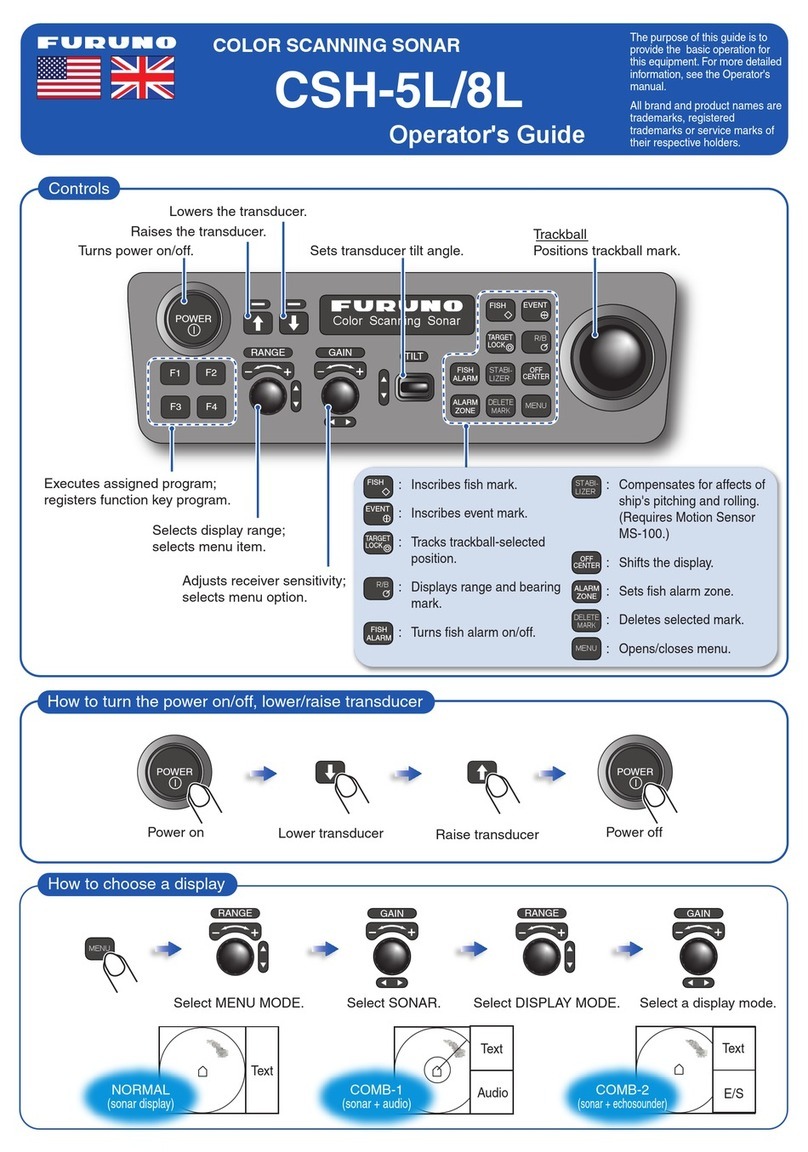
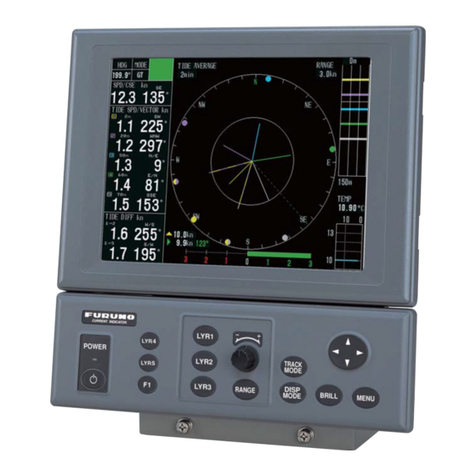
Furuno FSV-30 User manual

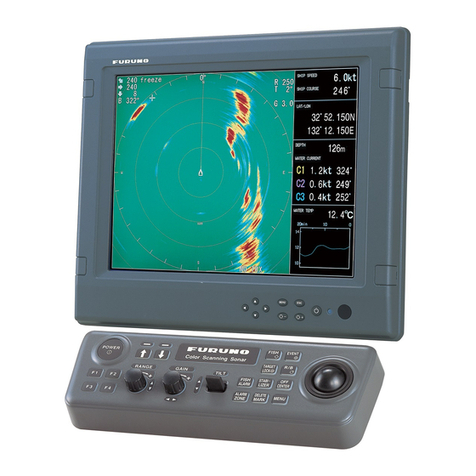
COLOR SCANNING SONAR
FSV-30

The paper used in this manual
is elemental chlorine free.
FURUNO Authorized Distributor/DealerFURUNO Authorized Distributor/Dealer
9-52
A
shihara-cho,9-52
A
shihara-cho,
Nishinomi
y
a 662-8580, JAPANNishinomi
y
a 662-8580, JAPAN
Tele
p
hone :Tele
p
hone : 0798-65-21110798-65-2111
FaxFax 0798-65-42000798-65-4200
::
FIRST EDITION :FIRST EDITION : DEC.DEC. 20032003
Printed in JapanPrinted in Japan
A
ll ri
g
hts reserved.
A
ll ri
g
hts reserved.
D1D1 :: JUL.JUL. 04, 200604, 2006
Pub. No.Pub. No. OME-13230OME-13230
*
0
0014857203*
*
0
0014857203*
*
0
0014857203*
*
0
0014857203*
(( TATATATA )) FSV-30FSV-30 * 0 0 0 1 4 8 5 7 2 0 3 ** 0 0 0 1 4 8 5 7 2 0 3 *
*
O
ME
1
3230D10*
*
O
ME
1
3230D10*
*
O
ME
1
3230D10*
*
O
ME
1
3230D10*
* O M E 1 3 2 3 0 D 1 0 ** O M E 1 3 2 3 0 D 1 0 *

i
SAFETY INSTRUCTIONS
WARNING
ELECTRICAL SHOCK HAZARD
Do not open the equipment.
Only qualified personnel
should work inside the
equipment.
Immediately turn off the power at the
switchboard if water leaks into the
equipment or something is dropped in
the equipment.
Continued use of the equipment can cause
fire or electrical shock. Contact a FURUNO
agent for service.
Do not disassemble or modify the
equipment.
Fire, electrical shock or serious injury can
result.
Do not place liquid-filled containers on
the top of the equipment.
Fire or electrical shock can result if a liquid
spills into the equipment.
Immediately turn off the power at the
switchboard if the equipment is emitting
smoke or fire.
Continued use of the equipment can cause
fire or electrical shock. Contact a FURUNO
agent for service.
Make sure no rain or water splash leaks
into the equipment.
Fire or electrical shock can result if water
leaks in the equipment.
WARNING
Keep heater away from equipment.
A heater can melt the equipment's power
cord, which can cause fire or electrical
shock.
Use the proper fuse.
Fuse rating is shown on the equipment.
Use of a wrong fuse can result in damage
to the equipment .
Do not operate the equipment with wet
hands.
Electrical shock can result.
DANGER
Keep away from moving
shaft of the hull unit.
Gears may cause injury.

ii
CAUTION
Maximum speed while the transducer is
projected and being raised or lowered
is as below, to prevent damage to the
transducer.
Projected Raising/
Lowering
1200 mm stroke Max. 18 kt Max. 15 kt
1600 mm stroke Max. 15 kt Max. 12 kt
A warning label is attached to the units
of the system. Do not remove the label.
If the label is missing or damaged,
contact a FURUNO agent or dealer.
WARNING
To avoid electrical shock, do not
remove cover. No user-serviceable
parts inside.
Name: Warning Label (1)
Type: 86-003-1011
Code No.: 100-236-231
DANGER
Keep fingers away
from gears.
Shaft may cause
injury.
Keep away froom
Name: Warning Label
Type:10-071-5313
Code No.: 100-291-160
Display unit
Processor unit
Hull unit
DANGER
goesoffandthenremovecover.
Turnoffpowerbeforeservicing.
Nouser‑serviceablepartsinside.
Andwaituntilcharge lamp(green)
Donotremovecover.
Electricalshockhazard.
DANGER
Name: Warning Label
Type:10-079-6144
Code No.: 100-310-880
Transceiver unit

iii
TABLE OF CONTENTS
FOREWORD ......................................................................................................viii
SYSTEM CONFIGURATION.................................................................................x
1. OPERATIONAL OVERVIEW.........................................................................1-1
1.1 Control Description ............................................................................................................ 1-1
1.2 Turning the Power On/Off.................................................................................................. 1-2
1.2.1 Turning the power on ............................................................................................ 1-2
1.2.2 Turning the power off ............................................................................................ 1-2
1.3 Lowering, Raising the Transducer ..................................................................................... 1-3
1.3.1 Lowering the transducer ....................................................................................... 1-3
1.3.2 Raising the transducer .......................................................................................... 1-3
1.4 Screen Brilliance................................................................................................................ 1-3
1.5 Control Panel Dimmer ....................................................................................................... 1-4
1.6 Display Mode, Display Division ......................................................................................... 1-6
1.6.1 Selecting a display mode...................................................................................... 1-6
1.6.2 Sample display mode pictures.............................................................................. 1-7
1.7 Adjusting the Gain ........................................................................................................... 1-12
1.8 Menu Overview................................................................................................................ 1-13
2. HORIZONTAL MODE....................................................................................2-1
2.1 Basic Operating Procedure ............................................................................................... 2-1
2.2 Indications and Marks........................................................................................................ 2-2
2.2.1 Horizontal Mode .................................................................................................... 2-2
2.2.2 Horizontal1 & horizontal2 mode............................................................................ 2-3
2.3 Display Range.................................................................................................................... 2-6
2.4 Tilt Angle ............................................................................................................................ 2-7
2.4.1 Setting the tilt angle .............................................................................................. 2-7
2.4.2 Automatic tilt.......................................................................................................... 2-7
2.4.3 Relation between bottom echo and tilt angle........................................................ 2-9
2.4.4 Tilt angle for surface fish..................................................................................... 2-10
2.4.5 Suitable tilt angle..................................................................................................2-11
2.5 Finding Range and Bearing to a Target............................................................................2-11
2.6 Eliminating Weak Echoes ................................................................................................ 2-12
2.7 Suppressing Bottom Tail .................................................................................................. 2-14
2.7.1 AGC..................................................................................................................... 2-14
2.7.2 By decreasing pulselength.................................................................................. 2-15
2.7.3 2nd AGC ............................................................................................................... 2-15
2.7.4 Near AGC............................................................................................................ 2-16
2.8 Suppressing Bottom and Sea Surface Reflections in Shallow........................................ 2-17

i
v
2.9 Rejecting Sonar Interference and Noise ......................................................................... 2-18
2.9.1 Identifying noise source ...................................................................................... 2-18
2.9.2 Interference rejector............................................................................................ 2-18
2.9.3 Changing Tx interval ........................................................................................... 2-19
2.9.4 Shifting Tx frequency .......................................................................................... 2-19
2.9.5 Noise limiter ........................................................................................................ 2-20
2.9.6 Echo average...................................................................................................... 2-20
2.9.7 Reverberation reduction ..................................................................................... 2-20
2.9.8 Setting reference bearing for frequency change ................................................ 2-20
2.9.9 Suppressing gain of bottom echo ....................................................................... 2-20
2.10 Adjusting Beamwidth ....................................................................................................... 2-21
2.11 Tracking a Fish School (target lock) ................................................................................ 2-22
2.11.1 Selecting target lock type.................................................................................... 2-22
2.11.2 Fish school tracking mode .................................................................................. 2-23
2.11.3 Position tracking mode........................................................................................ 2-24
2.11.4 Other items on the TARGET LOCK menu .......................................................... 2-24
2.12 Detecting Fish Schools Aurally........................................................................................ 2-26
2.12.1 Selecting direction............................................................................................... 2-26
2.12.2 Selecting audio sector......................................................................................... 2-27
2.12.3 Automatic training ............................................................................................... 2-28
2.12.4 Reverberation ..................................................................................................... 2-28
2.13 Presentation Mode........................................................................................................... 2-29
2.13.1 Presentation mode description ........................................................................... 2-29
2.13.2 How to select a presentation mode .................................................................... 2-30
2.14 Fish Alarm........................................................................................................................ 2-31
2.15 Relocating Fish School for Easy Observation................................................................. 2-33
2.16 Comparing Fish School Concentration............................................................................ 2-34
2.17 Measuring Fish School Speed......................................................................................... 2-35
2.17.1 Entering fish marks ............................................................................................. 2-35
2.17.2 Deleting fish marks ............................................................................................. 2-36
2.18 Event Mark, Own Ship Position Mark.............................................................................. 2-37
2.18.1 Entering an event mark....................................................................................... 2-37
2.18.2 Entering an own ship position mark.................................................................... 2-38
2.18.3 Erasing an event mark, own ship position mark................................................. 2-38
2.19 Net Course Mark.............................................................................................................. 2-39
2.20 Observing Net Behavior .................................................................................................. 2-40
2.21 Storing, Recalling Picture ................................................................................................ 2-41
2.21.1 Storing the picture............................................................................................... 2-41
2.21.2 Recalling stored picture ...................................................................................... 2-41
2.22 OTHERS Menu Overview on the H-SCAN SETTING Menu .......................................... 2-42
2.22.1 Displaying the OTHER menu.............................................................................. 2-42
2.22.2 OTHERS menu description ................................................................................ 2-43
2.23 Interpreting the Horizontal Display .................................................................................. 2-46

v
3. VERTICAL MODE ......................................................................................... 3-1
3.1 Basic Operating Procedure ............................................................................................... 3-1
3.2 Vertical Mode Concept.......................................................................................................3-2
3.2.1 Overview ............................................................................................................... 3-2
3.2.2 Settinng the vertical display .................................................................................. 3-2
3.3 Vertical Mode Indications and Marks................................................................................. 3-3
3.3.1 Typical vertical display .......................................................................................... 3-3
3.3.2 Vertical bearing mark, tilt mark ............................................................................. 3-4
3.3.3 Trackball mark position reference mark................................................................ 3-5
3.4 Auto train............................................................................................................................ 3-5
3.5 Display Range.................................................................................................................... 3-6
3.6 Measuring the Range ........................................................................................................ 3-6
3.7 Eliminating Weak Echoes .................................................................................................. 3-7
3.8 Suppressing Bottom Tail .................................................................................................... 3-9
3.8.1 AGC.......................................................................................................................3-9
3.8.2 By decreasing pulselength.................................................................................... 3-9
3.8.3 2nd AGC.............................................................................................................. 3-10
3.8.4 Near AGC............................................................................................................ 3-10
3.9 Rejecting Interference and Noise .....................................................................................3-11
3.9.1 Identifying noise source .......................................................................................3-11
3.9.2 Interference rejector.............................................................................................3-11
3.9.3 Noise limiter .........................................................................................................3-11
3.9.4 Shifting Tx frequency .......................................................................................... 3-12
3.9.5 Echo average...................................................................................................... 3-12
3.9.6 Reverberation reduction...................................................................................... 3-12
3.9.7 Suppressing gain of bottom echo ....................................................................... 3-12
3.10 Adjusting Beamwidth ....................................................................................................... 3-13
3.11 Vertical Expansion Display .............................................................................................. 3-14
3.12 OTHERS Menu Overview on the V-SCAN SETTING Menu ........................................... 3-15
3.12.1 Displaying the OTHERS menu ........................................................................... 3-15
3.12.2 OTHERS menu description................................................................................. 3-16
3.13 Application to Bonito and Tuna Fishing ........................................................................... 3-18
3.13.1 Searching ............................................................................................................ 3-18
3.13.2 Tracking............................................................................................................... 3-18
3.13.3 Approaching ........................................................................................................ 3-19
3.13.4 Catching .............................................................................................................. 3-19
4. ECHO SOUNDER MODE..............................................................................4-1
4.1 Basic Operating Procedure ............................................................................................... 4-1
4.2 Typical Echo Sounder Displays......................................................................................... 4-2
4.2.1 Echo sounder 1 display......................................................................................... 4-2
4.2.2 Echo sounder 2 (net recorder or echo sounder) display ...................................... 4-3
4.2.3 Echo sounder combination mode (ES1 + ES2).................................................... 4-4
4.3 Selecting an Echo Sounder Mode..................................................................................... 4-6
4.4 Selecting Display Range.................................................................................................... 4-8
4.5 Adjusting the Gain ........................................................................................................... 4-10
4.6 Picture Advance Speed ....................................................................................................4-11
vi
4.8 Comparing Fish School Concentration............................................................................ 4-13
4.9 ES1 SETTING Menu Overview ....................................................................................... 4-15
4.10 ES2 SETTING Menu Overview ....................................................................................... 4-16
5. HISTORY MODE ...........................................................................................5-1
5.1 Basic Operating Procedure ............................................................................................... 5-1
5.2 Sample History Display ..................................................................................................... 5-2
5.3 How to Interpret, Set the History Display .......................................................................... 5-3
5.3.1 Interpreting the history display.............................................................................. 5-3
5.3.2 Setting the history marker..................................................................................... 5-3
5.3.3 Setting the width of the history marker ................................................................. 5-4
5.3.4 Setting the picture advance mode ........................................................................ 5-5
6. NUMERIC/GRAPHIC DATA DISPLAY..........................................................6-1
6.1 Full Numeric/Graphic Data Display ................................................................................... 6-1
6.2 Abbreviated Numeric/Graphic Data Display...................................................................... 6-2
6.3 Numeric/Graphic Data Description.................................................................................... 6-3
7. CUSTOMIZING THE EQUIPMENT...............................................................7-1
7.1 User Menu ......................................................................................................................... 7-1
7.1.1 Deleting items from user menu............................................................................. 7-1
7.1.2 Programming the user menu ................................................................................ 7-2
7.2 Function Keys (F1-F6).......................................................................................................7-3
7.2.1 Executing a function.............................................................................................. 7-4
7.2.2 Programming function keys .................................................................................. 7-6
7.2.3 Erasing programs.................................................................................................. 7-6
7.3 USER PROG Control ........................................................................................................ 7-8
7.3.1 Selecting a user program...................................................................................... 7-8
7.3.2 Programming the USER PROG control................................................................ 7-8
8. OTHERS MENU ............................................................................................8-1
8.1 ERASE MARKS menu....................................................................................................... 8-1
8.2 DISPLAY SETTING menu ................................................................................................. 8-2
8.2.1 Opening the DISPLAY SETTING menu ............................................................... 8-2
8.2.2 DISPLAY SETTING menu description.................................................................. 8-2
8.3 ALARM & AUDIO menu..................................................................................................... 8-4
8.3.1 Opening the ALARM & AUDIO menu ................................................................... 8-4
8.3.2 ALARM & AUDIO menu description ..................................................................... 8-4
8.4 PRESET, MEMORY CARD menu ..................................................................................... 8-5
8.4.1 Opening the PRESET, MEMORY CARD menu.................................................... 8-5
8.4.2 PRESET, MEMORY CARD menu description...................................................... 8-5
8.5 INITIAL SETTING menu.................................................................................................... 8-6
8.5.1 Opening the INITIAL SETTING menu ................................................................. 8-6
8.5.2 INITIAL SETTING menu description..................................................................... 8-6

vii
9. MEMORY CARD OPERATION ..................................................................... 9-1
9.1 Storing Image, Configuration............................................................................................. 9-1
9.2 Loading, Deleting Files ...................................................................................................... 9-2
9.3 Formatting Memory Cards................................................................................................. 9-4
10. MAINTENANCE, TROUBLESHOOTING ..................................................10-1
10.1 Preventive Maintenance .................................................................................................. 10-1
10.2 Cleaning the Equipment .................................................................................................. 10-1
10.3 Hull Unit Maintenance...................................................................................................... 10-2
10.4 Transducer Maintenance ................................................................................................. 10-3
10.5 Fuse Replacement........................................................................................................... 10-3
10.6 Troubleshooting ............................................................................................................... 10-4
10.7 Warning Messages .......................................................................................................... 10-5
10.8 Error Codes...................................................................................................................... 10-6
10.9 Status Messages ............................................................................................................. 10-6
10.10 Tests.................................................................................................................................. 10-7
10.10.1 TEST menu......................................................................................................... 10-7
10.10.2 Board test ........................................................................................................... 10-8
10.10.3 Panel test............................................................................................................ 10-9
10.10.4 Test pattern ....................................................................................................... 10-10
10.10.5 Rx test (For service technician).........................................................................10-11
10.10.6 Noise test (For service technician) ....................................................................10-11
10.11 Raising the Transducer from the Hull Unit...................................................................... 10-12
10.11.1 Raising the transducer automatically................................................................ 10-12
10.11.2 Raising the transducer manually ...................................................................... 10-13
SPECIFICATIONS........................................................................................... SP-1
APPENDIX1 MENU TREE.......................................................................... AP-1
APPENDIX2 ORIGINAL SETTING............................................................. AP-5
INDEX............................................................................................................... IN-1

viii
FOREWORD
A Word to the Owner of the FURUNO FSV-30
Congratulations on your choice of the FURUNO FSV-30 Color Scanning Sonar.
We are confident you will see why the FURUNO name has become synonymous
with quality and reliability.
For over 50 years FURUNO Electric Company has enjoyed an enviable
reputation for quality marine electronics equipment. This dedication to
excellence is furthered by our extensive global network of agents and dealers.
This equipment is designed and constructed to meet the rigorous demands of
the marine environment. However, no machine can perform its intended function
unless operated and maintained properly. Please carefully read and follow the
recommended procedures for operation and maintenance.
Thank you for considering and purchasing FURUNO equipment.
Features
The FSV-30 is a full-circle, multibeam electronic color scanning sonar which
detects and displays fish schools on a 21-inch non-glare, high-resolution color
monitor. (System also available without monitor.)
The main features of the FSV-30 are
• Long detection range (5000m).
• Sphere transducer provides 90 degrees vertical detection.
• Vivid 32-color echo strength dependent display for improved recognition of
bottom, fish school concentration, distribution and volume.
• Wide variety of display combination modes: Horizontal, vertical, history, and
echo sounder.
• Function keys for direct access to desired menu item.
• User programs for one-touch setup of equipment.
• Menu-driven operation.
• Fish histogram shows signal strength distribution of echo within estimate
mark.
• Various marks and alphanumeric fishing and navigation information for
intuitive operation.
• Memory cards for storage and replay of picture and settings.

ix
• Audio function allows monitoring of echoes along user-selected area through
built-in loudspeaker.
• Fish mark estimates fish speed.
• Fish estimate feature compares volume of two fish schools.
• Target lock automatically tracks fish school.
• Net course mark shows probable drift of net against tide.

x
SYSTEM CONFIGURATION
Standard type
Note 1: Power Kit FSV-2403 (option, installed in
processor unit) required to connect CS-120A.
TRANSCEIVER
UNIT
FSV-301
100/110/115/
220/230 VAC,
1φ, 50-60 Hz
PROCESSOR UNIT
FSV-3002
Loudspeaker
Sub Monitor
Echo Sounder,
Current Indicator,
other
Navigator 1
Navigator 2
AD Converter
AD-100
Current
Indicator
Current
Indicator/Log
E/S Interface
VI-1100A
Net Recorder
VI-1100A
Net Sonde
Junction Box
CS-170
VI-1100A
Net Sonde
External
Interface CS-120A
(Note 1)
100/110/115/
220/230 VAC,
1φ, 50-60 Hz
CONTROL UNIT
FSV-3001
MONITOR
UNIT
FSV-2400
Local Supply
Option
Gyrocompass
FUSE
MAINSW
CHARGE
OVERR
BVERR
220 VAC,
3φ, 50-60 Hz
Hull unit Specifications
FSV-303 1200 mm stroke
FSV-304 1600 mm stroke
HULL UNIT
Cable for
Extension Kit
FSV-305-5 or
FSV-305-15
(incl. Junction
Box)
Control unit
FSV-3001
Standard type configuration

xi
System with locally supplied monitor
Note 1: Power Kit FSV-2403 (option, installed in
processor unit) required to connect CS-120A.
TRANSCEIVER
UNIT
FSV-301
100/110/115/
220/230 VAC,
1φ, 50-60 Hz
220 VAC,
3φ, 50-60 Hz
PROCESSOR UNIT
FSV-3002
Loudspeaker
Sub Monitor
Echo Sounder,
Current Indicator,
other
Navigator 1
Navigator 2
AD Converter
AD-10
Current
Indicator
Current
Indicator/Log
E/S Interface
VI-1100A
Net Recorder
VI-1100A
Net Sonde
Junction Box
CS-170
VI-1100A
Net Sonde
External
Interface CS-120A
(Note 1)
100/110/115/
220/230 VAC,
1φ, 50-60 Hz
CONTROL UNIT
FSV-3001
Hull unit Specifications
FSV-303 1200 mm stroke
FSV-304 1600 mm stroke
HULL UNIT
Gyrocompass
Cable for
Extension Kit
FSV-305-5 or
FSV-305-15
(incl. Junction
Box)
VGA Monitor
Standard
Local Supply
Option
Control unit
FSV-3001
Blackbox type configuration

This page is intentionally left blank.

1-1
1. OPERATIONAL OVERVIEW
1.1 Control Description
Turns power on.
Turns power off.
Raise, lower the transducer.
: Raises the transducer.
: Lowers the transducer
(mid protrusion).
: Lowers the transducer
(full protrusion).
Selects display
mode.
Selects display
range (horizontal
and vertical modes).
Adjusts receiver
sensitivity (hori-
zontal and ver-
tical modes).
Adjusts display brilliance
(supplied monitor only).
Adjusts volume of internal
and external (option) loudspeaker.
Automatic transducer train width
on audio bearing mark (horizontal
mode), vertical bearing mark
(vertical mode).
Off→±12°→ ±24°→±36°→Off
Expands respective
vertical mode; confirms
respective vertical bearing
mark location for vertical mode.
Displays range
and audio bearing marks
to monitor echoes along
audio bearing mark
(horizontal mode).
Trackball
• Positions trackball
mark.
• Selects items,
options on menu.
Opens, closes menu.
Off centers the picture.
Deletes
trackball-
selected
mark.
SHOOT: Displays net data.
EVENT: Inscribes event mark,
own ship position mark.
ESTIMATE 1, 2: Compares volume of
two fish schools.
TARGET LOCK:Tracks fish school.
FISH: Measures speed of
fish school.
Sets transducer
tilt angle
(horizontal
mode).
Selects mode (horizontal 1 or
horizontal 2, or horizontal
or vertical) for which
to adjust sensitivity,
select range.
Selects user
program.
Execute assigned
program.
FSV-30
H/V
H1/H2
Note: The BRILLIANCE and AUDIO
can not be adjusted from the sub
control unit (option).
Control unit

1. OPERATIONAL OVERVIEW
1-2
1.2 Turning the Power On/Off
1.2.1 Turning the power on
Press the POWER ON (|) switch. A beep sounds, the lamp above the switch
lights, and the last-used mode is presented.
Note: The example screens shown in this manual may not match the screens
you see on your display. The screen you see depends on your system
configuration and equipment settings.
1.2.2 Turning the power off
1. First retract the transducer with the []key. The lamp above the switch blinks
while the transducer is being raised and lights steadily when it is fully raised.
Note: While raising the transducer, the ship speed must be as below to
prevent damage to the transducer and the hull unit.
1200 mm stroke: 15 kts or less
1600 mm stroke: 12 kts or less
2. Press the POWER OFF (
) switch for more than one second, after the []
key lights steadily.
Note:The transducer is automatically retracted into the tank if the POWER
OFF (
) switch is pressed before retracting the transducer. However,
for safety purposes, make it a habit to retract the transducer before
turning off the power.
TRANSDUCER
POWER
POWER ON key
POWER OFF key
Retraction key
Mid protrusion key
Full protrusion key
POWER & TRANSDUCER key

1. OPERATIONAL OVERVIEW
1-3
1.3 Lowering, Raising the Transducer
CAUTION
Maximum speed while the transducer is
projected and being raised or lowered
is as below, to prevent damage to the
transducer.
Projected Raising/
Lowering
1200 mm stroke Max. 18 kt Max. 15 kt
1600 mm stroke Max. 15 kt Max. 12 kt
1.3.1 Lowering the transducer
With the boat at the fishing ground, press the [
] or [
] key. The lamp above the
key pressed blinks during lowering and lights when the transducer is completely
lowered. It takes about 22 seconds for full protrusion in case of 1200 mm stroke
and 29 seconds in case of 1600 mm stroke. In normal use fully lower the
transducer. If the transducer becomes entangled in the net for some reason,
partially raise the transducer with the [
] key. This raises the transducer by 400
mm.
1.3.2 Raising the transducer
Press the [ ]key to raise the transducer. The lamp above the switch blinks while
the transducer is being raised and lights steadily when it is fully raised.
1.4 Screen Brilliance
The [BRILLIANCE] control adjusts screen brilliance. Adjust it to suit lighting
conditions.
Note: The brilliance of an external monitor cannot be adjusted with the
[BRILLIANCE] control. Use the associated control on the monitor.

1. OPERATIONAL OVERVIEW
1-4
1.5 Control Panel Dimmer
The dimmer for the control panel may be adjusted on the DISPLAY SETTING
menu as below.
1. Press the [MENU] key to open the main menu.
MENU QUIT
H-SCAN SETTING...
V-SCAN SETTING...
OTHERS...
TX PULSE LENGTH-H : 9
TX POWER-H : 9
TVG-NEAR-H : 0
TVG-MEDIUM-H : 0
TVG-FAR-H : 0
AGC-H : 0
2ND AGC-H : 0
ECHO AVERAGE-H : 0
COLOR-H : COLOR 1
COLOR RESPONSE-H : COLOR CURVE 3
Main Menu (default)
2. Use the trackball to select OTHERS and press the [MENU] key.
ES1 SETTING...
ES2 SETTING...
ERASE MARKS...
DISPLAY SETTING...
ALARM & AUDIO...
PRESET, MEMORY CARD...
INITIAL SETTING...
OTHERS
MENU
QUIT
QUIT
OTHERS menu

1. OPERATIONAL OVERVIEW
1-5
3. Use the trackball to select DISPLAY SETTING and press the [MENU] key.
DISPLAY SETTING
DISPLAY MODE...
MODE SELECTION : MODE KEY
H2 DISPLAY :PORTRAIT
TRANSPONDER* :OFF
PRESENTATION MODE :HEAD UP
TM DISPLAY RANGE :1.6R
BEARING REF : SHIP HEADING
TILT LEVER : TILT
H-SLICE WIDTH : 16
H-SLICE PICT ADVC : KP SYNC
NET COURSE MARK : ENTER
MANUAL DEGAUSS : EXECUTE
AUTO DEGAUSS : INTSENSOR
DIMMER : 10
KEY BEEP VOLUME : 5
OTHERS
MENU QUIT
QUIT
QUIT
DISPLAY SETTING menu
4. Select DIMMER with the trackball and press the [MENU] key to open the
dialog box.
QUIT
CANCEL
DIALOG BOX FOR SETTING NUMERIC DATA
Select (raise setting) or (lower setting) with
the trackball and press [MENU] key to change
setting. Select QUIT to finish; CANCEL to cancel
operation.
Dialog box for setting numeric value
5. Select S(raise setting) or T(lower setting) with the trackball.
6. Use the [MENU] key to change the setting.
7. Select QUIT with the trackball and press the [MENU] key.
8. Select QUIT at the top of the menu screen and press the [MENU] key to
close all menus.
*: Transponder is
under development.

1. OPERATIONAL OVERVIEW
1-6
1.6 Display Mode, Display Division
This sonar provides a total of ten display mode selections: Horizontal,
Horizontal1 + Horizontal2, Vertical1, Vertical1 + Vertical2, Vertical1 + ES1 (echo
sounder), Vertical 1 + ES2 (echo sounder or net recorder), History, ES1, ES2,
and ES1 + ES2. The user may preset as many modes as desired and select one
with the [MODE] key.
1.6.1 Selecting a display mode
Press the [MODE] key several times until the desired display appears. The
default modes are Horizontal, Horizontal1 + Horizontal2, Vertical1, Vertical 1 +
Vertical 2, and History. For further details, see DISPLAY MODE on page 8-2.
Note that the [MODE] key may be programmed to show a pull-down menu
instead. For further details,see MODE SELECTION on page 8-2.
1. Press the [MODE] key. The following pull-down menu appears.
H1
H1&H2
V1
V1&V2
V1&ES1
V1&ES2
HISTORY
ES1
ES2
ES1&ES2
Pull-down menu (all display modes preset)
2. Use the trackball to select display mode desired.
3. Press the [MENU] key to display the selected mode.
Other manuals for FSV-30
1
Table of contents
Other Furuno Sonar manuals

Furuno
Furuno FSV-75 User manual

Furuno
Furuno FSV-84 User manual

Furuno
Furuno CSH-8L User manual

Furuno
Furuno FSV-35S User manual

Furuno
Furuno CI-35 User manual

Furuno
Furuno FSV-85 User manual

Furuno
Furuno COLOR SCANNING CSH-55 User manual

Furuno
Furuno COLOR SCANNING CSH-55 User manual

Furuno
Furuno CI-88 User manual

Furuno
Furuno CSH-5 MARK-2 User manual

Furuno
Furuno CH-300 User manual

Furuno
Furuno FCV-1200L User manual

Furuno
Furuno FE-700 User manual

Furuno
Furuno CSH-83 User manual

Furuno
Furuno CH-37BB User manual

Furuno
Furuno CSH-5L User manual

Furuno
Furuno FSV-35 User manual

Furuno
Furuno FCV-552 Operators User manual

Furuno
Furuno CH-300 User manual

Furuno
Furuno CSH-23F User manual