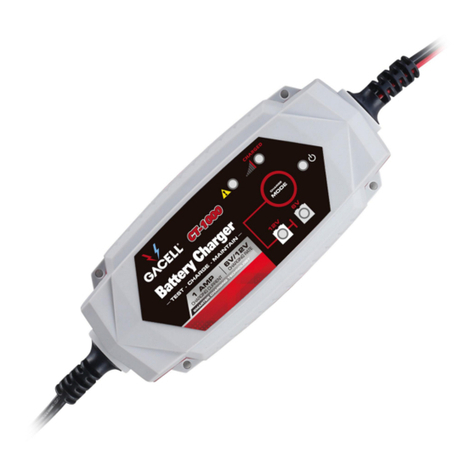
Gacell HF1000 User manual

MANUALE HF1000 Revisione n° 0 del 30/11/15
file : HF1000_Manuale Utente - Impostazione curve IT+GB+FR.doc
HF1000
Istruzioni di settaggio curva
Instructions for curve setting
Instructionspour la configuration de la courbe
ATT
ENZIONE!
WARNING! ATTENTION!
Leggere attentamente ilmanuale operativo prima di utilizzare il caricabatteria
Carefully read the operating instructions before using the battery charger
Lire attentivement lemanuel d'instructionsavant d'utiliser le chargeur de batterie
Superficie calda, rischio di ustione! NON TOCCARE.
Surface may be hot. To avoid risk of burns, DO NOT TOUCH.
Surface chaude, risque de brûlure ! NE PAS TOUCHER.
Solo personale autorizzato può aprire l’apparecchiatura
Only qualified electrical personnel only to open equipement.
Ouverture dell’appareil uniquement par une personne autorisée.

MANUALE HF1000 Revisione n° 0 del 30/11/15
file : HF1000_Manuale Utente - Impostazione curve IT+GB+FR.doc
INSTALLAZIONE E AVVERTENZE PERLA SICUREZZA
•Errori di installazione ed utilizzo del caricabatteria possono determinare danni al caricabatteria ed incidenti
all’operatore.
•Solo personale specializzato ed autorizzato potrà eseguire interventi che richiedono l’apertura del caricabatteria.
•Se il funzionamento in sicurezza del caricabatteria non può più essere garantito, fermare il caricabatteria e assicurarsi
che non possa essere rimesso in funzione.
•Prima della messa in funzione del caricabatteria occorre verificare il buono stato delle guaine di isolamento dei cavi di
collegamento alla rete di alimentazione e dei cavi di batteria.
•Scollegare il collegamento alla rete di alimentazione prima di effettuare il distacco della batteria.
•Al fine di ridurre i rischi di incidente, assicurarsi che la curva di carica selezionata sia adatta al tipo di batteria. Non
cercare di caricare alcun altro tipo di batteria ricaricabile o non ricaricabile: queste batterie possono esplodere,
creando danni a cose o persone.
•ATTENZIONE !! La batteria genera gas esplosivi durante la carica. Nelle vicinanze delle batterie occorre quindi seguire
le seguenti avvertenze: non fumare ed evitare fiamme libere e/o scintille.
•Evitare assolutamente di posizionare il caricabatteria nelle immediate vicinanze della batteria che deve essere
caricata; Eventuali gas prodotti/emessi dalla batteria durante la carica, corrodono e danneggiano il caricabatteria.
Posizionare il caricabatteria il più lontano possibile dalla batteria per quanto consentito da cavi di batteria.
•ATTENZIONE !! La collocazione del caricabatteria deve avvenire tenendo in considerazione il fatto che lo stesso
contiene componenti elettrici/elettronici che possono produrre archi voltaici. Non deve essere esposto a pioggia, getti
d'acqua, umidità, fonti di vapore e lontano da fonti di calore. Soprattutto non deve essere installato in locali densi di
polvere.
•E’ assolutamente vietato posizionare e/o fissare il caricabatteria su piani di appoggio in materiali infiammabile (come
mensole e/o pareti di legno).
•Per facilitare lo scambio termico del caricabatteria, e quindi garantire la sua affidabilità, occorre posizionarlo in modo
che possa scambiare facilmente calore con l’ambiente. Deve essere pertanto montato in posizione verticale
(sfruttando i 4 fori di fissaggio).
•Per evitare pericoli di folgorazione, il caricabatteria deve essere collegato ad una presa di corrente collegata a terra.
Inoltre la presa di corrente a cui si collega il caricabatteria deve essere proporzionata alla potenza assorbita dallo
stesso e dovrà essere protetta da apparecchiatura elettrica a norma (fusibili o interruttore automatico) dimensionata
per una corrente almeno il 10% superiore all’assorbimento di corrente dichiarato sulla matricola dell’apparecchio.
•ATTENZIONE !! Verificare la compatibilità della spina rete in dotazione al caricabatteria : E’ sconsigliato l’uso di
adattatori; se la presa non fosse dotata di messa terra, non utilizzare l’apparecchio prima di aver fatto installare una
spina adatta da un tecnico qualificato.
•L’apparecchio di carica non necessita di alcuna manutenzione particolare, a parte le normali operazioni di pulizia da
effettuarsi regolarmente e periodicamente in base alla tipologia dell’ambiente di lavoro. Prima di iniziare la pulizia
dell’apparecchio, occorre scollegare il cavo di alimentazione alla rete e i cavi di collegamento alla batteria.
•La superficie esterna del caricabatteria può surriscaldarsi mentre il caricabatteria è in funzione e può rimanere calda
anche dopo lo spegnimento.
•Il caricabatteria non deve essere utilizzato come componente critico in dispositivi per il supporto medico o altri
sistemi.
•La mancata osservanza di queste istruzioni nell’installazione e nell’uso del caricabatterie può pregiudicare la
protezione fornita dall’apparecchio e invalidare la garanzia del fabbricante.
•Non consentire l’uso dell’apparecchio a persone (anche bambini) con ridotte capacità psico-fisico-sensoriali, o con
esperienza e conoscenze insufficienti, a meno che non siano attentamente sorvegliate e istruite da un responsabile
della loro incolumità. Sorvegliare i bambini, assicurandosi che non giochino con l’apparecchio.
•Le specifiche menzionate in questo manuale sono soggette a cambiamenti senza preavviso. Questa pubblicazione
sostituisce ogni informazione precedentemente fornita.
MANUALE HF1000 Revisione n° 0 del 30/11/15
file : HF1000_Manuale Utente - Impostazione curve IT+GB+FR.doc
MANUALE D’USO PER L’UTENTE
1) Collegare il connettore USB ad una qualsiasi porta del PC, spostare il selettore sul connettore lato caricabatteria, in
questo modo collegandolo ad esso il led rosso si accende, stato di programmazione (non è necessario che il
caricabatteria sia alimentato da rete).
2) Aprire il software Reader.exe
3) Verificare che sia visualizzata la velocità di comunicazione (115200) e la porta corretta (il numero corretto della
porta si vede nella gestione dispositivi di Windows nella sezione ‘Porte (COM e LPT)’), altrimenti modificare tali
parametri in ‘Option->Communication’.

MANUALE HF1000 Revisione n° 0 del 30/11/15
file : HF1000_Manuale Utente - Impostazione curve IT+GB+FR.doc
4) Per visualizzare le informazione di configurazione del caricabatteria cliccare al centro dello schermo con il tasto
destro del mouse. Nella finestra che si apre selezionare la voce ‘Info’. Comparirà una finestra dove sono riassunte
tutte le informazioni principali del caricabatteria tra cui il profilo di carica (‘Profile’), l’identificativo della curva (‘Cfg.
I.D.’) e relativo tipo di batteria (‘Battery Type’).
5) Cliccare su OK per uscire dalla finestra visualizzata.
Per cambiare profilo di carica Cliccare su ‘File->Open…’ e nella nuova finestra andare a selezionare il file con il
profilo di curva desiderato (in funzione della tensione di batteria e della corrente di carica voluti).
Nell’esempio di seguito è stato selezionato il file per un profilo di carica per batterie Gel con tensione nominale
di 24V e corrente di carica del caricabatteria pari a 20A.

MANUALE HF1000 Revisione n° 0 del 30/11/15
file : HF1000_Manuale Utente - Impostazione curve IT+GB+FR.doc
6) Cliccare sul pulsante ‘Write Cfg.’ in alto per memorizzare i dati sul caricabatteria, se il processo è andato a buon fine
comparirà la seguente finestra. Cliccare ‘OK’ per chiudere tale finestra.

MANUALE HF1000 Revisione n° 0 del 30/11/15
file : HF1000_Manuale Utente - Impostazione curve IT+GB+FR.doc
Attenzione: Se compare la seguente finestra di errore significa che non si era in modalità programmazione, scollegare il
cavo, spostare il selettore sul connettore del cavo nell’altra posizione e ricollegarlo al caricabatteria (vedere punto 1).
7) Se si vuole verificare che sia stata impostata la corretta configurazione si ripetano i passaggi del punto 4.

MANUALE HF1000 Revisione n° 0 del 30/11/15
file : HF1000_Manuale Utente - Impostazione curve IT+GB+FR.doc
INSTALLATION AND SAFETY WARNINGS
•Installation errors and the misuse of the battery charger can damage the battery charger and harm the operator.
•Only specialised personnel authorised can carry outoperations that require the battery charger to be opened.
•If its safe operation cannot be ensured, stop the battery charger and make sure it cannot be not put back into operation.
•Before operating the battery charger, the insulation of mains connection cables and of the battery connectors must be verified.
•Disconnect the mains connection before connecting or disconnecting the battery.
•In order to prevent accidents ensure that the selected charging curve is suited to the type of battery. Do not charge any other type
of batteries, either rechargeable or non-rechargeable, since they could explode, causing serious damages and injuries.
•Carefully read all the safety instructions provided by the manufacturer, such as whether to remove the plugs of the elements
during the charge or not.
•CAUTION!! The battery generates explosive gases during the charge. Therefore, in the vicinity of the battery it is prohibited to
smoke and use naked flames and sparks.
•Do not place the battery charger near the battery to be charged; any gas produced/emitted by the battery during the charge can
corrode or damage the battery charger. Place the battery charger as far away as possible from the battery as permitted by the
battery cables.
•CAUTION!!The location of the battery charger must take into account the fact that it contains electric/electronic components that
can produce electric arcs. It must not be exposed to rain, water sprays, humidity and vapours and it must be stored away from
heat sources. Dusty places must be especially avoided.
•DO NOT place or fasten the battery charger on flammable surfaces (such as shelves and/or wooden walls).
•In order to optimise the battery charger's heat exchange, and, therefore, ensure its reliability, it is important to place it so as to
allow heat exchange with the environment. It must be installed in vertical position (using the 4 fastening holes)
•To prevent electrocution risks, the battery charger must be connected to an earthed socket. Moreover, the socket must be
proportionate to the battery charger's power consumption and must be protected by adequate electrical equipment (fuse or
automatic cut-out) set for a current that is at least 10% higher than the absorbed current stated on the device's serial plate.
•CAUTION!! Prior to the charge, ensure that the battery charger's input voltage indicated on the serial plate is compatible with the
power supply voltage and that the system is earthed.
•CAUTION!! Ensure compatibility of the mains plug provided with the battery charger: Do not use adaptors; should the socket not
be earthed, a suitable plug must be installed by qualified personnel before using the device.
•The outer surface of the battery charger may overheat during operation and remain hot even after it's been switched off.
•The battery charger must not be used as a critical component in life support devices or systems
•Failure to comply with the installation and use instructions may compromise the protection provided by the device and make the
guarantee void.
•This appliance is not intended for use by persons (including children) with reduced physical, sensory or mental capabilities, or lack
of experience and knowledge, unless they have been given supervision or instruction concerning use of the appliance by a person
responsible for their safety. Children should be supervised to ensure that they do not play withthe appliance.
•The specifications contained in this manual are subject to changes without prior notice. This publication supersedes and replaces all
previous information.
USER MANUAL

MANUALE HF1000 Revisione n° 0 del 30/11/15
file : HF1000_Manuale Utente - Impostazione curve IT+GB+FR.doc
1) Connect the USB connector to any ports of the PC, move the switch on the battery charger side connector, once
connection is carried out the red LED turns on, programming status (it is not necessary that the battery charger is
powered from the mains).
2) Open the Reader.exe software
3) Check that the communication speed (115200) and the correct port are displayed (the correct number of the
port is shown in Windows device management in section "Ports (COM and LPT)), otherwise change these
parameters in "Option->Communication".

MANUALE HF1000 Revisione n° 0 del 30/11/15
file : HF1000_Manuale Utente - Impostazione curve IT+GB+FR.doc
4) To display the configuration information of the battery charger click the centre of the screen with the right mouse
button. In the window that opens select "Info". A window will open summarizing all the main information of the
battery charger including the charging profile ("Profile"), the identifier of the curve ("Cfg. ID") and its battery type
("Battery Type").
5) Click OK to exit the window displayed.
To change the charging profile Click on "File->Open ..." and in the new window select the file with the profile of
the desired curve (depending on the battery voltage and charging current desired).
In the example below you have selected the file for a charging profile for gel batteries with nominal voltage
corresponding to 24V and charging current of the battery charger equal to 20A.

MANUALE HF1000 Revisione n° 0 del 30/11/15
file : HF1000_Manuale Utente - Impostazione curve IT+GB+FR.doc
6) Click on the top button "Write Cfg." to store data on the battery charger, if the process is unsuccessful, the following
window will be displayed. Click "OK" to close this window.

MANUALE HF1000 Revisione n° 0 del 30/11/15
file : HF1000_Manuale Utente - Impostazione curve IT+GB+FR.doc
Warning: If the following error windows is displayed it means that you were not working in programming mode,
disconnect the cable, move the switch on the cable connector to the other position and reconnect it to the battery
charger (see point 1).
7) If you want to be sure to have set the correct configuration repeat the steps described in point 4.

MANUALE HF1000 Revisione n° 0 del 30/11/15
file : HF1000_Manuale Utente - Impostazione curve IT+GB+FR.doc
INSTALLATION ET AVERTISSEMENTS POUR LA SECURITE
•Les erreurs d'installation et d'utilisation du chargeur de batterie peuvent provoquer des dommages au chargeur et des accidents à
l'opérateur.
•Seul un personnel spécialisé et autorisé pourra exécuter les interventions requérant l'ouverture du chargeur de batterie
•Si le fonctionnement en toute sécurité du chargeur de batterie ne peut être garanti,arrêter le chargeur et s'assurer qu'il ne peut
être remis en marche.
•Avant la mise en fonction du chargeur de batterie il faut vérifier l'état des gaines d'isolation des câbles de raccordement au réseau
d'alimentation et des câbles de la batterie.
•Débrancher le raccordement au réseau d'alimentation avant d'effectuer celui de la batterie.
•Afin de réduire les risques d'accidents, charger seulement des batteries de type Plomb Acide ou GEL ou AGM (s'assurer que la
courbe de charge sélectionner est adaptée au type de batterie). Ne pas essayer de recharger certain autre type de batterie
rechargeable ou non rechargea: ces batteries peuvent exploser, en créant des dommages aux choses ou aux personnes.
•ATTENTION!! La batterie génère des gaz explosifs pendant la charge. Au voisinage des batteries il faut donc suivre les
avertissements suivants: ne pas fumer et éviter la présence de flammes ou d'étincelles.
•Eviter absolument de positionner le chargeur au voisinage immédiat de la batterie qui doit être rechargée; éventuels gaz
produits/émis par la batterie durant la charge, corrodent et endommagent le chargeur de batterie. Positionner le chargeur aussi
loin possible que le permettent les câbles de la batterie.
•ATTENTION!! L'emplacement du chargeur doit être choisi en tenant en considération le fait que lui-même contient des composants
électriques/électroniques qui peuvent produire des arcs voltaïques. Il ne doit pas être exposé à la pluie, aux jets d'eau, sources de
vapeur et doit être placé loin des sources de chaleur. Surtout il ne doit pas être installé dans des locaux denses de poussières.
•Il est absolument interdit de positionner et/ou de fixer le chargeur sur des appuis en matière inflammable (comme étagères et/ou
parois de bois).
•Pour faciliter l'échange thermique du chargeur, et par conséquent pour garantir sa fiabilité, il faut le positionner de façon qu'il
puisse échanger facilement la chaleur émise avec l'ambiance. Il doit donc être monté en position verticale (en utilisant les 4 trous
de fixation).
•Pour éviter des dangers d'électrocution, le chargeur doitêtre raccordé à une prise de courant reliée à terre. En outre la prise de
courant la prise de courant à laquelle le chargeur est raccordé doit être proportionnée à la puissance absorbée par ce dernier et
devra être protégée par un dispositif électrique à norme (fusible ou interrupteur automatique) dimensionné de 10% supérieur au
moins à l'absorption de courant déclaré sur la plaquette de l'appareil.
•ATTENTION!! Vérifier que la tension d'entrée du chargeur indiquée sur les données de la plaque satisfait la tension d'alimentation
disponible et que l'installation est pourvue de mise à terre.
•ATTENTION!!Vérifier la compatibilité de la fiche de réseau en équipement au chargeur: Nous déconseillons l'utilisation
d'adaptateur; si la prise n'était pas dotée de mise à terre, ne pas utiliser l'appareil avant d'avoir fait installer une fiche adaptée par
un technicien qualifié.
•La surface externe du chargeur peut se surchauffer tandis que le chargeur est en fonction et peut rester chaude également après
l'arrêt.
•Le chargeur ne doit pas être utilisé comme composant critique dans des dispositifs pour le support médical ou autres systèmes.
•L'inobservation de ces instructions dans l'installation et dans l'utilisation du chargeur peut compromettre la protection fournie par
l'appareil et faire déchoir la garantie du Fabricant.
•Ne pas permettre l'utilisation de l'appareil à des personnes (même enfants) avec des capacités psycho-physico-sensorielles, ou avec
une expérience et des connaissances insuffisantes, à moins qu'ils ne soient surveillés attentivement et instruits par un responsable
qui veille à leur sécurité. Surveiller les enfants, en s'assurant qu'ils ne jouent pas avec l'appareil.
•Les spécifications mentionnées dans ce Manuel sont sujettes à des changements sans préavis. Cette publication substitue toute
information fournie précédemment.

MANUALE HF1000 Revisione n° 0 del 30/11/15
file : HF1000_Manuale Utente - Impostazione curve IT+GB+FR.doc
MANUEL D'INSTRUCTIONS POUR L'UTILISATEUR
1) Brancher le connecteur USB à un port quelconque du PC, déplacer le sélecteur sur le connecteur du coté
chargeur, de cette façon, après l'avoir branché à celui-ci, la led rouge s'allume, état de programmation (il n'est
pas nécessaire que le chargeur soit alimenté par le réseau)
2) Ouvrir le logiciel Reader.exe
3) Vérifier que la vitesse de communication (115200) et le bon port soient affichés (le bon numéro du port se voit
dans la gestion des dispositifs de Windows dans la section « Ports (COM et LPT) »), sinon modifier ces
paramètres dans « Option->Communication ».

MANUALE HF1000 Revisione n° 0 del 30/11/15
file : HF1000_Manuale Utente - Impostazione curve IT+GB+FR.doc
4) Pour afficher les informations de configuration du chargeur, cliquer au centre de l'écran avec la touche droite de la
souris. Dans la fenêtre qui s'ouvre, sélectionner la rubrique « Info ». Une fenêtre contenant toutes les informations
principales liées au chargeur dont le profil de charge (« Profile », l'identification de la courbe (« Cfg. I.D. ») et le type
de batterie (« Battery Type ») s'affichera.
5) Cliquer sur OK pour quitter la fenêtre affichée.
Pour changer de profil de charge, cliquer sur « File->Open… » et dans la nouvelle fenêtre, sélectionner le fichier
ayant le profil de courbe souhaité (en fonction de la tension de batterie et du courant de charge voulus).
Le fichier pour un profil de charge pour batteries Gel avec tension nominale de 24V et courant de charge du
chargeur de 20A, a été sélectionné dans l'exemple ci-dessous.

MANUALE HF1000 Revisione n° 0 del 30/11/15
file : HF1000_Manuale Utente - Impostazione curve IT+GB+FR.doc
6) Cliquer sur le bouton « Write Cfg » en haut pour mémoriser les données sur le chargeur, si le processus a été mené à
bien, la fenêtre suivante s'affichera. Cliquer sur « OK » pour fermer cette fenêtre.

MANUALE HF1000 Revisione n° 0 del 30/11/15
file : HF1000_Manuale Utente - Impostazione curve IT+GB+FR.doc
Attention : Si la fenêtre d'erreur suivante s'affiche, cela signifie que l'on n'était pas en mode programmation,
débrancher le câble, déplacer le sélecteur sur le connecteur du câble dans l'autre position et le rebrancher au chargeur
(voir le point 1)
7) Pour vérifier la bonne configuration, répéter les passages du point 4.
Table of contents
Languages:
Other Gacell Batteries Charger manuals

Gacell
Gacell SLC 93C User manual

Gacell
Gacell CT-7000 User manual

Gacell
Gacell CT-15000 User manual

Gacell
Gacell CT-1000 User manual

Gacell
Gacell SLC 53C User manual

Gacell
Gacell CTEK MULTI US 7002 User manual

Gacell
Gacell SLH 26C User manual

Gacell
Gacell SLH 19C User manual

Gacell
Gacell ABC 600 User manual

Gacell
Gacell C3-CHG-01 00 Series User manual
Popular Batteries Charger manuals by other brands

WatchGas
WatchGas POLI user manual

Opus
Opus BT-C700 operating instructions

BMW Motorrad
BMW Motorrad Plus battery charger operating instructions

Leviton
Leviton Duplex T5635 installation instructions

Mastervolt
Mastervolt CHARGEMASTER 12/35-3 installation manual

Battery Controller
Battery Controller BC K612 quick start guide