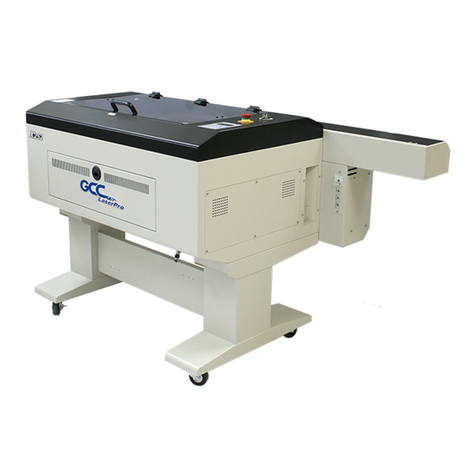
GCC Technologies LaserPro S400 User manual

Spirit Series User Manual |

Dear Sir / Madam,
Thank you for choosing GCC LaserPro laser systems. You can be assured that this machine meets the
highest safety standards while using technological innovations shared by no other laser engraver. The
S400 model is backed by GCC, a truly international company that is dedicated to help your business grow.
We at GCC are proud to introduce the LaserPro S400 machine, our most technologically advanced laser
engraver to date. This easy to operate model has been designed with quality, productivity, and safety in
mind. With the Touch-screen panel, SmartACTM, closed-loop DC servo motor, and the new DuraGuild rail
motion System, S400 is clearly on the cutting edge of all laser systems.
GCC understands that a creative technical background is the key to successful growth in the ever-
changing information economy. We have a strong team of R&D experts who propel our company to new
heights. From product development to manufacturing, our engineers are dedicated to innovation and
quality.
Guiding our solid technical base is a world-class management team. At GCC, our leaders bring together
marketing, technical support, research development and distribution experts to create an international
network to meet your demands. Over the years, this network has been able to span throughout the globe.
Our technical support staff is committed to provide you with impeccable service, and when your business is
ready to grow, our team will be there!
Sincerely,
Leonard Shih
President of GCC

1 232003110G (03)
Ta
b
l
e
o
f
C
on
t
e
n
t
s
Chapter
1 Sa
f
e
t
y
............................................................................................................3
1.1 Principles of a CO2 Laser....................................................................................................4
1.3 The Safety Interlock System ...............................................................................................4
1.4 Safety Label............................................................................................................................5
1.5 Safety Measures..................................................................................................................32
1.5.1 General Safety..........................................................................................................32
1.5.2 Safety Notice for Class 4 Machine .......................................................................33
1.6 Operating Environment.......................................................................................................34
1.7 Noise Test.............................................................................................................................34
Chapter
2 U
np
a
ck
i
ng&
C
on
t
e
n
t
s
...........................................................................36
2.1 Unloading and Unpacking..................................................................................................37
2.2 How to Re-
p
a
ck the Machine
.........................................................................................44
2.3 Contents and Accessories Checklist ...............................................................................46
Chapter
3 Me
c
h
a
n
i
c
a
l
O
v
e
r
v
i
e
w
...............................................................................47
3.1 Front View.............................................................................................................................48
3.2 Top View................................................................................................................................48
3.3 Right (Profile) View .............................................................................................................49
3.4 Left (Profile) View................................................................................................................49
3.5 Rear View..............................................................................................................................50
Chapter
4 Se
t
up
a
nd
I
n
s
t
a
ll
a
t
i
on
............................................................................51
4.1 Machine Setup .....................................................................................................................52
4.1.1 Powering Up the Machine......................................................................................52
4.1.2 Connecting the Computer......................................................................................52
4.1.2.1 Networking Connectivity Setup .........................................................................53
4.1.2.2 Ethernet Connectivity Setup ..............................................................................56
4.1.3 USB Storage Setup.................................................................................................65
4.2 Graphics Software Setup...................................................................................................68
4.2.1 Recommended Computer Configuration ............................................................68
4.3 Installation of the LaserPro Print Driver..........................................................................68
4.4 Paralle Desktops for MAC Users......................................................................................69
4.5 Using Adobe’s AP with GCC LaserPro machine.............................................................75
4.6 Using Autodesk Inventor with GCC LaserPro machine..................................................77
4.7 Using eCUT Plug-in with GCC Lasers..............................................................................80
Chapter
5
Operating
LaserPro
S400
...................................................................81
5.1 Using the Hardware ............................................................................................................82
5.1.1 Laser Key Switch.....................................................................................................82
5.1.2 Touch Screen Overview.........................................................................................83
5.1.3 Touch Screen Navigation Chart ...........................................................................85

2 232003110G (03)
5.1.4 Touch Screen Function Pages..............................................................................86
5.2 The LaserPro S400 Print Driver ..................................................................................... 115
5.2.1 Page Setup and Orientation................................................................................ 115
5.2.2 Color Management................................................................................................ 116
5.2.3 Using the LaserPro Print Driver.......................................................................... 117
5.2.3.1
LaserPro
S400
Print
Driver
>>
Options
Page.................................... 118
5.2.3.2 S400 Print Driver >> Pen Page.................................................................124
5.2.3.3 S400 Print Driver >> Advanced Page.......................................................128
5.2.3.4 S400 Print Driver >> Paper Page..............................................................135
5.2.3.5 S400 Print Driver >> Language Page.......................................................137
5.2.3.6 S400 Print Driver >> Raster Page.............................................................139
5.2.3.7 S400 Print Driver >> Stamp Page.............................................................143
Chapter
6
Engraving and Cutting Techniques
.................................................144
6.1 Raster Engraving...............................................................................................................145
6.3 Vector and Raster..............................................................................................................146
6.4 3D Tips.................................................................................................................................147
6.5 Modify Image Settings of Picture for Better Engraving Quality................................155
Chapter
7
Optional Items
....................................................................................158
7.1 Fume Extraction Unit ........................................................................................................159
7.2 Air Compressor ..................................................................................................................160
7.3 Focus Lens Options ..........................................................................................................163
7.4 Pass-Through Door Options............................................................................................165
7.5 Honeycomb Table .............................................................................................................166
7.6 R
o
t
a
r
y
A
tt
a
c
h
m
e
n
t & Rotary Chuck
.......................................................................167
7.7 SmartGUARD Fire Alarm Option....................................................................................176
7.8 SmartAIR Fine / Ultra Nozzles Option...........................................................................180
Chapter
8
Basic Maintenance
.......................................................................181
8.1 Suggested Cleaning and Maintenance Supplies ........................................................182
8.2 Maintaining the Work table and Motion System..........................................................183
8.2.1 Accessing the Work Table and Motion System...............................................183
8.2.2 Cleaning the Work Table and Motion System .................................................184
8.2.3 Lubrication of the X & Y Axis...............................................................................184
8.3 Cleaning the Optics System............................................................................................187
8.3.1 Removing the Mirrors............................................................................................187
8.4 Cleaning the Exhaust Duct..............................................................................................190
Chapter
9
Basic Troubleshooting
.................................................................191
Chapter
10
Appendix
.......................................................................................193
10.1 Glossary............................................................................................................................194
10.2 LaserPro S400 Specification Sheet.............................................................................195
3 232003110G (03)
1
Chapter
1
Sa
f
e
t
y
Principles of a CO
2
Laser
Safety Ratings
The Safety Interlock System
Safety Label
Safety Measures
Operating Environment

4 232003110G (03)
1.1 Principles of a CO2 Laser
LASER is the acronym for Light Amplification by Stimulated Emission of Radiation. A CO2 laser works
by electrically stimulating the molecules within a carbon dioxide gas mixture. When focused through a
lens, this highly-intense and invisible beam will vaporize many material. Depending on the speed and
intensity of the projected beam, a CO2laser may be used to engrave or cut through a wide variety of
material.
1.2 Safety Ratings
The LaserPro S400 is equipped with a sealed carbon-dioxide laser that emits intense and invisible
laser radiation with a wavelength of 10.6 microns in the infrared spectrum. The laser system is
designed as a Class 1 laser device, meaning that the system is equipped with key safety features and
an enclosed laser head to completely contain the laser under normal use. One of the key safety
features found on the LaserPro S400 is a Class 2 red beam safety guidance pointer (similar to a
laser-pointer presentation pen) allowing the operator to see the exact location where the laser beam
will fire.
Even though the LaserPro S400 is equipped with the most powerful laser to date, through proper
usage and taking necessary hardware safeguards, will make it an extremely safe machine.
When the front door and back door are open, machine becomes a Class 4 equipment and users must
wear goggles to operate the machine.
1.3 The Safety Interlock System
The laser system is equipped with a safety interlock system utilizing magnetic sensors on the top
and side access doors, laser-activation and door LED lights on the control panel. The magnetic
sensors will deactivate the laser when either door is open. At this time, the “door” LED light found on
the Touch Screen will illuminate, indicating an open or improperly closed door. When the laser is in
operation, the “laser” LED will illuminate to inform the operator that the laser is activated. If at any time,
any of the access doors are open and the “laser” LED is illuminated, IMMEDIATELY unplug the laser
system and contact GCC service team for technical support and maintenance instructions.
W
A
RNING
・DO NOT operate the laser system if any component of the safety system is malfunctioning.
・DO NOT attempt to remove or modify any component of the safety interlock system.

5 232003110G (03)
1.4 Safety Label
According to CDRH standards, all fixed or removable covers that allow access to a laser beam must
have an appropriate laser warning label attached to them. These warning labels must be clearly
visible to the operator prior to removing the cover. Additional labels must be applied to the interior of
the machine and be visible in the event when the covers are removed. A label clearly displaying the
manufacturer’s name, date of manufacture, description of product, model number, serial number, and
compliance statement must be attached to the outer surface of the machine.
In compliance with CDRH standards, the required warning labels are affixed at the time of
manufacture to the LaserPro S400, attached on appropriate locations. These labels are not to be
modified in any way or removed for any reason. Please familiarize yourself with the specific labels
and their locations on the machine. Below is a list of all the safety labels and their locations on the
machine.
Product
Label
This label is located at the right-back side of machine. All the product information such as Serial Number,
Model Numbers, Laser Power and Electric power can be found here. Before requiring any further tech
support, always provide the service person with the information on this label.

6 232003110G (03)

7 232003110G (03)

8 232003110G (03)

9 232003110G (03)

10 232003110G (03)

11 232003110G (03)

12 232003110G (03)

13 232003110G (03)

14 232003110G (03)

15 232003110G (03)

16 232003110G (03)

17 232003110G (03)

18 232003110G (03)
Other manuals for LaserPro S400
1
Table of contents
Other GCC Technologies Engraver manuals

GCC Technologies
GCC Technologies LaserPro X252 User manual

GCC Technologies
GCC Technologies LaserPro C180 User manual

GCC Technologies
GCC Technologies S290LS Series User manual

GCC Technologies
GCC Technologies LaserPro Venus II User manual

GCC Technologies
GCC Technologies LaserPro DFS User manual

GCC Technologies
GCC Technologies LaserPro Spirit Series User manual

GCC Technologies
GCC Technologies LaserPro E200 Series User manual

GCC Technologies
GCC Technologies LaserPro C180II User manual

GCC Technologies
GCC Technologies StellarMark 3DS User manual

GCC Technologies
GCC Technologies LaserPro SmartCut X380 Series User manual