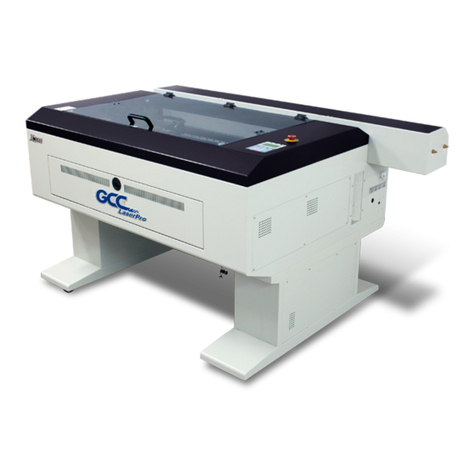
GCC Technologies LaserPro DFS User manual


DFS User Manual V3.0
Release Note
Version
Release Date
Change
1.0
Nov, 2017
First version
2.0
Dec, 2017
Add 5.2.2 convert file from AutoCAD
3.0
Feb. 2021
Add 5.5 vector engraving function operating &
AI/CorelDRAW Plug in
Update Machine Photos

DFS User Manual V3.0
TABLE OF CONTENTS
Chapter 1 Unpacking ...................................................................................................................................3
1.1 Unloading and Unpacking .....................................................................................................4
Chapter 2 Mechanical Overview ...............................................................................................................8
2.1 Front View ..................................................................................................................................9
2.2 Right View ................................................................................................................................10
2.3 Left View...................................................................................................................................10
2.4 Rear View .................................................................................................................................11
Chapter 3 Software Setup.........................................................................................................................12
3.1 Recommended Computer Configuration.........................................................................13
3.2 SmartCONTROLTM DFS Installation ..................................................................................13
3.3 SmartCONTROLTM DFS Uninstallation.............................................................................15
Chapter 4 Connection Setup....................................................................................................................18
4.1 Connect to GCC LaserPro DFS via Ethernet ..................................................................19
4.2 Connect to GCC LaserPro DFS via Wireless..................................................................28
Chapter 5 Operating the GCC LaserPro DFS ......................................................................................33
5.1 Running the SmartCONTROLTM DFS................................................................................34
5.2 Convert and Import File........................................................................................................36
5.2.1 Convert file from CorelDRAW .............................................................................................36
5.2.2 Convert file from AutoCAD..................................................................................................43
5.3 GCC LaserPro DFS Registration Marks Generator.......................................................49
5.4 SmartCONTROL DFS Operating - Single Mode .............................................................56
5.5 SmartCONTROL DFS Operating - Production Mode ....................................................68
5.6 Vector Engraving Function Operating..............................................................................81
5.5.1 Engraving by Frame operating...........................................................................................81
5.5.2 Engraving by Fill operating.................................................................................................85
Chapter 6 Appendix....................................................................................................................................89
6.1 GCC LaserPro DFS Specification Sheet ..........................................................................90
Chapter 1
Unpacking
Unloading & Unpacking

WARNING
More than one person may be needed when loading and unloading the
shipping crate in order to avoid body injury or damage to the machine.
1.1 Unloading and Unpacking
The GCC LaserPro DFS is shipped in one crate that contains machine, software, and
all of the necessary accessories. The following section shows detailed step-by-step
instructions for unpacking and assembly the accessory to workstation.
1) Move the shipping crate to the proximity of the designated work area.
2) Remove the bolt.
NOTE
Please keep and store the original shipping crate in case it is needed for future
transportation or product servicing.

3) Loosen the door lock

4) Loosen the screws fixed crate top and side panels, and remove all the panels.
5) Unbuckle and remove the two safety harnesses that hold the machine in place.

6) Take out the sliding board, and the fixing screws with red circle marked below
located in the rear side of the shipping crate.
7) Fix the sliding board to the crate with the fixing screws shown in step 6 to create a
ramp for machine to slide down.

Chapter 2
Mechanical Overview
Front View
Right View
Left View
Rear View

2.1 Front View
Dual Start Button
Laser Key
Z-axis Up Button
Z-axis Down Button
LED Light
Focus Light
Emergency Stop
Button

2.2 Right View
2.3 Left View
Screen Frame Module
(optional) Opening
Ethernet port & CCD Port
Right Feeder
Main Power
ON/OFF Switch
Main Board Access Panel
I/O Terminal
Connector
Power Cable
Inlet
I/O Port DC
12V/24V Switch
Left Feeder

2.4 Rear View
Ventilation Openings
Maintenance Door

Chapter 3
Software Setup
Recommended Computer Configuration
SmartCONTROLTM DFS Installation
SmartCONTROLTM DFS Uninstallation

3.1 Recommended Computer Configuration
SmartCONTROLTM DFS software was designed to work best using a Windows based
system with the following minimum requirements.
Computer Configuration
CPU
Intel Pentium, 1GHz or above
DRAM
1GB RAM or above
CDROM
One CD-ROM disk drive
HDD
1 GB of free hard drive space
SVGA
Super VGA display (1204 x 768 min. resolution)
Interface
PC or Laptop, USB 3.0 x 2
Operating System
Windows Vista /Win 7 /Win 8 /Win 10
3.2 SmartCONTROLTM DFS Installation
Please perform the following steps:
1) Take out the installation disk and insert to the CD-ROM drive of computer. Wait few
seconds for the CD Manager to begin the Setup automatically.
2) Click on “Install SmartCONTROLTM DFS from the menu of the installation disk.

3) Click “Next”
4) The installation would be finished in few seconds

5) When installation is complete, SmartCONTROLTM DFS will create a
“SmartCONTROL DFS” folder on windows desktop, open the folder and double click
SmartCONTRL DFS.exe to run the program.
3.3 SmartCONTROLTM DFS Uninstallation
1) Open the SmartCONTROL DFS folder from windows desktop and double click
“SmartCONTROL_Uninstall.exe”

2) SmartCONTROLTM DFS uninstallation window will pop up. Click “Next” to continue.
3) The uninstallation would be finished in few seconds.

4) Uninstall Driver Package window will pop up and ask you “All devices using this
driver will be removed. Do you wish to continue?” Click “Yes” to complete
uninstallation.

Chapter 4
Connection Setup
Connect to GCC LaserPro DFS via Ethernet
Connect to GCC LaserPro DFS via Wireless

4.1 Connect to GCC LaserPro DFS via Ethernet
Follow procedures to connect Laptop / PC and GCC LaserPro DFS.
Connect to GCC LaserPro DFS via Ethernet
1. Launch “Control Panel” and select “Network and Sharing Center”
2. Click “Change adapter Setting” to launch “Network Connections” window
This manual suits for next models
4
Table of contents
Other GCC Technologies Engraver manuals

GCC Technologies
GCC Technologies LaserPro S400 User manual

GCC Technologies
GCC Technologies StellarMark 3DS User manual

GCC Technologies
GCC Technologies LaserPro X252 User manual

GCC Technologies
GCC Technologies LaserPro C180 User manual

GCC Technologies
GCC Technologies LaserPro E200 Series User manual

GCC Technologies
GCC Technologies LaserPro Venus II User manual

GCC Technologies
GCC Technologies S290LS Series User manual

GCC Technologies
GCC Technologies LaserPro SmartCut X380 Series User manual

GCC Technologies
GCC Technologies LaserPro C180II User manual

GCC Technologies
GCC Technologies LaserPro Spirit Series User manual