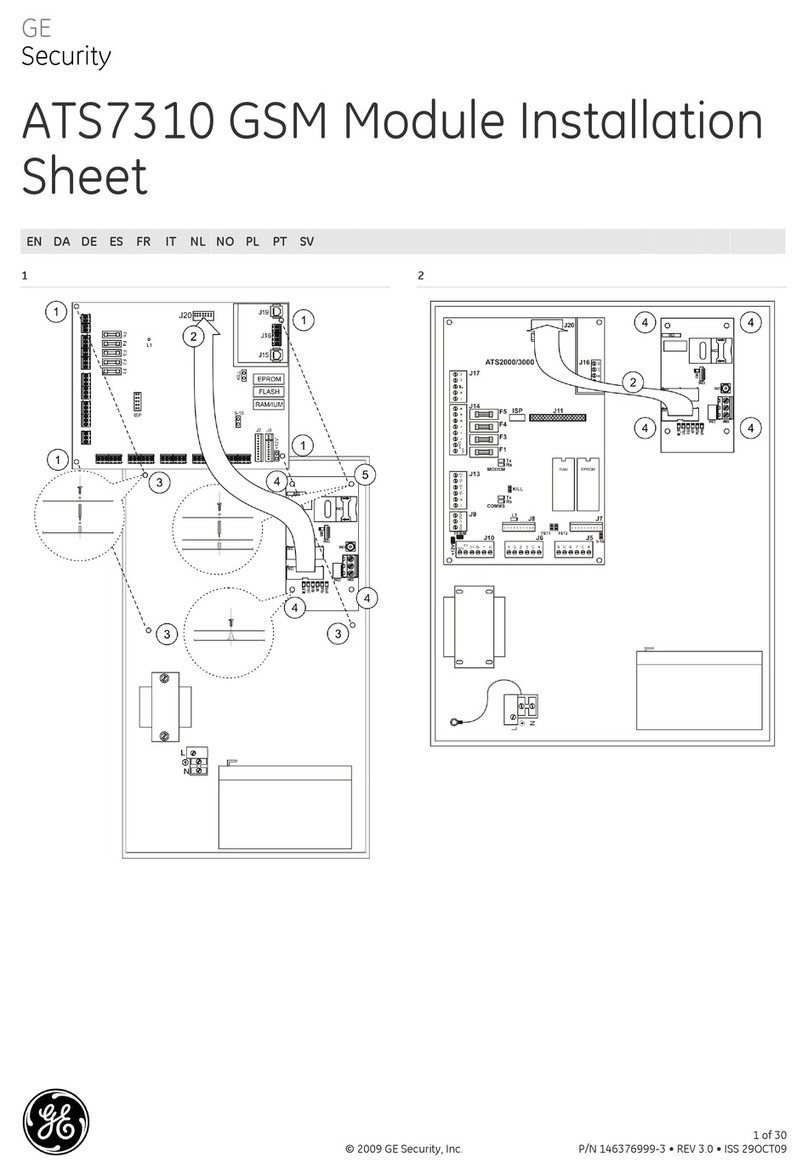
GE NX-1710E - Single Door Control Module Installation and operation manual

NetworX™Series
NX-1710E Single Door Control
Installation and Startup Manual

NX-1710E Single Door Control
2
© 2005 GE Security
All rights reserved.
NetworX
™
is a trademark of the GE companies. Printed in the USA.
These instructions do not purport to cover all details or variations in equipment nor to provide every
possible contingency to be met during installation, operation, and maintenance. If further information is
desired or if particular problems arise that are not covered sufficiently for the purchaser’s purpose, the
matter should be referred to GE Security, Gladewater, Texas, USA.
This document contains proprietary information of GE Security, USA and is furnished to its customer solely
to assist that customer in the installation, testing, operations, and/or maintenance of the equipment
described. This document shall not be reproduced in whole or in part nor shall its contents bedisclosed to
any third party without the written approval of GE Security.
Please refer to the current GE Security product catalog for detailed warranty information.
Symbol Legend
Warning
Indicates a procedure, practice, condition, or statement that, if not strictly observed, could
result in personal injury.
* This symbol indicates electrical warnings and cautions.
Caution
Indicates a procedure, practice, condition, or statement that, if not strictly observed, could
result in damage to or destruction of equipment or property.
** This symbol indicates general warnings and cautions.
Note
Indicates an essential or important procedure, instruction, condition, or statement.
Tip
Indicates a user tip. Provides helpful information that is not normally definedinregularuse,
but from an experienced user.
Enter Indicates a key or button should be pressed to enter data.

NX-1710E Single Door Control 3
TABLE OF CONTENTS
I. GENERAL DESCRIPTION.............................................................................................4
II. BOARD LAYOUT...........................................................................................................5
III. INSTALLATION AND WIRING TERMINALS ................................................................6
IV. ENROLLING...................................................................................................................6
V. ADDRESSING................................................................................................................7
VI. PROGRAMMING............................................................................................................7
VII. USER CARDS................................................................................................................9
VIII. PROGRAMMING LOCATIONS ...................................................................................11
IX. PROGRAMMING WORKSHEETS...............................................................................20
X. ORDERING INFORMATION........................................................................................35
XI. GLOSSARY..................................................................................................................35
XII. FCC INFORMATION....................................................................................................36
XIII. UNDERWRITERS LABORATORIES INFORMATION................................................36
XIV. SPECIFICATIONS........................................................................................................36
Main 800-727-2339 Technical Support 800-727-2339
Outside the US 903-845-6941 Tech Support Fax 903-845-8409
Main Fax 903-845-6811 Sales & Literature 800-547-2556
Web: www.ge-security.com

NX-1710E Single Door Control
4
I. GENERAL DESCRIPTION
The NetworX NX-1710E is a single door control module used to expand the capabilities of the NetworX control
panels.
• Flash-based microprocessor for reprogramming ability via In-Circuit Serial Programming™header
• +5 VDC and +12 VDC outputs
• 4-position dip switch which allows addressing of up to 16 modules on the NetworX bus
• Box tamper switch tied to tamper terminal
• One zone input to be connected to a door contact for monitoring the door zone.
• On-board relay with Normally Open, Normally Closed, and Common terminals for use in switching
power on MagLocks or other door locking mechanisms
• 8Kb of non-volatile RAM for storing programming and card data
• Two sets of terminal inputs/outputs for interfacing with one or two Wiegand card readers:
o 1 buzzer and 2 LED outputs
o 1 tamper and 1 egress input
o 2-wire Wiegand bus interface. Readers must be able to “speak” Wiegand. The
following are supported Weigand formats by default:
26-bit standard Weigand
27-bit Tecom ASC
35-bit HID Corporate 1000
37-bit HID 10304
40-bit with facility code (Casi Rusco 4001)
40-bit without facility code (Casi Rusco 4002)

NX-1710E Single Door Control
5
II. BOARD LAYOUT
NetworX bus
Programmer
Dip Switches
(see pg 7
for
specifics.)
LED is lit during
normal operation.

NX-1710E Single Door Control
6
III. WIRING TERMINALS
To install the door control, simply wire it into the system. Refer to the following wiring table for details.
For the purpose of these instructions, the term “doorcontrol” refers to theNX-1710E module, and
the term “reader” refers to the specific card reader attached to the system.
IV. ENROLLING
The NetworX control panels have the ability to automatically find and store in memory the presence of all
keypads, zone expanders, wireless receivers, output modules, and any other device on the keypad buss. This
allows these devices to be supervised by the control panel. To enroll the devices, enter the Program Mode
using the procedure outlined in the control panel Installation Manual. When the Program Mode is exited, the
NX-8 control will automatically enrollthe devices. The enrolling process takes about 12seconds, during which
time the Service LED will illuminate. User codes will not be accepted during the enrolling process. Once a
module is enrolled, if it is not detected by the control, the Service LED will illuminate.
DESCRIPTION
DATA
Connect to the NetworX control panel DATA terminal. Data-
signaling terminal to all the
devices on the bus.
COM
Connect to the NetworX control panel COMMON
terminal. Suppliesthecommonsideofthe
power to the door control module.
POS
Connect to NetworX control panel AUX POWER +
terminal. Supplies power to the door
control module.
+12 Power to reader module, if required.
+5 Power to reader module, if required.
COM Connect to common terminal of box tamper.
TMPR Box Tamper
N/C Normally closed relay contact to activate door strike.
C Closed relay contact to activate door strike.
N/O Normally open relay contact to activate door strike.
Rating:
5A 125, 277V AC
5A 30V DC
A-EG Egress input. To use this feature, connect the normal
ly open egress switch between this
terminal and COM.
A-TM Tamper input (from Reader “A”)
A-LR Red LED (LED2) control (to Reader “A”). Relay
. If available, connect to LED control on
reader.
A-LG Green LED (LED1) control (to Reader “A”). Relay
. If available, connect to LED control on
reader.
A-BZ Buzzer control (to Reader “A”).
A-D1 Wiegand Data 1 terminal (from Reader “A”).
Reader “A”
A-D0 Wiegand Data 0 terminal (from Reader “A”).
COM Common dry contact
B-EG
Egress input. To use this feature, connect the normally open egress switch between this
terminal and COM.
B-RM Tamper input (from Reader “B”)
B-LR Red LED (LED2) control (to Reader “B”). Relay. If available, connec
t to LED control on
reader.
B-LG Green LED (LED1) control (to Reader “B”). Relay
. If available, connect to LED control on
reader.
B-BZ Buzzer control (to Reader “B”).
B-D1 Wiegand Data 1 terminal (from Reader “B”).
Reader “B”
B-D0 Wiegand Data 0 terminal (from Reader “B”).
COM Common terminal.
DOOR Door contact (requires 3.3K end-of-line resistor).

NX-1710E Single Door Control
7
V. ADDRESSING
The first thing that must be decided is the address of this particularrelay/output module.This isthe addressthat
will be selected when programming the auxiliary devices. To set the addresses use the table below. Refer to
Table V-1 that follows for possible addresses.
The door control unit must be powered down and powered back up in order to read
new or modified dip switch settings.
Table V-1
Bus Address Dip Switch Setting Bus Address Dip Switch Setting
12341234
128 136 ON
129 ON 137 ON ON
130 ON 138 ON ON
131 ON ON 139 ON ON ON
132 ON 140 ON ON
133 ON ON 141 ON ON ON
134 ON ON 142 ON ON ON
135 ON ON ON 143 ON ON ON ON
VI. PROGRAMMING
USING THE LED KEYPAD
ENTERING THE PROGRAM MODE
Enters the Program Mode.
Stay, Chime, Exit, Bypass & Cancel LEDS
will flash.
[Go To Program Code]
Factory Default is
If the "Go To Program Code" is valid, the
"Service" LED will flash and the five function
LEDs will illuminate steady. You are nowin the
Program Mode and ready to select the module
address.
ENTERING THE MODULE ADDRESS
Scan a card.
#
(example only)
Enter the module address. Refer to Table V-1
for the address.
The Armed LED will illuminate while it is
waiting for a programming location to be
entered.
LOADING THE FACTORY DEFAULTS (USER PROGRAMMING ONLY)
#
The keypad will beep 3 times indicating that
the loading is in progress. The loading takes
about 6 seconds.
DEFAULTING THE CARD SERIAL NUMBERS
#
The keypad will beep 3 times indicating that
the loading is in progress.

NX-1710E Single Door Control
8
PROGRAMMING A LOCATION
If an attempt is made to program an invalid entry for a particular segment, the
keypad sounder will emit a triple error beep (beep, beep, beep), and remain in that
segment awaiting a valid entry.
To Enter a Location:
[location] # The Armed LED will flash. If the location is
valid, the "Armed" LED will extinguish, the
"Ready" LED will illuminate, and the zone
LED’s will show the data for the first segment
of this location.
To Change Location Data:
[changed data] The "Ready" LED will flash to indicate a data
change in process and will continue until the
data is saved.
The new data is saved.
The keypad will increment and display the next
segment’s data.
NOTE: Repeat these steps until the last segment is reached.
To Exit a Location:
# Exits from this location. The “Ready” LED will
extinguish. The "Armed" LED will illuminate
waiting for a new programming location to be
entered.
To Review The Data:
[location] # The Armed LED will flash. If the location is
valid, the "Armed" LED will extinguish, the
"Ready" LED will illuminate, and the zone
LED’s will show the data for the first segment
of this location.
(Do not enter data.)
The next segment is displayed. Each time r
is pressed, the data of the next segment will
be displayed for review.
Shortcuts:
Previous location.
Same location.
Next sequential location.
EXITING THE PROGRAM MODE:
EXIT EXIT Exits this programming level.
USING THE LCD KEYPAD
All steps required for programming are the same as the aforementioned LED keypad. The LCD keypad display
will prompt you for the data required. While in the programming mode, and not in a location, the number in
parenthesis is the location you were previously changing. For example, if the display reads "Enter location, then
# (5)", it is reminding you that location 5 was the last location you programmed. In feature selection data, the
numbers of the enabled features will be displayed. The features not enabled will display a hyphen (-).
PROGRAMMING DATA TYPES
1. Numerical Data can take on values from 0-255 or 0-15 depending on the segment size.
2. Feature Selection Data is used to turn features on or off.

NX-1710E Single Door Control
9
VII. USER CARDS
Adding and de-activating users is done through a combination of entering information at the keypad and
scanning cards. Before a card can be entered, one door control on the system must be programmed with User
Card Programming enabled (Location 3, Segment 1, Option 1, page 14).
It is recommended that only one door control on the system be enabled to modify user
cards and that this reader be located near a keypad. This reader will transfer information to
all other readers in the system once programming is finished.
Once a door control is enabled to modify users, it must be placed into one of the following five modes:
1) Add One User
2) Add Multiple Users w/ Auto-Increment
3) Activate One User
4) De-Activate One User
5) Delete/Reset One User.
Modifying users on a door control is similar to modifying user codes at a keypad.
ENTER USER PROGRAMMING
Accesses Code Programming
[master code]
Factory Default is
If the code is valid, the Ready LED will flash.
User Number 2 is used to program user
cards, so…
if control is an NX-4, NX-6,
or NX-8
if control is an NX-8E
Unit is now ready for you to choose one of the
User Card Programming modes (as if user
code 2):
$ Add One User
$ Add Multiple Users (w/Auto-Increment)
$ Activate Single User
$ De-activate One User
$ Delete / Reset One User
IMPORTANT NOTES
1. Adding or de-activating user cards from a door control will cause the code for User Number 2 to become
invalid. Therefore, it will need to be re-entered after all user cards are programmed into the door control.
2. By default, user cards are added and activated.
ADDING ONE USER
[STAY]
Accesses Activation mode
[3-digit user number]
Example: if 4-digit user
code or if 6-digit
If a valid user number is entered, LED1
(Green) on any enabled readers will begin to
flash.
Scan the card designated for the user
entered in the previous step.
If the user card is not already in the system, it
will be added and mapped to the entered user
number and LED1 (Green) will flash.
If the card is already in the system, the reader
will triple beep and LED1 (Green) will continue
flashing; the user number is not incremented in
this case.
Must be a
master user in
order to modify
user card
information.

NX-1710E Single Door Control
10
ADDING MULTIPLE USERS WITH AUTO-INCREMENT
[CANCEL] Accesses Activation mode
[3-digit user number]
Example: if 4-digit user code
or if 6-digit
If a valid user number is entered, LED1
(Green) on any enabled readers will begin
to flash.
Scan the card designated for the user
entered in the previous step.
If the user card is not already in the
system, it will be added and mapped to
the entered user number and LED1
(Green) will continue flashing indicating
that the next user card can be scanned for
the next user number.
If the card is already in the system, the
reader will triple beep and LED1 (Green)
will continue flashing; the user number is
not incremented in this case.
Continue scanning user cards until the
desired number of cards has been added.
After about 30 seconds without acard being
scanned, all the readers in the system will
be updated with the new user card
information.
IMPORTANT NOTE
Activating / De-activating / Resetting Users -- If User Number 0 is entered, the desired
function will be performed on the user associated with the card scanned.
ACTIVATE ONE USER (SINGLE USER)
[CHIME] Accesses Activation mode
[3-digit user number]
Example: if 4-digit user code or
if 6-digit
If a valid user number is entered, LED1
(Green) on any enabled readers will begin
to flash.
Scan any card. The card information for the user entered
in the previous step will be activated, and
LED1 (Green) will stop flashing. After
about 30 seconds, all the readers in the
system will be updated.
DE-ACTIVATE ONE USER
[BYPASS] Accesses De-activation mode
[3-digit user number]
Example: if 4-digit user code
or if 6-digit
If a valid user number is entered, LED1
(Green) on any enabled readers will begin
to flash.
Scan any card The card information for the user entered
in the previous step will be cleared, and
LED1 (Green) will stop flashing. After
about 30 seconds, all the readers in the
system will be updated.

NX-1710E Single Door Control
11
DELETE / RESET ONE USER
[EXIT]
Accesses De-activation mode
[3-digit user number]
Example: if 4-digit user code or
if 6-digit
If a valid user number is entered, LED1
(Green) on any enabled readers will begin
to flash.
Scan any card
The card information for the user entered
in the previous step will be cleared, and
LED1 (Green) will stop flashing. After
about 30 seconds, all the readers in the
system will be updated.
VIII. PROGRAMMING LOCATIONS
For the purpose of these instructions, the term “door control” refers to the NX-1710E
module, and the term “reader” refers to the specific card reader attached to the
system.
LOCATION 0 READER “A” SCAN FUNCTIONS & OPTIONS
(8 segments of binary data) Location 0 is used to select the particular function(s) that are activatedwhena card
is scanned at Reader “A”. More than one function may be selected. If more than one function is selected, they
will execute in order from function 1 to function 8.
Functions 1-6 will be performed based on the user’s authority as programmed by the [] [6]
function (refer to keypad user manual).
Segment 1 Single Scan Function
Program the functions that are performed when a card is scanned {one beep}.
LED1 - "On" to send Code Entry function to the control panel.
LED2 - "On" to activate the Armed Away mode.
LED3 - "On" to activate the Armed Stay mode.
LED4 - "On" to send the Disarm function to the control panel.
LED5 - "On" to send Auxiliary Function #1 to the control panel.
LED6 - "On" to send Auxiliary Function #2 to the control panel.
LED7 - "On" to broadcast an X-10 function (see Location 241 for programming).
LED8 - "On" to send a Request-to-Exit (RTE) and to activate the onboard relay. (Default is
“On”)
Segment 2 Triple Scan Function
Program the functions that are performed when a card is scanned three times {three beeps}. The descriptions
of the options are the same as for Single Scan Function (Segment 1 above). Default is 1.
Segment 3 Reader Options:
LED1 - "On" if tamper is inverted.
LED2 - "On" if tamper is enabled.
LED3 - "On" if reader buzzer is to follow typical keypad buzzing.
LED4 - "On" if reader automatically issues a beep when the card is scanned. Enabling
this option prevents the door control from issuing another beep. (Default is “On”)
LED5–8 Reserved.
If an individual keeps the card, it can still be deleted.

NX-1710E Single Door Control
12
Segment 4 LED1 (Green) Options:
LED1 - "On" to follow Ready status of system. (Default is “On”)
LED2 - "On" to toggle with the relay activation. (Default is “On”)
LED3 - "On" if inverted.
LED4–8 Reserved.
Segment 5 LED2 (Red) Options:
LED1 - "On" to follow Armed status of system. (Default is “On”)
LED2 - "On" to toggle with the relay activation.
LED3 - "On" if inverted.
LED4–8 Reserved.
Segments 6 – 8 Reserved
LOCATION 1 READER “B” SCAN FUNCTIONS & OPTIONS
(8 segments of binary data) Location 1 is used to select the particular function(s) that are activatedwhena card
is scanned at Reader “B”. More than one function may be selected. If more than one function is selected, they
will execute in order from function 1 to function 8.
Functions 1-6 will be performed based on the user’s authority as programmed by the [] [6]
function (refer to keypad user manual).
Segment 1 Single Scan Function
Program the functions that are performed when a card is scanned {one beep}.
LED1 - "On" to send Code Entry function to the control panel.
LED2 - "On" to activate the Armed Away mode.
LED3 - "On" to activate the Armed Stay mode.
LED4 - "On" to send the Disarm function to the control panel.
LED5 - "On" to send Auxiliary Function #1 to the control panel.
LED6 - "On" to send Auxiliary Function #2 to the control panel.
LED7 - "On" to broadcast an X-10 function (see Location 241 for programming).
LED8 - "On" to send a Request-to-Exit (RTE); and to activate the onboard relay. (Default
is “On”)
Segment 2 Triple Scan Function
Program the functions that are performed when a card is scanned three times {three beeps}. The descriptions
of the options are the same as for Single Scan Function (Segment 1 above). Default is 1.
Segment 3 Reader Options:
LED1 - "On" if tamper is inverted.
LED2 - "On" if tamper is enabled.
LED3 - "On" if reader buzzer is to follow typical keypad buzzing.
LED4 - "On" if reader automatically issues a beep when the card is scanned. Enabling
this option prevents the door control from issuing another beep. (Default is “On”)
LED5 - “On” if LEDs to extinguish after 2 minutes without a scan. (Note: This option doesn’t
disable the flashing green LED during card programming.)
LED6–8 Reserved.
Segment 4 LED1 (Green) Options:
LED1 - "On" to follow Ready status of system. (Default is “On”)
LED2 - "On" to toggle with the relay activation. (Default is “On”)
LED3 - "On" if inverted.
LED4–8 Reserved.

NX-1710E Single Door Control
13
Segment 5 LED2 (Red) Options:
LED1 - "On" to follow Armed status of system. (Default is “On”)
LED2 - "On" to toggle with the relay activation.
LED3 - "On" if inverted.
LED4–8 Reserved.
Segments 6 – 8 Reserved
LOCATION 2 PROGRAMMING THE X-10 ADDRESS FOR THE SCAN FUNCTIONS
(6 segments of numerical data)
Segment 1 Module Number
Program a number from 0 -15 to represent the corresponding X-10 Module Number from the following table.
Default is 0.
Module 1 2 3 4 5 6 7 8 9 10
11
12
13
14
15
16
Seg 1 0 1 2 3 4 5 6 7 8 9 10
11
12
13
14
15
Segment 2 House Code
Program a number from 0-15 torepresentthecorrespondingX-10Housecodefrom the followingtable.Default
is 0. X-10 ADDRESS CODES
0=A 4=E 8=I 12=M
1=B 5=F 9=J 13=N
2=C 6=G 10=K 14=O
3=D 7=H 11=L 15=P
Segment 3 Reader “A” Single Scan Function
Program the X-10 function that is performed when a card is scanned {one beep} at Reader “A”. This location
only needs to be programmed if Location 0, Segment 1, Option 7 is set. Use the following table. Default is 2.
Function # Function performed Function # Function performed
0 All units off 4 Dim
1 All lights on 5 Bright
2 On 6 All lights off
3 Off All others Reserved
Segment 4 Reader “A” Triple Scan Function
Program the X-10 function that is performed when a card is scanned three times {three beeps} at Reader “A”.
The descriptions of the function codes are the same as for Single BeepScan Function. This location onlyneeds
to be programmed if Location 0, Segment 2, Option 7 is set. Use the above table. Default is 3.
Segment 5 Reader “B” Single Scan Function
Program the X-10 function that is performed when a card is scanned {one beep} at Reader “B”. This location
only needs to be programmed if Location 0, Segment 1, Option 7 is set. Use the following table. Default is 2.
Segment 6 Reader “B” Triple Scan Function
Program the X-10 function that is performed when a card is scanned three times {three beeps} at Reader “B”.
The descriptions of the function codes are the same as for Single BeepScan Function. This location onlyneeds
to be programmed if Location 0, Segment 2, Option 7 is set. Use the above table. Default is 3.

NX-1710E Single Door Control
14
LOCATION 3 PROGRAMMING THE OPTIONS AND DOOR CONTROL PARTITIONS
(4 segments of binary data)
Segment 1 Unit Options:
LED1 - "On" if door control module is enabled for User Card Programming.
LED2 - "On" if tamper is enabled.
LED3 - "On" if disabling on-board zone.
LED4 - Reserved.
LED5 - “On” if an RTE from a scanned card is to be logged as Code Entry.
LED6 - “On” if an RTE from a zone or the egress input is logged as Code Entry.
LED7–8 Reserved.
Segment 2 Door Options
LED1 - "On" if locking mechanism is a Maglock or Drop Bolt.
LED2 - "On" if access is allowed regardless of Armed status of the system.
LED3 - "On" if the door is not to be latched unlocked during an open schedule.
LED4 - "On" if onboard relay only triggers during an open schedule.
LED5 - “On” if onboard relay only triggers during a close schedule.
LED6 - “On” if Forced Entry Alarm is logged.
LED7 - “On” if access allowed without an RTE.
LED8 - “On” if relay operates normally during off-schedule (outside regular operating hours).
Segment 3 Enabling the Schedules for the Onboard Relay:
LED1 - "On" if driver follows Schedule 1. (Default is “On”)
LED2 - "On" if driver follows Schedule 2. (Default is “On”)
LED3 - "On" if driver follows Schedule 3. (Default is “On”)
LED4 - "On" if driver follows Schedule 4. (Default is “On”)
LED5 - "On" if driver follows Schedule 5. (Default is “On”)
LED6 - "On" if driver follows Schedule 6. (Default is “On”)
LED7 - "On" if driver follows Schedule 7. (Default is “On”)
LED8 - "On" if driver follows Schedule 8. (Default is “On”)
Segment 4 Door Control Partition:
LED1 - "On" if door control is in Partition 1. (Default is “On”)
LED2 - "On" if door control is in Partition 2. (Default is “On”)
LED3 - "On" if door control is in Partition 3. (Default is “On”)
LED4 - "On" if door control is in Partition 4. (Default is “On”)
LED5 - "On" if door control is in Partition 5. (Default is “On”)
LED6 - "On" if door control is in Partition 6. (Default is “On”)
LED7 - "On" if door control is in Partition 7. (Default is “On”)
LED8 - "On" if door control is in Partition 8. (Default is “On”)
Segment 5 Weigand Format Enables:
LED1 - "On" if Weigand Format #1 is enabled. (Default is “On”)
LED2 - "On" if Weigand Format #2 is enabled. (Default is “On”)
LED3 - "On" if Weigand Format #3 is enabled. (Default is “On”)
LED4 - "On" if Weigand Format #4 is enabled. (Default is “On”)
LED5 - "On" if Weigand Format #5 is enabled. (Default is “On”)
LED6 - "On" if Weigand Format #6 is enabled.
LED7 - "On" if Weigand Format #7 is enabled.
LED8 - "On" if Weigand Format #8 is enabled.

NX-1710E Single Door Control
15
LOCATION 4 PROGRAMMING THE ZONES
(2 segments of numerical data)
Segment 1 Door Shunt Zone
Program the zone that will be monitored as a door for access control. This locationmustbe programmed with a
valid zone for monitored access control functions to work properly. (Default is 0)
Additionally, this zone must be configured in the control panel as a Door Shunt zone by
programming an unused Zone Type Characteristic in locations 111-169 (Seg 4, Opt 4).
Segment 2 Request To Exit (RTE) Zone
Program the zone that will be monitored to signal an RTE. If this segment is programmed with a valid zoneand
the zone is faulted, the reader will activate its onboard relay and send the RTE. (Default is 0)
Additionally, this zone must be configured in the control panel as an RTE zone by
programming an unused Zone Type Characteristicin locations111-169(Seg 4, Opt 3).
LOCATION 5 PROGRAMMING THE VARIOUS READER TIMERS
(4 segment of numerical data)
Segment 1 Scan Time
Enter the amount of time required to hold a card between beeps to activate the functions programmed in
Location 0, Segments 2 and 3. This timer is timed in 1/100-second increments from 0 to 2.55 seconds. (Default
is 100 = 1 second).
Segment 2 Relay Active Time
Enter the amount of time the onboard relay is energized once activated. This timer is timed in 1-second
increments from 0 to 255 seconds. (Default is 10 = 10 seconds).
Segment 3 Door Fault Warning Time
Enter the amount of time a monitored zone (see Location 4, Segment 1) must be faulted before sounding a
warning (local buzzer). The door fault warning is timed in 1-second increments from 0 to 255 seconds. (Default
is 30 = 30 seconds).
Segment 4 Door Fault Alarm Time
Enter the amount of time a monitored zone (see Location 4, Segment 1) must be faulted before sending an
alarm condition to the control panel. The door fault alarm is timed in 1-second increments from 0 to 255
seconds. (Default is 60 = 60 seconds).
LOCATION 6 PROGRAMMING THE OPENING TIME FOR SCHEDULE 1
(2 segments of numerical data)
Segment 1 Program the hour of the opening time in 24-hour format. (Default is 8= 8:00 AM)
Segment 2 Program the minutes after the hour of the opening time for Schedule 1. (Default is 0)
LOCATION 7 PROGRAMMING THE CLOSING TIME FOR SCHEDULE 1
(2 segments of numerical data)
Segment 1 Program the hour of the closing time in 24-hour format. (Default is 20 = 8:00 PM)
Segment 2 Program the minutes after the hour of the closing time for Schedule 1. (Default is 0)

NX-1710E Single Door Control
16
LOCATION 8 PROGRAMMING THE DAYS FOR SCHEDULE 1
(1 segment of binary data)
LED1 = "On" if schedule is active on Sunday.
LED2 = "On" if schedule is active on Monday.
LED3 = "On" if schedule is active on Tuesday.
LED4 = "On" if schedule is active on Wednesday.
LED5 = “On” if schedule is active on Thursday.
LED6 = “On” if schedule is active on Friday.
LED7 = “On” if schedule is active on Saturday.
LED8 = “On” if schedule is disabled on holidays.
LOCATIONS 9 - 29 PROGRAMMING THE SCHEDULES 2 - 8
Locations 9 – 29 are used to program the opening times, closing times, and days for Schedules 2 - 8. Each
schedule has three locations that are programmed with the same steps as Schedule 1 described previously.
Refer to Schedule 1 (Locations 6 - 8 above) for specific instructions.
Location 9 – Opening Time for Schedule 2 Location 21 – Opening Time for Schedule 6
Location 10 – Closing Time for Schedule 2 Location 22 – Closing Time for Schedule 6
Location 11 – Days for Schedule 2 Location 23 – Days for Schedule 6
Location 12 – Opening Time for Schedule 3 Location 24 – Opening Time for Schedule 7
Location 13 – Closing Time for Schedule 3 Location 25 – Closing Time for Schedule 7
Location 14 – Days for Schedule 3 Location 26 – Days for Schedule 7
Location 15 – Opening Time for Schedule 4 Location 27 – Opening Time for Schedule 8
Location 16 – Closing Time for Schedule 4 Location 28 – Closing Time for Schedule 8
Location 17 – Days for Schedule 4 Location 29 – Days for Schedule 8
Location 18 – Opening Time for Schedule 5
Location 19 – Closing Time for Schedule 5
Location 20 – Days for Schedule 5
LOCATION 30 PROGRAMMING THE DATE OF HOLIDAYS IN JANUARY
(8 segments of numerical data) Program the day of the month in January thatthe Opening time ina schedule is
suppressed. For example, if the opening should not occur on January 1, program a “1” in Segment 1. This
feature can be repeated up to a maximum of 8 holidays per location (month). (Default is No holidays)
LOCATIONS 31 - 41 PROGRAMMING THE DATE OF HOLIDAYS FROM FEBRUARY TO
DECEMBER
(8 segments of numerical data) Locations 31 - 41 are used to program the day ofeachmonth,from February to
December, in which the Opening time in a schedule is suppressed. Each location will accommodate up to a
maximum of 8 holidays, and programmed with the same steps as Location 30 described previously.
Location 31 – February holidays
Location 32 – March holidays
Location 33 – April holidays
Location 34 – May holidays
Location 35 – June holidays
Location 36 – July holidays
Location 37 – August holidays
Location 38 – September holidays
Location 39 – October holidays
Location 40 – November holidays
Location 41 – December holidays

NX-1710E Single Door Control
17
LOCATION 42 ACTIVATION DATA FOR USER CARDS 1 - 120
(15 segments of binary data)
This location is used to select which user cards 1 through 120 are activated. If the LED is “on”, the card is
active. Each segment has 8 LEDs corresponding to the 8 possible user cards. Example: Segment 4, LED 2
indicates that user card 26 is active.
Segment 1 User Cards 1 - 8 Segment 9 User Cards 65 - 72
Segment 2 User Cards 9 - 16 Segment 10 User Cards 73 - 80
Segment 3 User Cards 17 - 24 Segment 11 User Cards 81 - 88
Segment 4 User Cards 25 - 32 Segment 12 User Cards 89 - 96
Segment 5 User Cards 33 - 40 Segment 13 User Cards 97 - 104
Segment 6 User Cards 41 - 48 Segment 14 User Cards 105 - 112
Segment 7 User Cards 49 - 56 Segment 15 User Cards 113 - 120
Segment 8 User Cards 57 - 64
LOCATION 43 PROGRAMMING ACTIVATION DATA FOR USER CARDS 121 - 240
(15 segments of binary data) This location is used to select which user cards 121 through 240 are activated. If
the LED is “on”, the card is active. Each segment has 8 LEDs corresponding to the 8 possible user cards.
Example: Segment 15, LED 8 indicates that user card 240 is active.
Segment 1 User Cards 121 - 128 Segment 9 User Cards 185 - 192
Segment 2 User Cards 129 - 136 Segment 10 User Cards 193 - 200
Segment 3 User Cards 137 - 144 Segment 11 User Cards 201 - 208
Segment 4 User Cards 145 - 152 Segment 12 User Cards 209 - 216
Segment 5 User Cards 153 - 160 Segment 13 User Cards 217 - 224
Segment 6 User Cards 161 - 168 Segment 14 User Cards 225 - 232
Segment 7 User Cards 169 – 176 Segment 15 User Cards 233 - 240
Segment 8 User Cards 177 - 184
LOCATION 44 CODE ENTRY LOGGING PARTITION
(2 segments of numerical data) This location programs the partition that is logged with the Code Entry
message and sent when the following conditions are met:
An RTE scan function is selected (Location 0, Segment 1/2, Option 8); and
“RTE from a scanned card is to be logged as Code Entry” is enabled (Location 3, Segment 1,Option 5).
Entering a 0 (zero) will send the lowest valid partition of the reader. Entering 1-16 will sendthe enteredvalueas
the partition. (Default is 0.)
Segment 1 Code Entry Logging Partition for Reader “A”
Segment 2 Code Entry Logging Partition for Reader “B”
LED1 = Card 1
LED2 = Card 2
LED3 = Card 3
LED4 = Card 4
LED5 = Card 5
LED6 = Card 6
LED7 = Card 7
LED8 = Card 8
LED1 = Card 1
LED2 = Card 2
LED3 = Card 3
LED4 = Card 4
LED5 = Card 5
LED6 = Card 6
LED7 = Card 7
LED8 = Card 8

NX-1710E Single Door Control
18
USER-DEFINABLE FORMATS
The following locations are considered to be advanced programming and should
ONLY be used by installers with a thorough understanding of Weigand Formats. Do
not attempt to program these locations if you are not familiar with Weigand packets.
LOCATION 45 WEIGAND FORMAT 1 (STANDARD 26 BIT)– DIGITS & BITS
(5 segments of decimal data) This is the first location used to program the Weigand Format 1. (Loc 45-57)
Segment 1 Number of digits in Facility Code
Segment 2 Number of digits in Badge Number
Segment 3 Number of bits in Facility Code
Segment 4 Number of bits in Badge Number
Segment 5 Total number of bits in complete format (including parity bits)
LOCATION 46 WEIGAND FORMAT 1 – BIT DESCRIPTORS (BITS 1-32)
(32 segments of hex data) This location contains the descriptors for bits 1 – 32 of Weigand Format 1. The
available options are: 0=Always Zero; 1=Always One; B=Badge number; D=Parity bit; E=End of
format; F=Facility Code bit. Segment 1 = Bit Descriptor 1; Segment 32 = Bit Descriptor 32.
LOCATION 47 WEIGAND FORMAT 1 – BIT DESCRIPTORS (BITS 33-64)
(32 segments of hex data) This location contains the descriptors for bits 33 – 64 of Weigand Format 1.
The available options are: 0=Always Zero; 1=Always One; B=Badge number; D=Parity bit; E=End of
format; F=Facility Code bit. Segment 1 = Bit Descriptor 33; Segment 32 = Bit Descriptor 64.
LOCATION 48 WEIGAND FORMAT 1 – PARITY TYPE 1
(1 segment of decimal data) This location programs the Partity Type 1for Weigand Format 1. Available options
for this location are 0 = No Parity; 1 = Odd Parity; 2 = Even Parity. Factory default is 1.
LOCATION 49 WEIGAND FORMAT 1 – PARITY MASK 1
(8 segments of binary data) This location tells which bits to include for the parity count; and includes the parity
bits. It is used in conjunction with Location 48 (Parity Type 1). The factory default is:
Seg 1 Seg 2 Seg 3 Seg 4 Seg 5 Seg 6 Seg 7 Seg 8
12345678 12345678 12345678 ------78 -------- -------- -------- --------
LOCATION 50 WEIGAND FORMAT 1 – PARITY TYPE 2
(1 segment of decimal data) This location programs the Partity Type 2for Weigand Format 1. Available options
for this location are 0 = No Parity; 1 = Odd Parity; 2 = Even Parity. Factory default is 2.
LOCATION 51 WEIGAND FORMAT 1 – PARITY MASK 2
(8 segments of binary data) This location tells which bits to include for the parity count; and includes the parity
bits. It is used in conjunction with Location 50 (Parity Type 2). The factory default is:
Seg 1 Seg 2 Seg 3 Seg 4 Seg 5 Seg 6 Seg 7 Seg 8
12345678 ---45678 -------- -------- -------- -------- -------- --------
LOCATION 52 WEIGAND FORMAT 1 – PARITY TYPE 3
(1 segment of decimal data) This location programs the Partity Type 3for Weigand Format 1. Available options
for this location are 0 = No Parity; 1 = Odd Parity; 2 = Even Parity. Factory default is 0.
LOCATION 53 WEIGAND FORMAT 1 – PARITY MASK 3
(8 segments of binary data) This location tells which bits to include for the parity count; and includes the parity
bits. It is used in conjunction with Location 52 (Parity Type 3). The factory default is:
Seg 1 Seg 2 Seg 3 Seg 4 Seg 5 Seg 6 Seg 7 Seg 8
-------- -------- -------- -------- -------- -------- -------- --------

NX-1710E Single Door Control
19
LOCATION 54 WEIGAND FORMAT 1 – PARITY TYPE 4
(1 segment of decimal data) This location programs the Partity Type 4for Weigand Format 1. Available options
for this location are 0 = No Parity; 1 = Odd Parity; 2 = Even Parity. Factory default is 0.
LOCATION 55 WEIGAND FORMAT 1 – PARITY MASK 4
(8 segments of binary data) This location tells which bits to include for the parity count; and includes the parity
bits. It is used in conjunction with Location 54 (Parity Type 4). The factory default is:
Seg 1 Seg 2 Seg 3 Seg 4 Seg 5 Seg 6 Seg 7 Seg 8
-------- -------- -------- -------- -------- -------- -------- --------
LOCATION 56 WEIGAND FORMAT 1 – PARITY TYPE 5
(1 segment of decimal data) This location programs the Partity Type 5for Weigand Format 1. Available options
for this location are 0 = No Parity; 1 = Odd Parity; 2 = Even Parity. Factory default is 0.
LOCATION 57 WEIGAND FORMAT 1 – PARITY MASK 5
(8 segments of binary data) This location tells which bits to include for the parity count; and includes the parity
bits. It is used in conjunction with Location 56 (Parity Type 5). The factory default is:
Seg 1 Seg 2 Seg 3 Seg 4 Seg 5 Seg 6 Seg 7 Seg 8
-------- -------- -------- -------- -------- -------- -------- --------
LOCATIONS 58 – 70 WEIGAND FORMAT 2 (TECOM ASC 27 BIT)
These locations contain the programming for Weigand Format 2. Refer to theinstructionsfor Locations45 –57
regarding the Bit Descriptors, Parity Types and Parity Masks 1-5. Factory defaults are in the worksheets.
LOCATIONS 71 - 83 WEIGAND FORMAT 3 (HID1000)
These locations contain the programming for Weigand Format 3. Refer to theinstructionsfor Locations45 –57
regarding the Bit Descriptors, Parity Types and Parity Masks 1-5. Factory defaults are in the worksheets.
LOCATIONS 84 – 96 WEIGAND FORMAT 4 (H10304)
These locations contain the programming for Weigand Format 4. Refer to theinstructionsfor Locations45 –57
regarding the Bit Descriptors, Parity Types and Parity Masks 1-5. Factory defaults are in the worksheets.
LOCATIONS 97 - 109 WEIGAND FORMAT 5 (40 BIT W/FACILITY CODE –CASI 4001)
These locations contain the programming for Weigand Format 5. Refer to theinstructionsfor Locations45 –57
regarding the Bit Descriptors, Parity Types and Parity Masks 1-5. Factory defaults are in the worksheets.
LOCATIONS 110 - 122 WEIGAND FORMAT 6 (40 BIT W/O FACILITY CODE –CASI 4002)
These locations contain the programming for Weigand Format 6. Refer to theinstructionsfor Locations45 –57
regarding the Bit Descriptors, Parity Types and Parity Masks 1-5. Factory defaults are in the worksheets.
LOCATIONS 123 - 135 WEIGAND FORMAT 7 (UNDEFINED)
These locations contain the programming for Weigand Format 7. Refer to theinstructionsfor Locations45 –57
regarding the Bit Descriptors, Parity Types and Parity Masks 1-5. Factory defaults are in the worksheets.
LOCATIONS 136 - 148 WEIGAND FORMAT 8 (UNDEFINED)
These locations contain the programming for Weigand Format 8. Refer to theinstructionsfor Locations45 –57
regarding the Bit Descriptors, Parity Types and Parity Masks 1-5. Factory defaults are in the worksheets.

NX-1710E Single Door Control
20
Tip:
Defaults are shown in bold italics.
IX. PROGRAMMING WORKSHEETS
SEG
DESCRIPTION
LOCATION 0 – READER “A” SCAN FUNCTIONS & OPTIONS
1 SINGLE SCAN FUNCTION
1 = "On" to send Code Entry function to the control panel.
2 = "On" to activate the Armed Away mode.
3 = "On" to activate the Armed Stay mode.
4 = "On" to send the Disarm function to the control panel.
5 = "On" to send Auxiliary Function #1 to the control panel.
6 = "On" to send Auxiliary Function #2 to the control panel.
7 = "On" to broadcast an X-10 function (see Location 2).
8 = "On" to send a Request To Exit (RTE); and activate the onboard relay
2 TRIPLE SCAN FUNCTION
1 = "On" to send Code Entry function to the control panel.
2 = "On" to activate the Armed Away mode.
3 = "On" to activate the Armed Stay mode.
4 = "On" to send the Disarm function to the control panel.
5 = "On" to send Auxiliary Function #1 to the control panel.
6 = "On" to send Auxiliary Function #2 to the control panel.
7 = "On" to broadcast an X-10 function (see Loc 2).
8 = "On" to send an RTE & activate the onboard relay.
3 READER OPTIONS
1 = "On" if tamper is inverted.
2 = "On" if tamper is enabled.
3 = "On" if reader buzzer is to follow typical keypad buzzing.
4 = “On" if reader automatically issues a beep when a card is scanned.
5-8 Reserved.
4 LED1 (GREEN) OPTIONS
1 = "On" to follow Ready status of system.
2 = "On" to toggle with the relay activation.
3 = "On" if inverted.
5-8 Reserved.
5 LED2 (RED) OPTIONS
1 = "On" to follow Armed status of system.
2 = "On" to toggle with the relay activation.
3 = "On" if inverted.
4-8 Reserved.
6-8 RESERVED
LOCATION 1 – READER “B” SCAN FUNCTIONS & OPTIONS
1 SINGLE SCAN FUNCTION
1 = "On" to send Code Entry function to the control panel.
2 = "On" to activate the Armed Away mode.
3 = "On" to activate the Armed Stay mode.
4 = "On" to send the Disarm function to the control panel.
5 = "On" to send Auxiliary Function #1 to the control panel.
6 = "On" to send Auxiliary Function #2 to the control panel.
7 = "On" to broadcast an X-10 function (see Location 2).
8 = "On" to send a Request To Exit (RTE); and activate the onboard relay.
2 TRIPLE SCAN FUNCTION
1 = "On" to send Code Entry function to the control panel.
2 = "On" to activate the Armed Away mode.
3 = "On" to activate the Armed Stay mode.
4 = "On" to send the Disarm function to the control panel.
5 = "On" to send Auxiliary Function #1 to the control panel.
6 = "On" to send Auxiliary Function #2 to the control panel.
7 = "On" to broadcast an X-10 function (see Loc 2).
8 = "On" to send an RTE & activate the onboard relay.
3 READER OPTIONS
1 = "On" if tamper is inverted.
2 = "On" if tamper is enabled.
3 = "On" if reader buzzer is to follow typical keypad buzzing.
4 = “On" if reader automatically issues a beep when a card is scanned.
5 = “On” if LEDs to extinguish after 2 minutes without a scan.
6-8 Reserved.
4 LED1 (GREEN) OPTIONS
1 = "On" to follow Ready status of system.
2 = "On" to toggle with the relay activation.
3 = "On" if inverted.
4-8 Reserved.
This manual suits for next models
1
Table of contents
Other GE Control Unit manuals

GE
GE ARITECH ATS7300 User manual

GE
GE SX TRANSISTOR CONTROL IC3645SR4U404N2 User manual

GE
GE IC3645SR4W606N6 Owner's manual

GE
GE Intellix BMT 330 User manual
GE
GE CompactPCI VMIACC-7055 Series User manual
GE
GE 22158 User manual

GE
GE B90 User manual

GE
GE Tetra GECLPS5-2 User manual
GE
GE L60 User manual

GE
GE IC3645SR3R404R2 User manual
Popular Control Unit manuals by other brands

Rockwell Automation
Rockwell Automation Allen-Bradley 1756-EWEB installation instructions

Truma
Truma iNet X operating instructions

TriangleTube
TriangleTube CHALLENGER CC 85 manual

ICP DAS USA
ICP DAS USA I-8026W manual

Regulus
Regulus DBV1 owner's manual

IFM
IFM IO-Link master-PROFINET AL1102 operating instructions