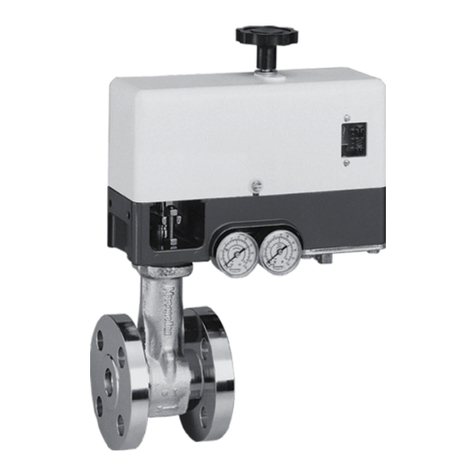
GE Baker Hughes Masoneilan 31000 Series User manual

Masoneilan*
31000 Series
Eccentric Rotary Control Valve with PFA Liner
Instruction Manual
BHGE Data Classification : Public

b | BHGE © 2017 Baker Hughes, a GE company. All rights reserved.
THESE INSTRUCTIONS PROVIDE THE CUSTOMER/OPERATOR WITH IMPORTANT PROJECT-SPECIFIC REFERENCE INFORMATION
IN ADDITION TO THE CUSTOMER/OPERATOR’S NORMAL OPERATION AND MAINTENANCE PROCEDURES. SINCE OPERATION AND
MAINTENANCE PHILOSOPHIES VARY, BAKER HUGHES, A GE COMPANY (BHGE AND ITS SUBSIDIARIES AND AFFILIATES) DOES NOT
ATTEMPT TO DICTATE SPECIFIC PROCEDURES, BUT TO PROVIDE BASIC LIMITATIONS AND REQUIREMENTS CREATED BY THE TYPE OF
EQUIPMENT PROVIDED.
THESE INSTRUCTIONS ASSUME THAT OPERATORS ALREADY HAVE A GENERAL UNDERSTANDING OF THE REQUIREMENTS FOR
SAFE OPERATION OF MECHANICAL AND ELECTRICAL EQUIPMENT IN POTENTIALLY HAZARDOUS ENVIRONMENTS. THEREFORE,
THESE INSTRUCTIONS SHOULD BE INTERPRETED AND APPLIED IN CONJUNCTION WITH THE SAFETY RULES AND REGULATIONS
APPLICABLE AT THE SITE AND THE PARTICULAR REQUIREMENTS FOR OPERATION OF OTHER EQUIPMENT AT THE SITE.
THESE INSTRUCTIONS DO NOT PURPORT TO COVER ALL DETAILS OR VARIATIONS IN EQUIPMENT NOR TO PROVIDE FOR EVERY
POSSIBLE CONTINGENCY TO BE MET IN CONNECTION WITH INSTALLATION, OPERATION OR MAINTENANCE. SHOULD FURTHER
INFORMATION BE DESIRED OR SHOULD PARTICULAR PROBLEMS ARISE WHICH ARE NOT COVERED SUFFICIENTLY FOR THE
CUSTOMER/OPERATOR'S PURPOSES THE MATTER SHOULD BE REFERRED TO BHGE.
THE RIGHTS, OBLIGATIONS AND LIABILITIES OF BHGE AND THE CUSTOMER/OPERATOR ARE STRICTLY LIMITED TO THOSE
EXPRESSLY PROVIDED IN THE CONTRACT RELATING TO THE SUPPLY OF THE EQUIPMENT. NO ADDITIONAL REPRESENTATIONS OR
WARRANTIES BY BHGE REGARDING THE EQUIPMENT OR ITS USE ARE GIVEN OR IMPLIED BY THE ISSUE OF THESE INSTRUCTIONS.
THESE INSTRUCTIONS ARE FURNISHED TO THE CUSTOMER/OPERATOR SOLELY TO ASSIST IN THE INSTALLATION, TESTING,
OPERATION, AND/OR MAINTENANCE OF THE EQUIPMENT DESCRIBED. THIS DOCUMENT SHALL NOT BE REPRODUCED IN WHOLE
OR IN PART TO ANY THIRD PARTY WITHOUT THE WRITTEN APPROVAL OF BHGE.

Masoneilan 31000 Series Control Valve Instruction Manual | c
© 2017 Baker Hughes, a GE company. All rights reserved.
Contents
Safety Information .......................................................................1
1. Introduction................................................................................2
2. General..........................................................................................2
3. Principle of Operation............................................................2
4. Unpacking....................................................................................3
5. Installation...................................................................................3
6. Disassembly ...............................................................................3
7. Reassembly .................................................................................4
8. Seat Ring Replacement.........................................................8
9. Assembly Tools .........................................................................8

1 | BHGE © 2017 Baker Hughes, a GE company. All rights reserved.
Safety Information
Important - Please Read Before Installation
Masoneilan 31000 Series Valve instructions contain DANGER,
WARNING, and CAUTION labels, where necessary, to alert
you to safety related or other important information. Read the
instructions carefully before installing and maintaining your
control valve. DANGER and WARNING hazards are related
to personal injury. CAUTION hazards involve equipment or
property damage. Operation of damaged equipment can, under
certain operational conditions, result in degraded process
system performance that can lead to injury or death. Total
compliance with all DANGER, WARNING, and CAUTION
notices is required for safe operation.
This is the safety alert symbol. It alerts you to potential
personal injury hazards. Obey all safety messages that
follow this symbol to avoid possible injury or death.
Indicates a potentially hazardous situation which, if not avoided,
could result in death or serious injury.
Indicates a potentially hazardous situation which, if not avoided,
could result in serious injury.
Indicates a potentially hazardous situation which, if not avoided,
could result in minor or moderate injury.
When used without the safety alert symbol indicates a
potentially hazardous situation which, if not avoided, could
result in property damage.
NOTE: Indicates important facts and conditions.
About this Manual
• The information in this manual is subject to change without
prior notice.
• The information contained in this manual, in whole or part,
shall not be transcribed or copied without BHGE’s written
permission.
• Please report any errors or questions about the information
in this manual to your local supplier.
• These instructions are written specifically for the 31000 Series
Valve, and do not apply for other valves outside of this
product line.
Life Period
The current estimated useful life period for the Masoneilan 31000
Series valve is 25+ years. To maximize the useful life of the product
it is essential to conduct annual inspections, routine maintenance
and ensure proper installation to avoid any unintended stresses
on the product. The specific operating conditions will also impact
the useful life of the product. Consult the factory for guidance on
specific applications if required prior to installation.
Warranty
Items sold by BHGE are warranted to be free from defects
in materials and workmanship for a period of one year from
the date of shipment provided said items are used according
to BHGE recommended usages. BHGE reserves the right to
discontinue manufacture of any product or change product
materials, design or specifications without notice.
This instruction manual applies to the Masoneilan
31000 Series
Valve.
The Valve and Actuator:
• MUST BE installed, put into service and maintained
by qualified and competent professionals who have
undergone
suitable training.
• Under certain operating conditions, the use of damaged
equipment could cause a degradation of the performance
of the system which may lead to personal injury or death.
• Changes to specifications, structure, and components
used may not lead to the revision of this manual unless
such changes affect the function and performance of the
product.
• All air supply to the actuator must be turned off.
• All surrounding pipe lines must be thoroughly flushed
to ensure all entrained debris has been removed from
the system.

Masoneilan 31000 Series Control Valve Instruction Manual | 2
© 2017 Baker Hughes, a GE company. All rights reserved.
1. Introduction
The following instructions are designed to assist maintenance
personnel in performing most of the maintenance required
on the 31000 Series valve and, if followed carefully will reduce
maintenance time.
Spare Parts
When performing maintenance always use Masoneilan
replacement parts. Parts are obtainable through your local
BHGE Representative or sales office. When ordering parts,
always include Model and Serial Numbers shown on serial plate.
The use of the assembly tools is recommended to simplify
disassembly and reassembly work. These are listed in Figures
2 and 3 and can be obtained from BHGE Masoneilan parts
department.
Service
BHGE has highly skilled service technicians available to assist
you in the operation, start-up, maintenance and repair of our
valves and component parts. Contact your nearest BHGE
Representative or sales office.
Training
BHGE regularly holds training programs to train customer
service and instrumentation personnel in the operation,
maintenance and application of our control valves and
instruments. To participate in one of these training sessions
contact your local BHGE Representative.
2. General
The statements and information given in these operating
instructions apply to all sizes in the 31000 Series control valves.
The model number, size and rating of the valve are shown on
the serial plate. Refer to numbering system hereafter to identify
the valve model.
3. Principle of Operation
The concept of the 31000 Series is based on the proven rotating
plug principle:
• The valve plug, which forms one unit with the valve shaft, can
rotate eccentrically in a free flow design, flanged valve body.
The seating surface of the plug has the shape of a segment of
a sphere.
• The midpoint of the spherical seating surface lies eccentrically
to the axis of the shaft so that there is no contact between
seat and plug even when the valve is only partially opened.
Wear is reduced to a minimum.
• Excellent sealing in the seat/plug closure is achieved by the use
of PTFE and PFA, provided as a standard feature on the 31000
Series. The seat is fixed in the valve body through its conical
outside shape. The plug shaft is connected to the actuator
with the help of a lever. The actuator is operated by means of a
rolling diaphragm with opposing spring.
Numbering System
—
1st 2nd 1st 2nd 3rd 4th 5th
3 1 0
Actuator Type
35 Spring-opposed
rolling-diaphragm
Body
Series
31
Actuator Mounting
(Type 35 Only)
1Parallel to pipeline, air to close
2Parallel to pipeline, air to open
Seat
Material
1PTFE
2Special
Not Assigned
0
—
Note: Actuator positions 1 and 2 are standard configurations.
View seen from actuator end. Other positions are available:
consult BHGE.

3 | BHGE © 2017 Baker Hughes, a GE company. All rights reserved.
4. Unpacking
Unpack valves and accessories carefully to avoid damage.
The control valves are packed in a clean state and the valve
openings are sealed with protective caps. The caps provide
protection against dirt and damage and should not be removed
until the valve is being fitted into service.
5. Installation
Before installing the valve, clean all piping carefully, removing all
dirt, grease, oil and other residues. The sealing surfaces between
control valve and piping must be cleaned carefully and checked
to ensure they are tightened properly. Flange gaskets should not
be used.
The valve must be fitted in the line so that the flow is through
the valve body in the direction of the arrow marked on the
housing. The arrow corresponds to flow to close direction. All
31000 Series control valves must be fitted in this manner since
flow assists in closing the plug.
31000 Series valves are designed with a maximum operating
pressure of 232 psi (16 bar), this limit is set by the lining. The
bodies are available in different sizes in accordance with DIN
and ANSI standards. Before fitting the control valve, the plant
operator should ensure that the maximum pressure the valve
body will be subjected to will not exceed the allowed value.
Refer to the diagram below.
6. Disassembly
Control valves, which have been in service should be thoroughly
cleaned before disassembly. Residues present inside the valve
can be harmful to health.
NOTE: All parts which come in contact with flow are
constructed of PTFE or PFA in standard versions of the
31000 Series. Particular care must be taken when handling
these parts since they can be easily damaged.
Prior to disassembly of the control valve, ensure that the valve
body has been depressurized. Accessories (positioner, airset
etc.) must be removed.
6.1 Actuator Disassembly (Figure 5a and 5b)
1. Remove the rear and front covers (118 & 121) of the actuator
by releasing the screws (119). If necessary screw out the
handwheel (141) after removing the Truarc ring (138) and
washer (139).
2. Move the actuator to its intermediate position with
compressed air.
3. Remove the indicator (154), clevis pin clip (122) and clevis pin
(124), release the lever cap screw (137).
4. Depressurize the spring barrel. If the valve is not supplied
with a positioner, remove screw (127) and shaft cover (126).
5. Remove the yoke screws (19) (Figure 1) and lift off the
complete actuator unit and lever (135).
(bar)
°C
(15)
(10)
(5)
(0)
0-20 50 100 120 150 180
°F32-4 122 212 248 302 356
(16)
psi
218
145
73
0
232
Pressure/Temperature Diagram

Masoneilan 31000 Series Control Valve Instruction Manual | 4
© 2017 Baker Hughes, a GE company. All rights reserved.
6.2 Valve Body Disassembly (Figures 1, 2, and 4)
1. Remove screws (17) and washers (18) and take off the
actuator connecting flange (12). In the case of models with
safety packing (Figure 4), remove the disk springs (24), upper
packing box ring (23), packing rings (21) and base ring (20).
2. Release the packing follower (9) using the packing tool
(Figure 2).
3. Remove the body bolt (14, 15, 16). The bonnet (2) can now
be lifted off when the plug is in the fully open position. To
remove the plug (3), carefully pull downwards.
4. Remove the packing follower (9) together with the O-rings
(10 and 11), disk springs (8), lower packing box ring (7) and
packing (6).
5. Carefully push the seat ring (4) from the valve outlet side into
the inside of the body and remove; also remove the O-ring (5)
from the body (1).
Check all parts for condition and degree of wear.
Once the packing (6), has been dismantled, it must not be
reused. To ensure satisfactory sealing of the shaft, use only
new, original packings from the manufacturer. It is strongly
recommended that the complete packing (6) including O-rings
(10 and 11) and seat Oring (5) be replaced each time the valve
is disassembled. When valves have safety packing (21), the
replacement of the packing rings and O-rings (25 and 26) is also
required.
7. Reassembly
7.1 Valve Body S/A Reassembly (Figures 1 to 4)
1. Insert the seat O-ring (5) into the body groove.
2. Slide in the seat ring (4) from the inside of the body into the
outlet side of the body with the shoulder of the seat facing
the body outlet port. Place the body on a bench. Put it where
its seat side flange contacts the cleaned surface of the bench.
Take care not to damage the sealing surface. The inlet flange
must be at the top. Using the seat assembly tool, press the
seat through the flange opening on the opposite side until it
seats securely on the shoulder. Remove the tool after fitting.
NOTE: Refer to Figure 3 for the reference number of the
seal ring fitting tool.
3. Insert the plug (3) into the bottom guiding bore of the body.
4. Place the bonnet (2) over the plug shaft onto the body and
handtighten the bolting (14, 15, 16).
5. To insert the packing into bonnet (2), screw the guide tube
into the body (Figure 2) up to the stop. Insert the complete
packing (6) via the shaft end of the shaft into the guide tube
until the packing has been fully inserted. It is essential that
the packing is aligned in accordance with the detail drawing,
(Figures 1 and 4).
6. Insert the lower packing box ring (7) and using the assembly
tool (Figure 2) slide the packing into the bonnet up to the
stop. The packing is correctly positioned when the lower
edge of the groove of the assembly tool reaches the top of
the guide tube.
7. Insert the seven disk springs (8) in accordance with Figures 1
and 4 and unscrew the guide tube (Figure 2).
8. Insert the O-rings (10 inner, 11 outer) into the grooves of the
packing follower (9) and screw the packing follower in up to
its stop using the assembly tool (Figure 2).
If the control valve is equipped with a safety packing, insert the
base ring (20), three packing rings (21), upper packing box ring
(23) and three disk springs (24) in accordance with Figure 4.
9. Insert the wiper ring (13) into the actuator connecting flange
(12). When the actuator connecting flange has the grooves
option, the relevant O-rings (25 inner, 26 outer) are to be
inserted.
10. Slide the actuator connecting flange over the plug shaft and
secure it to the bonnet with screws (17) and washers (18).
11. After the assembly of the shaft seal has been completed,
tighten the bonnet bolts (14, 15, 16) to the required torques
given below in accordance with the nominal valve size.
Valve Size Required Torques
N.m Ft. Lb
1” (25 mm) 18 14
2” (50 mm) 25 19
3” (80 mm) 35 26
7.2 Actuator Reassembly (Figures 5a, 5b & 6)
The assembly and setting of the actuator is made much easier
if the spring barrel (103) is first removed from the actuator yoke
(134). This is accomplished by removing the screws (101 and
102).
1. Insert the shaft bearing (125) and the grommet (129) into the
yoke (134).
2. Turn the plug to its closed position, hold the lever (135) in
position inside the yoke housing and slide the latter along
with the lever over the plug shaft.

5 | BHGE © 2017 Baker Hughes, a GE company. All rights reserved.
Ref Qty Description Ref Qty Description Ref Qty Description
1 1 Body •10 1 O-ring 19 4 Hexagon Head Cap Screw
2 1 Bonnet •11 1 O-ring 20 1 Base Ring(1)
3 1 Plug/Shaft 12 1 Actuator Connecting Flange •21 1 Packing (3 Rings)(1)
4 1 Seat Ring 13 1 Wiper Ring 23 1 Upper Packing Box Ring(1)
•5 1 O-ring 14 4 Hexagon Head Cap Screw 24 3 Disc Spring(1)
•6 1 Packing 15 4 Hexagon Nut •25 1 O-ring(1)
7 1 Lower Packing Box Ring 16 8 Washer •26 1 O-ring
8 7 Disc Spring 17 4 Hexagon Head Cap Screw 27 1 Serial Plate
9 1 Packing Follower 18 4 Washer 28 2 Grooved Pin
• Recommended Spare Part
(1) Refer to Figure 4
Figure 1
Section View of the 31000 Series
Eccentric Rotary Control Valve

Masoneilan 31000 Series Control Valve Instruction Manual | 6
© 2017 Baker Hughes, a GE company. All rights reserved.
NOTE: Carefully place the valve lever (135) on to the
splines so that its free end reaches as near as possible
(this depending on the splines of the plug shaft) to the
housing wall of the yoke (Figure 6 distance approximately
28 mm). The position of the plug (3) should not be allowed
to change during this process.
3. Secure the yoke to the valve body with screws (19) (Figure 1).
7.3 Setting the Actuator (Figures 6, 7, 8)
The actuator setting depends on the required fail-safe position
of the valve (see Step 1).
Since the seat and plug are of soft materials, the lever (135)
must be set so that the valve produces the required tightness.
The handwheel or adjusting tool (Figure 6), can be used as an
aid.
The selected tool is screwed until the plug is brought into the
closed position. The tightness of the seat/plug seal can be
checked using an appropriate method with the handwheel or
adjusting tool being tightened until the required tightness is
obtained.
It is essential that the instructions for setting the actuator be
carefully followed. An incorrect setting will lead to wear of seat
or plug.
Figure 4
Section View of the Safety Packing
1. Actuator Settings
A. Valve closed on air failure (Air to open) (Figure 7)
a. Determine the position of the lever at which the
valve reaches the required tightness and measure
the “D” distance from the contact surface of the
spring barrel on the yoke to the beginning of the
hole for the clevis pin in the lever (135).
b. The clevis (100) can now be adjusted so that the
distance from the beginning of the hole for the
clevis pin to the contact surface for the yoke is 1
to 2 mm less than the previously measured “D”
distance.
c. Remove the handwheel or setting tool and secure
the spring barrel with the screws (101) and washers
(102).
Figure 2 Figure 3
Valve Size
(in.)
Reference Order
No.
1 (25 mm)
2 (50 mm)
3 (80 mm)
00-603003910-780
00-603003940-780
00-603003950-780
Assembly Tool for
Packing Box
Assembly Tool for
Seat Rings
Ref. Order No. for the
Set: 00-603004100-799

7 | BHGE © 2017 Baker Hughes, a GE company. All rights reserved.
Figure 5a
Section View of the Actuator and Handwheel
Figure 5b
Section View of the Actuator Yoke and
Handwheel Figure 6
Ref Qty Description Ref Qty Description Ref Qty Description
100 1 Clevis 119 2 Cover Screw 135 1 Lever
101 2 Cap Screw 120 2 Screw Retainer 135A 1 Roller Bearing Pin
102 2 Lockwasher 121 1 Front Cover 135B 1 Roller
103 1 Spring Barrel 122 2 Clevis Pin Clip 135C 1 Lever Bearing
104 1 Spring 123 1 Indicator Dot 136 1 Handwheel Thread Plug
•105 1 Diaphragm 124 1 Clevis Pin 137 1 Lever Cap Screw
106 4 Cap Screw 125 1 Shaft Bearing 138 1 Handwheel Truarc Ring
107 1 Diphragm Case 126 1 Shaft Cover 139 1 Handwheel Washer
108 1 Piston/Actuator Stem 127 1 Cover Screw 140 1 Handwheel Lock
110 1 Washer 129 1 Grommet 141 1 Handwheel
111 1 Locknut 130 1 Bottom Cover 142 1 Direction Plate
111A 1 Locknut 131 1 Serial Plate 143 2 Screw
112 2 Plate Screw 133 1 Boss Cover 153 2 Indicator Screw
118 1 Rear Cover 134 1 Yoke 154 1 Indicator
• Recommended Spare Part

Masoneilan 31000 Series Control Valve Instruction Manual | 8
© 2017 Baker Hughes, a GE company. All rights reserved.
B. Valve open on air failure (Air to close) (Figure 8)
a. When the lever has reached the position
corresponding to the required tightness, measure
the “D” distance from the contact surface of the
spring barrel on the yoke to the beginning of the
hole for the clevis pin in the lever (135).
b. Supply air to the actuator so that the actuator
stem moves out fully. Set the clevis (100) so that
the distance from the beginning of the hole for the
clevis pin to the contact surface for the yoke is 1
to 2 mm greater than the previously measured “D”
distance.
c. Remove the handwheel or setting tool and secure
the spring barrel with screws (101) and washers
(102).
2. Move the actuator to an intermediate position, align the lever
and the clevis holes, insert the clevis pin (124) and fit the
clevis pin clips (122).
3. Tighten the locknut (111A).
4. Press the lever (135) against the shaft bearing (125) and
tighten the lever cap screw (137).
5. Secure the indicator (154), screw in the handwheel (141) if
necessary and install the washer (139) and truarc ring (138).
Lock handwheel in neutral position. Install the remaining
covers (118, 121, 130 and 133).
7.4 Eliminating Seat Leakage During Operation
If leakage between seat and plug is found during operation,
it can be eliminated in most cases by adjusting the actuator.
Supply air to put the valve at mid travel, remove the clevis pin
(124) and slide the lever (135) out of the clevis (100).
A. If the valve is closed on air failure (Air to open)
After loosening the locknut (111A), screw the clevis (100) in by
one full revolution.
B. If the valve is open on air failure (Air to close)
After loosening the locknut (111A), screw the clevis (100) out
by one full revolution.
After refitting the clevis pin, check the tightness between seat
and plug. If the necessary tightness has not been reached,
repeat Step A or B as required.
If adequate tightness cannot be achieved by adjusting the
actuator, the seat and plug should be checked for wear.
Tightness between seat and body must also be checked.
8. Seat Ring Replacement
To check the seat and plug for wear or to replace the seat ring,
perform the following steps:
1. Bring the plug into its fully open position (if the valve is
closed on air failure, supply air to the actuator to fully open
the plug).
2. Remove the bonnet bolting (14, 15, 16), turn the bonnet
(2) clockwise up to the stop on the body flange, and in this
position, carefully remove it from the body.
The seat ring (4) and plug (3) can now be checked for wear
and the seat ring replaced if necessary. The procedures for
disassembly and reassembly were described in detail in
Sections 6 & 7.
The plug can be replaced only after the complete valve body
S/A has been disassembled. Refer to Section 6.2.
9. Assembly Tools
The operation of fitting the packing and adjusting the actuator
require the use of special tools. In addition these tools reduce
the risk of sealing elements being damaged during assembly.
The tools can be obtained as a complete set from BHGE parts
department and are suitable for all valve sizes (refer to Figure
2).
Fitting tools for the seat rings are available in accordance with
the valve size (refer to Figure 3).

9 | BHGE © 2017 Baker Hughes, a GE company. All rights reserved.
Figure 7
Setting the Actuator on Air to Open
(Valve closed on Air Failure)
Figure 8
Setting the Actuator on Air to Close
(valve open on Air Failure)

Masoneilan 31000 Series Control Valve Instruction Manual | 10
© 2017 Baker Hughes, a GE company. All rights reserved.
Notes

11 | BHGE © 2017 Baker Hughes, a GE company. All rights reserved.
Notes

Masoneilan 31000 Series Control Valve Instruction Manual | 12
© 2017 Baker Hughes, a GE company. All rights reserved.
Notes

bhge.com
*Denotes a trademark of Baker Hughes, a GE company, LLC.
Other company names and product names used in this document are the registered trademarks or
trademarks of their respective owners.
© 2017 Baker Hughes, a GE company, LLC – All rights reserved.
BHGE reserves the right to make changes in specifications and features shown herein, or discontinue the
product described at any time without notice or obligation. Contact your BHGE representative for the most
current information. The BHGE logo is a trademark of Baker Hughes, a GE company, LLC. Baker Hughes, a GE
company and the GE monogram are trademarks of the General Electric Company and Baker Hughes, a GE
company, LLC.
GEA31746B 10/2017
AUSTRALIA
Brisbane:
Phone: +61-7-3001-4319
Fax: +61-7-3001-4399
Perth:
Phone: +61-8-6595-7018
Fax: +61 8 6595-7299
Melbourne:
Phone: +61-3-8807-6002
Fax : +61-3-8807-6577
BELGIUM
Phone: +32-2-344-0970
Fax: +32-2-344-1123
BRAZIL
Phone: +55-19-2104-6900
CHINA
Phone: +86-10-5689-3600
Fax: +86-10-5689-3800
FRANCE
Courbevoie
Phone: +33-1-4904-9000
Fax: +33-1-4904-9010
GERMANY
Ratingen
Phone: +49-2102-108-0
Fax: +49-2102-108-111
INDIA
Mumbai
Phone: +91-22-8354790
Fax: +91-22-8354791
New Delhi
Phone: +91-11-2-6164175
Fax: +91-11-5-1659635
ITALY
Phone: +39-081-7892-111
Fax: +39-081-7892-208
JAPAN
Tokyo
Phone: +81-03-6871-9008
Fax: +81-03-6890-4620
KOREA
Phone: +82-2-2274-0748
Fax: +82-2-2274-0794
MALAYSIA
Phone: +60-3-2161-0322
Fax: +60-3-2163-6312
MEXICO
Phone: +52-55-3640-5060
THE NETHERLANDS
Phone: +31-15-3808666
RUSSIA
Veliky Novgorod
Phone: +7-8162-55-7898
Fax: +7-8162-55-7921
Moscow
Phone: +7 495-585-1276
Fax: +7 495-585-1279
SAUDI ARABIA
Phone: +966-3-341-0278
Fax: +966-3-341-7624
SINGAPORE
Phone: +65-6861-6100
Fax: +65-6861-7172
SOUTH AFRICA
Phone: +27-11-452-1550
Fax: +27-11-452-6542
SOUTH & CENTRAL
AMERICA AND THE CARIBBEAN
Phone: +55-12-2134-1201
Fax: +55-12-2134-1238
SPAIN
Phone: +34-93-652-6430
Fax: +34-93-652-6444
UNITED ARAB EMIRATES
Phone: +971-4-8991-777
Fax: +971-4-8991-778
UNITED KINGDOM
Bracknell
Phone: +44-1344-460-500
Fax: +44-1344-460-537
Skelmersdale
Phone: +44-1695-526-00
Fax: +44-1695-526-01
UNITED STATES
Jacksonville, Florida
Phone: +1-904-570-3409
Corpus Christi, Texas
Phone: +1-361-881-8182
Fax: +1-361-881-8246
Deer Park, Texas
Phone: +1-281-884-1000
Fax: +1-281-884-1010
Houston, Texas
Phone: +1-281-671-1640
Fax: +1-281-671-1735
DIRECT SALES OFFICE LOCATIONS
Table of contents
Other GE Control Unit manuals

GE
GE NetworX Series Installation manual

GE
GE CompactPCI VMIACC-7055 Series User manual

GE
GE Mini COM Express 10 Quick user guide

GE
GE Baker Hughes 2900-40 Series User manual

GE
GE IC695ETM001 User manual

GE
GE MiCOM P40 Agile User manual

GE
GE b30 User manual

GE
GE MM200 User manual

GE
GE SX TRANSISTOR CONTROL IC3645SR4U404N2 User manual

GE
GE Masoneilan 48000 Series User manual

GE
GE C-400 Series User manual

GE
GE TLE Scalable 150 User manual

GE
GE EntelliGuard TU User manual

GE
GE CR194 User manual

GE
GE IC3645SR7T405T5 User manual

GE
GE IC3645SR4T405CT1 User manual

GE
GE 21861 User manual

GE
GE AV-300i User manual

GE
GE WH18X28174 Configuration guide

GE
GE Masoneilan 41005 Series User manual