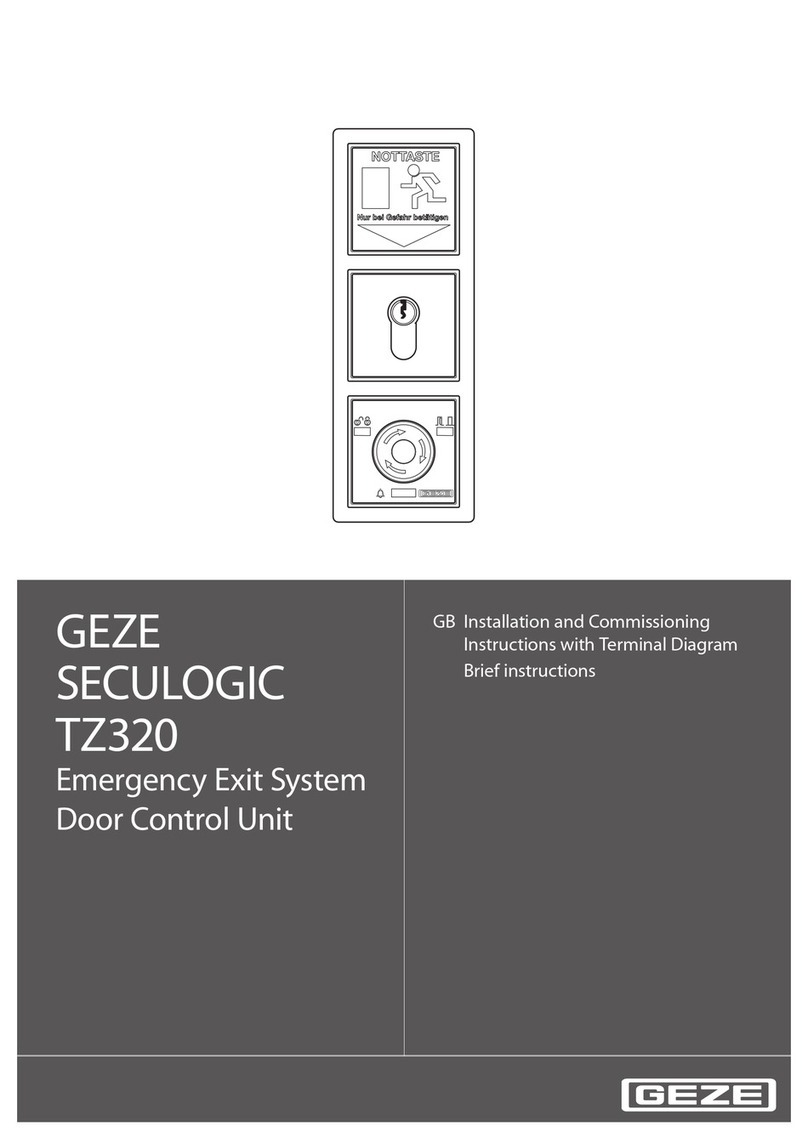
GEZE SecuLogic RWS TZ 300 Installation and operation manual

1
GEZE
SECULOGIC
TZ300
Emergency Exit System
Door Control Unit
GB Installation and Commissioning
Instructions with Terminal Diagram
Brief instructions

SECULOGIC TZ320
2
About this document
Contents
1About this document ..........................................................................................................................................2
1.1 Product description......................................................................................................................................................................................2
1.2 Related documents.......................................................................................................................................................................................2
1.3 Key to symbols................................................................................................................................................................................................3
2Safety and responsibility....................................................................................................................................3
2.1 General safety instructions .......................................................................................................................................................................3
2.2 Product liability..............................................................................................................................................................................................3
3Installation and assembly...................................................................................................................................4
3.1 Preconditions..................................................................................................................................................................................................4
3.2 Installing the ush-mounted door control unit.................................................................................................................................4
3.3 Fitting the surface-mounted door control unit .................................................................................................................................6
3.4 Replacing the lock cylinder .......................................................................................................................................................................7
4Commissioning......................................................................................................................................................8
4.1 Preconditions .................................................................................................................................................................................................8
4.2 Settings ............................................................................................................................................................................................................8
4.3 Description of basic functions..................................................................................................................................................................8
4.4 Fire detection system (BMA), hazard alert system (GMA), smoke and heat extraction system (RWA)..........................8
5Operation.................................................................................................................................................................9
5.1 Controlling door control unit TZ300 with the key switch..............................................................................................................9
5.2 Opening doors in emergencies and triggering the alarm.......................................................................................................... 10
5.3 Cancelling alarms ....................................................................................................................................................................................... 10
5.4 Alarm signal...................................................................................................................................................................................................11
5.5 Removing alarms and system faults.....................................................................................................................................................11
6Terminal diagram ................................................................................................................................................12
6.1 Door control units .......................................................................................................................................................................................12
6.2 Key switch.......................................................................................................................................................................................................14
6.3 Timer ................................................................................................................................................................................................................14
7Appendix................................................................................................................................................................15
7.1 Commissioning check list.............................................................................................................................................................15
About this document1
These instructions describe the installation and commissioning of the GEZE TZ300 door control unit.
Product description1.1
The GEZE door control unit is part of the SecuLogic emergency exit system. It is designed for controlling and
monitoring electrically interlocked emergency exit doors. The GEZE door control unit reliably secures doors
along emergency exit routes against unauthorized access. At the same time the built-in emergency stop
pushbutton allows instant passage in the event of an emergency.
Related documents1.2
All components are supplied with data sheets containing their technical specications. These data sheets,
as well as further documentation and the detailed installation and commissioning instructions with terminal
diagram No. 137351-00, is available on the Internet under www.geze.de/SecuLogic.
SECULOGIC TZ320
3
Safety and responsibility
Key to symbols1.3
Warning
In these instructions, warnings are used to warn against material damage and injuries.
Always read and observe these warnings.
Follow all instructions marked with the warning symbol and the word WARNING.
Warning
symbol
Warning Meaning
WARNING Danger for people.
Serious or fatal injury can occur if these instructions are not observed.
Further symbols used in these instructions
Important information and technical notes are emphasised to illustrate the correct operation.
Symbol Meaning
means “Important note”
means “Additional information”
Symbol for a user action. Here you have to take an action.
Observe the sequence if there are several action steps.
Safety and responsibility2
The GEZE door control unit has been designed according to the latest technical standards and acknowledged
safety rules and regulations. Dangers can, nevertheless, occur in its installation and use. You must therefore
observe the following instructions.
General safety instructions2.1
Installation, commissioning and repairs must be performed only by GEZE-authorized specialists.
Use only genuine GEZE parts for repairs.
GEZE accepts no liability for damage arising from unauthorized modications to the installation.
Primary building safety measures must be taken by the owner.
Cables must be laid according to standards VDE 0100 and VDE 0815.
Doors with electrical locks along escape routes should be inspected annually by a specialist. The specialist
must issue a certicate verifying the periodic inspection, which the owner must submit to the building in-
spectorate on request.0 The inspection can be performed by a GEZE service technician or a GEZE-authorized
service provider.
In addition, GEZE recommends a monthly inspection of the emergency exit system for visible damage and
faults by the owner. Any identied damage or faults must be rectied immediately by a GEZE service techni-
cian or a GEZE-authorized service provider.
Intended use
The GEZE door control unit is intended for controlling and monitoring electrically locked emergency exits. Third-
party products must be used only after consultation with GEZE.
Improper use
Improper use includes the connection of any products that are not expressly approved by GEZE.
Product liability2.2
According to manufacturers’ liability for their products as dened in the German product liability act, theà
information contained herein and in the associated installation instructions and terminal diagrams (product
information and intended use, incorrect use, product performance, product maintenance, obligation to in-
form and obligation to provide instruction) must be observed. Non-observation frees the manufacturer from
their liability.
Installation, function testing and maintenance must be performed only by GEZE-authorized personnel. GEZEà
accepts no liability for damage arising from unauthorized modications to the installation.
A combination with third-party devices invalidates GEZE’s warranty. For repair and maintenance, use onlyà
original GEZE parts.

SECULOGIC TZ320
4
Installation and assembly
Installation and assembly3
WARNING!
Risk of death through electric shock.
Installation must be performed only by GEZE-approved specialist personnel.
Check that all cables are voltage-free before installation.
Preconditions3.1
Cables are routed according to GEZE cabling diagramà
Miniature circuit-breakers as primary, mains-side disconnectorsà
Observation of standards VDE 0100 und VDE 0815 for laying cablesà
Tamper-proof cable routing according to VDE 0833 (surface-mounted cables in steel conduit)à
For ush-mounted cabling, ush-mounted sockets (depth 62.5 mm) at a mounting height of 850 mm fromà
upper edge of oor and up to 1200 mm for the emergency button
Installing the ush-mounted door control unit3.2
These instructions describe the recommended installation of the a ush-mounted door control unit using the
TZ300SN as an example.
Lay mains cable and ribbon cable in the ush-mounted sockets.
Connect cable to terminal blocks according to terminal diagram.
850 - 1200
60
71
71
62,5
Connect and t the PSU.
Connect the door control module with the key switch using the ribbon cable.

SECULOGIC TZ320
5
Installation and assembly
Fit the terminal blocks to the back of the door control unit.
C
C
D
D
Fit the door control unit.
Fit the green adhesive frame.
Test the unit’s function.

SECULOGIC TZ320
6
Installation and assembly
Fitting the surface-mounted door control unit3.3
Open the housing.
Fit the wall-mounting bracket near the door (height of emergency button: 850 mm – 1200 mm from oor
surface).
850 - 1200
Take o the mains connection cover.
Connect the 230 V cable to the screw terminals of the PSU and ret the cover.
Connect cable to terminal blocks according to terminal diagram.
Fit the terminal blocks to the back of the door control unit.
Secure loose cables with cable ties.

SECULOGIC TZ320
7
Installation and assembly
Hook in housing and secure with screws.
Fit the cover of the emergency button.
Test the unit’s function.
Apply the labels “EMERGENCY” and “Press only
in emergency” in the required language on the
provided elds on the emergency exit sign. The
required adhesive labels are supplied separately in
English, French, German and Norwegian.
Replacing the lock cylinder3.4
The lock cylinder must full the following requirements:
Prole half-cylinder, 40 mm (30/10)à
Eight-way adjustableà
When the plant is in operation, disable tamper
switch.
To do this, turn key to left for ten seconds.à
Right LED lights up green.à
Left LED goes out.à
Tamper alarm function is disabled for two minutes.à
Take housing o the wall bracket.
Unscrew key switch.
Release cap screw and remove the lock cylinder.
Replace the lock cylinder.
Fit a new lock cylinder and secure with cap screw.
Reassemble the door control unit in reverse order to
disassembly.
Test the unit’s function.

SECULOGIC TZ320
8
Commissioning
Commissioning4
Preconditions4.1
Doors with electrical locks along escape routes must be taken into operation after the manufacturer has certied
their suitability for the intended purpose. In addition, the correct installation and correct function of the electri-
cal lock must be veried by a specialist.
Settings4.2
No settings can be made or changed on the door control unit. All values, such as temporary unlocking, cancel-
ling, pre-alarm, etc. are permanently set.
Description of basic functions4.3
Temporary unlocking (KZF)4.3.1
Temporary unlocking releases the emergency door protection for a limited time. During this time, access through
the door is possible without triggering an alarm. It is activated with the built-in key switch or an external actuator
connected to the Temporary Unlocking input.
The temporary unlocking duration is about 20 seconds. This value can not be changed.
Cancellation of temporary unlocking4.3.2
When temporary unlocking is active, the door locks prematurely when it is closed before the temporary unlock-
ing time has expired. This prevents unauthorized access through the door after an authorized person has gone
through.
Pre-alarm4.3.3
If the door is passed through after the temporary unlocking time has expired, an audible signal is issued to warn
the user that the temporary unlocking time has expired. The pre-alarm duration is 60 seconds. If the door is
closed while a pre-alarm is active, the door is locked again automatically and the pre-alarm is reset.
Door alarm4.3.4
If the pre-alarm time is exceeded, the door alarm is triggered. This must then be reset with the built-in key switch
or with a new temporary unlocking command. If the door is closed while the door alarm is active, it locks and can
be unlocked again only after the alarm has been reset (except when the emergency button is pressed or emer-
gency unlocking is triggered). The door alarm is also triggered when the door is opened forcefully.
Fire detection system (BMA), hazard alert system (GMA), smoke and heat4.4
extraction system (RWA)
Alarm triggers4.4.1
If the BMA, GMA or RWA signal of a door control unit is applied, it is unlocked and a local alarm is triggered (audi-
ble through built-in buzzer and visual through built-in LED). The system remains unlocked as long as the signal is
applied and until the alarm has been reset. The alarm is triggered through a oating NC contact.
Resetting/acknowledging the alarm4.4.2
When the BMA signal is cancelled, the alarm is automatically reset after 60 seconds. The visual and audible signal
at the TZ300 goes out and the door control unit locks the door.
The system can be reset before the 60 seconds have expired with the built-in key switch of the TZ300.

SECULOGIC TZ320
9
Operation
Operation5
“Locked” LED1
Door state LED2
Alarm LED3
emergency button4
No. Indicator Colour Meaning
1Red Locked
Green Unlocked
Green ashing (every second) Temporary unlocking
2Red Door closed
Green Door open
3Yellow Alarm
Yellow ashing (every second) Pre-alarm
Yellow ashing Fault
Controlling door control unit TZ300 with the key switch5.1
Unlocking the door
When the system is unlocked, the locking elements are disabled and the door can be opened.
Turn the key to the left and hold it for about one second.
LED 1 lights up green. The door is unlocked.à
Locking the door
When the system is unlocked, the locking elements are enabled and the door can not be be opened.
Turn the key to the right.
LEDs 1 and 2 light up red. The door is locked.à
Unlocking the door temporarily (temporary unlocking = 20 seconds)
With the temporary unlocking function, the door can be unlocked with the key switch for 20 seconds. When this
time has expired, the door is locked again.
If the door is not closed after temporary unlocking, a pre-alarm is issued.à
If the door is closed after the temporary unlocking time has expired, the door is locked again.à
If the temporary unlocking function is triggered again while the function is still active, the temporary unlock-à
ing period starts again (is retriggered).
Turn the key to the right.
LED 1 ashes green.à

SECULOGIC TZ320
10
Operation
Opening doors in emergencies and triggering the alarm5.2
When the emergency button is pressed the door’s locking elements are de-energized and the door can be
opened (direct unlocking).
Press the emergency button.
LED 1 lights up green and LED 3 lights up yellow. The door is unlocked.à
The alarm is triggered.à
Cancelling alarms5.3
Alarms of the door control unit remain active until their cause has been eliminated and the alarm is acknowl-
edged at the door control unit. (Exception: emergency unlocking through BMA,GMA or RWA, after which the
alarm is automatically reset after 60 seconds; see section 4.4.3.)
Resetting emergency button5.3.1
When the emergency has passed, the emergency button must be reset.
Remove emergency button cover.
Turn the emergency button to the right.
The emergency button returns to its normal state.à
Ret the cover.
Acknowledge the alarm.
Acknowledge alarm5.3.2
Precondition:
The alarm cause has been eliminated.
To acknowledge the alarm and lock the door
Turn the key to the right.
To acknowledge the alarm and unlock the door
Turn the key to the left.
The door alarm can also be acknowledged through the temporary unlocking input.
A tamper alarm can be acknowledged only 30 seconds after the alarm cause has been eliminated.
For the duration of the tamper alarm the TZ300 remains locked. It can, however, be unlocked with the emergency
button.
If the alarm can not be acknowledged with the key switch, a new alarm may be active. If, for example, the cover
was not retted after resetting the emergency button, a tamper alarm is triggered when emergency unlock-
ing is acknowledged, and the door control unit locks the door. This is indicated by a change in the sound of the
audible signal.

SECULOGIC TZ320
11
Alarm signal5.4
Misuse of the system and emergency situations are indicated by a built-in buzzer and yellow alarm LED 3.
Alarm Alarm LED Alarm bell
Pre-alarm Yellow ashing light
(1 s on, 1 s o)
Acoustic signal, 2 beeps
Door alarm Yellow continuous light Acoustic signal, 2 seconds continuous
Tamper alarm Yellow continuous light Acoustic signal, 4 beeps
Alarm
-Unlocking through emergency button-Trig-
gering trough BMA/GMA
Yellow continuous light Acoustic signal, 4 seconds continuous
System fault Yellow ashing light
at 2 second interval
No acoustic signal
Removing alarms and system faults5.5
Alarm state Cause of alarm Elimination of alarm cause
Pre-alarm Door not closed after unlocking period has expired.
No Closed signal
Close door.
Unlocking the door
Door alarm No Closed signal Close door.
Check door contact.
No Locked signal Check locking element.
Tamper alarm Tamper switch of door control unit not
closed (on UP only).
Close contact.
Fit cover.
After duration of tamper alarm, ac-
knowledge alarm.
Key switch tamper switch not closed.
Alarm Emergency button of TZ300 pressed
(direct unlocking).
Reset door control unit emergency
button.
Fuse in TST300 blown Check fuse.
Replace fuse.
Emergency unlocking through connected BMA,
GMA or RWA.
Check BMA, GMA or RWA and switch
o emergency unlocking signal.
Check input of aected door control
unit.
2K resistor between terminals 2 and 10 not set and
no BMA, GMA or RWA connected.
Fit a 2K resistor between terminals 2
and 10.
Locking element connected with reversed polarity.
Emergency button LED goes on and o. Other LEDs
remain o. (With PSUs NET220 und NT19.2-24. With
larger PSUs the fuse blows.)
Immediately isolate from the power
supply and connect correctly.
Locking element not connected. Connect locking element.
Jumper on FTÖ331U was not removed.
FTÖ332 is connected without RP220.
Short-circuit in the supply line of the locking ele-
ment.
Remove jumper on FTÖ331.
Check locking element supply line for
short-circuit.
Connect FTÖ332 with RP220.
Press emergency button.
Release (pull out) emergency button.
Controller defective Replace door control unit.

SECULOGIC TZ320
12
Terminal diagram
Terminal diagram6
Door control units6.1
Latch
LED
Door
LED
Buzzer
Alarm LEDs
Tamper
switch
Emergency
button LED
Programming
interface
red
orange
blue
Door control unit TZ300 (terminals, fuses)6.1.1
Fuse
Name Value Meaning
F1 1.5 A, SMF 125 V, quick-acting 24 V external
Terminal assignment
Max. cable cross-section for screw and plug-in terminals: 1 mm²
Terminal function
X103 Blade terminal for GEZE
key switch
X100 Red terminal eld 1 Supply GND
324 V DC supply
X101 Orange terminal eld 5 Locking element, +, 24 V DC
6Locking element, -, GND
14 Door Locked feedback
15 Door Closed feedback
224 V DC
224 V DC
9Brief Unlocking input
10 Emergency Unlocking input
224 V DC
X102 Blue terminal eld 2 24 V DC
22 NO, alarm output
Max. 1 A, 24 V DC
21 Com, alarm output
20 NC, alarm output
1GND
Notes about the terminal diagram6.1.2
The notes apply for the following terminal diagram of the various versions of the TZ300.
1) Building mains fuse.
2) Spatially separate primary and secondary side. With the TZ320 the PSU is tted outside the door control unit.
3) TZ300SN UP: Protection class II, PE (protective earth) conductor is not connected.
TZ300SN AP: Protection class I with PE conductor testing according to VDE0100.
4) 2K resistor set by default. In delivery state the 2K resistor is tted.
When connecting a BMA, GMA or RWA, remove the resistor and connect it in series with the NC contact of the
BMA, GMA or RWA (see plan “Emergency unlocking through BMA, GMA or RWA”).
5) Contact closed when door closed.
6) When a GEZE alarm bell or siren is tted, a jumper must be set.

SECULOGIC TZ320
13
Terminal diagram
Door control unit TZ300S, TZ300SN6.1.3
blue

SECULOGIC TZ320
14
Terminal diagram
Emergency unlocking through BMA, GMA or RWA6.1.4
If a BMA, GMA or RWA system is connected, the 2K resistor tted to terminals 2 and 10 of the TZ300 must be removed and con-
nected in series with the NC contact of the triggering device.The alarm automatically resets after 60 seconds when its cause has been
removed (contact closed again).
Key switch6.2
Key switch SCT221/SCT to temporary unlocking6.2.1
Brief unlocking input
24 V DC
(orange terminal strip)
No. 094170, UP Jung LS990, stainless steel
SCT No. 117996 + 024467 UP AS500
SCT No. 117996 + 024467 + 120503 AP AS500
SCT221 No. 054240 + 024467 without PHZ UP
SCT221 No. 054532 + 024467 without PHZ AP
SCT221 No. 054245 + 024467 with PHZ UP
SCT221 No. 054533 + 024467 with PHZ AP
No. 094012, UP GIRA E2, pure white
Key switch SCT320 for external control unlocking, locking, temporary unlocking and6.2.2
acknowledging alarms
Connected through SCT320 of door control unit TZ300
24 V DC
Lock SCT, KZF, acknowledge
Unlock SCT, acknowledge
Tamper
key switch
24 V DC
Lock SCT, KZF, acknowledge
Unlock SCT, acknowledge
Tamper
key switch
No. 132278, UP GIRA E2, anthracite
No. 130370, UP GIRA E2, pure white
No. 131984, UP Jung AS500, WW
Timer6.3
Brief unlocking input
24 V DC
(orange terminal strip)
Floating NO
contact
The door control unit is temporarily unlocked for the duration of the contact.

SECULOGIC TZ320
15
Appendix
Appendix7
Commissioning check list7.1
Yes No Not tted
Power supply OK
Upper edge of all emergency buttons between 850 and 1200 mm from
oor surface
All emergency button labels applied
Cables laid according to DIN VDE 0833, tamper-protected
All screws of magnet mounting tightened
Rubber buers on screws of magnetic disc OK
Magnet surfaces cleaned
Door passage lights at least 2000 mm
Emergency door opener tted correctly and tamper-protected
All cables connected, exposed cables insulated
Emergency button illumination working
“Emergency button” function OK
Tamper switches working correctly
Unlocking through key switch is working correctly
Locking through key switch is working correctly
Feedback from magnet and/or door opener working correctly
Additional door contacts working correctly
Door Leaf Open/Closed LED working correctly
Door Locked/Unlocked LED working correctly
Alarm/Fault LED working correctly
2K resistor correctly set if BMA, GMA or RWA connected
Magnets working; door openers are locking
All access possibilities OK (access control, etc.)
Emergency exit doors OK
External key switch OK
External alarm generator/alarm generator combination working correctly
Uninterruptible power supply working correctly

Germany
GEZE Sonderkonstruktionen GmbH
Planken 1
97944 Boxberg-Schweigern
Tel. +49 (0) 7930-9294-0
Fax +49 (0) 7930-9294-10
E-Mail: sk.de@geze.com
Germany
GEZE GmbH
Niederlassung Nord/Ost
Bühringstraße 8
13086 Berlin (Weissensee)
Tel. +49 (0) 30-47 89 90-0
Fax +49 (0) 30-47 89 90-17
E-Mail: berlin.de@geze.com
Germany
GEZE GmbH
Niederlassung West
Nordsternstraße 65
45329 Essen
Tel. +49 (0) 201-83082-0
Fax +49 (0) 201-83082-20
E-Mail: essen.de@geze.com
Germany
GEZE GmbH
Niederlassung Mitte
Adenauerallee 2
61440 Oberursel (b. Frankfurt)
Tel. +49 (0) 6171-63610-0
Fax +49 (0) 6171-63610-1
E-Mail: frankfurt.de@geze.com
Germany
GEZE GmbH
Niederlassung Süd
Reinhold-Vöster-Straße 21-29
71229 Leonberg
Tel. +49 (0) 7152-203-594
Fax +49 (0) 7152-203-438
E-Mail: leonberg.de@geze.com
Germany
GEZE Service GmbH
Reinhold-Vöster-Straße 25
71229 Leonberg
Tel. +49 (0) 7152-9233-0
Fax +49 (0) 7152-9233-60
E-Mail: service-info.de@geze.com
Germany
GEZE Service GmbH
Niederlassung Berlin
Bühringstraße 8
13086 Berlin (Weissensee)
Tel. +49 (0) 30-470217-30
Fax +49 (0) 30-470217-33
E-Mail: service-info.de@geze.com
Austria
GEZE Austria GmbH
Mayrwiesstraße 12
5300 Hallwang b. Salzburg
Tel. +43-(0)662-663142
Fax +43-(0)662-663142-15
E-Mail: austria.at@geze.com
Baltic States
GEZE GmbH Baltic States oce
Dzelzavas iela 120 S
1021 Riga
Tel. +371 (0) 67 89 60 35
Fax +371 (0) 67 89 60 36
E-Mail: oce-latvia@geze.com
Benelux
GEZE Benelux B.V.
Leemkuil 1
Industrieterrein Kapelbeemd
5626 EA Eindhoven
Tel. +31-(0)40-26290-80
Fax +31-(0)40-26 290-85
E-Mail: benelux.nl@geze.com
Bulgaria
GEZE Bulgaria - Trade
Representative Oce
61 Pirinski Prohod, entrance „B“,
4th oor, oce 5,
1680 Soa
Tel. +359 (0) 24 70 43 73
Fax +359 (0) 24 70 62 62
E-Mail: oce-bulgaria@geze.com
China
GEZE Industries (Tianjin) Co., Ltd.
Shuangchenzhong Road
Beichen Economic Development
Area (BEDA)
Tianjin 300400, P.R. China
Tel. +86(0)22-26973995-0
Fax +86(0)22-26972702
E-Mail: Sales-info@geze.com.cn
China
GEZE Industries (Tianjin) Co., Ltd.
Branch Oce Shanghai
Unit 25N, Cross Region Plaza
No. 899, Ling Ling Road,
XuHui District
200030 Shanghai, P.R. China
Tel. +86 (0)21-523 40 960
Fax +86 (0)21-644 72 007
E-Mail: chinasales@geze.com.cn
China
GEZE Industries (Tianjin) Co., Ltd.
Branch Oce Guangzhou
Room 17C3
Everbright Bank Building, No.689
Tian He Bei Road
510630 Guangzhou, P.R. China
Tel. +86(0)20-38731842
Fax +86(0)20-38731834
E-Mail: chinasales@geze.com.cn
China
GEZE Industries (Tianjin) Co., Ltd.
Branch Oce Beijing
Rm3A02, Building 3,
ZhuBang 2000 Business Plaza,
No. 98, Balizhuang xili,
Chaoyang District,
100025 Beijing, P.R.China
Tel. +86-(0)10-8797 5177/-78
Fax +86-(0)10-8797 5171
E-Mail: chinasales@geze.com.cn
France
GEZE France S.A.R.L.
ZAC de l’Orme Rond
RN 19
77170 Servon
Tel. +33-(0)1-606260-70
Fax +33-(0)1-606260-71
E-Mail: france.fr@geze.com
Hungary
GEZE Hungary Kft.
Bartók Béla út 105-113.
Budapest
H-1115
Tel. +36 (1) 481 4670
Fax +36 (1) 481 4671
E-Mail: oce-hungary@geze.com
Iberia
GEZE Iberia S.R.L.
Pol. Ind. El Pla
C/Comerc, 2-22, Nave 12
08980 Sant Feliu de Llobregat
(Barcelona)
Tel. +34(0)9-02194036
Fax +34(0)9-02194035
E-Mail: info@geze.es
India
GEZE India Private Ltd.
MF2 & 3, Guindy Industrial Estate
Ekkattuthangal
Chennai - 600 097
Tamilnadu
Tel. +91 (0) 44 30 61 69 00
Fax +91 (0) 44 30 61 69 01
E-Mail: oce-india@geze.com
Italy
GEZE Italia Srl
Via Giotto, 4
20040 Cambiago (MI)
Tel. +3902950695-11
Fax +3902950695-33
E-Mail: italia.it@geze.com
Italy
GEZE Engineering Roma Srl
Via Lucrezia Romana, 91
00178 Roma
Tel. +3906-7265311
Fax +3906-72653136
E-Mail: roma@geze.biz
Kazakhstan
GEZE Central Asia
050061, Almaty, Kasakhstan
Rayimbek ave. 348, A, oce 310
Tel. +7 (0) 72 72 44 78 03
Fax +7 (0) 72 72 44 78 03
E-Mail: oce-kazakhstan@geze.com
Poland
GEZE Polska Sp.z o.o.
ul. Annopol 21
03-236 Warszawa
Tel. +48 (0)22 440 4 440
Fax +48 (0)22 440 4 400
E-Mail: geze.pl@geze.com
Romania
GEZE Romania S.R.L.
IRIDE Business Park
Building nr. 10, level 2
Str. Dimitrie Pompei nr. 9–9a
RO-020335 Bucharest, sector 2
Tel. +40 (0) 316 201 257
Fax +40 (0) 316 201 258
E-Mail: oce-romania@geze.com
Russian Federation
GEZE GmbH Representative
Oce Russia
Kolodesnij pereulok3, str. 25
Oce Nr. 5201-5203
107076 Moskau
Tel. +7 (0) 49 55 89 90 52
Fax +7 (0) 49 55 89 90 51
E-Mail: oce-russia@geze.com
Scandinavia
GEZE Scandinavia AB
Mallslingan 10
Box 7060
18711 Täby, Sweden
Tel. +46(0)8-7323-400
Fax +46(0)8-7323-499
E-Mail: sverige.se@geze.com
Scandinavia
GEZE Norway
Industriveien 34 B
2072 Dal
Tel. +47(0)639-57200
Fax +47(0)639-57173
E-Mail: norge.se@geze.com
Scandinavia
GEZE Finland
Postbox 20
15871 Hollola
Tel. +358(0)10-4005100
Fax +358(0)10-4005120
E-Mail: nland.se@geze.com
Scandinavia
GEZE Denmark
Høje Taastrup Boulevard 53
2630 Taastrup
Tel. +45(0)46-323324
Fax +45(0)46-323326
E-Mail: danmark.se@geze.com
South Africa
DCLSA Distributors (Pty.) Ltd.
118 Richards Drive, Midrand,
Halfway House Ext. 111
P.O. Box 7934
Midrand 1685
Tel. +27(0)113158286
Fax +27(0)113158261
E-Mail: info@dclsa.co.za
Switzerland
GEZE Schweiz AG
Bodenackerstrasse 79
4657 Dulliken
Tel. +41-(0)62-2855400
Fax +41-(0)62-2855401
E-Mail: schweiz.ch@geze.com
Turkey
GEZE GmbH Türkiye - İstanbul
İrtibat Bürosu
Ataşehir Bulvarı, Ata 2/3
Plaza Kat: 9 D: 84 Ataşehir
Kadıköy / İstanbul
Tel. + 90 (0) 21 64 55 43 15
Fax + 90 (0) 21 64 55 82 15
E-Mail: oce-turkey@geze.com
Ukraine
Repräsentanz GEZE GmbH Ukraine
ul. Vikentiya Hvoyki, 21,
oce 151
04080 Kiev
Tel. +38 (0) 44 49 97 725
Fax +38 (0) 44 49 97 725
E-Mail: oce-ukraine@geze.com
United Arab Emirates/GCC
GEZE Middle East
P.O. Box 17903
Jebel Ali Free Zone
Dubai
Tel. +971(0)4-8833112
Fax +971(0)4-8833240
E-Mail: geze@emirates.net.ae
United Kingdom
GEZE UK Ltd.
Blenheim Way
Fradley Park
Licheld
Staordshire WS13 8SY
Tel. +44(0)1543443000
Fax +44(0)1543443001
E-Mail: info.uk@geze.com
GEZE GmbH
P.O.Box 1363
Reinhold-Vöster-Straße 21–29
71229 Leonberg
Germany
Tel.: 0049 7152 203-0
Fax.: 0049 7152 203-310
www.geze.com 139930-00
Other manuals for SecuLogic RWS TZ 300
2
Table of contents
Other GEZE Control Unit manuals

GEZE
GEZE MBZ300 User manual

GEZE
GEZE SecuLogic TZ320 Installation and operation manual

GEZE
GEZE THZ User manual

GEZE
GEZE GCVR 800 Touch Instruction manual

GEZE
GEZE IO 420 User manual

GEZE
GEZE TS 5000 E-ISM User manual

GEZE
GEZE GCVR 300 Touch T Instruction manual

GEZE
GEZE RSZ6 User manual

GEZE
GEZE RSZ 7 User manual

GEZE
GEZE SecuLogic TZ320 Installation and operation manual