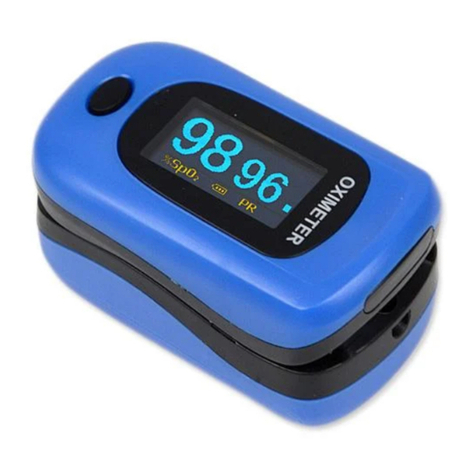
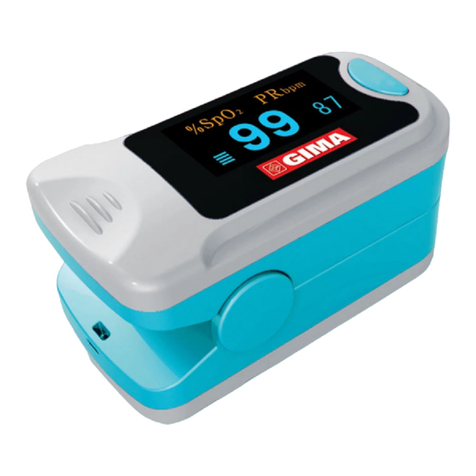
Gima OXY-100 User manual

PROFESSIONAL MEDICAL PRODUCTS
Gima S.p.A.
Via Marconi, 1 - 20060 Gessate (MI) Italy
gima@gimaitaly.com - export@gimaitaly.com
www.gimaitaly.com
PULSOXIMETRO OXY-100
OXY-100 PULSE OXIMETER
OXYMÈTRE OXY-100
OXÍMETRO OXY-100
OXÍMETRO DE PULSO OXY-100
Manuale d’uso - User manual
Manuel de l’utilisateur
Guía de uso - Guia para utilização
ATTENZIONE: Gli operatori devono leggere
e capire completamente questo manuale
prima di utilizzare il prodotto.
ATTENTION: The operators must carefully read
and completely understand the present manual
before using the product.
AVIS: Les opérateurs doivent lire et bien
comprendre ce manuel avant d’utiliser le produit.
ATENCIÓN: Los operadores tienen que leer y entender
completamente este manual antes de utilizar el producto.
ATENÇÃO: Os operadores devem ler e entender
completamente este manual antes de usar o produto.
M34342-M-Rev.4-02.19
Gima S.p.A.
Via Marconi, 1
20060 Gessate (MI) Italy
Made in China
34342 0476

23 ENGLISH
Instructions for Safe Operation
- Check the device to make sure that there is no visible damage that may
aect user’s safety and measurement performance. It is recommended that
the device should be inspected minimally before each use. If there is obvious
damage, stop using the device.
- Necessary service must be performed only by qualied technicians. Users
are not permitted to service this device.
- The oximeter must not be used with the devices and accessories not specied
in User Manual.
Cautions
- Explosive hazard—DO NOT use the oximeter in environment with inammable
gas such as some ignitable anesthetic agents.
- DO NOT use the oximeter while the Patient is under MRI or CT scanning.
This device is NOT MRI Compatible.
Warnings
- Discomfortable or pain may occur if using the sensor of this device
continuously on the same location for a long time, especially for the patients
with poor microcirculation. It is recommended that the Oximeter should not be
applied to the same location for longer than 2 hours or less if any abnormal
condition is found. Frequently check and re-position the Oximeter.
- For the individual patients, there should be a more prudent inspecting in the
placing process. The sensor can not be placed on the edema and tender tissue.
- The local law should be followed when disposing of the expired device or
its accessories.
Attentions
- Keep the oximeter away from dust, vibration, corrosive substances, explosive
materials, high temperature and moisture.
- If the Oximeter gets wet, please stop operating it and do not resume operation
until it is dry and checked for correct operation. When it is carried from a cold
environment to a warm and humid environment, please do not use it immediately.
Allow at least 15 minutes for the Oximeter to reach ambient temperature.
- DO NOT operate the button on the front panel with sharp materials or sharp point.
- DO NOT use high temperature or high pressure steam disinfection on the
oximeter and probes. Refer to related chapter for instructions regarding
cleaning and disinfection.
- The intended use of this device is not for therapy purpose.
24
1 Overview
1.1 Appearance
Figura 1-1
DC power inputData interface
Display screen
Navigation key
Mode / OK
SpO2 probe
connector
Power / Back
Recall / Mute
1. Display screen: display SpO2plethysmogram and parameter values.
2. Navigation key:
: Up/Left/Increase
Press this key, the default screen can be shifted to display pulse rate (PR) or
perfusion index (PI). If on the system setup screen, press it to move the cursor
upwards or to the left and adjust parameter values.
: Down/Right/Decrease
Its function is similar with the key “ : Up/Left/Increase”.
3. (Mode/OK): press this key, the screen can be shifted between default
screen display and alternative screen display; longtime press it, the menu
ENGLISH

25
screen will be displayed; when you nish parameter setting, press this key
to conrm.
4. (Data interface): used for uploading data (Optional function).
5. (DC power input): used for connecting external DC power input for
recharging the built-in rechargeable battery.
6. (Power/Back): Power on/o the device by longtime pressing; short time
press it to back to the previous level of menu while setting menu operation.
7. (Recall/Mute): Longtime press it to enter SpO2 trend data recall screen;
when the device is beeping, short time pressing will mute the indication sound,
the mute state will persist for about 90s. After this mute period (90s), then the
indication sound will resume.
8. Icon “SpO2”: SpO2Probe Connector.
1.2 Product Name and Model
Name: Oxy-100 Pulse Oximeter
Model: 34342
1.3 Structure
It consists of the main unit and SpO2probe.
1.4 Features
- It is lightweight, small in size and easy to carry
- Color LCD to display plethysmogram and parameters
- Monitor SpO2and Pulse Rate simultaneously
- PI (Perfusion Index) display is available
- Up to 384 hours storage and recall of SpO2and PR data.
- Audible and visual alert function is available
- Data transmission to PC for view and analysis (Optional)
- Power saving mode is available
1.5 Intended Use
This Oxy-100 Pulse Oximeter is intended for measuring and recording the pulse
rate and functional oxygen saturation (SpO2). It is applicable for monitoring
SpO2and pulse rate of adult and pediatric patients in clinical institutions and
homes.
ENGLISH

26
Figure 2-1
Figure 2-2
Figure 2-3 Fixing Holder
1.6 Working Environment
Operating temperature: 5~40°C
Operating humidity: 30~80%
Atmospheric pressure: 70kPa~106kPa
2 Installation of Battery and Holder
1) Open the rear panel with coin or an ordinary at
screwdriver, as shown in Figure 2-1.
2) AAAlkaline batteries or Lithium battery (optional):
- If AA alkaline batteries (non-chargeable) are
provided, then according to the polarity mark,
insert three AA batteries into battery house, as
shown in Figure 2-2.
- If Lithium battery (rechargeable) is provided,
place the lithium battery into the battery house, and
insert its terminal header into the corresponding
connector in the battery compartment.
3) Close the battery cover and lock it.
4) Fixing Holder, as shown in gure 2-3.
Notes: 1) When the device is provided
with AA alkaline batteries and it shows
low battery, the user should replace
the batteries in time.
2) When the device is provided with
lithium battery and it shows low
battery, the user should recharge the
battery in time.
That is, connect one end of the
charging cable to the device’s DC
power input, and connect the other
end to the USB power (from PC
or DC adapter). When the display
screen appears the rolling icon “
“, it means the battery is charging;
ENGLISH

27
When the screen shows icon “ “, it means the battery is
fully charged.
Pulling out the charging cable, then the above icon will disappear.
Safety instruction for operation
Do not throw the battery into the water, liquid and re.
Keep the battery out of the reach of the child.
Do not disassemble the battery.
The local law should be followed when disposing of the expired device or its
accessories in order to protect environment from being polluted.
Please remove the battery and put it to specied condition if the device will
not be used for a long time.
If the battery is damaged, please replace it with the same model AA alkaline
battery or lithium battery provided by the same manufacturer.
In order to prolong the lithium battery’s using life, please pay attention to the
battery maintenance.
3 SpO2Probe Connection
Connect the SpO2 probe to the connector labeled “SpO2” at the right side of
the Oximeter. After starting up the Oximeter, insert one nger (index nger,
middle nger or ring nger with proper nail length) into the probe according to
the demonstration shown in the following gure.
Figure 3-1 Demonstration for Using SpO2
probe (nger clip)
ENGLISH

28
Instructions of Operation
1. The nger should be put in properly and correctly.
2. Do not shake the nger and keep at ease during measurement.
3. Do not put wet nger directly into sensor.
4. Avoid placing the sensor on the same limb which is wrapped with a cu for
blood pressure measurement or during venous infusion.
5. Do not let anything block the emitting light from the sensor.
6. Vigorous exercise and electrosurgical device interference may aect the
measuring accuracy.
7. Using enamel or other makeup on the nail may aect the measuring
accuracy.
8. If the rst reading appears with poor waveform (irregular or not smooth),
then the reading is unlikely true, the more stable value is expected by waiting
for a while, or a re-inserting nger is needed when necessary.
4 Operation
4.1 Power on/o the Oximeter
- When the device is o, press “ ” power/back key for 2 seconds to power
up the Oximeter, then it will enter into measurement display screen.
- If the Oximeter is working, longtime press “ ” power/back key to power it o.
- During measurement, if the “probe o” is detected for longer than one minute,
then the device will power o automatically.
- If not in the measurement state and there is no any key operation for 1 minute,
the device will power o automatically as well.
4.2 Default Display Screen
Press “ ” power key for 2 seconds to start up the Oximeter, the display
screen shows the prompt “Please use appropriate sensor according to the
patient type and change the related settings” rstly, then the screen will display
the default screen, as shown in Figure 4-1.
ENGLISH

29
Figure 4-1 Default Screen
Description:
Sound indicator “ “ means the device is on mute status, the user can turn
on the indication sound by short pressing
recall/mute “ ” key. During the measurement, over-limit event or probe o
event can activate the alert indication sound.
“ ”: Memory full icon; if the memory is full, the memory full icon “ “ appears
on the screen. No display of this icon means the current storing space is not
full. If the memory is full, the data storing will continue in such way the new
record will overwrite the oldest record, so that it’s recommended to upload the
stored data into the computer in time.
During the measurement, short time press recall/mute “ ” key to turn o (or
resume) the device sound (including pulse beep sound, audible alert and key
click), while the pulse symbol “ ” still blinks. For alert sound mute function.
Refer to Section 6.2 for detail of the sound mute function.
Note: The pitch tone of pulse beep (dididi...) is modulated by the SpO2 value,
that means the pitch tone changes when the measured SpO2 changes. The
higher the SpO2 value is, the higher the tone frequency of pulse beep (sound
becomes sharper); The lower the SpO2 value is, the lower the tone frequency
of pulse beep (sound becomes atter).
ENGLISH

30
4.3 Display Screen with PI Value
On the default display screen, press “ / ” Navigation key to shift screens
between default screen and display screen with PI value. The display screen
with PI value is shown below.
Figure 4-2 Display Screen with PI Value
4.4 Menu Setup
On the above mentioned screens, longtime press “ ” key for entering into
setup menu screen (as shown in Figure 4-3).
Figure 4-3 Setup Menu Screen
Screen Description
- “Setting”: set parameter values, refer to Chapter 4.4.1 for details.
- “Upload data”: enter into data uploading state, refer to Chapter 4.4.2 for
details.
- “Default”: enter into the factory default setting, refer to Chapter 4.4.3 for details.
“Version”: for viewing version number of the software, refer to Chapter 4.4.5
for details.
ENGLISH

31
4.4.1 Setting
On the menu screen, select “Setting” and then press “ ” key for entering
into system setup screen. The setup screen is as shown in the following gures.
Figure 4-4 System Setup Screen
Operation Instructions:
- Patient: two options:”ADU ” for adult, and “PED ” for pediatric.
- SpO2 Lo-Limit: SpO2 low limit setting; range: 50%~99%, the step is 1%. The
factory default value for adult is 90%
and 95% for pediatric.
- PR Hi-Limit: High limit setting of pulse rate; range: 100~240bpm. From 100
to 150, the step is 1bpm, and from 150 to 240, the step is 5bpm. The factory
default value for adult is 120bpm and 160bpm for pediatric.
- PR Lo-Limit: Low limit setting of pulse rate; range: 30~99bpm, and the step
is 1bpm. The factory default value for adult is 50bpm and 60bpm for pediatric.
Note: When the SpO2 reading is lower then the preset alert setting or the
PR reading is higher or equal to the preset alert setting, then the over-limit
alert event will be activated, that’s, the alert sound “bibibibi” occurs, and the
corresponding reading(s) blinks. When measured on pediatric, if the SpO2
reading is lower or equal to the preset alert setting for 10 seconds, then the
alert sound and blinking display will be activated.
- Date: Date setting
When cursor stays on the Year of the date, press “ ” (Mode/OK) key to
active Year option, the cursor ashes on the Year of the date;
Press “ / ” (Navigation key) to adjust year.
Press “ ” (Power/back) key or “ ” (Mode/OK) key to conrm and exit
from date setting.
The procedures of adjusting Month value and Day value are the same with
Year adjustment.
Date Format: yy-mm-dd
ENGLISH

32
Note: The setting operations of other parameters (such as TIME, PATIENT,
RECORDING INTERVAL, POWER SAVING etc.) are the same with date
setting.
- Time: Time setting
- Recording: Time interval for recording data (SpO2 & PR), there are ve
options: “1s, 2s, 4s, 8s” and “OFF”.
1) “1s”: the least length of data record is set to 30 seconds, and the maximal
length for one record is limited to 1 hour. The total storage time is up to 48 hours.
2) “2s”: the least length of data record is set to 60 seconds, and the maximal
length for one record is limited to 2 hours. The total storage time is up to 96
hours.
3) “4s”: the least length of data record is set to 120 seconds, and the maximal
length for one record is limited to 4 hours. The total storage time is up to 192
hours.
4) “8s”: the least length of data record is set to 240 seconds, and the maximal
length for one record is limited to 8 hours. The total storage time is up to 384
hours.
5) When the option is set to “OFF”, the device will not store the measuring data.
- Power saving: power saving setting; two options: “on” and “o”. The factory
default setting is “on”. If the power saving mode is on during measurement,
and there is no key operation for 2 minutes, the screen display will be dim
for power saving. The display brightness will resume to normal condition by
pressing any key.
- Volume (optional): 3 levels setting: “1”, “2” and “3”, corresponding to the
speaker volume icons of “ “,” “ and “ “ respectively. The speaker
volume icon indicates the volume of any sound generated by the device for
key clicks, over-limit alerting, pulse beep and audible probe-o indication etc..
ENGLISH

33
4.4.2 Upload Data
On the menu screen, select “UPLOAD DATA” and then press “ ” key for
entering into connecting status (as shown in Figure 4-5).
Note: Make sure the USB data cable (optional) is well connected between the
device and PC before uploading data.
When you transmit data (SpO2and PR values) to your computer, please let the
oximeter stay in connecting status. Do the following operation by the instruction
in “Oximeter Data Manager User Manual”. The data uploading will be activated.
Figure 4-5 Connecting Status Screen
4.4.3 Default
On the menu screen, select “Default“ and then short time press “ “ key
for entering into default setting screen (as shown in Figure 4-6). Press the
Navigation “ / ” key to choose “Yes” or “No”, and press “ “ mode/OK
key to conrm or exit. Short time press “ “ power/back key to return to the
previous menu screen.
Figure 4-6 Default Setting Screen
ENGLISH

34
4.4.4 Version
On the menu screen, select “VERSION” and then press “ ” key for entering
into version screen (as shown in Figure 4-7).
Figure 4-7
4.5 Data Recall
On the default display screen, longtime press “ ” ( Recall/mute) key to enter
into record list display screen.
Figure 4-8 Record List
ENGLISH

35
4.5.1 Data Recall
Choose one record in the record list, then press “ ” (mode/OK) key, the
display screen will display trend graph, as shown in Figure 4-9A.
Figure 4-9A Trend Graph Display Screen
SpO2 ordinate PR ordinate
PR Trend graph
SpO2 Trend graph
Recording interval
Operation Instructions:
- Short time press “ ” mode/OK key to shift the trend graph screens (as
shown in Figure 4-9A , Figure 4-9B and Figure 4-9C)
- Short time press “ “ power/back key to return to record list screen.
Figure 4-9B Trend Graph Display
Screen
Figure 4-9C Trend Graph Display
Screen
ENGLISH

36
4.5.2 Data Deletion
On the menu screen, longtime press “ ” key and the records list will appear.
At this time, longtime pressing “ ” key again, an message “Are you sure to
delete all?” prompts on the screen, as shown in Figure 4-10.
Figure 4-10
At this time, press “ / ” navigation key to select “Yes” or “No”, and press
“” mode/OK key to conrm or exit. Or short time press “ “ power/back
key to return to record list screen.
5 Technical Specications
A. Display Mode: Color dot-matrix LCD;
B. Power Supply:
d.c. 4.5V(3 AA alkaline batteries), or d.c. 3.6V (Lithium rechargeable battery)
Operating current: ≤180mA
C. SpO2Meaurement
Transducer: dual-wavelength LED sensor with wavelength: Red light: 663 nm,
Infrared light: 890 nm.
Maximal optical output power: ≤ 2mW maximum average
Display range: 35~99%
Measuring range: 35~100%
Measuring accuracy: Not greater than 3% for SpO2 range from 70% to 100%
*NOTE: Accuracy dened as root-mean-square value of deviation according
to ISO 9919 / ISO 80601-2-61.
Low limit setting range: 50%~99% (Default setting: 90% Adult, 95%pediatric).
D. Pulse Rate Measurement
Measuring range: 30bpm~240bpm
Accuracy: ±2bpm or ±2% (whichever is greater)
ENGLISH

37
Over-limit setting range: 25bpm~250bpm
Default setting limit: High -- 120bpm, Low -- 50bpm
E. Perfusion Index Display
Range: 0.2%~20%
F. Operating Environment
Operating Temperature: 5°C ~40°C
Operating Humidity: 30%~80%
Atmospheric pressure: 70kPa~106kPa
Note: portable and mobile RF communications equipment may aect the
performance of the Oximeter.
G. Data Update
8 beats moving average for both SpO2and pulse rate readings
H. Data Storage
Recording SpO2and pulse rate data every 1/2/4/8 second(s), up to 384–hour
records can be stored.
I. Low Perfusion Performance
The accuracy of SpO2and PR measurement still meet the precision described
above when the modulation amplitude is as low as 0.5%.
J. Resistance to interference of surrounding light:
The dierence between the SpO2value measured in the condition of indoor
natural light and that of darkroom is less than ±1%.
K. Dimensions: 145 mm (L) × 74 mm (W) × 29 mm (H)
Net Weight: 210g (including batteries)
L. Classication
Type of protection against electric shock: Internally powered equipment
Degree of protection: Type BF applied parts.
Degree of protection against harmful ingress of liquids: IP22. The device is not
intended for use in the environment with rich oxygen or ignitable gas.
Mode of operation: Continuous operation.
Electro-Magnetic Compatibility: Group I, Class B
6 Over-limit Indication
6.1 Limit settings
- SpO2 low limit setting range: 50% ~ 99%.
- Pulse Rate limits setting range:
High: 100bpm--240bpm Low: 30bpm - 99bpm
During the measurement, if the measured value exceeds the preset value,
the alert beeping sound will be activated, the value that is over-limit will blink
at the same time.
ENGLISH

38
6.2 Alert sound mute setting
- During the measurement, if the alert sound is set to on, short time press “
“ recall/mute key, then the alert sound will mute for 90 seconds, but the
over-limited value still keeps blinking. At this moment, the sound indication
icon “ ” becomes “ “. If this alert event persists over 90 seconds, then the
alert sound will be activated again.
- During the measurement, if the probe is o or disconnected, the message
“Check Probe” shows on the display screen. The alert sound starts (interval is
5 seconds) and lasts for about 1 minute. If the probe is still o, the Oximeter
will power o automatically.
7 Packing List
1. An Oximeter
2. A SpO2 probe
3. A holder
4. Battery ( AA ) × 3
5. Charging cable (optional)
6. User Manual
7. Quality Inspection Certicate
8. A data cable (optional)
Note: The accessories are subject to change. See the Packing
List for detailed items and quantity.
8 Repair and Maintenance
8.1 Maintenance
The expected service life(not a warranty) of this device is 5 years. In order to
ensure its long service life, please pay attention to the maintenance;
- Please change the batteries when the low-voltage indicator appears.
- Please take out the batteries if the oximeter will not be used for a long time.
- The recommended storage environment of the device:
Ambient temperature: -20ºC ~60ºC
Relative humidity 10%~95%
Atmospheric pressure: 50kPa~107.4kPa
- The oximeter is calibrated in the factory before sale, there is no need to
calibrate it during its life cycle. However, if it is necessary to verify its accuracy
routinely, the user can do the verication by means of SpO2simulator, or it can
be done by the local third party test house.
ENGLISH

39
8.2 Cleaning and Disinfecting Instruction
- Surface-clean sensor with a soft cloth by wetting with a solution such as 75%
isopropyl alcohol, if low-level disinfection is required, use a 1:10 bleach solution.
- Then surface-clean by a dampened cloth and let it air dry or wipe it with a cloth.
High-pressure disinfection cannot be used on the device.
Do not immerse the device in liquid.
Disposal: The product must not be disposed of along with other
domestic waste. The users must dispose of this equipment by
bringing it to a specic recycling point for electric and electronic
equipment.
For further information on recycling points contact the local
authorities, the local recycling center or the shop where the product
was purchased. If the equipment is not disposed of correctly,
nes or penalties may be applied in accordance with the national
legislation and regulations.
GIMA WARRANTY CONDITIONS
Congratulations for purchasing a GIMA product.
This product meets high qualitative standards both as regards the material
and the production. The warranty is valid for 12 months from the date of
supply of GIMA.
During the period of validity of the warranty, GIMA will repair and/or replace
free of charge all the defected parts due to production reasons. Labor costs
and personnel traveling expenses and packaging not included. All components
subject to wear are not included in the warranty.
The repair or replacement performed during the warranty period shall not
extend the warranty.
The warranty is void in the following cases: repairs performed by unauthorized
personnel or with non-original spare parts, defects caused by negligence or
incorrect use.
GIMA cannot be held responsible for malfunctioning on electronic devices or
software due to outside agents such as: voltage changes, electro-magnetic
elds, radio interferences, etc.
The warranty is void if the above regulations are not observed and if the serial
code (if available) has been removed, cancelled or changed.
The defected products must be returned only to the dealer the product was
purchased from. Products sent to GIMA will be rejected.
ENGLISH

40
9 Troubleshooting
Trouble Possible Reason Solution
Unstable SpO2and
Pulse Rate display 1. The nger is not placed
far enough inside.
2. The nger is shaking or
the patient is moving.
1. Place the finger
correctly inside and try
again.
2. Reduce patient
movement.
Device will not
switch on 1. The batteries are
drained or almost drained.
2. The batteries are not
inserted properly.
3. The device is
malfunctioning.
1. Change batteries.
2. Reinstall batteries.
3. Please contact the
local service center.
No Display 1. The device will power
off automatically when
there is no signal and no
operation for 1 minute.
2. The batteries are almost
drained.
1. Normal.
2. Change batteries.
No Signal 1. Probe o or incorrect
connection
2. Incorrect nger insert
3. Probe is damaged
1. Reconnect the probe
2. Reinsert the nger
3. Replace a new probe
ENGLISH

41 ENGLISH
Symbols on the screen
Symbol Description
%SpO2The oxygen saturation
PI% Perfusion Index
bpm Pulse rate
(Unit: beats per minute)
Low battery voltage
Battery full
Speaker mute icon
Speaker volume icon
Memory full
(Pediatric/Adult)
Patient type
Appendix
Symbols on the panels
Symbol Description
SpO2SpO2 probe connector
Power/Back Key
Mode/OK Key
Recall/Mute Key
/Navigation Key
Data Interface
Product complies with
European Directive
Serial number
Date of manufacture
Manufacturer
Type BF applied part
Please read
instructions carefully
WEEE
No alarm
Lot number
(see box / package)
Product code
Keep away from sunlight
Keep in a cool, dry place
Other manuals for OXY-100
3
Table of contents
Other Gima Medical Equipment manuals

Gima
Gima OXY-5 Parts list manual

Gima
Gima 1200G ECG User manual

Gima
Gima CARDIO-B Parts list manual

Gima
Gima SUPER TOBI SUCTION ASPIRATOR User manual

Gima
Gima 27363 User manual

Gima
Gima 24402 User manual

Gima
Gima L100 User manual

Gima
Gima 30892 User manual

Gima
Gima SUPER VEGA BATTERIA User manual

Gima
Gima 34340 User manual