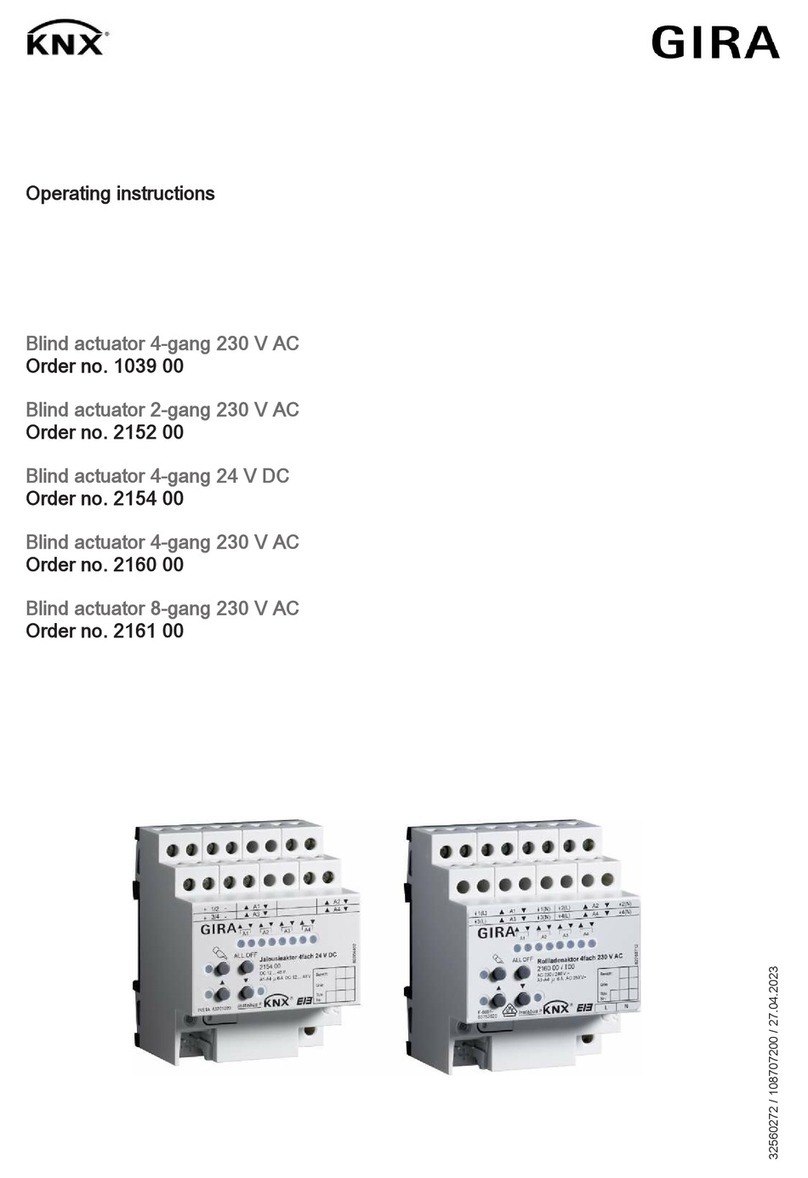
Gira 1039 00 User manual

GIRA
Info
4-channel blind/shutter actuator 230 V~
Installation Instructions
4-channel blind/shutter actuator 230 V~ 1/07 Page 1 of 10
System information
This device is a product of the Instabus KNX/EIB-sys-
tem and complies with KNX directives. Technical
knowledge obtained in Instabus KNX training courses
is a prerequisite to proper understanding.
The functionality of this device depends on the soft-
ware. Detailed information on loadable software and
attainable functionality as well as the software itself
can be obtained from the manufacturer’s product da-
tabase.
Planning, installation and commissioning of the unit is
effected by means of KNX-certified software. The full
functionality with KNX commissioning software from
version ETS3.0d. onwards.
The product database, technical descriptions and
conversion programs and other utilities are available
in the Internet at www.gira.de.
Function
Designated use
• Switching of electrically operated blinds, shutters,
awnings and similar devices for mains voltage
230 V AC or extra-low voltage 12...48 V DC
• Installation on DIN rail in small distribution boards
Product features
• Manual output control, provisional operation
• Suitable for AC motors 230 V and DC motors
12...48 V
• Automatic run time detection with 230 V AC drives
• Direct control of blind/shutter position
• Direct control of slat position
• Scene function
• Checkback of run status, blind/shutter position and
slat position for bus and manual operation
• Forced top and bottom position from primary con-
trol
• Safety function: 3 independent wind alarms, rain
alarm, frost alarm
• Sun protection function
• Integration into the temperature management of
the building possible
• Disabling of individual outputs by hand or via the
bus possible
4-channel blind/shutter actuator 230 V~ Order no.: 1039 00
Safety instructions
Electrical equipment must be installed and fitted
by qualified electricians only.
Failure to observe the instructions may cause
damage to the device and result in fire or other
hazards.
The device is not suited for safe disconnection of
the mains supply.
For parallel connection of several drives to an
output it is indispensable to observe the corres-
ponding instructions of the manufacturers.
There is otherwise risk of irreparable damage to
the drives.
Use only blinds/shutters with mechanical or
electronic limit switches. Check the limit switch-
es for correct adjustment.
Do not connect mains voltage consumers to-
gether with SELV/PELV consumers to the same
shutter actuator.
These operating instructions are part of the pro-
duct and must be left with the final customer.
iState of delivery: output control via keypad
enabled, provisional operation.

GIRA
Info
4-channel blind/shutter actuator 230 V~
Installation Instructions
4-channel blind/shutter actuator 230 V~ 1/07 Page 2 of 10
Device components
(1) buttons for manual control
(2) programming button and LED
(3) Instabus KNX/EIB bus connection
(4) mains supply connection
(5) output status LEDs
(6) shutter drive connection
1
Operation
Controls:
(5) output status LEDs
(7) key )manual operation
(8) LED )on: permanent manual control
mode
(9) key Sraise blind/shutter, stop
(10) LED Son: blind/shutter moving up-
wards, manual control
mode
(11) key Tlower blind/shutter, stop
(12) LED Ton: blind/shutter moving down,
manual operation
(13) key ALL OFF stop all blinds/shutters
2
Status indication
The status LEDs A1...A4 (Fig. 2, 5) indicate the out-
put states.
• Off: output is off
• On: output is on, up or down
• Flashing slowly: output in manual control mode
• Flashing fast: output disabled in permanent
manual control mode
Modes of operation
• Bus operation: operation from touch sensors or
other bus devices
• Temporary manual control mode: manual opera-
tion locally with keypad, automatic return to bus
operation
• Permanent manual operation: only manual opera-
tion locally on device
A1 A2 A3 A4
LN
ALL OFF
1(L)
(1)
(3) (4) (5)
(2)
A1 1(N)
3(L) A3
A2
A4
(6)
3(N)
2(L)
4(L)
2(N)
4(N)
ALL OFF
A1 A2 A3 A4
(5)
(7)
(8)
(9)
(10)
(11) (12) (13)
iBus operation in manual mode disabled.
Manual operation in the event of bus fail-
ure enabled.
After failure and return of bus voltage, the
device switches over to the bus mode.
After failure and return of mains voltage,
the device switches over to the bus mode.
Manual control mode can be disabled in
operation via bus telegram.

GIRA
Info
4-channel blind/shutter actuator 230 V~
Installation Instructions
4-channel blind/shutter actuator 230 V~ 1/07 Page 3 of 10
Priorities
• Highest priority: manual control mode
• 2 priority: force-position control
• 3 priority: safety function
• 4 priority: sun protection
• Lowest priority: bus operation: raising / lowering,
slat adjustment, scenes, position-
ing
Activating the temporary manual control mode
Keypad operation is programmed and not disabled.
• Press the key )briefly, < 1 s.
LEDs A1 are flashing, LED )remains off.
Deactivating the temporary manual control mode
The device is in the temporary manual control mode.
• No key-press for 5 s.
- or -
• Press the )key briefly < 1 s several times until
the actuator quits the temporary manual control
mode.
LEDs A1...A4 are no longer flashing, but indicating
the output status.
Depending on programming, the blinds/shutters
move to the position active at the time of deactiva-
tion of the manual control mode, e.g. forced-control
position, safety or sun protection position.
Activating the permanent manual control mode
Keypad operation is programmed and not disabled.
• Press the )key for at least 5 s.
LED )is on, LEDs A1 are flashing, permanent
manual mode is activated.
Deactivating the permanent manual control mode
The device is in the permanent manual control mode.
• Press the )key for at least 5 s.
LED )is off, bus mode is activated.
Depending on programming, the blinds/shutters
move to the position active at the time of deactiva-
tion of the manual control mode, e.g. forced-control
position, safety or sun protection position.
Operating the outputs
The device is in the permanent or temporary manual
control mode.
• Press the )key briefly < 1 s several times until
the desired output is selected.
The LEDs of the selected output A1...A4 are flash-
ing.
The LEDs Sand Tindicate the status.
• Controlling the output with the Sor Tkey.
Brief press: blind/shutter stop
Long press: blind/shutter up/down
The selected blind/shutter executes the respective
commands.
The LEDs Sand Tindicate the status.
Stopping all blinds/shutters
The device is in the permanent manual control mode.
• Press the ALL OFF key.
All outputs are shut off; all blinds/shutters are
stopped.
iAfter 5 s without key-press, the actuator re-
turns automatically to the bus mode.
iTemporary manual control mode: After all
outputs have been selected one after an-
other, the device quits the manual control
mode with the next brief press.

GIRA
Info
4-channel blind/shutter actuator 230 V~
Installation Instructions
4-channel blind/shutter actuator 230 V~ 1/07 Page 4 of 10
Disabling individual outputs
The device is in the permanent manual control mode.
• Press the )key briefly < 1 s several times until
the desired output is selected.
The status LEDs of the selected output A1...A4 are
flashing.
• Press the Sand the Tkey simultaneously for at
least 5 s.
The selected output A1...A4 is disabled.
The status LEDs of the selected output A1...A4 are
flashing fast .
• Activate the bus mode (deactivate the permanent
manual control mode).
Re-enabling the outputs
The device is in the permanent manual control mode.
• Press the )key briefly < 1 s several times until
the desired output is selected.
The status LEDs of the selected output A1...A4 are
flashing twice briefly at intervals
• Press the Sand the Tkey simultaneously for at
least 5 s.
The selected output A1...A4 is enabled.
The LEDs of the selected output are flashing slow-
ly.
• Activate the bus mode (deactivate the permanent
manual control mode).
Information for qualified electricians
Fitting and electrical connection
Fitting the device
Observe the temperature range (Technical data).
Ensure sufficient cooling.
• Fit the device by snap-fastening on a mounting rail
in acc. with DIN EN 60715. The connecting termi-
nals must be at the top.
iA disabled output can be operated in the
manual control mode.
When a disabled output is selected in the
manual control mode, the respective sta-
tus LEDs are flashing twice briefly at inter-
vals.
DANGER
Electric shock in case of accidental contact with live parts. Electric shocks may be fatal.
Before working on the device, cut out the mains supply and cover up live parts in the surroundings.
Risk of irreparable damage if several drives are connected in parallel to one output.
Limit switch contacts can weld together and drives, blinds/shutters and the shutter actuator can be
irreparably damaged.
Use an isolating relay.

GIRA
Info
4-channel blind/shutter actuator 230 V~
Installation Instructions
4-channel blind/shutter actuator 230 V~ 1/07 Page 5 of 10
Connecting the device without running time
detection
• Connect the bus line to the bus terminal (Fig. 3).
• Connect the mains voltage supply (Fig. 3).
Observe the admissible load rating (Technical data).
3
• Connect the drives (Fig. 4).
4
Connecting the device with automatic running
time detection
If programmed and connected accordingly, the shut-
ter actuator detects the running time of the individual
blinds/shutters and stores them. The actuator mea-
sures the voltage against the connected N terminal at
the drives and can thus recognize the limit positions.
In operation, the shutter actuator can adapt itself to
changes in the running times of the blinds/shutters
that are due, for instance, to ageing of the motors.
Information for qualified electricians
The running time detection function is activated in the
software.
The blinds/shutters are not blocked.
• Connect the bus line to the bus terminal (Fig. 3).
• Connect the mains voltage supply (Fig. 3).
CAUTION
When the N conductor is connected and when
the concerned output is energized without inter-
ruption for a prolonged time due to retriggering,
the device may heat up excessively.
Risk of irreparable damage to the device.
Do not connect the N conductors.
L1
L3
L2
N
BUS
A1 A2 A3 A4
LN
ALL OFF
M1 M2
1(L) A1 1(N)
3(L) A3
A2
A43(N)
2(L)
4(L)
2(N)
4(N)
230 V
12-48 V
iThe N conductor terminals are only used
for running time detection purposes and
are not at neutral potential.
L1
L3
L2
N
M1 M2
1(L) A1 1(N)
3(L) A3
A2
A43(N)
2(L)
4(L)
2(N)
4(N)
iThe automatic running time detection can-
not be used for 110 V AC drives, for DC
drives, for drives with electronic limit
switches and for drives connected to the
outputs via isolating relays.
Only for 230 AC drives with mechanical
limit switches. iConnect only one drive to an output.

GIRA
Info
4-channel blind/shutter actuator 230 V~
Installation Instructions
4-channel blind/shutter actuator 230 V~ 1/07 Page 6 of 10
Observe the admissible load rating (Technical data).
• Connect the drive (Fig. 5).
• Connect the N conductor of the respective drive to
the N conductor terminals (Fig. 5, 14). Observe the
RCD wiring.
5
6
Connecting the device for 12...48 V DC drives
The shutter outputs A1 and A2 as well as A3 and A4
can be used in common for switching a DC drive.
The shutter actuator is programmed as DC device.
• Connect the bus line to the bus terminal (Fig. 3).
• Connect the mains voltage supply (Fig. 3).
Observe the admissible load rating (Technical data).
• Connect the drives (Fig. 6)
• Mark 12-48 V on the label (Fig. 7).
7.
Sliding on the protective cap
To protect the bus lines against dangerous voltages
at the connecting terminal, slide on the protective cap.
• Lead out the bus line at the rear of the device.
• Slide the cap over the bus terminal (Fig. 8 A) until
it is heard to engage.
8A
Removing the cap
• Press the sides of cap and withdraw (Fig. 8 B)
.8B
iThe N conductor terminals of the individual
outputs and of the mains connection are
internally not connected.
When an output is energized without inter-
ruption for a prolonged time due to retrig-
gering, the device may heat up exces-
sively.
The automatic running time detection is
configured during commissioning and the
running time thus determined is perma-
nently stored.
iConnect only one drive to an output.
iIn DC operation, the manual mode for the
outputs A2 and A4 is not operational. The
status LEDs indicate the relay states.
230 V
12-48 V

GIRA
Info
4-channel blind/shutter actuator 230 V~
Installation Instructions
4-channel blind/shutter actuator 230 V~ 1/07 Page 7 of 10
Commisioning
Measuring the blind/shutter and slat running
times
The blind/shutter running time is important for posi-
tioning and scene moves. With Venetian blinds, the
slat adjusting time is for technical reasons part of the
overall running time of blinds/shutters.
The opening angle of the slats is therefore defined as
the running time required between the „open“ and
„closed“ positions.
The upward move is generally longer than the down-
ward move and is accounted for as running time pro-
longation in percent.
• Measure the „up“ and „down“ running times of the
blind/shutter.
• Measure the slat adjusting time between „open“
and „closed“.
• Enter the measured values into the parameter set-
tings list.
Loading the address and the application software
• Switch on the bus voltage.
• Allocate the physical address and load the applica-
tion software into the device.
Performing a reference run
The shutter actuator can move the blind/shutters into
scene and other directly controlled positions only if
the positions have been stored beforehand. For this
purpose, every output must perform a reference run.
• Move the blinds/shutters to the upper limit-stop po-
sition.
• Wait until the output relay and the limit switch are
off.
Automatic running time detection: storing the
running times
With the running time detection activated, the device
can find positions and scenes only if the running times
have been stored beforehand. The running times
must be stored in undisturbed conditions, i.e. without
any control operations being performed and in the ab-
sence of wind, snow and obstacles.
The automatic running time detection function is acti-
vated in the software.
The N conductor terminals of the pertaining outputs
are connected as shown (Fig. 5).
• Move the blinds/shutters into the upper limit-stop
position (perform a reference run).
The upper limit-stop position is reached.
• Move the blinds/shutters in the manual control
mode into the lower limit-stop position.
• Move the blinds/shutters in the manual control
mode into the upper limit-stop position.
The running times are now stored.
iIn case of automatic running time detec-
tion no measurement of the blind/shutter
running times is required.
Automatic measurement of the slat adjust-
ing time is not possible.
iThe shutter actuator does not store the
blind/shutter positions permanently. After
each failure and return of the mains, a new
reference run is performed.
Without reference run, the shutter actuator
sets for each output the internal flag ‚Inva-
lid position‘ which can be read out.
iFor 230 V drives only.
iProgramming runs must be performed
only in the manual control mode or with the
commissioning software.
iThe shutter actuator stores the blind/shut-
ter positions permanently.
Without stored running times, the shutter
actuator sets for each output the internal
flag ‚Invalid position‘ which can be read
out.
In operation, the shutter actuator can
adapt itself to changes in the running times
of the blinds/shutters that are due, for in-
stance, to ageing of the drives. The slat
running time is taken into account.
The modified times are stored permanent-
ly only in the manual control mode.
GIRA
Info
4-channel blind/shutter actuator 230 V~
Installation Instructions
4-channel blind/shutter actuator 230 V~ 1/07 Page 8 of 10
Technical data
KNX medium: TP1
Mode of commissioning: S-Mode
Instabus KNX/EIB supply: 21...32 V DC
Instabus KNX/EIB power
consumption: max. 150 mW
Mains supply: AC 230/240 V ±10%
Mains frequency: 50/60 Hz
Total dissipated power: max. 4.5 W
Connection
Instabus KNX/EIB: connecting terminal
230 V supply and outputs: screw terminals
Single-wire: 0.5...4 mm²
Stranded wire
without ferrule: 0.5...4 mm²
Stranded wire with ferrule: 0.5...2,5 mm²
Screw terminal tightening
torque: max. 0.8 Nm
Switching voltage AC: AC 230/240 V ±10%,
50/60 Hz
Switching capacity
AC 230/240 V: 6 A AC1
Switching voltage DC: 12...48 V DC
Switched current DC: 12/24 V 6 A
Switched current DC: 48 V 3 A
max. blind/shutter
running time: 20 min
Automatic running
time detection: max. 20 % of blind/shutter
running time
Ambient temperature: -5 °C ... +45 °C
Storage temperature -25 °C ... +70 °C
Mounting width: 72 mm (4 modules)
Weight: approx. 300 g
Help in case of trouble
Manual control with keypad not possible
Cause 1: Manual control mode not programmed.
Program the device for manual control.
Cause 2: Manual control mode disabled from bus.
Enable the manual control mode.
Output control not possible
Cause 1: Output disabled.
Re-enable the output.
Cause 2: Forced-control position, safety function
or sun protection active for the output
concerned.
No control operation possible for this output as
long as primary functions are active.
No output operational
Cause 1: All outputs are disabled.
Re-enable the outputs.
Cause 2: Permanent manual control mode active.
Deactivate the permanent manual control
mode (switch this mode off).
Cause 3: Forced-control position, safety function
or sun protection active for all outputs.
No control operation possible as long as pri-
mary functions are active.
Cause 4: Application software stopped, program-
ming LED flashing.
Make a reset: disconnect the device from the
bus, reconnect after 5 seconds.
Cause 5: No or faulty application software.
Check programming and rectify.

GIRA
Info
4-channel blind/shutter actuator 230 V~
Installation Instructions
4-channel blind/shutter actuator 230 V~ 1/07 Page 9 of 10
Positioning and scene moves are not executed or
executed only incorrectly
Cause 1: Sun protection, safety function, forced-
control position or manual control mode
active.
No positioning or scene moves possible as
long as primary functions are active.
Cause 2: No running time stored.
Store the running times (automatic running
time detection: store the running times).
Cause 3: Automatic running time detection is acti-
vated and N conductor is not connected.
Correct the electrical connection.
- or
deactivate the automatic running time detec-
tion.
Cause 4: Automatic running time detection is ac-
tivated, but the switching voltage is <
230 V or drives with electronic limit
switches are being used.
Deactivate the automatic running time de-
tection.
Correct the electrical connection and re-
move the N conductor.
Blind/shutter does not move to limit position, po-
sitioning or scene moves faulty
Cause: Blind/shutter running time adjustment
incorrect.
Correct the blind/shutter running time.
Blind/shutter moves upward before a positioning
scene moves
Cause: No position stored, e.g. because of
mains failure.
Blind/shutter performs a reference run. Do
not stop the moving blind/shutter.
Accessories
Isolating relay UP: Order no. 0382 00
Isolating relay AP: Order no. 0387 00
Isolating relay REG: Order no. 0861 00
Tubular motor 10 Nm: Order no. 0857 00
Tubular motor 25 Nm: Order no. 1149 00
Tubular motor 35 Nm: Order no. 0858 00
Tubular motor 50 Nm: Order no. 0859 00
iWithout running times being stored, the
shutter actuator raises or lowers the
blinds/shutters for positioning or scene
moves depending on whether the blinds/
shutters are in the upper or lower half.

GIRA
Info
4-channel blind/shutter actuator 230 V~
Installation Instructions
4-channel blind/shutter actuator 230 V~ 1/07 Page 10 of 10
Acceptance of guarantee
We accept the guarantee in accordance with the corresponding legal provisions.
Please return the unit postage paid to our central service department giving a brief description of the
fault:
Gira
Giersiepen GmbH & Co. KG
Service Center
Dahlienstrasse 12
D-42477 Radevormwald
Gira
Giersiepen GmbH & Co. KG
Postfach 1220
D-42461 Radevormwald
Telefon: +49 / 21 95 / 602 - 0
Telefax: +49 / 21 95 / 602 - 339
Internet: www.gira.de
Table of contents
Other Gira Controllers manuals

Gira
Gira 5431 00 User manual

Gira
Gira Powernet Switchactuator 2fold User manual

Gira
Gira One 5023 00 User manual

Gira
Gira One User manual

Gira
Gira 5023 00 User manual

Gira
Gira KNX 2139 00 Operator's manual

Gira
Gira 1288 Series User manual

Gira
Gira 2100 Series User manual

Gira
Gira 1289 00 User manual

Gira
Gira KNX 5062 00 User manual