Gira 1289 00 User manual

Operating Instructions
Switching actuator
1289 00


Table of contents
Device description ....................................................... 4
Operating elements and indicators .............................. 5
Connection terminals................................................... 7
Mounting ................................................................... 8
Setting operating mode ............................................... 9
Switching operating mode after programming........... 10
Information on programming..................................... 11
"Schalten" (Switching) operating mode...................... 12
"Timer/sek." operating mode...................................... 14
"Timer/min." operating mode ..................................... 16
"Impuls" (Pulse) operating mode................................ 18
"Türöffner" (Door opener) operating mode ................. 20
Deleting assignments of the switching actuator ........ 23
Application example "Switching illumination" ............ 24
Application example "Additional signalling" ............... 26
Technical data........................................................... 28
Acceptance of guarantee.......................................... 29

4
Device description
The switching actuator is part of the Gira
door communication system.
Switching functions operated via the
2-wire bus are executed via the potential-
free relay contact of the switching actua-
tor.

5
Operating elements and indicators
"Progr." button
The "Progr." button has two functions:
1. Starting programming mode of the
switching actuator: If the "Progr." but-
ton is pressed for 3 seconds while the
system is in programming mode, the
programming mode of the switching
actuator is started. The "Progr." LED
flashes in programming mode.
Briefly pressing the "Progr." button
exits programming mode of the
switching actuator.
2. Actuation of the connected device. By
briefly pressing the "Progr." button in
the operating mode, the connected
device is activated based on the set
operating mode. The "Progr." LED illu-
minates during the switching time.
i
Exiting switching actuator
programming mode
When exiting programming mode at the
control unit, switching actuator pro-
gramming mode is also exited.

6
"Funktion" button
The required operating mode can be set
with the "Funktion" button (see Page 9).
The next operating mode is selected with
each button press.
The LEDs next to the operating mode
names indicate the active operating
move.
Adjuster
The activation duration of the connected
device is set at the adjuster. Depending
on the selected operating mode, the set-
ting time lies in the range 1 to 10 seconds
or 1 to 10 minutes. The adjuster is set
with a screwdriver (3 mm blade).
i
LED indication
The LEDs only illuminate while the door
communication system is in program-
ming mode. The LEDs go out 2 minutes
after programming mode is exited. By
pressing the "Funktion" button, the LED
indication can be activated in normal
operation for 2 minutes.

7
Connection terminals
Bus
The switching actuator is connected to
the 2-wire bus via these terminals. Polar-
ity need not be taken into account here,
as the polarity of the Gira door communi-
cation system 2-wire bus is neutral.
Binary in
One or more mechanical buttons (NO
contact), used to initiate the switching
functions, can be connected to the binary
input.
Potential-free relay contact
The device to be switched is connected to
the relay contact.
It could be a light or a door opener, for
example, depending on the selected
operating mode.
i
Max. cable length
The maximum cable length between the
binary input of the switching actuator
and the button is 20 m.

8
Mounting
For installation protected from dripping
and sprayed water, mount the control unit
to a top-hat rail in the distribution.
The device connection and bus connec-
tion are made via terminal screws.
The relay contact must be protected with
a 10 A miniature circuit-breaker.
Attention
Installation and mounting of electrical
devices may only be carried out by a
qualified electrician.

9
Setting operating mode
The switching actuator can be used in five
different operating modes:
• Schalten (Switching, see Page 12)
• Timer/sek. (Timer/sec., see Page 14)
• Timer/min. (Timer/min., see Page 16)
• Impuls (Pulse, see Page 18)
• Türöffner (Door opener, see Page 20)
Proceed as follows to select the desired
operating mode:
1. Start programming mode at the
control unit by pressing the "System-
progr." button for 3 seconds until the
LED next to the button starts flashing.
✓The LED of the last set operating mode
flashes at the switching actuator.
2. Press the "Funktion" button at the
switching actuator several times until
the LED of the desired operating mode
flashes.
3. Press the "Systemprogr." button at the
control unit to exit operation-selection
mode of the switching actuator.
✓The last set operating mode is acti-
vated.

10
Switching operating mode after programming
If the operating mode of a previously pro-
grammed switching actuator was
switched, the programming remains in
tact.
When only switching between switching
functions, e.g. from "Schalten" to "Timer/
min.", the switching function with the
modified conditions is executed.
When switching to or from the "Türöffner"
operating mode, no functions are exe-
cuted. In this case, the existing assign-
ments must first be deleted (see Page 23)
in order to teach in new assignments suit-
able for the operating mode.

11
Information on programming
• Switching actuator functions must be
assigned in a separate programming
procedure, i.e. the programming mode
of the door communication system
must be restarted beforehand at the
control unit and exited afterwards.
• Before a switching actuator function
can be assigned to a call button for
home stations, the call button must
have been taught in (e.g. as a call but-
ton of another home station).
• If a switching actuator function is to be
executed while a home station call is
made when a call button is pressed, the
switching actuator function must be
assigned first, followed by the home
station (see Page 26).
i
Automatic assignment
of the switching actuator
The switching actuator is automatically
assigned to the button of the home
stations. If the switching actuator is pro-
grammed to a specific button, the auto-
matic assignment is lost.

12
"Schalten" (Switching) operating mode
In the "Schalten" operating mode, the
device is activated via the press of a but-
ton and remains activated until the button
is pressed again.
The "Schalten" operating mode can be
assigned to the following buttons:
• button of the home stations
• Floor-call button on the ET terminal of a
home station
• call button for flush-mounted and sur-
face-mounted door station
• call button for home stations
(left: ON, right: OFF)
It is irrelevant whether the button is oper-
ated to the left or right when program-
ming a call button for home stations. The
left button is automatically ON and the
right one is OFF.

13
Programming "Schalten"
1. Start programming mode at the
control unit by pressing the "System-
progr." button for 3 seconds until the
LED next to the button starts flashing.
✓The LED of the last set operating mode
flashes at the switching actuator.
2. Press the "Funktion" button at the
switching actuator several times until
the "Schalten" LED flashes.
3. Press the "Progr." button at the swit-
ching actuator for 3 seconds until the
LED next to the button flashes.
4. Press the button to be assigned at the
door station or home station for 3
seconds until you hear a short
acknowledgement tone.
✓A long acknowledgement tone con-
firms successful assignment.
5. Press the "Systemprogr." button at the
control unit to end programming
mode.

14
"Timer/sek." operating mode
The "Timer/sek." operating mode (1 - 10 s)
could be used for direct operation of the
door opener of a back/side door, for
example. It can then be operated directly,
even if no calls were initiated from the
back/side door. This cannot be imple-
mented in the "Türöffner" operating
mode, as it is switched to the main door 2
minutes after the door call with this
mode.
After the button is pressed, the contact
closes according to the set time. The acti-
vation time can be set within the range of
1 to 10 seconds via the adjuster. The timer
function can be re-triggered, i.e. if switch-
ing occurs before the set time expires, the
set time restarts.
The "Timer/sek." operating mode can be
assigned to the following buttons:
• button of the home stations
• floor-call button on the ET terminal of a
home station
• call button for flush-mounted and sur-
face-mounted door station
• call button for home stations
(left / right - same function)

15
Programming "Timer/sek."
1. Start programming mode at the
control unit by pressing the "System-
progr." button for 3 seconds until the
LED next to the button starts flashing.
✓The LED of the last set operating mode
flashes at the switching actuator.
2. Press the "Funktion" button at the
switching actuator several times until
the "Timer/sek." LED flashes.
3. Press the "Progr." button at the swit-
ching actuator for 3 seconds until the
LED next to the button flashes.
4. Press the button to be assigned at the
door station or home station for
3 seconds until you hear a short
acknowledgement tone.
✓A long acknowledgement tone con-
firms successful assignment.
5. Press the "Systemprogr." button at the
control unit to exit programming
mode.

16
"Timer/min." operating mode
The "Timer/min." (1 - 10 minutes) operat-
ing mode could be used for the operation
of path illumination or staircase illumina-
tion (without security function), for exam-
ple.
After the button is pressed, the contact
closes according to the set time. The acti-
vation time can be set within the range of
1 to 10 seconds via the adjuster. The timer
function can be re-triggered, i.e. if switch-
ing occurs before the set time expires, the
set time restarts.
The "Timer/min." operating mode can be
assigned to the following buttons:
• button of the home stations
• Floor-call button on the ET terminal of a
home station
• call button for flush-mounted and sur-
face-mounted door station
• call button for home stations
(left / right - same function)

17
Programming "Timer/min."
1. Start programming mode at the
control unit by pressing the "System-
progr." button for 3 seconds until the
LED next to the button starts flashing.
✓The LED of the last set operating mode
flashes at the switching actuator.
2. Press the "Funktion" button at the
switching actuator several times until
the "Timer/min." LED flashes.
3. Press the "Progr." button at the swit-
ching actuator for 3 seconds until the
LED next to the button flashes.
4. Press the button to be assigned at the
door station or home station for
3 seconds until you hear a short
acknowledgement tone.
✓A long acknowledgement tone con-
firms successful assignment.
5. Press the "Systemprogr." button at the
control unit to exit programming
mode.

18
"Impuls" (Pulse) operating mode
The "Impuls" operating mode could be
used for the operation of an existing auto-
matic staircase mechanism, for example.
The contact closes for 0.3 seconds after
the button is pressed.
The "Impuls" operating mode can be
assigned to the following buttons:
• button of the home stations
• Floor-call button on the ET terminal of a
home station
• call button for flush-mounted and sur-
face-mounted door station
• call button for home stations
(left / right - same function)

19
Programming "Impuls"
1. Start programming mode at the
control unit by pressing the "System-
progr." button for 3 seconds until the
LED next to the button starts flashing.
✓The LED of the last set operating mode
flashes at the switching actuator.
2. Press the "Funktion" button at the
switching actuator several times until
the "Impuls" LED flashes.
3. Press the "Progr." button at the swit-
ching actuator for 3 seconds until the
LED next to the button flashes.
4. Press the button to be assigned at the
door station or home station for 3
seconds until you hear a short
acknowledgement tone.
✓A long acknowledgement tone con-
firms successful assignment.
5. Press the "Systemprogr." button at the
control unit to exit programming
mode.

20
"Türöffner" (Door opener) operating mode
In the "Türöffner" (1 - 10 seconds) operat-
ing mode, the switching actuator of the
button of the home station is oper-
ated. The activation time of the door
opener can be set within the range 1 to
10 seconds via the adjuster.
In the "Türöffner" operating mode, the
switching actuator is assigned to a door
station and can only be operated via the
button of the home stations.
The door opener connected to the switch-
ing actuator is assigned to the "back/side"
door. The door opener of the "main" door
is operated via the control unit.
The door opener connected to the switch-
ing actuator can then only be activated
via the button of the home station if a
door call was initiated beforehand from
the door station of the "side/back" door. It
is switched to the "main" door 2 minutes
after the door call (with no conversation)
or 30 seconds after the door conversa-
tion.
Table of contents
Other Gira Controllers manuals

Gira
Gira 5423 00 User manual

Gira
Gira One User manual

Gira
Gira KNX 213900 User manual

Gira
Gira G1 User manual

Gira
Gira 5023 00 User manual
Gira
Gira 0309 00 User manual

Gira
Gira KNX 5061 00 User manual

Gira
Gira 1039 00 User manual
Gira
Gira 5431 00 User manual

Gira
Gira Powernet Single Switching Actuator User manual

Gira
Gira 0388 00 User manual

Gira
Gira System 3000 User manual

Gira
Gira 0570 00 User manual

Gira
Gira 0425 00 User manual

Gira
Gira 2164 00 User manual

Gira
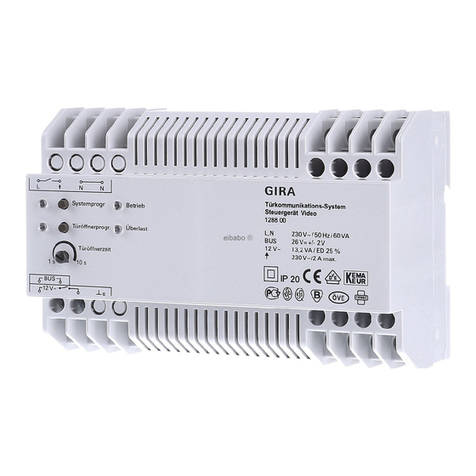
Gira 1288 Series User manual

Gira
Gira 2114 00 User manual
Gira
Gira KNX 1039 00 User manual

Gira
Gira One 5065 00 User manual
Gira
Gira KNX 2139 00 Operator's manual