>2500K 100
CCT
CCT displayed on the screen
means CCT mode
2:
>1: I
I100
FX
3: I
S:99
>H:354 100
HSI
>2700K 100
CCT
>2700K 100
CCT
2700K 20
CCT
S:99
>H:354 100
HSI
>S:99
H:354 100
HSI
2:
>1: I
I100
FX
3: I
2:
>1: III
I100
FX
3: I
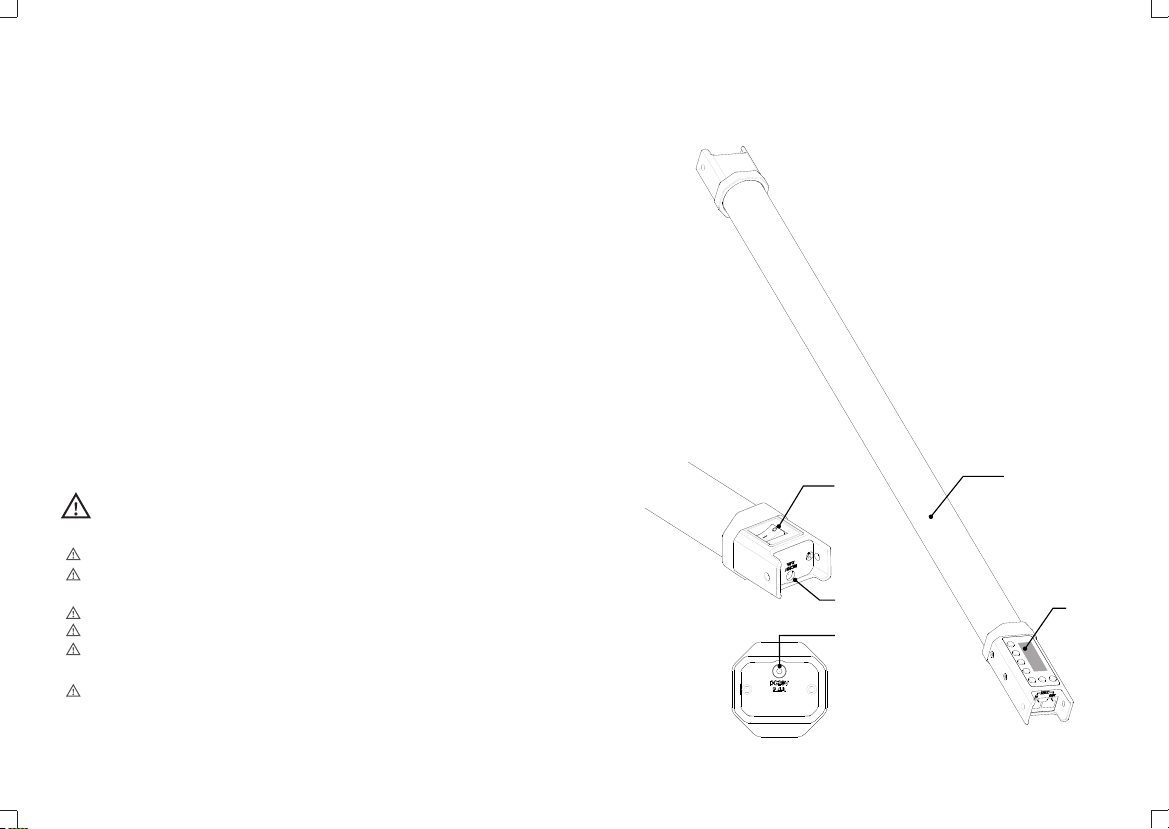
Operation
1. Power Switch
Use the power switch to control the on or off of the RGB tube light. Then, the
current information will be displayed on the LCD panel.
2. Mode Selection: CCT Mode/RGB Mode/
Special Effects Mode
Press MOD button to switch different modes:
HSI displayed on the screen
means RGB mode
FX means special effects
mode
2.1 Bicolor Mode
2.1.1 Color temperature adjustment: press the “+”or“-”button to adjust the color
temperature from 2700K to 6500K.
2.1.2 Press the DIM button, then, press the “+” or “-” button to adjust the brightness
from 0 to 100.
2.2 Colorful Mode
2.2.1 Adjust hue H: press the FN multifunction select dial and H is selected. Then,
press the “+”or “-”button to adjust the hue from 0 to 360°.
2.2.2 Adjust saturation S: press the FN multifunction select dial and S is selected.
Then, press the “+”or “-”button to adjust the saturation from 0 to 100.
3. Special Effects Modes (39)
3.1 Press the “+” or “-”button to choose different special effects categories from 1
to 14. And the modes will display circularly by turning the select dial.
3.2 After choosing the current mode, press down the FN multifunctional select dial
from I, II and III. And the modes will display circularly when keeping pressing the
FN multifunctional select dial.
- 17 - - 18 -