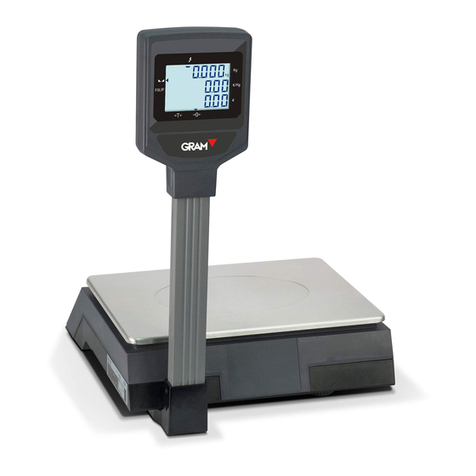
Gram FC Series User manual

SERIES / SERIE / SÉRIE
FC
100 / 200 / 2000 / 5000
OPERATION MANUAL
MANUEL D´UTILISATION
MANUAL DE UTILIZACION

2
INDEX English
Safety information 8
Installation 8
Preparatory before using 9
Storage 9
Unfolding the package 9
Package list 9
Installation of the balance 10
Usage conditions 10
Install the balance with wind shield 11
Install the balance with round weighing pan 11
Connect the power adapter 11
Install the external facilities 11
Warm-up time 11
Adjust the level gaugepurpose: 12
Display and keys description 12
Power on / Power off the balance 14
Tare function 14
Counting mode 14
Percentage mode 15
Weighing units 16
Calibration 16
User setups 16
Parameters 17
Communication with a computer 20
Rs-232 interface hardware 21
Pin description 21
Routine maintenance and troubleshooting 22
Troubleshooting 22

3
Clearance 22
Clearing the stainless steel surface 23
Safety check 23
Troubleshooting 23
Technical conditions 25
Guarantee 26
Notes 27

4
SOMMAIRE Français
Informations de sécurité 28
Installation 28
Avant d’utiliser la balance 29
Entourage de la balance 29
Emballage 29
Liste de matériel 30
Installation de la balance 30
Conditions d’utilisation 30
Installation de la balance avec pare-brise (cage de pesée) 31
Installer la balance sans pare-brise (cage de pesée) 31
Branchement secteur 31
Raccordement d’appareils périphériques 31
Temps de préchauffage 31
Niveler la balance 32
Description de l’affichage et du clavier 32
Allumer / éteindre la balance 34
Fonction de tare 34
Fonction compte-pièces 34
Fonction de pourcentages 35
Unités de pesée 36
Calibrage 36
Configuration de paramètres 37
Paramètres 37
Communication avec un ordinateur 40
Interface rs-232 41
Description du pin 42
Routine de maintenance et résolution de problèmes 42
Résolution des pannes 42

5
Nettoyage 42
Nettoyage de la superficie d’acier inoxydable 43
Révision de sécurité 43
Résolution de problèmes 43
Conditions techniques 45
Garantie 46
Notes 47

6
ÍNDICE Español
Información de seguridad 48
Instalación 48
Antes de utilizar la balanza 49
Entorno de la balanza 49
Embalaje 49
Lista de material 50
Instalación de la balanza 50
Condiciones de uso 50
Montaje de balanza con paravientos 51
Montaje balanza con el plato de pesada redondo 51
Conectar el adaptor 51
Montaje dispositivos externos 51
Tiempo de precalentamiento 51
Nivelar la balanza 52
Descripción del display y del teclado 52
Encender / Apagar la Balanza 54
Función de tara 54
Función cuentapiezas 54
Función porcentajes 55
Unidades de pesada 56
Calibracion 56
Configuracion de parametros 56
Parametros 57
Comunicación a un ordenador 59
Interface rs-232 60
Descripción del pin 60
Rutina de mantenimiento y solución de problemas 61
Solución de averías 61

7
Limpieza 61
Limpieza de la superficie de acero inoxidable 62
Revisión de seguridad 62
Solución de problemas 62
Condiciones técnicas 64
Garantía 65
Notes 66
Notes 67

8
ENGLISH
SAFETY INFORMATION
To avoid unnecessary demage to the balance, please pay attention to the
following tips:
• Please do not use this balance in dangerous área.
• Please turn off the power of the balance before connect it or disconnect
it with other facilities.
• If the environment requires a higher safety standard, please follow the
relevant installation instructions.
• Excessive electromagnetic interference will make the displayed value
in this balance change. Once the interference is dismissed, the balance
could operate in normal way.
• Please avoid any liquid on the surface of the balance. A piece of lightly
damp cloth is allowed to wipe the balance.
INSTALLATION
• Please make sure the local voltage is in line with the rated voltage on the
name board
• Please pay special attention when use RS-232 as the pins location might
be incompatible with our facilities. Please check the pins locations before
the connection and turn off the connection of different configuration.
• If the facility or the power cord has apparent damage, please turn off the
power, put it or them in a safe place and do not use it or them before they
are fixed.
9
• This balance could only be connected to our accessories or optional
fittings. We are not responsible for any modification the operator makes
to our balance, including using the facilities and cable which are not
supplied by us. However, we are always ready to offer the operation
norms information.
• If the balance does not work well, please contact your local distributor or
our customer service center.
PREPARATORY BEFORE USING
STORAGE
This balance requires an environment which is free from excessive high or
low temperature, corrosive, vibration, air current and collision.
UNFOLDING THE PACKAGE
• Unfold the package and check if there is any outer damage of the balance.
• If there is outer damage, please refer to section routain maintenance
and troubleshooting
• Please keep all the package for possible transportation in the future.
Whenpackthebalance,pleaseremoveallthecablestoavoid unnecessary
damagre.
PACKAGE LIST
• The balance.
• Weighing pan.

10
• Pan support.
• Power adapter.
• User manual.
INSTALLATION OF THE BALANCE
Put it in a proper place, please avoid the following situations:
• Much heat and direct sunlight.
• Air currents and vibrations.
• Excessive moisture.
Usage Conditions
Please do not lay the balance in a quite damp palce for a long time. If the
balance is transferred from a lower temperature environment to a higher
temperature environment, please lay it there with power off foraround 2
hours.

11
Install the balance with wind shield
• Assemble the parts in the indicated order.
Install the balance with round weighing pan
• Installation Sequence.
• Pan support.
Connect the Power Adapter
• Connect the power adapter to the balance.
• Connect the power adapter to the power socket.
Install the External Facilities
Turn off the balance before connect it or disconnectit with external facilities
such as the printer or the computer).
Warm-up Time
To assure the measure accuracy, the balance must be warmed up for 30
minutes before normal operation.
1
2
4
3
2
1

12
Adjust the Level GaugePurpose:
• Adjust the level guage of the balance.
The level guage needs to be adjusted once its
place is changed.The two front bottom bolts
are used to adjust the level guage.
• Spin the two bolts as shown in the figure until
the bubble in the level gauge is in the ceter of
the circle.
• Normally, it needs to be adjusted repeatedly.
DISPLAY AND KEYS DESCRIPTION
1
3
4
2
1. Count sign.
2. Weighing units.
3. Stability sign.
4. Level gauge.
L
R
R
R
L
L

13
OK - Reading shown is stable.
g - Reading shown is given in grams.
OZ - Reading shown is given in ounces (1g = 0.03527396200 oz).
ct - Reading shown is given in carats (1g = 5.0000000000 ct).
dwt - Reading shown is given in pennyweight (1g = 0.64301493100dwt)
% - Reading shown is given in percent weight.
PCS - Reading shown is given in as a counting.
------- The balance is developing a stable reading.
UNABLE - Error operation.
HHHHH - The weight on the pan excedes the capacity of the balance.
LLLLLL – The pan is not properly seated or has been removed.
Calibration / Adjustment key
Print / Output key
Percentage key
Count / Function confirmation key
Unit conversion key
Touche Fonction Tare

14
POWER ON / POWER OFF THE BALANCE
Procedure
1. Press the key to power on the balance.
2. Press and hold the for 5 seconds to power off.
TARE FUNCTION
Procedure
1. Put a container on the weighing pan.
2. Press the key, the balance will auto tare.
3. Put the object you want to weigh into the container, the balance will
display the weight of the object.
COUNTING MODE
Procedure
1. To choose the reference object’s quantity, press the key and then
the key.
2. Put the empty container on the weighing pan and press the to
substract his weight.
3. Press the key, the display will show “10”, then press the key,
the reference quantity will change to “20, 50,…….1000 pièces”.
4. Press the key to confirm the selected reference quantity.

15
5. Press the for 3 seconds, the reference quantity will flicker, put the
same quantity objects into the container and then press again the
key. The reference quantity will be stable, the balance enters into count
mode.
6. Put the rest of objects into the container, the balance will display the
total quantity.
7. Take off the objects, you can repeat this action to count another objects.
8. To finish and come back to normal weighing mode, press the key.
PERCENTAGE MODE
Procedure
1. Press the key to 3 seconds. The message “100%” will flicker on the
display.
2. Put the reference object on the weighing pan and then press the
key again.
3. The “100%” message will be stable, the balance enters into percentage
mode.
4. Take off the reference object, the balance displays “0%”, then put the
compare object on the weighing pan.
5. The display will show the percent value relative to the reference weight
object.
6. To return to normal weighing mode press the key.

16
WEIGHING UNITS
Procedure
Press the key to select the desired unit weight (g, oz, dwt).
CALIBRATION
Procedure
To decide the accuracy of the balance through test the difference between
thereading and the actual weight of the object on the weighing pan.
1. Adjust the level bubble and warm the balance for 30 minutes.
2. Ensure no object on the pan.
3. Press the for 5 seconds, the display will show “cal -----“ and then the
calibration value.
4. According to the calibration value on the display, put the same weight on
the pan, the balance will display the weight, the calibration is over.
USER SETUPS
Procedure
Press the and keys together for 5 seconds to enter into Code
Setting State.

17
Under Setting State the function of keys are as follows:
• Key to save the current parameter and enter into the next parameter
setup.
• Key to move to left.
• Key to move to right.
• Key pressed for several seconds to enter into linearity calibration
state.
• Key to decrease the value.
• Key to increase the value.
PARAMETERS
No FUNCTION
CODE
DISPLAY
SYMBOL DESCRIPTION SETTING RANGE
1 C00800 Zero-x.x Zero range 0.0d to 6.0d
2 C00800 Stdy-x.x Sensibility 0.0d to 6.0d
3 C00800 Sens—X Internal sensitivity 1,2,3,4,5,6
4 C00800 Filt – X Filtration Parameter 1,2,3,4,5,6,7
1 is the weakest
7 is the strongest
5 C00800 Speedx Weighing speed mode
1-basse
1-Low-speed
2-Medium speed
3-Fast speed
6 C00801 LED—X Display LED brightness 1,2,3, P1,P2,P3
7 BL – X LCD back light display
mode On, Off, Auto
8 SLEEP Enter into power saving
mode 0 – 9
9 POST Power-on self-
inspection mode 0, 1

18
10 BEP Buzzer switch On, Off
11 C00802 Baudxx Baud rate 12:1200
12 C00802 Con---xxx Communication mode
KEY: PRT key
CON: continuous
Sty: communication
when stable
13 C01688 FLEXxx
Sensor flexibility
compensation, for
compensating weighing
deviation when the
balance is unload
-5 to 5
14 C01688 CrEEP-x Sensor creep rating 0, 1, 2, 3, 4, 5
15 C01688 TCrEEPx Weight compensation or
creep tracking time 0 – 9 seconds
16 C01688 RetZ ---x Weight compensation or
creep tracking time
0: not back to 0
1 – 9: means speed
to back to 0, larger
number, faster speed
to 0
17 C01688 SSENS-x Steady state adjustment
factor (generally no need
to adjust)
0 – 9. Setting to 0
means canceling this
function
18 C01688 SFILT-x Steady state filtration
parameter
0 – 5. Setting to 0
means cancelling this
function
19 C01688 TFILt-x Steady state filtration
extended time
0 – 60. Setting to 0
means cancelling this
function
20 C01688 Trckxxx Long-term weight
tracking is allowed or
not (only HZY has) 0, 1
21 rEdrSxx
Compensation way
(Remarks: it is not whole
point compensation
switch)
Only indicates
compensation way, it
is not the switch if the
compensation is on
or off
22 rEdInt Whole point
compensation enabled
or not
0: forbidden
1: enabled

19
23 rEdrEP
Repeatibility
compensation intensity,
larger value with
stronger compensation
0 – 9. Setting to 0
means canceling this
function
24 rEdrNxx Largest range for whole
point or repeatability
compensation 0d – 20d

20
COMMUNICATION WITH A COMPUTER
The balance keyboard functions can be accessed via the RS-232 interface.
The following commands are available:
U – :Units conversion.
T – : Tare function.
C – :Calibration with external standard weight.
P – : Print function.
% - : Percent function.
# - : Instant print.
M – : Counting function.
When a balance is connected to a computer, it is suggested that immediate
print # be used. In response to this command the balance will transm it
whatever number or message appears on the balance display.
The string format output is shown below:
A B C D E F G H I J K L M
A - +/- : Signs field, usually no display as a space when it is a positive
number, - is displayed when it is a negative number.
B – G: Number and decimal field, spaces are used when there are less
than six digits.
H – I: Spaces fields.
This manual suits for next models
4
Table of contents
Languages:
Other Gram Scale manuals

Gram
Gram WHITE MEL SERIES User manual

Gram
Gram GEC Series User manual

Gram
Gram RV-300i User manual

Gram
Gram VK Series User manual

Gram
Gram SILK ISLAND User manual

Gram
Gram D3 Series User manual

Gram
Gram Xtrem F User manual

Gram
Gram K3X Series User manual

Gram
Gram K3 SERIES User manual

Gram
Gram CR-30 User manual