manuals.online logo
Brands
  1. Home
  2. •
  3. Brands
  4. •
  5. Hacker
  6. •
  7. Toy
  8. •
  9. Hacker ZOOM 4D Instructions for use

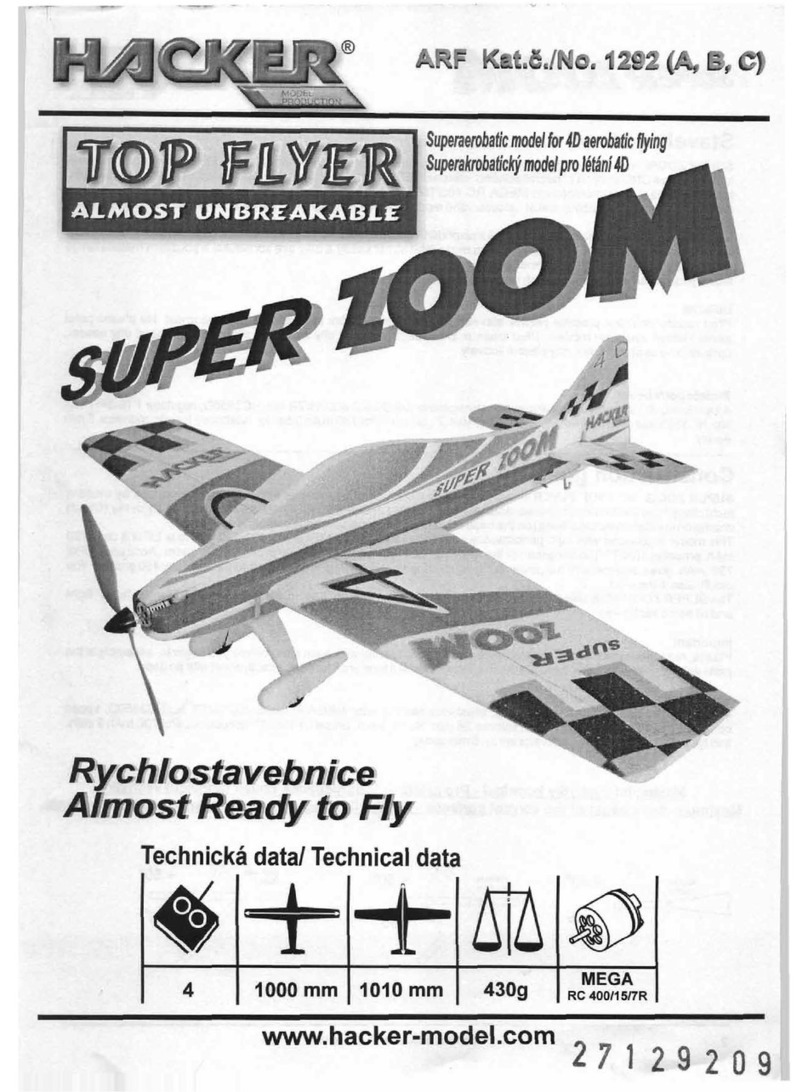
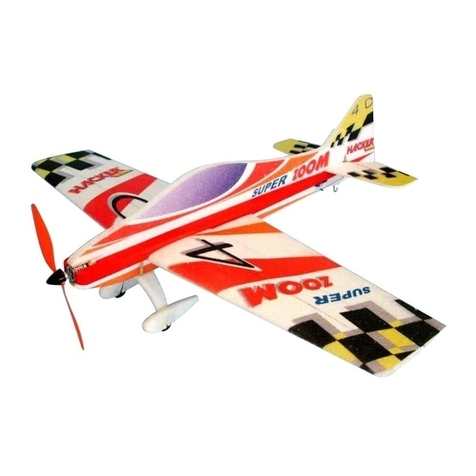
Hacker ZOOM 4D Instructions for use

MEGA
FORCE 400+
Technická data/ Technical data
g
850 mm 760 mm 390 g
4
Superaerobatic model for “3D” aerobatic flying
Superakrobatický model pro létání “3D”
www.hacker-model.com
Rychlostavebnice
Rychlostavebnice
Almost Ready to Fly
Almost Ready to Fly
www.hacker-model.com
Pitts EPP èervený / ed
Pitts EPP ARF modrý / blue
Pitts EPP ARF oranový / orange
ARF r Kat.è./No. 1 A299
Kat.è./No. 1299B
Kat.è./No. 1299C
It comes painted! No decals!
Model je potištìný! ádné samolepky!
116
No. 1292C BLUE
4D
4D
No. 1292B YELLOW
Coloured Fuselage, Wing and Horizontal Stabilizer,
Landing Gear, Wheels, Pushrods, Complete Hardware and
Instruction Guide.
Contents:
No. 1292A RED
Contents:
Coloured Fuselage, Wing and Horizontal Stabilizer, Landing
Gear, Wheels, Pushrods, Complete Hardware and Instruction
Guide.
Items Needed To Complete: (Not Included)
4 Channel RC Set with 3 Micro Servos, brushless electromotor
MEGA FORCE 400 No.HC35 , speed controller
No. spinner No. propeller
10/4,7 , accupack LiPol 7 0 mAh 3 cells.
/15/7R 50D F18-
3PH 18A HC3353, 28 mm HC5320,
” 0 -1000
Super lehké plováky / Superlight Floats
Airplane type Délka/Lenght
Reno Racers
Zoom Zoom
Extra Chaos
Super Zoom
Obsahuje:
Trup, køídlo, výškovku a smìrovku s povrchovou úpravou,
podvozek, kola, táhla a veškeré drobné pøíslušenství, stavební
návod.
Budete potøebovat:
4 kanálovou RC soupravu a 3-4 mikroserva, tøífázový power
set MEGA FORCE 400 No.HC3515, vrtuli 10x4.7, sadu
akumulátorù 3 LiPol 700-900 mAh.
Obsahuje:
Trup, køídlo, výškovku a smìrovku s povrchovou úpravou,
podvozek, kola, táhla a veškeré drobné pøíslušenství, stavební
návod.
Budete potøebovat:
4 kanálov RC souprav s 3 mikroservy, MEGA
400 HC35 ,
vrtul 10/4,7 , baterii LiPol
7 0 mAh 3 èlánky
ou u elektromotor
RC /15/7R No. 50D regulátor F18-3PH 18A
No.HC3353, kuel 28 mm No.HC5320, i ”
0 -1000 , øídké vteøinové lepidlo, Aktivátor spray, 5
minutové epoxy.
Items Needed To Complete (Not Included): 4 Channel RC Set
with 3 Micro Servos, Power set MEGA FORCE 400 No.HC.3515,
Propeller 10/4,7,Accu pack 3 LiPol 700-900mAh.
www.hacker-model.com
g
MEGA
FORCE 400
Technická data/ Technical data
g
900 mm 920 mm 320 g
4
350 mm
450 mm
550 mm
500 mm
No.1810
No.1807
No.1808
No.1809
4D
4D
NEW
USA
ý /
modrý / b
èervený / red
lue
fialov violet
Kat.è./No. 1300
Kat.è./No. 1300A
Kat.è./No. 1300
Kat.è./No. 1300
B
C
Zoom Zoom NEW ARF
Stavební návod
www.hacker-model.com www.hacker-model.com
Construction guide
Pitts Special 3 Model is produced by modern technology on CNC
machines from EPP “almost unbreakable” material.
+ 6 85
0
4 Channel RC Set with 3 Micro Servos, extension servo cables 100mm 1x and 150mm 2x, Power set MEGA FORCE
400 No.HC.351 , Propeller 10/4,7 , Accu pack LiPol 700-1200 mAh (3 cells);
Requirement
is superaerobatic model for D aerobatic flying.
This model is powered with high performance electro power set
MEGA FORCE 400 (No.HC351 ) with brushless motor, propeller 10/4,7”. The wingspan of the model is 0 mm and
wing charge is unbelievable only 19,5 g/ sqdm . Accu pack LiPol 700 mAh gives together with the power set the pull 500
g while the flying weight of the airplane is only 39 grams !
The flying time of Pitts Special is between 8 to 15 minutes, it depends on the flying figures. The model is able to "torque
roll” and then after giving more "gas” to rise verticaly up, looping in “knife” flight and all aerobatic figures. It is very easy to
land with the model, you are able to do it into your hand if you want like with handlaunchglider.
+ 6 ” thin type cyanoacrylat (CA) glue and
Activator spray, fusion glue.
Pitts Special 3 Model je vyroben moderní technologií na CNC
strojích z “ neznièitelného” materiálu EPP. +
6 85
90
4 kanálová RC soupravu s 3 mikroservy prodluovací servokabel 100 , pohonnou jednotku MEGA FORCE 400
No.HC.351 , vrtuli 10/4,7 , baterii LiPol 700-1200 mAh (3 èlánky);
Budete potøebovat
je superakrobatický model pro D akrobatické létání.
témìø Model je pohánìn pohonnou jednotkou MEGA FORCE 400
(No.HC351 ) s vrtulí 10/4,7”. Rozpìtí modelu je 0 mm a plošné zatíení je pouze 19,5 g/dm2 . Baterie LiPol 700 mAh
spolu s pohonnou jednotkou umoòují získat hmotnost modelu pouhých 3 gramù.
Letový èas modelu je podle létaných sestav 8 a 15 minut. Model je schopen na pùl plynu viset na vrtuli a po pøidání
plynu letìt kolmo vzhùru, je schopen zaletìt pøemet v noovém letu a další akrobatické prvky. S modelem mùe létat
témìø kadý a díky své konstrukci a pouitým materiálùm vydrí i “nešetrné” zacházení.
, mm +
6 ” tavné lepidlo, øídké kyanoakrylátové (CA) lepidlo a
aktivátor - sprej.
+40mm
- 40mm
Doporuèené maximální výchylky kormidel
Recommended maximum movements of the control surfaces
Køidélka
Ailerons
Výškovky
Elevators
+60mm
- 60mm
+85mm
- 85mm
Smìrovka
Rudder
Doporuèujeme: Plováky Super Zoom No.HC1809
Recommended: Floats Super Zoom No.HC1809
152
Upozornìní! Toto není hraèka! Warning! This is not a toy!
Mnoho štìstí pøi létání s modelem Pitts Special pøeje Hacker Model Production!
Good luck with the Pitts Special wish you Hacker Model Production!
Made in Czech republic by HACKER MODEL PRODUCTION a. s., Zahradní 465, 270 54 Øevnièov
Tel/Fax: (+420) 313 562229,562258 E-mail: Internet: www.Hacker-model.com
[email protected]
Dokonèení modelu
Instalace RC soupravy
Vyváení modelu
Zalétání
Final Check
Radio control set installation
Centre of gravity
Flying
Zkontrolujte celý model. Musí být soumìrný a nepokroucený.
Nainstalujte do modelu radiovou soupravu. Rozmístìní jednotlivých prvkù soupravy je znázornìno na obrázku. Nainstalujte serva a pøipojte k nim
táhla. Zapnìte RC soupravu a kontrolujte zda se kormidla pohybují správným smìrem. Pokud ne, pøipojte táhlo na druhou stranu páky serva nebo
pøepnìte na vysílaèi revers vypínaè pro poadované servo. Akumulátor umístìte tak, aby se jeho posouváním model vyváil. Pøi provozu
elektromotoru postupujte podle instrukcívýrobce elektromotoru aregulátoru.
Dokonèený model vyváíme. Poloha tìitì je mm od nábìné hrany køídla a je nutno ji dodret. Model podepøeme v oznaèeném
místì. V pøípadì, e se model sklání kupøedu, mùeme korigovat polohu tìitì posouváním baterie smìrem dozadu. Je-li model naopak lehký na
pøedek, posuòte baterii více dopøedu.
Zkontrolujte velikost asmysl výchylek navech ovládaných prvcích. Pøedlétáním vyzkouejte chod motoru v rùzných reimech otáèek apøesvìdète
se zda Vae RC souprava není ruena. Model polote na zem, dejte plný plyn a model se musí rozjet rovnì. Po asi 8 metrech model získá vyí
rychlost, mírnì pøitáhnìte výkovku a model se odlepí od zemì. Po startu stoupejte mírnì, aby model neztratil rychlost. Model lze odstartovat i
hozením z ruky. Pøi létání a jakékoliv manipulaci vdy zapínejte nejprve vysílaè a potom
pøijímaè! Pokud jdete létat na místo, kde ji nìkdo jiný létá, zjistìte jakou frekvenci má jeho vysílaè, uetøíte si tak velké zklamání z rozbitého modelu.
Check the model. It must be symetrical and not twisted.
Refer to top and side view, showing a basic radio installation. Put accu pack in fuselage as shown. Accu pack will be used for balancing the Pitts
Special. Use instruction guide for speed controller for operating with electro power set.
Support your model with your fingertips. It should balance, slightly nose down, when your finger tips are mm behind the leading edge of the
wing. Move the battery to balance properly.
Check each control surface for the correct movement and adjust pushrods. Check running of motor.For taking of you need a flying field about 50m
long without trees around. Put your Pitts Special on the flying field , put full gas. During 8 metres get the right speed for taking off. Move elevator a
little bit up and Pitts Special will be in the air. Model you can take off also from your hand.
Nikdy nelétejte s nevyváeným modelem!
Pøed prvním zapnutím vysílaèe dbejte na maximální bezpeènost!
Do not try to fly an out-of balanced model, as it will crash!
10-20 spodního
10-20
lower Pitts Special
www.hacker-model.com
RC set- 4 channel and power set
RC sestava 4 kanálová s pohonnou jednotkou
Elektromotor
Electromotor
Pohonná baterie
Accu pack
Regulátor otáèek
Speed controller Pøijímaè 4 kanálový
Receiver 4 channel
Serva
Servos
Køidélka
Ailerons
Výškovka
Elevator
Smìrovka
Rudder
Vypínaè
Switch
LiPol
www.hacker-model.com 314
72
1
Nasaïte kompletní podvozek do dráky v loi podvozku .
Insert the complete landing gear into the landing gear mount
.
10 12
10
12
12
Na høídel elektromotoru nasaïte unaeè, vrtuli a kuel (není
souèástí stavebnice), dùkladnì utáhnìte.
Insert the prop shaft, the propeller and the spinner to the
electromotor (not included). T ighten properly.
Nasaïte "Z" dráty do pák køidélek 1,6mm v horním køídle
( + ).
Insert the "Z" wires into the ailerons control horns in the
upper wing ( + ).
31 23
2a 3a 31 23
2a 3a
23
Nasuòte "Z" dráty do konektorù táhla ve spodním køídle
( + ).
Insert the "Z" wires into the pushrod connectors in the lower
wing ( + ).
31 16
2 3 31 16
2 3
73
31
74
31
16
75
Vyrovnejte køidélka podle nákresu. Utáhnìte dráty v
konektorech táhla ve spodním køídle ( + ).
Set the ailerons to neutral as shown. Tighten the screws in the
pushrod connectors .
31
16 2 3
16
31
Posouváním pohonné baterie model vyvate. Modeláøským
noem vyøíznìte do trupu otvor pro baterii. Díra musí být o1mm
mení ne baterie.
Moving the accu pack make the model balance. Into the fuselage
cut opening for accu pack - the hole must be about 1 mm smaller
of each side, the fuselage foam will hold the accu pack in the right
position.
1
1
76
77
akumulátor
accu pack
tìištì
ballance point
10-20mm
Akumulátor zamáèknìte do vyøíznuté díry v trupu .
The accu pack press into the hole in fuselage .
1
1
78
1 1 Trup / Fuselage HC 1299A(B,C)090
2 1 Levé dolní køídlo / Left Lower Wing HC 1299A(B,C)080
2a 1 Levé horní køídlo / Left Upper Wing HC1299A(B,C)085
31 Pravé dolní køídlo / Right Lower Wing spolu s 2 / along with 2
3a 1 Pravé horní køídlo / Right Upper Wing spolu s 2a / along with 2a
41 VOP / Horizontal stabilizer HC1299A(B,C)070
5 1 Smìrovka / Vertical fin HC1299A(B,C)060
6 2 Drát 1,6x560mm / Wire 1,6x560mm
7 2 Drát 1,6x640mm / Wire 1,6x640mm
8 2 Kryt kola / Wheel pant
9 2 Kryt podvozku / Landing gear cover
10 1 Podvozek / Landing gear
11 2 Kolo 40mm / Wheel 40mm
12 1 Loe podvozku / Landing gear mount
13 2 Trubièka 1,5/0,5x12mm / Tube 1,5/0,5x12mm
14 1 Prodlouení páky serva / Extension of the servo arm
15 1 Lita 3x7x180mm / Spruce 3x7x180mm
16 6 Konektor táhla / Pushrod connector
17 6 Podloka Quicklock / Washer Quicklock
18 2 Z drát Al 1,6x70mm / Z Wire Al 1,6x70mm
19 1 Páka kormidla (smìrovka) / Control arm (vertical fin)
20 1 Páka kormidla (výkovka) / Control arm (elevator)
21 2 Páka kormidla (køidélka) / Control arm (ailerons)
22 4 Páka køidélka 1mm / Aileron control arm 1mm
23 1 Páka køidélka 1,6mm / Aileron control arm 1,6mm
24 1 Loe motoru / Engine mount HC1299A520
25 4 roub M3x6 / Screw 3x6
26 3 Kolík kabiny / Cockpit pin
27 1 Baldachýn / Baldachin
28 2 Vzpìra køídla / Wing strut
29 1 Drát Al 1,6x120mm / Wire Al 1,6x120mm
30 4 Drát Al 1,6x360mm / Wire Al 1,6x360mm
31 2 Z drát Al 1,6x200mm / Z Wire Al 1,6x200mm
32 2 Plastová trubka 2/1x200mm / Plastic tube 2/1x200mm
33 2 Z drát Fe 0,8x330mm / Z Wire Fe 0,8x330mm
34 1 Kabina / Canopy HC1299A030
Èíslo Poèet Název Náhradnídíl
No. Qty. Description SparePart
Seznam dílù/Part list
www.hacker-model.com
7
6
www.hacker-model.com
1
23
2a 3a
4
5
8
8
9
9
6
7
10
11
12
13
14 15
1617
18
11
19 20
21
21
22
29
24
25
26
27
28
28
30
33
32
134
23
34
31
64
Polote model horním køídlem na rovnou desku. Dráty , vzpìry
a baldachýn zalepte do horních køídel ( + ) CA lepidlem
a zastøiknìte aktivátorem. Dráty slepte v místì pøekøíení.
Put the model on the flat board as shown. The wires wing
struts and baldachin glue into the upper wings ( + )
using CA Glue and activator spray. Glue the wires in their
crossover.
30
28 27 2a 3a
30 30,
28 27 2a 3a
30
2a 3a
1
65
2
31
Otoète model a dráty , vzpìry a baldachýn zalepte do
dolních køídel ( + ) a trupu CA lepidlem, zastøíknìte
aktivátorem.
Turn the model and glue the wires wing struts and
baldachin into the lower wing ( + ) and into the fuselage
using CA Glue and activator spray.
30 28 27
2 3 1
30, 28
27 2 3 1
67
10
11
13
CA
Nasaïte na podvozek poloviny trubièky a kola . Zajistìte
trubièky kapkou CA lepidla.
Insert half of the tube and wheels on the landing gear .
Use drop of the CA glue to secure the plastic tubes in place.
10 13 11
13 13 11 10
13
68
Sestavte podvozek podle obrázku. P
Complete the landing gear as shown.
øilepte kryty kol na
podvozek podle obrázku. Díly musí být zajitìny ve správné
poloze a do úplného zaschnutí lepidla.
Glue the wheel pants into
the landing gear as shown. Use CA glue and apply activator
spray. The parts must be ensured in correct position until the glue
is dry.
8
1
10
8
0
90°
88
10
8
8
10
A
B
A=B
Zkontrolujte rovnobìnost dolního køídla ( + ) a horního køídla
( + ) podle obrázku.
Check the alignment of lower wing ( + ) and upper wing ( + ).
2 3
2a 3a 2 3 2a 3a
2+3
2a+3a
66
Modeláøským noem proøíznìte do krytù podvozku záøez do
hloubky 3 mm podle obrázku.
9
Cut the slot in the landing gear covers using sharp knife. The slot
must be 3 mm deep.
9
69
9 9
10mm
70
88
99
10
odøíznout
trim away
N amáèknìte kryty a zaøíznìte hrany podle
obrázku.
Insert landing gear covers on the landing gear and cut the edges
using sharp knife as shown.
9
9
a podvozek n
10
71
N te kryty CA lepidlem podle obrázku.
Glue the landing gear covers on the landing gear using CA
glue as shown.
9
9 10
a podvozek pøilep
10
88
99
10
6
1
CA
1
6
20
40
www.hacker-model.comwww.hacker-model.com 512
Vlote do trupu loe podvozku podle obrázku a zalepte ho po
celém obvodu CAlepidlem.
Insert the landing gear mount into fuselage . Glue the landing
gear mount into fuselage around the edge. Use CA glue.
1 12
12 1
12 1
CA
1
12
1
2
Pøilote pravítko na trup podle obrázku.
Right position of the slot for the wire .
16
3
Modeláøským noem proøíznìte do trupu záøez do hloubky
3mm podle obrázku.
Cut the slot in the side of the fuselage using sharp knife. The slot
must be 3 mm deep.
1
1
1
1
4
Namaèknìte drát do dráky v trupu .
Press the wire into slot.
6 1
6
5
Na rovné pracovní desce zalepte drát do dráky CA lepidlem.
Body 1-4 opakujte na druhé stranì trupu .
On the flat board glue the wire into fuselage using CAglue.
In the same manner install the wire on the opposite side of the
fuselage .
6
1
6 1
6
1
90°
90°
6
Sestavte loe motoru , vyrovnejte podle obrázku a dùkladnì
slepte CAlepidlem.
Glue the engine mount as shown. Use CAglue.
24
24
24
CA
!
1
24
CA
!
Vlote loe motoru do trupu podle obrázku. Otvory v loi musí
být na pravé stranì trupu - zajiují vyosení motoru doprava.
Zalepte loe po celém obvodu CAlepidlem.
Insert engine mount into the fuselage . Be sure the holes are
on the right side - look from the top. Glue it in place around the
edge using CAglue.
24 1
24 1
8
7
Pøiroubujte motor ètyømi rouby na motorové loe .
Screw engine into the engine mount using screws .
25 24
24 25
1
25
24
Modeláøským noem vyøíznìte do trupu otvor pro regulátor
otáèek. Díra pro regulátor otáèek musí být mení o 1mm ne
regulátor. Regulátor vtlaète do vyøíznutého otvoru.
Cut opening for Electronic Speed Controller. Insert Speed
Controller into opening - the hole must be about 1 mm smaller, the
fuselage foam will hold the Speed Controller in the right position.
1
9
1
Na horní køídlo ( + ) polote pravítko podle obrázku.
Put the rule on the upper wing as shown.
2a 3a
( + )
2a 3a
Modeláøským noem proøíznìte do horní plochy køídla záøez pro
drát do hloubky 3mm v délce 640mm.
upper side upper
640mm lenght
7
Cut the slot in the of the wing using sharp knife.
The slot must be 3 mm deep and .
Zamáèknìte drát do záøezu v køídle.
Press
7
wire into slot in the wing.
7
Na rovné desce zalepte drát do horního køídla CA lepidlem,
zastøíknìte aktivátorem.
7
On the flat board glue the wire into upper side of the upper wing
using CA glue and activator spray.
7
2a 3a
80mm
80mm
2a 3a
2a
3a
7
CA
3a
2a
Do køidélek horního køídla ( + ) vyøíznìte dráky pro páky
køidélek podle obrázku. Páky vlote do dráek a zalepte CA
lepidlem, zastøíknìte aktivátorem.
2a 3a
23
Cut a slots in the ailerons of the upper wing ( + ) fo the control
horns as shown. Glue the control horns into the ailerons
using CA glue and activator spray.
2a 3a
23 23
20
55
56
57
58
59
60
61
Na baldachýn a vzpìry nasuòte horní køídlo ( + ).
Insert the uper wing ( + ) on the baldachin and the wing
struts as shown.
27 28 2a 3a
2a 3a 27
28
28
27
62
BA
A=B
Vyrovnejte horní køídlo ( + ) podle nákresu.
Align the uper wing ( + ) as shown.
2a 3a
2a 3a
2
2a
130
60
Do køídel ( + , + ) a trupu zapíchnìte dráty podle
obrázku.
Stab the wires into the wings ( + , + ) and into the fuselage
as shown.
2 3 2a 3a 1 30
30 2 3 2a 3a
1
Do køídel ( + , + ) zapíchnìte volné konce drátù podle
obrázku.
Stab the opposite ends of wires into the wings ( + , + ) as
shown.
2 3 2a 3a 30
30 2 3 2a 3a
63
30
2
2a
1
2a
3a
23
CA CA
CA
2
1
Do spodního køídla ( + ) zasuòte vzpìry .
Insert the wing strut into the lower wing ( + ) as shown.
2 3 28
28 2 3
28
28
1
27 !
Do trupu zasuòte baldachýn . Dodrte polohu dvou otvorù
podle obrázku.
Insert the baldachin into the fuselage as shown. Keep right
position of two holes at back side as shown.
1 27
27 1
34
26
Do kabiny pøilepte 2kolíky kabiny CAlepidlem.
Glue 2 canopy pins into the canopy use CA glue.
34 26
26 34
CA
Anténa
Antene Pøijímaè
Reciever Trup
Fuselage
11
Do trupu propíchnìte otvory pro anténu. Protáhnìte anténu
otvory podle obrázku.
Pin the holes into the fuselage for the antene. Insert the antene
into the holes as shown.
1
1
Pøijímaè vlote do vyøíznuté díry. Pøipojte serva výkovky,
smìrovky køidélek a regulátor k pøijímaèi.
Insert the receiver into place. The fuselage foam will hold it in
place. Plug the elevator, rudder and aileron servos and electronic
speed controller conectors into receiver.
,
1
www.hacker-model.com www.hacker-model.com 116
Modeláøským noem vyøíznìte do trupu díry pro serva výkovky
a smìrovky a pro pøijímaè. Díry musí být na délku i íøku o 1mm
mení ne serva.
Using sharp knife cut an opening for rudder and elevator servos
and for Receiver. The opening for servos must be 1mm smaller
from each side.
1
10
11
tavné lepidlo
fusion glue
Serva namaèknìte do vyøíznutých otvorù podle obrázkù a
zajistìte tavným lepidlem.
Insert the servos into the hole as showns. Us the fusion glue.
1
12 16
17
Do pák serv nasaïte konektory táhla a zajistìte podlokami
Quicklock .
16
17
Install the pushrod connector to the servo arm. Insert the
Quicklock onto the pushrod connector .
16
17 16
RC souprav u serva neutrálu. y
ùm o nastavte do Pák serv pøiroubujte
k serv .
arms s
s
Use your radio system and determine which hole in the servo
will give the desired control throw. Install the servo arm on
the servo .
1
13
14
Do trupu vyvrtejte otvor prùmìr 8mm pro servokabel regulátoru.
Kabel otvorem protáhnìte k pøijímaèi.
Into the fuselage drill 8mm hole for servo cable of the electronics
speed controller. Install the servo cable into this hole in opening
for receiver.
1
1
15
osa konektoru táhla pro výškovku
axis of pushrod connector for elevator
16
16
1
1
32
Modeláøským noem proøíznìte na pravé stranì trupu záøez pro
trubièku . Poloha pravítka podle obrázku.
32
Using sharp knife cut the slot for the tube at right side of the
fuselage. The slot must be 3 mm deep. Position slot as shown.
32
otvor pro pøijímaè
opening for the receiver
1
elektronický regulátor
electronic speed control
47
16
32
Trubièku zamaèknìte do záøezu v trupu podle obrázku.
Zalepte CAlepidlem.
Press the tube into the slot in fuselage as shown. Glue it using
CAglue.
32 1
32 1
1
48
49
50
52
53
Kabinu ostøíhejte podle naznaèených rysek. Vyvrtejte a
vystøíhnìte 3mm otvory pro pøipevnìní kabiny.
Trim the canopy according the guidelines. Drill three holes
3mm and cut out in the front as shown.
34
34
34
vpøedu vyvrtat a vystøíhnout
in the front drill and cut out
34
1
26
1
34
26
CA
Do trupu zapíchnìte a pøilepte pøední kolík kabiny . Kabinu
nasuòte na pøední kolík. Boèní kolíky zapíchnìte do trupu.
Glue the front canopy pin into the fuselage as shown. Put on
the canopy under front canopy pin . Both side canopy pins
stab into the fuselage side as shown.
1 26
26 1
34 26 26
1
zapíchnout kolíky
stab canopy pin
51
34
CA
Na rovné desce slepte horní køídla a CA lepidlem,
zastøíknìte aktivátorem.
On the flat board glue the lower wing panels , together using
CA glue and activator spray.
2a 3a
2a 3a
2a 3a
54
4
15
10mm
osa konektoru
axisconnector
záøezy
slots
Modeláøským noem
as shown.
vyøíznìte do køidélek záøezy pro páky
køidélek podle obrázku.
Cut a slots in the ailerons for the control horns
21 21
710
17
osa konektoru táhla pro smìrovku
axis of pushrod connector for rudder
16
16
10
1
CA
1
32
18
1
4
90°
výkovka 4
elevator 4
trup 1
fuselage 1
VOP do trupu dùkladnì zalepte po celém obvodu CAlepidlem.
Dodrte kolmost VOP k trupu podle obrázku.
The horizontal stabilizer into the fuselage glue arround the
edge with CA glue. Check the perpendicularity as shown.
4 1 44 1
Zasuòte VOP do trupu podle obrázku.
Insert the horizontal stabilizer into the fuselage as shown.
4 1 4 1
Na rovné desce zalepte litu d
15
4
4
o výkovky CA lepidlem.
Dodrte vzájemnou polohu polovin kormidel - pøitisknìte je na
pracovní desku bìhem lepení. Zastøíknìte aktivátorem.
On the flat board glue the spruce into the elevator with thin
type CA glue and apply the activator spray. Check the right
position, during the glueing push the elevator to the flat board.
4
15
19
20
1
4
1
4CA
CA
90°
trup 1
fuselage 1
výkovka 4
elevator 4
www.hacker-model.com www.hacker-model.com
21
33
1
4
20
32
Na Z drát 0,8x330 navléknìte páku (s výøezem), drát
prostrète trubkou v trupu .
33 20
32 1
Onto Z wire 0,8x330 insert the horn (with slot), put the wire
through the tube in the fuselage .
33 20
32 1
Ostrým noem proøíznìte záøezy pro páku výkovky .
20
Using the sharp knife cut the slots for control horn (elevator) .
20
Z drát 0,8x330 prostrète konektorem na páce serva
výkovky.
33 16
The Z wire 0,8x330 insert into the pushrod connector on the
horn of servo for elevator.
33 16
4
1
20
22
1
16 33
32
Stejným zpùsobem jako v obr. zalepte trubièku na levé
stranì trupu.
In the samme manner (as fig. ) install the tube into the left
side of fuselage .
18
18
32
32
1
23
Páku zamáèknìte do záøezu ve výkovce a dùkladnì zalepte
CAlepidlem
20 4
.
Press the horn into the slot in the elevator using CA glue
20 4, .
CA
20
4
1
CA
90°
23
1
Slepená køídla a vlote do trupu podle obrázkù. Kontrolujte
správnou polohu køídla k trupu . Køídlo musí být soumìrnì a
kolmo k trupu . Check if the wing
is in the centre and in the right alignment.Also check if the wings is
perpendicular to the fuselage side.
2 3 1
1
1
Insert wings , into the fuselage as showns.
2 3 1
dùkladnì podle obrázk
Glue the wing in place using CA glue. Apply glue at the top and
than to the bottom (as shown).
Zalepte køídlo do trupu CA lepidlem u .
1
2
3
1
90°
Provrtejte do køídla + a trupu otvor 8mm pro kabel serva
køidélek a do prostoru pro pøijímaè.
I
2 3 1
nto the lower wing + and the fuselage drill the 8mm hole for
aileron servo cable up to the space for receiver.
2 3 1
40
41
42
CA
21
2
3
1
Servo køidélek vlote do otvoru ve spodním køídle ( + ) podle
obrázku, kabel serva vyveïte otvorem k pøijímaèi. Zapnìte RC
soupravu, nastavte servo do neutrálu. Nasaïte páku serva s
nalepeným prodlouením páky . Servo zalepte do køídla
tavným lepidlem.
2 3
14
Insert the ailerons servo into the hole and put through the servo
cable into the opening for receiver. Switch on the RC-set for to
have the servo in neutral. Install the servo arm on the servo. Glue
the servo using glue.fusion
23
43
44
Páky køidélek nasaïte do dráek a zalepte CA lepidlem.
Glue the control horns into the ailerons with CA glue as shown.
21 21
45
1
2
3
21
18
16
Z dráty nasaïte do pák køidélek a do konektorù táhla .
18 21 16
Zapnìte RC soupravu, nastavte servo do neutrálu. Nastavte
køidélka do neutrálu a utáhnìte rouby konektorù táhla .
Insert the control wires into the ailerons horns and into
pushrod connector as shown. Switch on the RC-system for to
have the servo in neutral. Put the ailerons in neutral. Now the
pushrod connectors screws must be tightened.
16
18 21
16
16
46
8mm
23
7
CA
1
29
25mm
4
5
CA
5
1
4
9
8
www.hacker-model.com www.hacker-model.com
24
1
Táhlo výkovky odstøíhnìte cca 10mm od konektoru táhla .
Cut the pushrod as shown.
16
cca 10mm
Smìrovku pøilepte na trup CA lepidlem. Kontrolujte kolmost a
souosost smìrovky podle nákresu.
Glue Vertical fin on the fuselage using CA glue. Check the
perpendicularity and alignment as shown.
5 1
5 1
4
5
1
90°
CA
15
4
Na Z drát 0,8x330 navléknìte páku , drát prostrète trubkou
v trupu .
33 21
32 1
Onto Z wire 0,8x330 insert the horn , put the wire through the
tube in the fuselage .
33 21
32 1
1
3233
21
4
5
Z drát 0,8x330 prostrète konektorem na páce serva
smìrovky.
33 16
The Z wire 0,8x330 insert into the pushrod connector on the
horn of servo for rudder.
33 16
132
33 16
Do smìrovky proøíznìte záøezy pro páku
smìrovky . smìr
5
19 5
ostrým noem
Páku zamáèknìte do záøezu ve ovce a
dùkladnì zalepte CAlepidlem
Using the sharp knife cut the slots for control horn (rudder) .
Press the horn into the slot in the elevator using CA glue
.19
19 4, .
19
5
4
1
CA
27
28
Zapnìte RC soupravu. .
Vyrovnejte smìrovku a výkovku podle
nákresu. Dùkladnì utáhnìte rouby konektorù na táhlech.
Switch on the RC set. control surfaces as
shown. the connector screws.
Put the to the neutral
Tighten
vyrovnejte kormidla á
control surfaces
do neutr lu
put into neutral
29
20mm
Ohnìte drát (Al 1,6x120) podle obrázku.
Bend the wire
29
29
(Al 1,6x120) as shown.
29
30
Drát zapíchnìte do trupu podle obrázku. Zalepte CA
lepidlem.
Stab the wire into the fuselage
29 1
29 1
as shown. Glue using CA glue.
CA
CA
23
Na rovné desce slepte dolní køídla a CA lepidlem.
On the flat board glue the lower wing panels , together using CA
glue.
2 3 2 3
31
32
55mm
55mm
Na dolní køídlo ( + ) polote pravítko podle obrázku.
Put the rule on the lower wing ( + ) as shown.
2 3 2 3
Modeláøským noem proøíznìte do spodní plochy køídla záøez pro
drát do hloubky 3mm v délce 640mm.
lower side lower
640mm lenght
7
Cut the slot in the of the wing using sharp knife.
The slot must be 3 mm deep and .
33
34
Zamáèknìte drát do záøezu v køídle.
Press the
7
wire into slot in the wing.
7
Na rovné desce zalepte drát do dolního køídla CA lepidlem,
zastøíknìte aktivátorem.
7
On the flat board glue the wire into bottom side of the lower wing
using CA glue and aply activator spray.
7
23
35
Pøilepte prodlouení páky serva na páku serva køidélek CA
lepidlem.
Glue the extension of the servo arm onto the ailerons servo
arm using CA glue. Before glueing rough the arm and extension.
14
14
Plochy pøed lepením zdrsnìte.
Do prodlouení páky serva nasaïte konektory táhel . Ze
spodní strany je zajistìte podlokami Quicklock .
Insert connectors into extension of the servo horn and insert
Quicklock washers on the opposite side as shown and press
together.
14 16
17
16 14
17
36
37
14
CA
16
17
14
25
23
23
26
Do køidélek spodního køídla ( + ) vyøíznìte dráky pro páky
køidélek podle obrázku. Páky vlote do dráek a zalepte CA
lepidlem.
2 3
22
Cut a slots in the ailerons of the lower wings ( + ) fo the control
arms as shown. Glue the control arms into the ailerons using
CAglue.
2 3
22 22
CA CA
22
22
30mm
Do pák køidélek nasaïte konektory táhla a zajistìte
podlokami Quicklock .
washers on the opposite side and press together.
22 16
17
17
Install the pushrod connector to the aileron horns . Push the
Quicklock
16 22
16
17
22 22
38
39

Other manuals for ZOOM 4D

1

This manual suits for next models

1

Other Hacker Toy manuals

Hacker SPECTRE Reference manual

Hacker

Hacker SPECTRE Reference manual

Hacker RACE1200 Series User manual

Hacker

Hacker RACE1200 Series User manual

Hacker Ballerina Manual

Hacker

Hacker Ballerina Manual

Hacker SBACH 342 1200 User manual

Hacker

Hacker SBACH 342 1200 User manual

Hacker Xtra Vector HC 1360A User manual

Hacker

Hacker Xtra Vector HC 1360A User manual

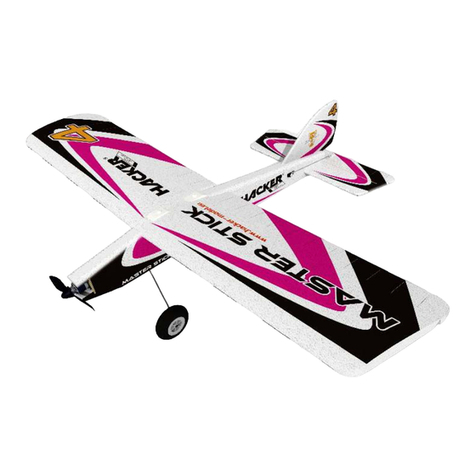
Hacker Master Stick hkpa2000 User manual

Hacker

Hacker Master Stick hkpa2000 User manual

Hacker HC 1392 A PS User manual

Hacker

Hacker HC 1392 A PS User manual

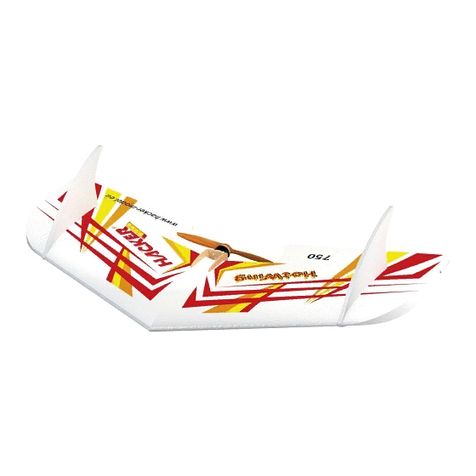
Hacker Hotwing 750 User manual

Hacker

Hacker Hotwing 750 User manual

Hacker Acrostar mk2 XL User manual

Hacker

Hacker Acrostar mk2 XL User manual

Hacker Me-163 User manual

Hacker

Hacker Me-163 User manual

Hacker DH 82 TIGER MOTH User manual

Hacker

Hacker DH 82 TIGER MOTH User manual

Hacker FOX Electro SKG Series User manual

Hacker

Hacker FOX Electro SKG Series User manual

Hacker WW2 WARBIRDS AIRCOMBAT Series User manual

Hacker

Hacker WW2 WARBIRDS AIRCOMBAT Series User manual

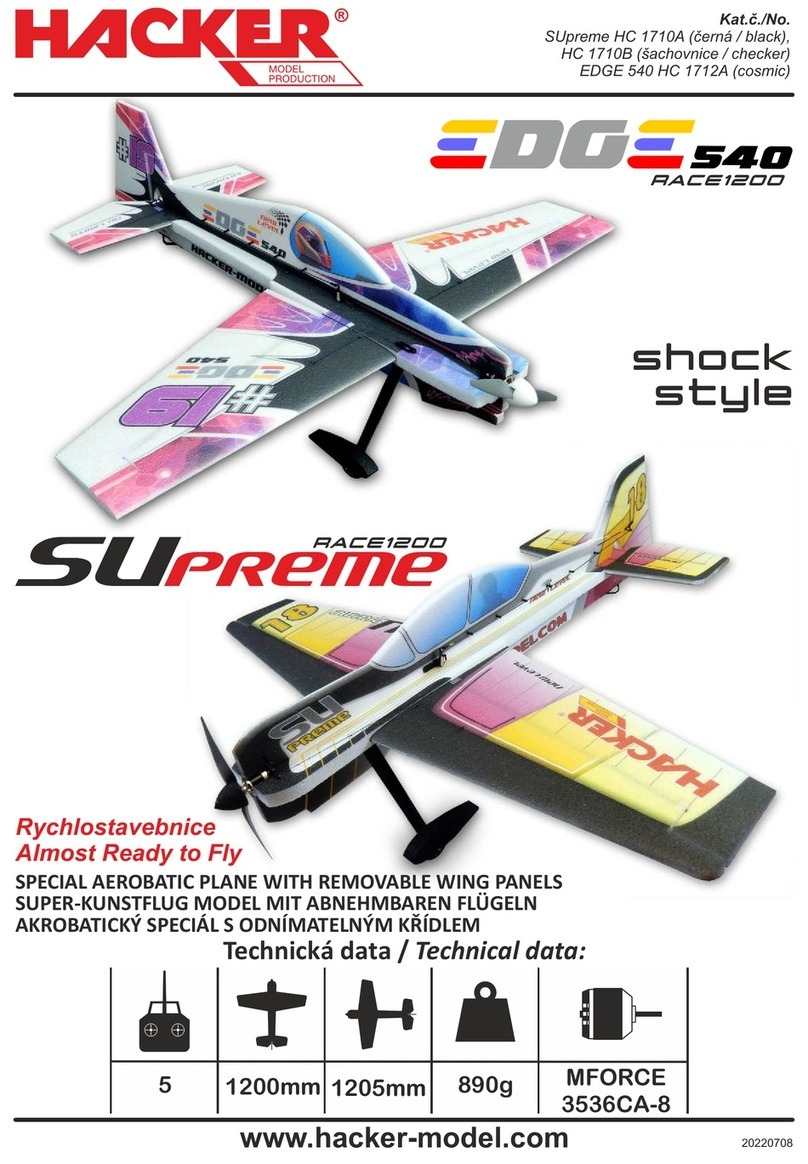
Hacker EDGE 540 RACE 1200 User manual

Hacker

Hacker EDGE 540 RACE 1200 User manual

Hacker ZOOM 4D Instruction manual

Hacker

Hacker ZOOM 4D Instruction manual

Hacker A30-UAV User manual

Hacker

Hacker A30-UAV User manual

Hacker Skyfighter Evo User manual

Hacker

Hacker Skyfighter Evo User manual

Hacker FLY 1107 User manual

Hacker

Hacker FLY 1107 User manual

Hacker DLG 1000 User manual

Hacker

Hacker DLG 1000 User manual

Hacker EDGE 540 v3 Toxic User manual

Hacker

Hacker EDGE 540 v3 Toxic User manual

Hacker Bird Wings Ara User manual

Hacker

Hacker Bird Wings Ara User manual

Hacker HURRICANE User manual

Hacker

Hacker HURRICANE User manual

Hacker Sky Fighter User manual

Hacker

Hacker Sky Fighter User manual

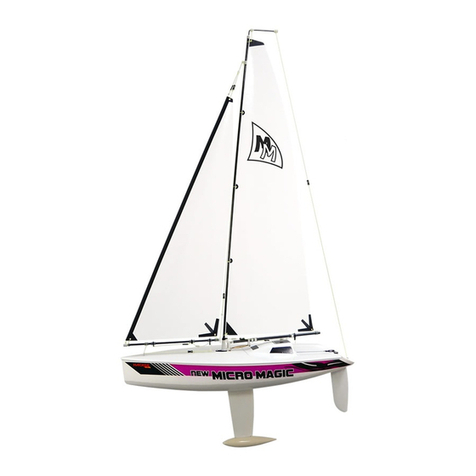
Hacker Micro Magic Instruction manual

Hacker

Hacker Micro Magic Instruction manual

Popular Toy manuals by other brands

Brassmasters BULLDOG instructions

Brassmasters

Brassmasters BULLDOG instructions

Nine Eagles P47 instruction manual

Nine Eagles

Nine Eagles P47 instruction manual

Beyblade Wyborg instructions

Beyblade

Beyblade Wyborg instructions

Hobbico P-40 WARHAWK Assembly instructions

Hobbico

Hobbico P-40 WARHAWK Assembly instructions

LEGO 4100 manual

LEGO

LEGO 4100 manual

Hasbro Cinderella Musical Castle 10119 instruction manual

Hasbro

Hasbro Cinderella Musical Castle 10119 instruction manual

Fisher-Price BMG94 manual

Fisher-Price

Fisher-Price BMG94 manual

Tiger Electronics Find Furby 70-883 instruction manual

Tiger Electronics

Tiger Electronics Find Furby 70-883 instruction manual

Kasama Srimok 90 manual

Kasama

Kasama Srimok 90 manual

Phoenix Model Dolphin 40 instruction manual

Phoenix Model

Phoenix Model Dolphin 40 instruction manual

GRAUPNER 2158 Building instructions

GRAUPNER

GRAUPNER 2158 Building instructions

GREAT PLANES SopWith Camel instruction manual

GREAT PLANES

GREAT PLANES SopWith Camel instruction manual

Mattel little MOMMY DTV56 instructions

Mattel

Mattel little MOMMY DTV56 instructions

Pilot Communications COLUMBIA 400 Assembly manual

Pilot Communications

Pilot Communications COLUMBIA 400 Assembly manual

Eduard Mask B-17G Flying Fortress Assembly instructions

Eduard

Eduard Mask B-17G Flying Fortress Assembly instructions

THE WORLD MODELS PAULISTINHA P-56 EP instruction manual

THE WORLD MODELS

THE WORLD MODELS PAULISTINHA P-56 EP instruction manual

AeroWorks 35cc EXTRA 300 ARF-QB Assembly manual

AeroWorks

AeroWorks 35cc EXTRA 300 ARF-QB Assembly manual

MTHTrains PREMIER GP 7/9 operating instructions

MTHTrains

MTHTrains PREMIER GP 7/9 operating instructions

manuals.online logo
manuals.online logoBrands
  • About & Mission
  • Contact us
  • Privacy Policy
  • Terms and Conditions

Copyright 2025 Manuals.Online. All Rights Reserved.