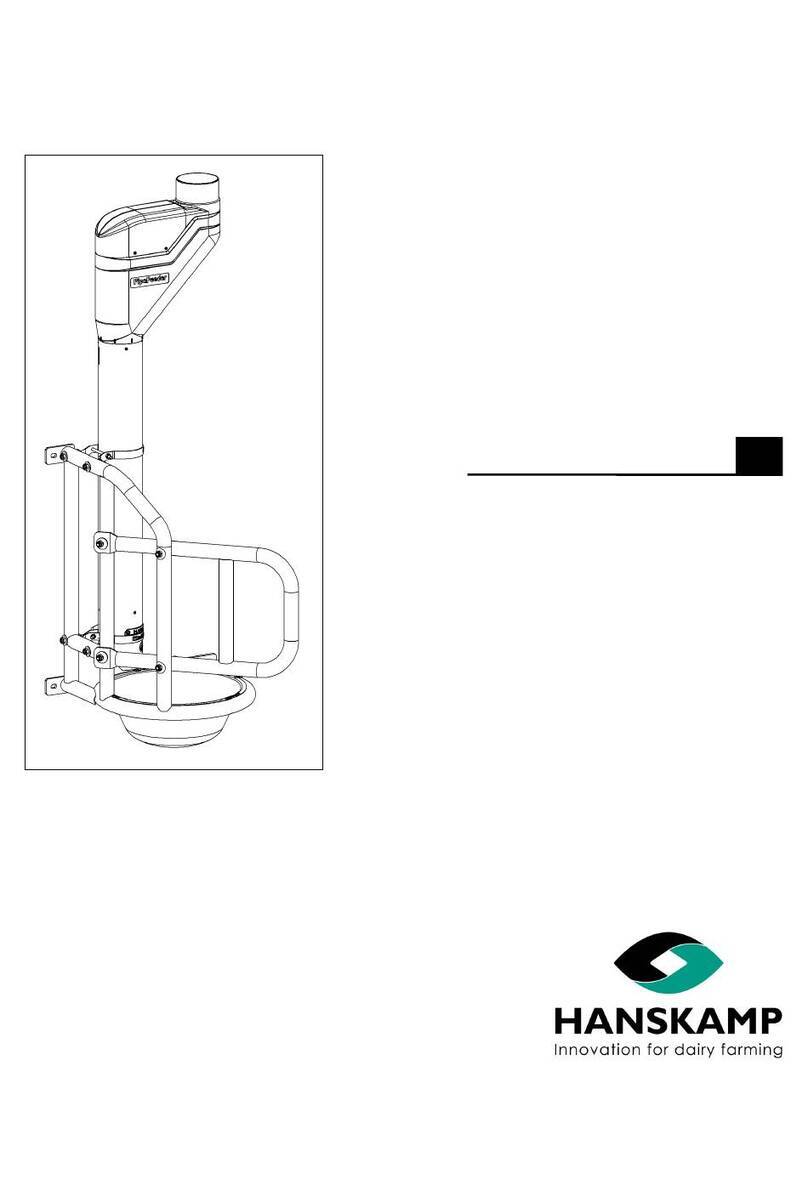
Hanskamp FeedStation 42000 User guide

FeedStation 42000
EN
Installaon and operang instrucon
Arcle number: 010-084-000
Date: January 2017
Version 3.5 - Translaon of Original Instrucons for use
Doenchem,
The Netherlands
www.hanskamp.nl
Voerstation
Out of parlour feeder
Futterstation
Distribution alimentation con-
centré(DAC)

2 - 17
Hanskamp AgroTech B.V. (the Netherlands) www.hanskamp.nl/en
FeedStaon
EN 42000
Name
Address
Telephone number
E-mail address
Model Model number
Feedstaon walk-in 42000
Preface
Manual Contents
This manual contains the informaon necessary for the correct installaon and operaon
of a Hanskamp FeedStaon. Study and understand this informaon thoroughly before
conguraon of the FeedStaon. Failure to do so could result in damage to equipment.
Please consult your milking equipment dealer if you do not understand the informaon
in this manual, or if you need addional informaon. All informaon in this manual has
been compiled with care. Hanskamp shall not be liable for errors or faults in this manual.
The recommendaons are meant to serve as guidelines. All instrucons, pictures and
specicaons in this manual are based on the latest informaon that was available at the
me of publicaon. Your FeedStaon may comprise improvements, features or opons
that are not covered in this manual.
Applicability
The table below shows the type numbers of the FeedStaon for which this manual is
applicable.
Model designaon
Contact number Local Service Provider
We suggest you write the name, address, telephone number and e-mail address of your
local service provider contact in the table below. This makes sure you can easily nd the
informaon.

3 - 17
Hanskamp AgroTech B.V. (the Netherlands) www.hanskamp.nl/en
FeedStaon
EN 42000
1. Introducon
The FS-WI concentrate feeding staon ts into any dairy unit and can be connected to
any feeding computer. Installaon of the FeedStaon is quick and easy. The very clever,
modular nature of the FeedStaon means it is possible to link mulple
FeedStaons next to each other. This is done at a remarkably low cost as each addional
FeedStaon only needs one sidebar. Due to it's open character the cow can remain it's
contact with the herd. This is good for cowcomfort.
The informaon in this manual is for farmers and technicians.
• Dairy farmers use the informaon to test and adjust the FeedStaon or to list
overviews.
• Technicians use the informaon to install and setup the FeedStaon.

4 - 17
Hanskamp AgroTech B.V. (the Netherlands) www.hanskamp.nl/en
FeedStaon
EN 42000
2. Safety
2.1 Introducon
The safety alert symbol idenes important safety messages on your FeedStaon and in
the manual. When you see this symbol, be alert to the possibility of personal injury or
death. Follow the instrucon of the safety message.
Safety Alert Symbol
2.2 Signal Words
Note the use of the signal words DANGER, WARNING and CAUTION with the safety mes-
sages. The signal word for each message uses the following guidelines:
Warning! Indicates a potenally hazardous situaon that, if not avoided, could
result in death or serious injury, and includes hazards that are exposed when
guards are removed.
Danger! Indicates a imminently hazardous situaon that, if not avoided, will
result in death or serious injury.
2.3 Safety Instrucons
YOU are responsible for the SAFE operaon and maintenance of your FeedStaon. YOU
must make sure that you and anyone else who is going to operate, maintain or work in
the vicinity of the FeedStaon knows all the related SAFETY informaon in this manual.
YOU are the key to safety. Good safety pracces protect you and the people around you.
Make these pracces a working part of your safety program. Make sure EVERYONE who
operates, maintains or works near the FeedStaon obeys the safety precauons. Do not
risk injury or death by ignoring good safety pracces.
• FeedStaon owners must train operators before they operate the FeedStaon.
This training must be repeated at least annually.
• The operator must read, understand and obey all safety and operang instruc-
ons in the manual.
• A person who has not read and understood all safety and operang instrucons
is not permied to operate the FeedStaon.
• Do not modify the equipment in any way. Unauthorized modicaon may impair
the funcon and/or safety and could aect the life of the equipment, and per-
sons.
• Only use approved spare parts, and make sure they are only installed by author-
ized technicians.

5 - 17
Hanskamp AgroTech B.V. (the Netherlands) www.hanskamp.nl/en
FeedStaon
EN 42000
2.3.1 General Safety
• Read and understand the manual and all safety signs before you connect power
supplies to operate or adjust the FeedStaon.
• Only trained persons are permied to operate the FeedStaon. A rst-aid kit must
be available near the FeedStaon. Store in a highly visible place.
• A carbon dioxide or foam re exnguisher must be available near the FeedStaon.
Store the re exnguisher in a highly visible place.
• Install all protecve covers and guards before you operate the FeedStaon.
• Wear the correct protecve clothing and equipment. Disconnect and isolate the
electrical power supply before you clean or do maintenance on the FeedStaon,
also be sure that the compressed air supply is depressurised.
• Know the emergency medical centre number for your area.
• Contact your nearest milking equipment dealer provider if you have any quesons
• Review safety related items with all operators frequently (annually).
2.3.2 Electrical Safety
• Only an authorized electrician must install the electrical power supply for the
FeedStaon.
• Make sure the electrical grounding of the electrical system and all parts of the
FeedStaon meet the local rules and regulaons.
• Replace any damaged electrical lines, conduits, switches and components immedi-
ately.
• Isolate the electrical power supply before you open the lid of the FeedStaon to
work on the electrical system.
2.3.3 Installaon Safety
• Read and understand the instrucons in this manual.
• Make sure the FeedStaon is correctly installed.
2.3.4 Operang Safety
• Read and understand the applicable manual and all safety signs before you con-
nect power supplies to operate or adjust the FeedStaon.
• Only trained persons are permied to operate the FeedStaon.
• Switch o the electrical power supply by taking plug out of the power point and
secure the plug before you clean or do maintenance on the FeedStaon.
• Install the covers and guards before you operate the FeedStaon.
• Keep hands, feet, hair and clothing away from all the electrical parts.
• Keep unauthorized persons, especially small children away from the FeedStaon at
all mes.
• Before the electrical supply is aached to the FeedStaon, make sure all parts are
ght and that all the parts are in good condion.
• Contact your nearest milking equipment dealer if you have any quesons.

6 - 17
Hanskamp AgroTech B.V. (the Netherlands) www.hanskamp.nl/en
FeedStaon
EN 42000
2.3.5 Maintenance Safety
• Read and understand the applicable manual and all safety signs before you con-
nect power supplies to operate or adjust the FeedStaon.
• Only trained persons are permied to maintain the FeedStaon.
• Switch o the electrical power supply by taking plug out of the power point and
secure the plug before you clean or do maintenance on the FeedStaon.
• Wear protecve clothing and safety goggles when you do work on the pneumac
system.
• Make sure all the covers and guards are installed when maintenance work is com-
plete.
2.3.6 Safety Decals
• General safety messages appear in this safety messages secon. Specic safety
messages are in applicable parts of this manual when potenal hazards may occur
if the instrucons or procedures are not followed.

7 - 17
Hanskamp AgroTech B.V. (the Netherlands) www.hanskamp.nl/en
FeedStaon
EN 42000
3. Installaon instrucon
General descripon
The Hanskamp FeedStaon is a universal feed staon, with a modular setup, that
has been developed to provide cows with their individual porons of concentrates.
The FeedStaon is ed with PipeFeeder concentrate dosators and can be expand-
ed to take up to four dierent types of feed (one PipeFeeder per feed type). In
addion, the L’port closing gate (Item No. 004-030-000) can easily be incorporated
into the FeedStaon (Fig. 1). These installaon instrucons will guide you through
the installaon of the FeedStaon. Always read all the instrucons and keep to the
safety rules. You can browse sample installaons at www.hanskamp.nl/en.
See the annex for the order numbers and names of various parts.
Transport and storage
The FeedStaon will be shipped on a pallet. This pallet
is completely sealed and the corners are covered with tape to prevent damage.
The FeedStaon is also stored in this way.
Please note! Always use an appropriate vehicle (forkli truck,
pallet fork, pump truck, etc.) to move the pallet.
Please note! Parts may fall o the pallet when it is being unpacked.
Type descripon;
to be found on the Feedtrough Item.no.004-203-000
1
The pallet includes (for one FeedSta-
on):
1. 4x Item no. 004-200-000 FS side fence
2. 1x Item no. 004-201-000 FS connecng gate
3. 2x Item no. 004-202-000 FS frame
4. 1x Item no. 004-203-000 FS feed trough
5. 1x Item no. 004-205-000 Set of FS mounng
components
6. 1x Item no. 004-208-000 Cable guide tube
7. 1x Item no. 27000/28000 PipeFeeder*
8. 0x Item no.: 004-207-000 Set of mounng
components per feed type**
* Variable depending on number of feed types
ordered.
* Variable depending on number of feed types
ordered, starng at two.
2
Item
nummer
Product
name
Contact
details

8 - 17
Hanskamp AgroTech B.V. (the Netherlands) www.hanskamp.nl/en
FeedStaon
EN 42000
Safety sckers
The user and installer are responsible for the safe operaon and maintenance of the
FeedStaon. Safety sckers are used to ensure safety in and around the FeedStaon.
Informaon about which sckers should be aached where can be found further on in
these instrucons for installaon and use (incl. Fig. 3).
Applying the sckers:
• Make sure the surface is dry and clean.
• Make sure the surface temperature is at least 5°C.
• Find the right posion for the scker.
• Remove a small poron of the foil on the back.
• Place the scker on the surface and press a small poron of the self-adhesive
layer onto the surface.
• Carefully remove the foil and press down the rest of the scker.
• Remove any air bubbles with a needle and use the foil to smoothen the scker.
Maintenance of the sckers:
• Keep the safety sckers clean and legible. Clean the safety sckers with soap and
water. Do not use any solvents or abrasives that could damage the safety sckers.
• Replace missing or illegible safety sckers.
• Safety sckers are obtainable from Hanskamp. Always specify the item numbers
in correspondence.
Scker warning risk of impact
001-703-000
3
001-703-000

9 - 17
Hanskamp AgroTech B.V. (the Netherlands) www.hanskamp.nl/en
FeedStaon
EN 42000
Assembly:
1. Check that all the parts are present using the item list.
Please note! No electrical items are supplied for operang the Feed-
Staon with accompanying PipeFeeders. Please note! The Feed-
Staon must be installed on an appropriately constructed, rm sur-
face. Please note! It must not be possible for cows to lie down in the
exit route of the FeedStaon.
2. First assemble the side fences (Item No. 004-200-000). Do this using the double T
clamps (Item No. 004-115-000) with the standing tube (Item No. 004-204-000) in
between (Fig. 4).
3. Mount one of the two frames (Item No. 004-202-000) on the feed trough side
using the indicated mounng materials (Fig. 5).
4. Aach the connecng gate (Item No. 004-201-000) to the two side fences (Fig.
6). The mounng components for this have been supplied.
5. Insert the second frame between the side fences and aach this too using the
mounng materials as used in step 3 (Fig. 7).
Please note! Make sure the side fences and frames are fully levelled
(vercally and horizontally). Then x them into posion.
4
5
6
7

10 - 17
Hanskamp AgroTech B.V. (the Netherlands) www.hanskamp.nl/en
FeedStaon
EN 42000
6. Place the feedtrough (Item No. 004-203-000) between the side fences and x it to the
connecng gate and side fences (Fig. 8). The mounng components for this
have been supplied.
7. Aach the M8 carriage bolt with M8 locknut to the feed trough. Pushing this up
will allow any uid to be easily discharged from the feed trough (Fig. 9).
Please note! Do not ghten the locknut completely, otherwise it will not be
possible to push up the carriage bolt and it will not serve its cleaning
purpose.
8. Aach the cable guide tube (art.nr. 004-208-000) to the side rail. Do this by using
the supplied parallel clamps. Cut out the round hole from the manger with a side
cuer . Insert the cable guide in the cued hole. By means of the second M10x55
bolt, the parallel clamp can be securely aached to the FeedStaon and prevent
rotaons or shiing of the cable guide. The cable which comes from the PipeFeed-
er can be slided through this tube.
8
9
001-508-000 001-769-000
10
Eding cable guide tube
Art. Nr.: 004-208-000

11 - 17
Hanskamp AgroTech B.V. (the Netherlands) www.hanskamp.nl/en
FeedStaon
EN 42000
9. Mount the PipeFeeder with the included mounng parts. Mount the brackets to
the side fence rst. Don’t ght them. Shove the PipeFeeders into the brackets.
Mount the PipeFeeders about 10cm above the Feed trough. Between the
boom of the trough and the underside of the PipeFeeder should be at least
26cm height. Be sure there is a good venlaon around the PipeFeeder. Then
turn ght the brackets on the PipeFeeders and the side fence.
Important!
• Clean the feed trough regularly. Make sure no feed remains get le
between the PipeFeeder and the feed trough.
• Make sure no water gets into the PipeFeeder as this can impair its
funconing.
• Make sure there is sucient room between the PipeFeeders and
the feed trough as this will stop the cow’s breath from condensing.
11
Front view

12 - 17
Hanskamp AgroTech B.V. (the Netherlands) www.hanskamp.nl/en
FeedStaon
EN 42000
10. Posion the enre FeedStaon in the correct place and aach it to the oor using
foundaon anchors or coer bolts. Use M12 mounng components (Fig. 12). If the feet
do not come out properly, the enre frame can be moved forward or backward. Allow
for the fact that everything will have to be posioned fully level again aerwards.
Please note! Mounng components for xing the FeedStaon into place
are not supplied with the standard pack.
11. Aach the relevant electronics to the feed staon. Connect the
PipeFeeders. Holes have already been made in the feed trough’s
sender/receiver plate for dierent brands/types of
senders/receivers/controllers.
12. The cabling can be ed along the underside of the trough using e-wraps. The two
protruding tubes in the connecng gate can be used as cable conduits to feed the ca-
bling upwards.
Connecng FeedStaons
It is easy to connect FeedStaons alongside each other. All that is needed is one inter-
vening fence. This saves on a lot of parts.
The FeedStaon can even be connected to the L’port closing gate. The modular con-
strucon means that even mirror image setups or three FeedStaons alongside each
other are possible.
12
Please note! Make sure that the PipeFeeders are aligned correctly so that they do not spill if a cow knocks against them.
(See manual 001-847-000, PipeFeeder.)
Please note! Always use a cable conduit or protecve pipe to protect the cables and wiring from external mechanical
impacts.
Please note! Always make sure the cabling is hidden away, out of reach of the cow.
Please note! Make sure the electronics and feed staon are earthed.
Please note! Calibrate the PipeFeeder feed dosator before use. Repeat this once a month or when changing feed type.
Please note! Do not climb onto the feed staon because of the danger of falling.
15
13 14

13 - 17
Hanskamp AgroTech B.V. (the Netherlands) www.hanskamp.nl/en
FeedStaon
EN 42000
Maintenance
Check the FeedStaon daily for faults, dirt and wear and tear. It is important to keep
the feed staon clean for the benet of animal health and the staon’s lifespan.
Please note! When doing maintenance, always rst switch o the voltage
to the feed staon.
Disassembly
During disassembly, all parts must be separated according to type of material and as-
signed to the relevant waste processing ow.
Please note! When dismantling the staon, always rst switch o the volt-
age to the feed staon.
List of included amendments of this installaon and operang instrucon:
Warranty limitaons
The warranty excludes costs and expenses due to:
- incorrect use of the equipment, not in accordance with the specicaons in the
instrucons for installaon and use;
- the consequences of any intervenons by engineers other than engineers recog-
nised and approved by Hanskamp for carrying out service, maintenance and other
technical work;
- incidents such as freezing, ice, re, ooding, inundaon or any other form of ex-
treme water damage, and lightening;
- defects in the electrical system or earthing system;
- damage to the electrical system caused by vermin and so forth.
The warranty is not applicable to consequenal damage that is not related to the feed
staon itself. All systems have been tested. However, in the event of faults, Hanskamp
cannot be held responsible for consequenal damage.
Nr. Release datum Chapter(s) Remarks
108/2013 First release
1.1 09/2013 All Change to long version of PipeFeeder
1.2 10/2013 Safety Installaon statement deleted. FeedStaon is not a machine.
2.0 01/2014 All Second edion, FeedStaon Redesign.
3.0 08/2014 All Converted into Publisher
3.1 02/2015 All Parallel clamp changed
3.2 10/2015 All General inspecon
3.3 4/2015 All Clamp 1910 replaced for mounng materials
3.4 6/2016 Annex 3 Arcle structure
3.5 1/2017 Page 11 Install PF heights and safety cow
Copyright and disclaimer
The informaon given in this publicaon is provided for informaon purposes only and does not constute an oer for sale. The products supplied may
dier from those illustrated. No part of this publicaon may be reproduced or made public without prior permission in wring from Hanskamp AgroTech
BV. Although this publicaon was put together with the utmost care, Hanskamp AgroTech is not liable for any damage that might arise due to errors or
gaps in this publicaon. The instrucons for installaon and use in Dutch are the original instrucons for installaon and use. The translaons into other
languages have used the Dutch instrucons for installaon and use as the source document. Hanskamp AgroTech does not accept any liability for dier-
ences between the translaons. If there are doubts about the content and accuracy of the translated instrucons for installaon and use, the Dutch
instrucons for installaon and use constute the authoritave document.

14 - 17
Hanskamp AgroTech B.V. (the Netherlands) www.hanskamp.nl/en
FeedStaon
EN 42000
Annex 1
Hanskamp can supply the following opons for the FeedStaon concentrates box :
27000 PipeFeeder concentrate feed dosator
28000 PipeFeeder low capacity dosator
004-030-000 Universal L’port closing gate
002-400-000 PowerDos pneumac powder and minerals dosator
35000/36000 MulDos liquid concentrate dosator
Dimensions:

15 - 17
Hanskamp AgroTech B.V. (the Netherlands) www.hanskamp.nl/en
FeedStaon
EN 42000
Annex 2 Loose components
It is possible to reorder loose components from your supplier for maintenance, or for
any other reason. When doing so, please use the item numbers shown below in the
drawing.

16 - 17
Hanskamp AgroTech B.V. (the Netherlands) www.hanskamp.nl/en
FeedStaon
EN 42000
Visit us on:
Annex 3 Descripon of the components in annex 2:
FeedStaon walk-in (042-012-000)
Arcle number Descripon Number
004-115-000 Double T-clamp 1½" x 1¼" galvanized 4
004-200-000 Side Frame FS 4
004-201-000 Connecon fence FS 1
004-202-000 Frame out of parlour feeder FS 2
004-204-000 Support tube FS 2
004-208-000 Cable guide tube 1¼" (Ø42.4x2.6mm) l=1820mm 1
004-236-000 Parallel bracket double clamp 1"x1¼" 2
Default number of feed types is one (PipeFeeder feeding
dosator) per FeedStaon.
004-205-000 Set mounng materials FeedStaon
Arcle-number Descripon Number
001-376-000 Seal bag 150x200 mm 1
001-509-000 carriage bolt M8x60 a2 DIN 603 4
001-703-000 Scker warning risk of impact 1
001-707-000 Washer M10 DIN 125 8.8 ev 24
001-741-000 Bolt M8x55 a2 DIN 933 8
001-746-000 Bolt M10x30 DIN 933 8.8 ev 4
001-769-000 Prevailing torque type hexagon nut M8 a2 DIN 985 Coat 12
001-774-000 Washer M8 DIN 9021 a2 24
001-866-000 Self locking nut M10 8.8 12
004-206-000 Round insert 1.7/8” x 1.0-3.0 mm darkgrey 4
011-124-000 Tap bolt M10x105 DIN 931 8.8 ev 8
004-207-000 Kit fasteners FeedStaon per addional feeding sort PipeFeeder
Arcle-number Descripon Number
001-376-000 Seal bag 150x200 mm 1
001-741-000 Bolt M8x55 a2 DIN 933 4
001-774-000 washer M8 DIN 9021 a2 8
001-796-000 screw DIN 7504 K A2 4,8x16 (for lid) 4
Arcle number Descripon Number
001-857-000 Self locking nut M10 a2 1
004-130-000 Grommet 2
004-228-000 Mushroom head square neck bolt M10x35 A2 DIN 603 1
004-240-000 Feedtrough FS 1
Composion Feedtrough FS-WI (004-203-000)

17 - 17
Hanskamp AgroTech B.V. (the Netherlands) www.hanskamp.nl/en
FeedStaon
EN 42000
Hanskamp AgroTech B.V.
Broekstraat 17
7009 ZB Doenchem
The Netherlands
Tel: +31 (0)314 - 393 797
Fax: +31 (0)314 - 393 826
www.hanskamp.nl
Table of contents
Other Hanskamp Farm Equipment manuals

Hanskamp
Hanskamp Spider User manual
Hanskamp
Hanskamp MultiFrame User manual

Hanskamp
Hanskamp MultiDos 035-000-000 Series User manual
Hanskamp
Hanskamp L'port User manual

Hanskamp
Hanskamp PowerSpray User manual

Hanskamp
Hanskamp PipeFeeder HighSpeed User guide

Hanskamp
Hanskamp PipeFeeder HighSpeed User guide
Hanskamp
Hanskamp PipeFeeder User guide
Hanskamp
Hanskamp PipeFeeder Dump User manual
Hanskamp
Hanskamp MultiFrame 007-501-000 User manual

