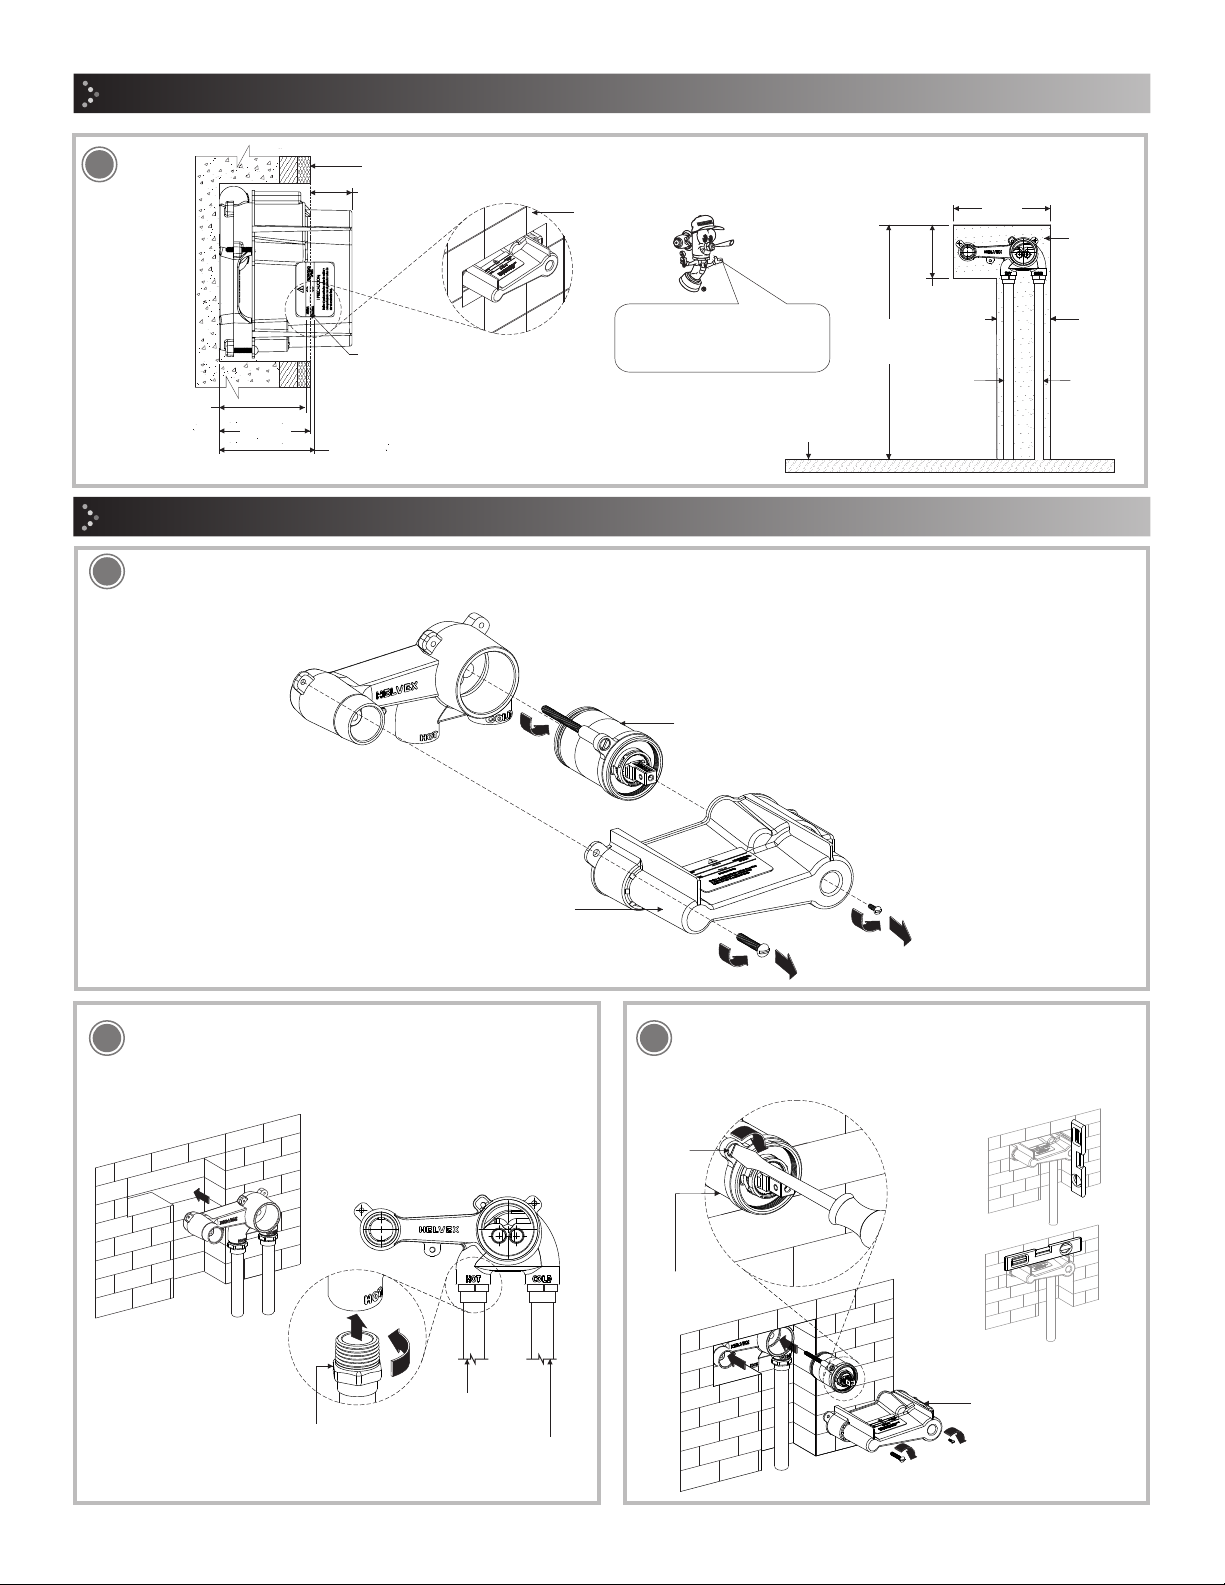
Helvex Vertika E-3007 User manual
Other Helvex Plumbing Product manuals

Helvex
Helvex RM-27 User manual

Helvex
Helvex Explora H-201 User manual

Helvex
Helvex PIAZZA PIA-200 User manual

Helvex
Helvex TH-064 User manual

Helvex
Helvex ATE User manual

Helvex
Helvex FC-185-19 User manual

Helvex
Helvex E-937 User manual

Helvex
Helvex Forza TV-304 Instruction Manual

Helvex
Helvex TZF NAO User manual

Helvex
Helvex ME-2122 User manual

Helvex
Helvex E-711 User manual

Helvex
Helvex Land E-939 User manual

Helvex
Helvex MEP-2004 User manual

Helvex
Helvex Nuva TV-203-C User manual

Helvex
Helvex TH-063 User manual

Helvex
Helvex UTH-058 User manual

Helvex
Helvex Elegance 8124 User manual

Helvex
Helvex Konos E-916 User manual

Helvex
Helvex FB-185-19 User manual

Helvex
Helvex UH-105-WOA User manual


Popular Plumbing Product manuals by other brands

Weka
Weka 506.2020.00E ASSEMBLY, USER AND MAINTENANCE INSTRUCTIONS

American Standard
American Standard DetectLink 6072121 manual

Kohler
Kohler K-6228 Installation and care guide

Uponor
Uponor Contec TS Mounting instructions

Pfister
Pfister Selia 49-SL Quick installation guide

Fortis
Fortis VITRINA 6068700 quick start guide


Elkay
Elkay EDF15AC Installation, care & use manual

Hans Grohe
Hans Grohe AXOR Citterio E 36702000 Instructions for use/assembly instructions

baliv
baliv WT-140 manual

Kohler
Kohler Mira Eco Installation & user guide

BELLOSTA
BELLOSTA romina 0308/CC Installation instruction

Bristan
Bristan PS2 BAS C D2 Installation instructions & user guide