*15 cm (5,9”)
tubería de
PVC Ø 4”
(Nivel de Piso
Terminado)
pared con
acabado final
válvula de paso
*30,5 cm (12”)
NPT
2%
wall finish
off valve
PVC pipe Ø 4 “
(Finished Floor
Level)
llave 7/16”
silicone antifungal
silicón antihongos
screwdriver
destornillador
Ø 3/8“ dril bit
taladro con broca
de Ø 3/8” pencil
lápiz
Artículos incluidos en el Producto
/ Items Included in the Product
Instalación General / General Installation
fixing package
paquete de fijación
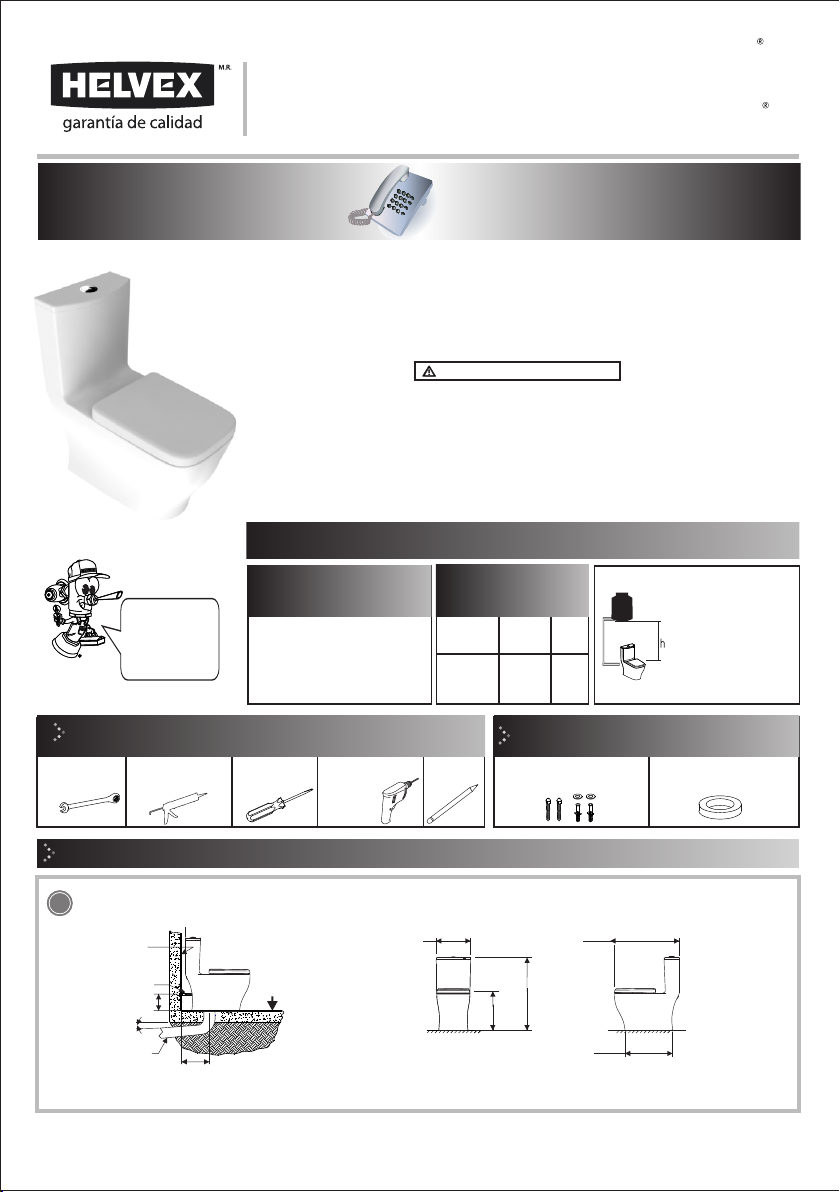
*Medidas Recomendadas
Instale la taza de acuerdo a las distancias que se muestran en la figura. / Attach the toilet according to the distances shown in Fig.
* Recommended Dimmensions
11
371 mm
(14,6”)
790 mm
(31,1”)
406 mm
(15,9”)
Hola soy Fluxy, te
ayudaré a instalar
tu producto.
INSTALLATION GUIDE
GUÍA DE INSTALACIÓN
Hi I'm Fluxy, I'll
help you to install
your product.
One Piece CAPRI PLUS Trampa Oculta, Una Descarga 4.8 l,
con Asiento de Cierre Lento, Color Marfil. / RIVOLI PLUS
Concealed Trap, 4.8 l per Flush, Bone Color, One Piece Toilet
with Slow Closing Seat.
2,5 m
30 m
60 m
PSI
Altura (h)
3,55
42,67
85,34
kg/cm²
0,25
3,0
6,0
Cada metro de altura de su
producto a la base del tinaco
equivalen a (0,1 kg/cm²) [1,42
psi].
Every meter of height of your
product to the base of the tub
is equivalent to (0,1 kg/cm²)
[1,42 psi].
Height (h)
Para el correcto funcionamiento de este
producto, la presión mínima es de (0,25
kg/cm²) 3,55 PSI y la máxima es de (6,0
kg/cm²) 85,34 PSI.
For the correct operation of this product, the
minimum pressure is (0,25 kg/cm²) 3,55 PSI
and the maximum is (6,0 kg/cm²) 85,34 PSI.
wax ring
cuello de cera
ADVERTENCIA / WARNING
Para disminuir el riesgo de lesiones o daños a la propiedad, lea todas las instrucciones antes de
instalar el producto. Utilice gafas de seguridad. En obras de construcción, instalación, modificación,
ampliación y reparación deben cumplir con el reglamento de construcción y obras de su localidad.
El producto ilustrado puede sufrir cambios de aspecto como resultado de la mejora continua a la que
está sujeto.
Agradecemos su elección por los productos HELVEX. Estamos seguros de que su confiabilidad por el
producto excederá sus más altas expectativas, cuya funcionalidad, estética, durabilidad, respaldo
integral y alta calidad le otorgarán plena satisfacción por años, reflejando el compromiso con la
calidad, innovación y el medio ambiente que forman parte de Helvex.
Thank you for choosing HELVEX products.We are confident that the product reliability will exceed your
highest expectations. The functionality, aesthetics, durability are at its highest quality! The
comprehensive support will grant full satisfaction for years, reflecting our commitment to quality,
innovation and the environment as part of Helvex.
To reduce the risk of injury or property damage, read all instructions. Before installing the product,
please remember to use safety glasses. In construction, installation, alteration, extension and repair,
the rules of constructions must be applied.
As result of continuous improvement, the product illustration may change in appearance.
Esta guía de instalación aplica al producto en cualquier acabado. / This installation
guide applies to the product in any finish.
Requerimientos de
Instalación
Relación
Altura Tinaco-Presión
Installation Requirements Relation
Tub Height-Pressure
Herramienta Requerida / Required Tools
wrench 7/16”
1
520 mm
(20,4”)
700 mm
(27,5”)
Vista Frontal / Front View Vista Lateral / Side View
OP CAPRI PLUS M
OP CAPRI PLUS
One Piece CAPRI PLUS Trampa Oculta, Una Descarga 4.8 l,
con Asiento de Cierre Lento, Color Blanco. / RIVOLI PLUS
Concealed Trap, 4.8 l per Flush, White Color, One Piece Toilet
with Slow Closing Seat.
Original Spare Parts:
Consultancy and Technical
01(55)53339431
01800 909 2020 01 (55) 53 33 94 00
Refacciones Originales:
Asesoría y Servicio Técnico:
Ext. 5068, 5815 y 5913
Service:
53 33 94 21
01 800 890 0594


