manuals.online logo
Brands
  1. Home
  2. •
  3. Brands
  4. •
  5. HIK VISION
  6. •
  7. Touch Terminal
  8. •
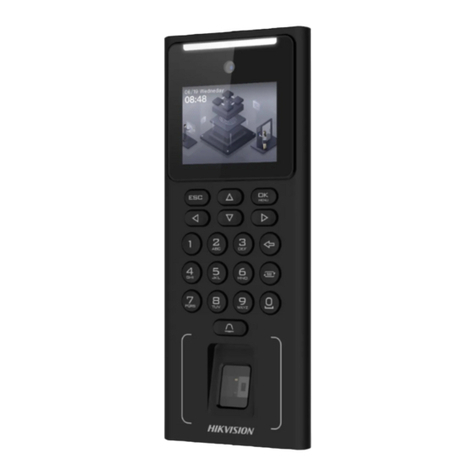
  9. HIK VISION UD02454B User manual

HIK VISION UD02454B User manual

1
2
Fingerprint Time Aendance Terminal
Quick Start Guide
UD02454B
©2016 Hangzhou Hikvision Digital Technology Co., Ltd.
It includes instrucons on how to use the Product. The soware embodied
in the Product is governed by the user license agreement covering that
Product.
About this Manual
This Manual is subject to domesc and internaonal copyright protecon.
Hangzhou Hikvision Digital Technology Co., Ltd. (“Hikvision”) reserves all
rights to this manual. This manual cannot be reproduced, changed,
translated, or distributed, parally or wholly, by any means, without the
prior wrien permission of Hikvision.
Trademarks
and other Hikvision marks are the property of Hikvision and
are registered trademarks or the subject of applicaons for the same by
Hikvision and/or its affiliates. Other trademarks menoned in this manual
are the properes of their respecve owners. No right of license is given to
use such trademarks without express permission.
Legal Disclaimer
TO THE MAXIMUM EXTENT PERMITTED BY APPLICABLE LAW, THE
PRODUCT DESCRIBED, WITH ITS HARDWARE, SOFTWARE AND FIRMWARE,
IS PROVIDED “AS IS”, WITH ALL FAULTS AND ERRORS, AND HIKVISION
MAKES NO WARRANTIES, EXPRESS OR IMPLIED, INCLUDING WITHOUT
LIMITATION, MERCHANTABILITY, SATISFACTORY QUALITY, FITNESS FOR A
PARTICULAR PURPOSE, AND NON-INFRINGEMENT OF THIRD PARTY. IN NO
EVENT WILL HIKVISION, ITS DIRECTORS, OFFICERS, EMPLOYEES, OR
AGENTS BE LIABLE TO YOU FOR ANY SPECIAL, CONSEQUENTIAL,
INCIDENTAL, OR INDIRECT DAMAGES, INCLUDING, AMONG OTHERS,
DAMAGES FOR LOSS OF BUSINESS PROFITS, BUSINESS INTERRUPTION, OR
LOSS OF DATA OR DOCUMENTATION, IN CONNECTION WITH THE USE OF
THIS PRODUCT, EVEN IF HIKVISION HAS BEEN ADVISED OF THE POSSIBILITY
OF SUCH DAMAGES.
REGARDING TO THE PRODUCT WITH INTERNET ACCESS, THE USE OF
PRODUCT SHALL BE WHOLLY AT YOUR OWN RISKS. HIKVISION SHALL NOT
TAKE ANY RESPONSIBILITIES FOR ABNORMAL OPERATION, PRIVACY
LEAKAGE OR OTHER DAMAGES RESULTING FROM CYBER ATTACK, HACKER
ATTACK, VIRUS INSPECTION, OR OTHER INTERNET SECURITY RISKS;
HOWEVER, HIKVISION WILL PROVIDE TIMELY TECHNICAL SUPPORT IF
REQUIRED.
SURVEILLANCE LAWS VARY BY JURISDICTION. PLEASE CHECK ALL RELEVANT
LAWS IN YOUR JURISDICTION BEFORE USING THIS PRODUCT IN ORDER TO
ENSURE THAT YOUR USE CONFORMS THE APPLICABLE LAW. HIKVISION
SHALL NOT BE LIABLE IN THE EVENT THAT THIS PRODUCT IS USED WITH
ILLEGITIMATE PURPOSES.
IN THE EVENT OF ANY CONFLICTS BETWEEN THIS MANUAL AND THE
APPLICABLE LAW, THE LATER PREVAILS.
ESC OK
12
ABC
3
DEF
4
GHI
5
JKL
6
MNO
7
PQRS
8
TUV
9
WXYZ
0
2.8-inch
LCD Display Screen
Keypad
Fingerprint Reading Module
12V
Power Interface USB Interface
Ethernet Port
Loudspeaker
Front Cover
Indicator
ESC OK
12
ABC
3
DEF
4
GHI
6
MNO
7
PQRS
8
TUV
9
WXYZ
0
5
JKL
Exiting Key:
Press the buon to exit the menu.
Numeric Keys/Letter Keys:
Press to input numbers or leers.
Direction Keys:
Use , , and to move the
cursor on the screen.
Editing Key: Press to enter the eding status.
Shi among Chinese, numbers/lowercases,
numbers/uppercases and symbols.
Confirming Key:
Press to confirm operaons.
Press and hold the key for 3s
to login the main interface.
Deleting Key:
Delete the contents
in the textbox.
Appearance
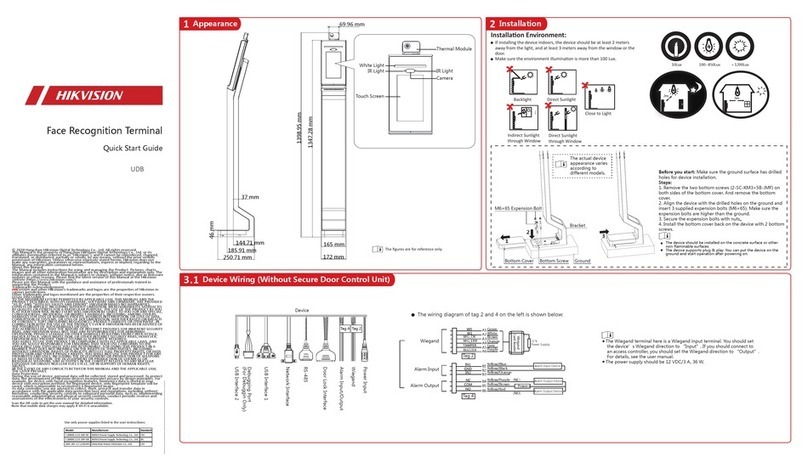
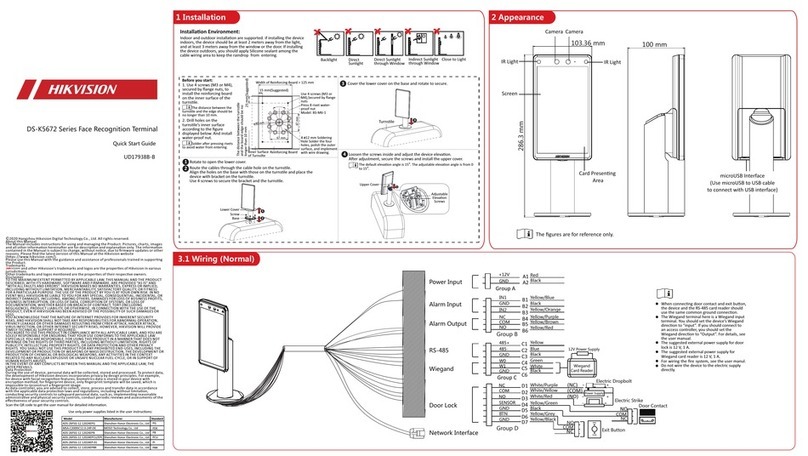
Installation
102010858
Pastethe template on the required place,. Drill screw and cable
holesaccording to the template.
Hole1: Wall Mounting Screw Hole
Mounting Template
Hole 1 Hole 1
Hole 1
UP
165.0 mm
149.9 mm
Tear Here
Wall Mounting
Wall Mounting
with
Mounting Plate
1. Drill holes on the wall or other places
according to the mounng template. (supplied)
1. Remove the two screws at the
boom of the front cover and
remove the back cover.
2. Align the back cover on the level on the
wall or other places.
3. Drill through the holes at the four corners
of the back cover.
4. Insert the screw sockets of the setscrews
in the drilled holes.
5. Fasten the screws in the
sockets to fix the back cover on
the wall or other places.
6. Align the front cover to
the back cover and buckle
them together.
2. Insert the screw sockets of the
setscrews in the drilled holes.
3. Fix and fasten the screws in the sockets
on the wall or other places.
4. Align the three holes on the device
plate with the fixed screws and hang the
device on the wall.
155
140
30
3Basic Operation
Activation
Parameters Configuration
Power on and wire the network cable aer installaon.
Activating via SADP
Activating via Client Software
Acvaon via SADP and acvaon via the iVMS-4200 Client Soware are supported.
You should acvate the device before the first login.
Aer powering on, the interface will be displayed as follows:
The default values of the terminal are as follows:
• The default IP address: 192.0.0.64
• The default port No.: 8000
• The default user name: admin
1
2
1. Download SADP Soware
Get the SADP soware from the supplied disk or the official website. Install and run the soware.
2. Acvate Device
Check the inacve device from the device list. Create a password in the right side of the interface and confirm the password.
3. Edit Device IP Address
Check the device and manually edit the device IP address, Port No., Subnet Mask, Gateway, etc.
1. Get the client soware from the supplied disk or the official website. Install and run the client soware. Click “Switch System -> Access Control System” at the
upper le corner of the interface to enter the Access Control System interface.
2. Click Controller Management to enter the Controller Management interface.
3. Select an inacve device from the device list. Click Acvate to pop up the Acvaon interface. Create a password and confirm the new password. Click OK to start
acvate.
4. Click “Edit Network” to configure the device IP address, mask address, gateway address, port No.
Add User: Edit the ID No. and the user name. Press the OK key to confirm. Enter the card No., register the fingerprint, set the password, select the department, select the user role and select the authencaon mode. Save the parame-
ters to confirm adding.
Configure the shi schedule by department or by individual.
Schedule Shift by Department Flow: Add User (Select department when adding new user.) - Department Management - Shi Management - Add Holiday - Shi Schedule Management (Schedule Shi by Department)
Schedule Shift by Individual Flow: Add User - Shi Management - Add Holiday - Shi Schedule Management (Schedule Shi by Individual)
Edit Department: Select the department in the department list and select “Edit”. Edit the department name, the shi type and the shi name. Save the parameters to confirm eding.
Shift Management:
Normal Shi:Enter the Normal (Normal Shi) interface under the Shi Management menu. Configure the shi rule and the normal shi. Save the parameters to confirm eding.
Man-Hour Shi: Enter the Man-Hour (Man-Hour Shi) interface under the Shi Management menu. Configure the man-hour parameters and save the parameters.
Add Holiday: Enter the New (Add New Holiday) interface under the Holiday menu. Enter the holiday No., the holiday name, the holiday start date and the holiday end date. Save the parameters to confirm configuraon.
Shift Schedule Management:
Schedule Shi by Department: Select a department to configure in the By Dept. (Schedule by Department) interface. Configure the shi, the start date, the end date and the holiday. Save the parameters to confirm configuraon.
Schedule Shi by Individual: Select New Individual Shi in the By Indiv. (Schedule by Individual) interface. Select a person to schedule in the New Individual Shi interface. Configure the shi, the schedule start date and the end date. Save
the parameters to confirm eding.
STRONG PASSWORD RECOMMENDED–
We highly recommend you create a strong password of your own choosing (using a minimum of 8 characters, including upper case leers, lower
case leers, numbers, and special characters) in order to increase the security of your product. And we recommend you reset your password
regularly, especially in the high security system, reseng the password monthly or weekly can beer protect your product.
The device will automacally check the USB disk memory. If there is no enough space for exporng, a prompt will be displayed. You are able to configure the record over threshold prompt and record delete funcon in the System interface.
Record over Threshold Pop up Prompt (%): If the aendance record memory reaches the configured value, the system will pop up a prompt to remind you. If configure the threshold to 99%, the system will pop up a prompt to
remind you to delete the aendance data when the capacity reaches the threshold. The available value: 1 to 99.
Record Delete: When the funcon is enabled, the terminal will delete the first 3000 aendance records when the memory is full, in order to save the new aendance records. By default, the funcon is enabled. See Secon 5.2
Aendance Record Delete Rule in the User Manual of Fingerprint Time Aendance Terminal.
Attendance Report
Insert the USB disk to the USB interface. In the Report interface, select a table type to export. Press the OK key to export the aendance report to the USB disk.

Other HIK VISION Touch Terminal manuals

HIK VISION DS-K1T343 Series User manual

HIK VISION

HIK VISION DS-K1T343 Series User manual

HIK VISION DS-K5671B Series User manual

HIK VISION

HIK VISION DS-K5671B Series User manual

HIK VISION DS-K1A8503 User manual

HIK VISION

HIK VISION DS-K1A8503 User manual

HIK VISION K1T671 User manual

HIK VISION

HIK VISION K1T671 User manual

HIK VISION DS-K1T321 Series User manual

HIK VISION

HIK VISION DS-K1T321 Series User manual

HIK VISION DS-K1T341C Series User manual

HIK VISION

HIK VISION DS-K1T341C Series User manual

HIK VISION DS-K1T673 User manual

HIK VISION

HIK VISION DS-K1T673 User manual

HIK VISION DS-K1T502 Series User manual

HIK VISION

HIK VISION DS-K1T502 Series User manual

HIK VISION DS-K1T8003 Series User manual

HIK VISION

HIK VISION DS-K1T8003 Series User manual

HIK VISION DS-K1T680DG User manual

HIK VISION

HIK VISION DS-K1T680DG User manual

HIK VISION DS-K1T680 Series User manual

HIK VISION

HIK VISION DS-K1T680 Series User manual

HIK VISION DS-MDH005-B User manual

HIK VISION

HIK VISION DS-MDH005-B User manual

HIK VISION DS-TCP345-K User manual

HIK VISION

HIK VISION DS-TCP345-K User manual

HIK VISION DS-K5671 Series User manual

HIK VISION

HIK VISION DS-K5671 Series User manual

HIK VISION DS-K1A8503 Series User manual

HIK VISION

HIK VISION DS-K1A8503 Series User manual

HIK VISION DS-MDH005-B User manual

HIK VISION

HIK VISION DS-MDH005-B User manual

HIK VISION DS-K1T802E User manual

HIK VISION

HIK VISION DS-K1T802E User manual

HIK VISION DS-K1T805 Series User manual

HIK VISION

HIK VISION DS-K1T805 Series User manual

HIK VISION DS-K1A340 Series User manual

HIK VISION

HIK VISION DS-K1A340 Series User manual

HIK VISION DS-KH9510-WTE1 User manual

HIK VISION

HIK VISION DS-KH9510-WTE1 User manual

HIK VISION DS-K1T607 Series User manual

HIK VISION

HIK VISION DS-K1T607 Series User manual

HIK VISION DS-K5604A-3XF Series User manual

HIK VISION

HIK VISION DS-K5604A-3XF Series User manual

HIK VISION DS-K5032 Series User manual

HIK VISION

HIK VISION DS-K5032 Series User manual

HIK VISION DS-K5032-3XFD User manual

HIK VISION

HIK VISION DS-K5032-3XFD User manual

Popular Touch Terminal manuals by other brands

Ai Hardware AI-HT-T5-2D user manual

Ai Hardware

Ai Hardware AI-HT-T5-2D user manual

Bitron Video AV0151/010 instruction manual

Bitron Video

Bitron Video AV0151/010 instruction manual

Kaba B-eco manual

Kaba

Kaba B-eco manual

Pyramid TimeTrax Clock reference guide

Pyramid

Pyramid TimeTrax Clock reference guide

Electronic OMNI V-570 Series Quick reference guide

Electronic

Electronic OMNI V-570 Series Quick reference guide

Samson TROVIS 6616-1 Mounting and operating instructions

Samson

Samson TROVIS 6616-1 Mounting and operating instructions

Sharp UP-X300CF256 instruction manual

Sharp

Sharp UP-X300CF256 instruction manual

Sharp UP-3300 Service manual

Sharp

Sharp UP-3300 Service manual

NR Electric RCS-9698G instruction manual

NR Electric

NR Electric RCS-9698G instruction manual

Seuic AUTOID Q9 Reference manual

Seuic

Seuic AUTOID Q9 Reference manual

ADC ADCP-90-250 user manual

ADC

ADC ADCP-90-250 user manual

Ingenico group Yorkshire Payments ICT200 user guide

Ingenico group

Ingenico group Yorkshire Payments ICT200 user guide

Avalue Technology RIPAC-10P3 Quick reference guide

Avalue Technology

Avalue Technology RIPAC-10P3 Quick reference guide

UniData Communication Systems Neon 2000 Series manual

UniData Communication Systems

UniData Communication Systems Neon 2000 Series manual

Sharp UP-820N instruction manual

Sharp

Sharp UP-820N instruction manual

DEC VT520 Installation and operating information

DEC

DEC VT520 Installation and operating information

Aastra OpenPhone 26 user guide

Aastra

Aastra OpenPhone 26 user guide

Thrane&Thrane EXPLORER 122 user manual

Thrane&Thrane

Thrane&Thrane EXPLORER 122 user manual

manuals.online logo
manuals.online logoBrands
  • About & Mission
  • Contact us
  • Privacy Policy
  • Terms and Conditions

Copyright 2025 Manuals.Online. All Rights Reserved.