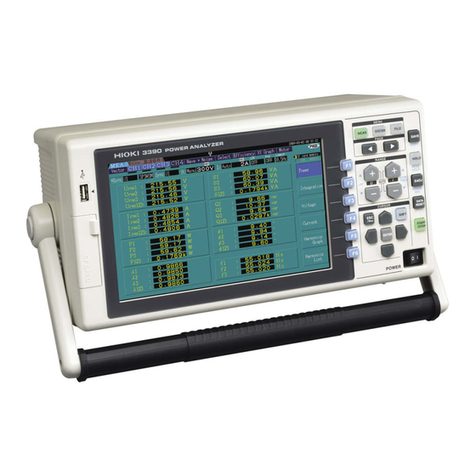
Hioki 3181-01 User manual

DIGITAL POWER HiTESTER
INSTRUCTION MANUAL
3181-01
XPHyosi.A5FE.fm1ページ2006年12月28日 木曜日 午前9時37分

XPHyosi.A5FE.fm2ページ2006年12月28日 木曜日 午前9時37分

Contents
Introduction i
Inspection i
Safety Notes ii
Notes on Use iii
Chapter 1 Introduction 1
1.1 Features 2
Chapter 2 Specifications 3
Chapter 3 Principle of Operation 5
3.1 Power Measurement 5
3.2 Current and Voltage Measurement 7
3.3 Integrated Watt Value 8
3.4 Crest Factor 10
Chapter 4 Names and Functions of Parts 11
Chapter 5 Operation 19
5.1 Preparing for Measurement 19
5.2 Power, Current and Voltage Measurement 22
5.3 Integrated Watt Value Measurement 23
Chapter 6 Applications 27
6.1 Determing the Power Factor 27
6.2 Connecting the Recorder 27
6.3 Printer Connection 28
6.4 External Control Terminal 30
6.5 Data Output Connector 31
6.6 Inputs Exceeding the Measurement Range 34
6.7 Three-Phase Three-Wire Connection 35

Chapter 7 Maintenance and Service 37
7.1 Battery Replacement 37
7.2 Fuse Replacement 39
7.3 Cleaning 40
7.4 Service 40

i
―――――――――――――――――――――――――――――――――――――――
Inspection
―――――――――――――――――――――――――――――――――――
I
ntroduction
I
nspection
Thank you for purchasing this HIOKI "3181-01 DIGITAL
POWER HiTESTER ." To get the maximum performance
from the unit, please read this manual first, and keep
this at hand.
When the unit is delivered, check and make sure that it
has not been damaged in transit. If the unit is damaged,
or fails to operate according to the specifications, contact
your dealer or HIOKI representative.
Accessory
Instruction Manual 1
Power cord 1

ii
―――――――――――――――――――――――――――――――――――――――
Safety Notes
―――――――――――――――――――――――――――――――――――
In the manual, this mark indicates explanations
which it is particularly important that the user read
before using the equipment.
DANGE
R
Indicates that incorrect operation presents extreme
danger of accident resulting in death or serious
injury to the user.
WARNIN
G
Indicates that incorrect operation presents
significant danger of accident resulting in death or
serious injury to the user.
CAUTIO
N
Indicates that incorrect operation presents
possibility of injury to the user or damage to the
equipment.
NOTE Denotes items of advice related to performance of
the equipment or to its correct operation.
S
afety Notes
This Instruction Manual provides information and
warnings essential for operating this equipment in a safe
manner and for maintaining it in safe operating
condition. Before using this equipment, be sure to
carefully read the following safety notes.
Safety symbols
The following symbols are used in this Instruction
Manual to indicate the relative importance of cautions
and warnings.

iii
―――――――――――――――――――――――――――――――――――――――
Notes on Use
―――――――――――――――――――――――――――――――――――
DANGE
R
Always connect the voltage cable to the secondary
side of a breaker. On the secondary side of a
breaker, even if the lines are shorted the breaker
can trip and prevent an accident. On the primary
side, however, the current capacity may be large,
and in the event of a short-circuit there may be a
serious accident.
This unit cannot be used on voltage lines of 250
Vrms. If the voltage exceeds 250 VAC, there will be
a short-circuit accident or electrocution accident
will result.
WARNIN
G
In order to prevent an electrical accident, do not
make any connections while the power supply or
the device to be measured is on. Turn off the
power for both devices before proceeding.
The power supply voltage for this unit is switchable
.
To avoid electrical accidents, check that the voltage
selector is set correctly for the supply voltage you
are using.
In order to maintain safety and assure the stable
operating performance of this unit, be sure to
connect the ground terminal to a proper ground.
N
otes on Use
In order to ensure safe operation and to obtain maximum
performance from the unit, observe the cautions listed
below.

iv
―――――――――――――――――――――――――――――――――――――――
Notes on Use
―――――――――――――――――――――――――――――――――――
CAUTIO
N
・Before measurement, check the position of the range
switch. The unit may be damaged if current or voltage
exceeds the measurement limit is applied for a long
time.
・Before using the unit, make sure that the sheathing on
the leads is not damaged and that no bare wire is
exposed. If there is damage, replace it with a new one.
・Do not store or use the unit where it will be exposed to
direct sunlight, high temperatures, high humidity, or
condensation. If exposed to such conditions, the unit
may be damaged, the insulation may deteriorate, and
the unit may no longer satisfy its specifications.
・To avoid damage to the unit, do not short the output
terminal and do not input voltage to the output terminal.
NOTE ・After initiating watthour measurement by pressing the
start button, do not alter the settings of the range switch,
the time setting dial or the time unit switch.
・The 3181-01 is not certified for commercial metering.
・The 3181-01 uses a voltage transformer (PT) and current
transformer (CT), which do not transmit DC. It is
therefore not possible to measure a signal (for example
full-wave or half-wave rectified) which includes a DC
component.
・Do not use the 3181-01 to measure equipment with
ratings outside its ranges or whose current consumption
continuously exceeds 15A.

1
―――――――――――――――――――――――――――――――――――――――
Chapter 1 Introduction
―――――――――――――――――――――――――――――――――――
Chapter
1
Introductio
n
The 3181-01 is a compact, multifunction power meter
providing power, current, voltage and watthour
measurements on equipment such as consumer products.
Current and voltage are indicated as true rms values,
enabling accurate measurements even on distorted
waveforms.
The integrator contains a timer allowing integration time
to be set in ranges 1 to 99 minutes or 1 to 99 hours. With
several output terminals, the 3181-01 can be linked to a
data recorder or a printer, enabling easy recording of
measurement data.

2
―――――――――――――――――――――――――――――――――――――――
Chapter 1 Introduction
―――――――――――――――――――――――――――――――――――
1
.1 Features
(1) Power, current, voltage and watthour measurements in a
single unit
(2) True rms reading of voltage and current values
unaffected by distorted waveforms
(3) Integrator timer can be set in ranges 1 to 99 minutes or 1
to 99 hours. (set timer at 00 for continuous integration)
(4) Auto-zero circuit ensures accurate power and watthour
measurements over long time spans.
(5) Three simultaneous outputs for power, current and
voltage
(6) Connecting the optional 3171 DIGITAL PRINTER to the
data output connector makes it possible to record power
consumption and average power values over time.
(7) Watthour data is protected against power failures by a
battery backup function.
(8) Compact, lightweight and highly portable

3
―――――――――――――――――――――――――――――――――――――――
Chapter 2 Specifications
―――――――――――――――――――――――――――――――――――
Display (Power meter) 1999 digit LCD
(Integrator) 999999 digit LCD
Sampling rate (Power meter) Approx. 3 samples/s
Measurement
functions (Power meter) Single-phase active power
AC current and AC voltage (rms
reading)
(Integrator) Watthour value
Timer setting ranges (Integrator) 1 to 99 min/1 to 99 h
Timer accuracy (Integrator) ±0.01 %±1 s (at 0℃to 40℃)
Measurement range (Power meter) Power: 200/2000 W
Current: 2/20 A
Voltage: 0 to 250 V (resolution 1 V)
(Integrator) Lo: 200 W range 103/105Wh
Hi: 2000 W range 104/106Wh
Accuracy (Ambient
temperature: 23℃±5℃
,
line power: 50/60 Hz,
power factor: 1.0)
(Power meter) Power: ±0.5% of rdg. ±0.3% of f.s.
Current: ±0.5% of rdg. ±0.3% of f.s.
Voltage: ±0.7% rdg. ±1 dgt.
(Integrator) ±1% rdg. ±1 dgt. (at input of 2.5% to
120% of f.s.)
Frequency response
(40 to 500 Hz) (Power meter) Power: ±1% of max (power factor 1.0
)
Current, Voltage: ±0.5 % max
Influence of power
factor (Power meter) ±0.8% of rdg. max (power factor 0.5)
Temperature
characteristics (in
range 0 to 40 ℃)
(Power meter) ±0.1% f.s./℃max
(Integrator) ±0.05% f.s./ ℃max
Maximum circuit
voltage (Power meter) 250 Vrms
Chapter
2
Specification
s

4
―――――――――――――――――――――――――――――――――――――――
Chapter 2 Specifications
―――――――――――――――――――――――――――――――――――
Rated current (Power meter) 15 Arms (continuous rating)
Crest factor (Power meter) Power, current: 2 max at maximum
display or 30 A peak (lower value)
Voltage: 500 V peak value max
Output terminals (Power meter) 2 VDC/f.s. 2 VDC output for 200 V
input in voltage function only.
(Integrator) Hi: 5V, Lo: 0 V CMOS level
External control
terminal (Integrator) OFF: Open (or Hi: 5 V)
ON: Closed (or Lo: 0V)
Dielectric strength AC 2.4 kV/1 min (between input terminals and case)
Power supply 100, 120, 220, 240 VAC ±15%, 50/60 Hz
Rated power Approx. 3.5 W
Effect of power supply
voltage Specified accuracy satisfied within above specified
line voltage ranges.
Backup power R6P manganese batteries×3 (supplies more than 100
hours backup capability)
Dimensions Approx. 218 (W) ×85 (H) ×240 (D) mm
(excluding protrusions)
Mass 2.6 kg
Accessories Power cord 1
Instruction Manual 1
Options 3171 DIGITAL PRINTER
9084 CARRYING CASE
9149 CARRYING CASE

5
―――――――――――――――――――――――――――――――――――――――
Chapter 3 Principle of Operation
―――――――――――――――――――――――――――――――――――
{
{
INPUT
OUTPUT
CT
PT
To A IN
To V IN
Power suppl
y
To eac
h
section
Figure 3.1-1 The Block Diagram 1
Chapter
3
Principle of Operatio
n
3
.1 Power Measurement
Figure 3.1-1 and 2 show the block diagram. The line
voltage and current of the device under measurement are
detected by a voltage transformer (PT) and current
transformer (CT), respectively. The resulting detected
signals are voltage-level converted and input to a
multiplier. Since the DC component of the output of this
multiplier is proportional to the active power, after the
level is adjusted, this is displayed and output as the
power value.

6
―――――――――――――――――――――――――――――――――――――――
Chapter 3 Principle of Operation
―――――――――――――――――――――――――――――――――――
Absolut
e
value Rms
conversio
n
Auto-zer
o
Low-pas
s
filter
VF
converte
r
Absolut
e
value Rms
conversio
n
3
-1/2 dig
it
A-D
3
-1/2 dig
it
LCD
6-digit
counter Decode
r
driver
Division
(106)6-digit
LCD
Clock
oscillato
r
Division
(60) Division
(60)
Division
(215)Timer
9 9
Power output
Voltage output
Current output
To VF converter
VIN
AIN
Multiplie
r
32.768 kH
z
1 s pulse 1 min pulse 1 h puls
e
Figure 3.1-2 The Block Diagram 2
e = Ecosωt
i = lcos(ωt+θ
)
P=e・i=Elcosθ+ Elcos(2ωt+θ
)
P=Elcos
θ
Figure 3.1-3 Power Calculation Waveform
The voltage and current waveforms in Figure 3.1-3 are
described by equations and .
Sinewave AC voltage e = Ecosωt [V]
Sinewave AC current i = Icos(ωt+θ) [A]
The product of e and i representing the voltage-current
product is the instantaneous power.
Instantaneous power p = e・i = 2EIcosωt・cos(ωt+θ)
= EIcos(2ωt+θ) + EIcosθ
[W]

7
―――――――――――――――――――――――――――――――――――――――
Chapter 3 Principle of Operation
―――――――――――――――――――――――――――――――――――
Ei(t)lnx exL. P. Fadde
r
lnx lnx
E
o
a
+
ー
True Rms Conversion Circuit
ln Ei(t)
───── +ln E(t)
──── - ln Eo = ln Eo
ln Ei2(t)
────── =lnEo
2
∴ Eo =
E
i2(t
)
─────
3
.2 Current and Voltage Measurement
Thus, the active power P = EIcosθ[W] is the DC
component of the product of the voltage and current (the
second term in equation ( )).
When measuring AC signals using a general-purpose
measuring instrument, an average-value detection is
performed, after which conversion to the rms value is
made. Therefore, measurements on distorted or other-
wise non-sinusoidal waveforms will result in errors. In
the 3181-01, the true rms value is read by an absolute
value detection circuit and a true rms value conversion
circuit.
In the true rms conversion circuit shown in the figure
above, if we observe point a, we find the following
relationship.
Now let Ei(t) be the result of performing absolute-value
detection on the voltage and current signals from the
voltage transformer and current transformer, then the
output voltage Eo is proportional to the voltage-current
rms value.

8
―――――――――――――――――――――――――――――――――――――――
Chapter 3 Principle of Operation
―――――――――――――――――――――――――――――――――――
3
.3 Integrated Watt Value
The DC voltage Ei(2 V f.s.) is proportional to the power
measured by the power meter. The V-F converter
converts Ei into a pulse train, the pulses are counted by
the counter and the result is displayed as the watthour
value. (V-F conversion rate α= 27.7....(Hz/V))
For example, if 100 [W] is the power measured in the low
range (200 [W] f.s.), the voltage Ei input to the V-F
converter is given by the following formula.
Ei = 2 [V](f.s.)×100 [W] /200 [W]= 1 [V]
The time-unit switch on the 3181-01 front panel is also
the integrator RANGE switch. If integration is
performed at Wh:Lo (TIME:MIN) for one hour, the
resulting integration value N is calculated thus:
N=α[Hz/V]×Ei [V]×T [s]
= 27.7.... [Hz/V]×1 [V]×3600 [s]
= 100000
By interlocking ranges and setting the decimal point at
the fourth digit from the right, it is possible to directly
display watthour values of up to 100.000 Wh. If
integration is performed for one hour with Wh:Hi
(TIME:HOUR) set, after the divide-into-100 circuit, the
following value is obtained:
N = 27.7.... [Hz/V]×1 [V]×3600 [s]×1/100
= 1000
If the decimal point is set at the second digit from the
right in this case, the value 100.0 Wh is displayed. As
the above discussion shows, the maximum display value
of the integrator can be changed by different
combinations of time units and ranges (table on the next
page).

9
―――――――――――――――――――――――――――――――――――――――
Chapter 3 Principle of Operation
―――――――――――――――――――――――――――――――――――
Integrator Maximum Display Values
Rang
e
Time unit Lo(200W)Hi(2000W)
TIME: MIN
Wh: Lo 999.999 Wh 9999.99 Wh
TIME: HOUR
Wh: Hi 99999.9 Wh 999999 Wh
The Wh/TIME and the time setting dial on the 3181-01
front panel are used to set the integration time in the
range 1 to 99 minutes or 1 to 99 h. Once the desired time
is set, pressing the START switch resets the internal
circuits and integration begins. When the set time is
reached, the counter output is put on hold. If the
integrator is started with the timer set to "00", it
performs continuous integration. The HOLD/RUN switch
on the front panel is used to stop the counter and start
again. Below the V-F converter there is a backup battery
which maintains continuous operation in the event of a
power failure, so there is no danger of loosing watthour
values measured up to the power failure.

10
―――――――――――――――――――――――――――――――――――――――
Chapter 3 Principle of Operation
―――――――――――――――――――――――――――――――――――
AC voltage 500 V peak value max
AC current 2 max at maximum display value or 30 A
peak (lower value)
Single-phase
active power same as for voltage and current
3
.4 Crest Factor
Crest factor is a measure of the dynamic range of a
measurement. In measurements in which the peak value
is high but the rms value is low, if the measuring
instrument range is selected based on the rms value,
waveform peaks will exceed the dynamic range of the
circuit, causing errors since the circuit is not operating
linearly in this region.
The relation between the crest factor, peak value and rms
value is defined as follows.
Crest factor = Peak value/rms value
The 3181-01 has the following specifications.
For example, using the 3181-01 to measure AC current in
the Lo range, since the maximum display value is 2 A,
the largest allowable peak value on the input being
measured can be calculated as follows.
From the definition,
Peak value = rms value ×crest factor
=2×2
= 4 [A]

11
―――――――――――――――――――――――――――――――――――――――
Chapter 4 Names and Functions of Parts
―――――――――――――――――――――――――――――――――――
Rear Panel
9
10
11
12
13
14
15
16
17
18
Front Panel
1
2
3
4
5
6
7
8
Chapter
4
Names and Functions
of
Par
ts

12
―――――――――――――――――――――――――――――――――――――――
Chapter 4 Names and Functions of Parts
―――――――――――――――――――――――――――――――――――
1
2
3
4
Range
switch Function
switch Maximum display valu
e
Hi WATT 1999 W
AC A 19.99 A (Rating is 15 A)
Lo WATT 199.9 W
AC A 1.999 A
POWER switch
Allow approximately five minutes of warm-up before
performing measurements.
POWER METER display
This 3 1/2 digit LCD display has a maximum display
value of 1999. The function switches are selected to
enable it to indicate measured voltage, current and power
values.
If the input exceeds the maximum display value, the
uppermost digit will appear as 1 and the decimal point
will be displayed, while the lower three digits will be
blanked.
If the voltage of the backup battery falls below 4 V, BATT
will appear in the lower left corner.
INTEGRATOR display
This 6-digit LCD display has a maximum display value of
999999. If the integration value exceeds this, the decimal
point will occupy the uppermost digit. It will blink at
approximately one-second intervals, and integration will
start again from 000000. The colon (:) after the second
digit from the left blinks when the display is running at
approximately one-second intervals, and is blanked when
the display is on hold.
RANGE and functions (WATT, ACA, ACV) switches
These switches are used to switch the display between
power, current and voltage.
Table of contents
Other Hioki Measuring Instrument manuals
Hioki
Hioki CM3286 User manual

Hioki
Hioki 3275 User manual

Hioki
Hioki Super megohm SM7110 User manual

Hioki
Hioki 3196 User manual

Hioki
Hioki PW6001 User manual

Hioki
Hioki CM4371-50 User manual

Hioki
Hioki IM7580 User manual

Hioki
Hioki HiTester 3443-01 User manual

Hioki
Hioki LR5041 User manual

Hioki
Hioki PW3335 User manual

Hioki
Hioki PQ3198-94 User manual

Hioki
Hioki 3280-10F User manual

Hioki
Hioki RM3545 User manual

Hioki
Hioki 3441 User manual

Hioki
Hioki 3283-20 User manual

Hioki
Hioki lr5001 User manual

Hioki
Hioki TM6102 Use and care manual

Hioki
Hioki MR8875 User manual

Hioki
Hioki IM3523A User manual

Hioki
Hioki 3664 User manual