manuals.online logo
Brands
  1. Home
  2. •
  3. Brands
  4. •
  5. HME
  6. •
  7. Conference System
  8. •
  9. HME IC300 User manual

HME IC300 User manual

Other HME Conference System manuals
HME EOS HD User manual

HME

HME EOS HD User manual

HME NEXEO HDX User manual

HME

HME NEXEO HDX User manual

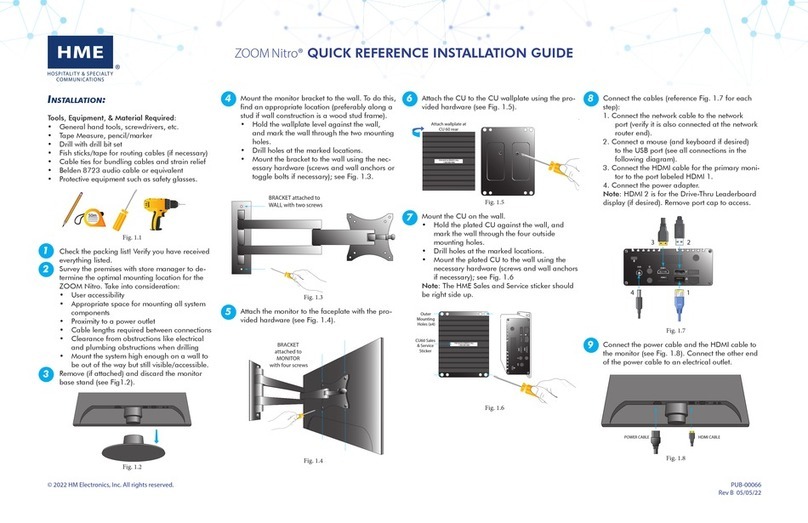
HME ZOOM Nitro User manual

HME

HME ZOOM Nitro User manual

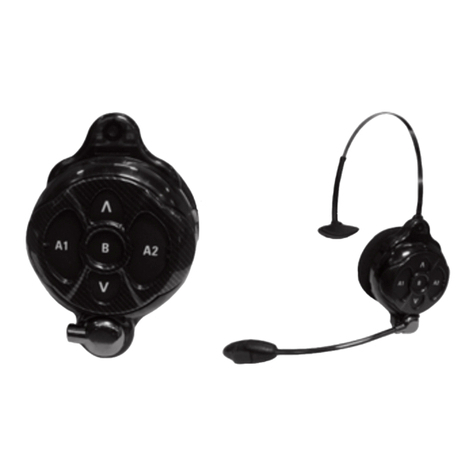
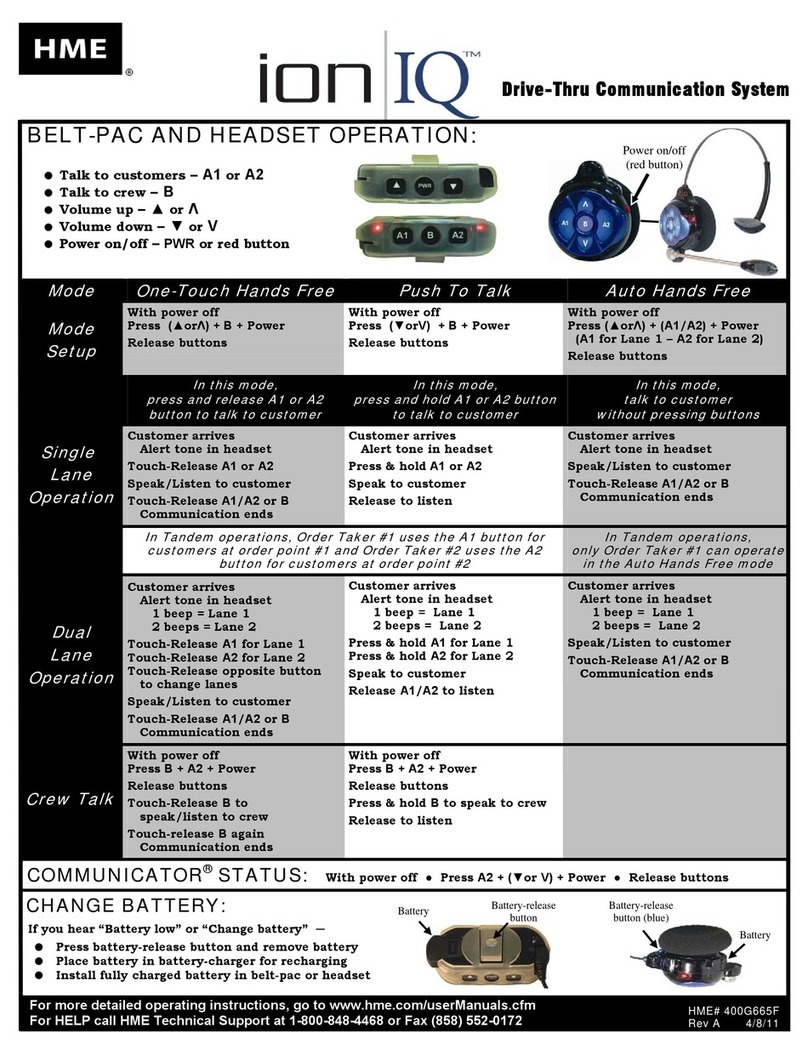
HME ION IQ Instruction Manual

HME

HME ION IQ Instruction Manual

HME Clear-Com HelixNet Partyline User manual

HME

HME Clear-Com HelixNet Partyline User manual

HME EOS HD User manual

HME

HME EOS HD User manual

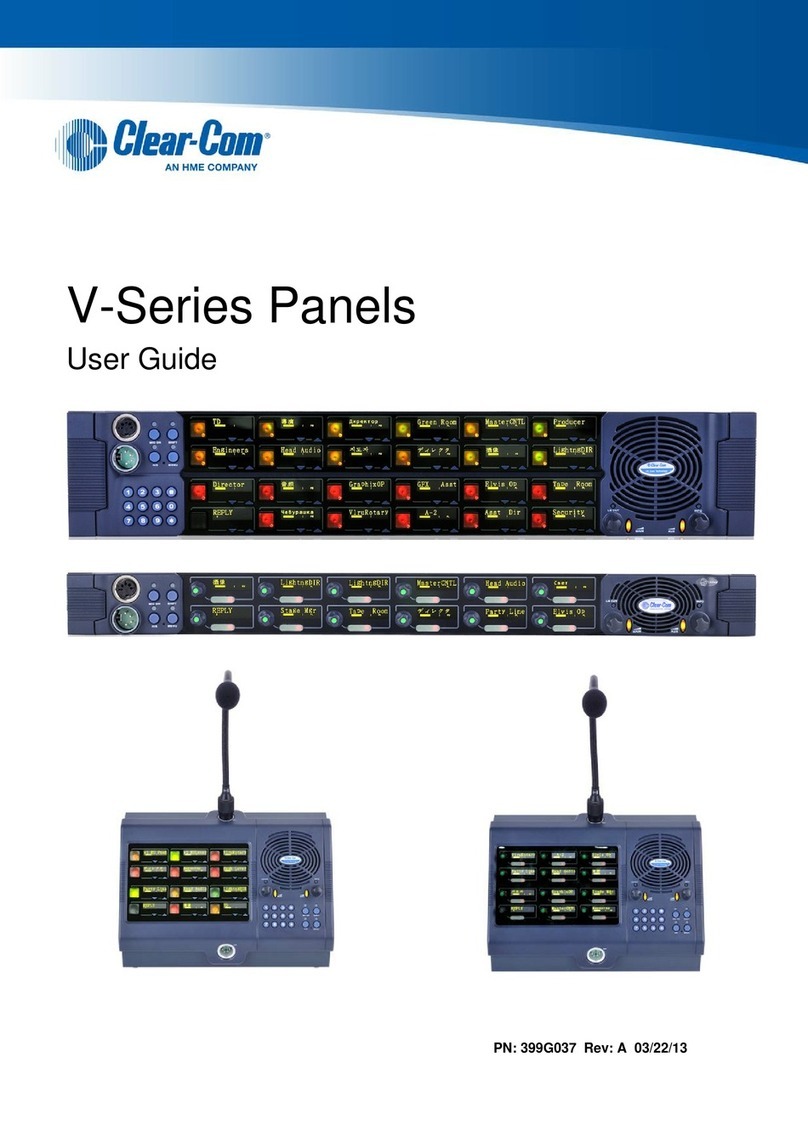
HME Clear-Com V Series User manual

HME

HME Clear-Com V Series User manual

HME SYS6700HD User manual

HME

HME SYS6700HD User manual

HME NEXEO HDX User manual

HME

HME NEXEO HDX User manual

HME SYS6700HD Specifications

HME

HME SYS6700HD Specifications

HME NEXEO HDX User manual

HME

HME NEXEO HDX User manual

HME Wireless 6400 User manual

HME

HME Wireless 6400 User manual
HME Communicator COM6000 User manual

HME

HME Communicator COM6000 User manual

Popular Conference System manuals by other brands

Jabbla Tellus 6 operating instructions

Jabbla

Jabbla Tellus 6 operating instructions

LY International Electronics H-9500 Series Installation and operating manual

LY International Electronics

LY International Electronics H-9500 Series Installation and operating manual

RADVision Scopia XT1000 user guide

RADVision

RADVision Scopia XT1000 user guide

AT&T MERLIN LEGEND Reference

AT&T

AT&T MERLIN LEGEND Reference

Polycom RealPresence Group Series setup sheet

Polycom

Polycom RealPresence Group Series setup sheet

ProSoft Technology AN-X4-AB-DHRIO user manual

ProSoft Technology

ProSoft Technology AN-X4-AB-DHRIO user manual

Sony PCS-I150 Operation guide

Sony

Sony PCS-I150 Operation guide

Middle Atlantic Products VTC Series instruction sheet

Middle Atlantic Products

Middle Atlantic Products VTC Series instruction sheet

AVT MAGIC AC1 Go Configuration guide

AVT

AVT MAGIC AC1 Go Configuration guide

Prentke Romich Company Vanguard Plus Setting up and using

Prentke Romich Company

Prentke Romich Company Vanguard Plus Setting up and using

Speakerbus iD 712 user guide

Speakerbus

Speakerbus iD 712 user guide

Trelleborg SafePilot CAT PRO user guide

Trelleborg

Trelleborg SafePilot CAT PRO user guide

Sennheiser ADN instruction manual

Sennheiser

Sennheiser ADN instruction manual

ADTRAN NetVanta 7100 Configuration guide

ADTRAN

ADTRAN NetVanta 7100 Configuration guide

AINA PTT Voice Responder quick guide

AINA

AINA PTT Voice Responder quick guide

Yamaha ProjectPhone PJP-100H owner's manual

Yamaha

Yamaha ProjectPhone PJP-100H owner's manual

vissonic VLI Series user manual

vissonic

vissonic VLI Series user manual

Panasonic KX-VC500 user manual

Panasonic

Panasonic KX-VC500 user manual

manuals.online logo
manuals.online logoBrands
  • About & Mission
  • Contact us
  • Privacy Policy
  • Terms and Conditions

Copyright 2025 Manuals.Online. All Rights Reserved.

Chick-fil-A EOS Installation
Installation Training
•Install Verification Form
•Installation Checklist
•Training Checklist
•Store Layout
•Audio Adjustments
•Store Settings
•Installer Setup
•EOS Base Location and Mounting
•Speed Team and Extended Range Antennas
•Switcher Board Installation
•IC300 Installation
•Photo Requirements
•Possible Cable Splicing
IC300 is to be wired for a single element. It
will not be using a separate microphone and
speaker
Check the switch settings on the IC300 at
install time to confirm that it is set for a combo
element (HALF-DUPLEX) When switching to
backup, both inbound and outbound audio will
be routed through the SP10 speaker
Chick-fil-A ION/EOS Installation
Chick-fil-A Ion/EOS Installation
Scope of Work
•Contact GC’s Superintendent at least 24 hours in advance of install to confirm
schedule and ETA
•Base station shall be mounted on top of DT J-box and over cover plate located on
bulkhead facing DT window (inside drive-thru area) –it is recommended you install
a 1” grommet in cover plate to protect wiring from base to J-box (Ask GC to notch
the plate for cables)
•Pull new cable for both systems!
Do not use existing D15 harness for the IC300!
•IC300 should be mounted flat on the wall (no pedestal mount) near the J-box with
conduit connected to base station as shown on drawing –IC300 will always be
connected to inside lane (lane 1)
•Install/interface with cabled intercom
•Install DM5 and SP10 speaker
•No mode switch will be installed –set-up system with dedicated mode On (✓)
-CFA refers to this as “3-man”
•If supplied, EC10 Shall be mounted overhead where order taking is being
performed, if order taking is not done in DT area. If order taking is done in DT
area install the EC10 antenna to cover any areas of reduced signal in the store
(walk-test store to verify coverage prior to EC10 installation)
•EC30 Extended range antenna shall be installed to have coverage just prior to
speaker post toward the beginning of DT lanes. Walk test to speaker post and
inside remote order station (if present). Tech to walk-test range with available
on-site CFA personnel, please document name and title on the IVF
•Tech must:
- Train onsite CFA personnel
- Complete IVF
- Complete Training Checklist
- Take photos and submit them with IVF (Base station, IC300 & Speaker post )
Chick-fil-A Ion/EOS Installation
Scope of Work…Continued
The Installation Verification
form must be completed,
signed, and submitted to
HME to close the order
Dining
DT
Kitchen
Counter
Storage
Equipment Location Inside Store
Contact HME if this location is not suitable
Base location above soffit in counter area
Drive-Thru
Equipment Location Inside Store
Mount EOS base on top
of J-box and attach to
cover plate
Do Not mount EOS
base above or
below J-box
Have GM notch the
plate (1”hole) for cable
routing
EOS|HD Network Connection
Connect the provided
CAT6 cable to the network
(biscuit jack) connector
inside the J-Box
Speaker and microphone install
Make sure to install and pack both speaker
and microphone in acoustic foam Please note: Current microphone
being installed for CFA is DM5
Speaker and microphone install
You will need a ladder to access
all bolts holding the back panel in
place. The speaker and loop will
be accessible from the rear