manuals.online logo
Brands
  1. Home
  2. •
  3. Brands
  4. •
  5. Hodedah
  6. •
  7. Indoor Furnishing
  8. •
  9. Hodedah HI 288 User manual

Hodedah HI 288 User manual

1
Hodedah
www.hodedah.com
support @hodedah.com
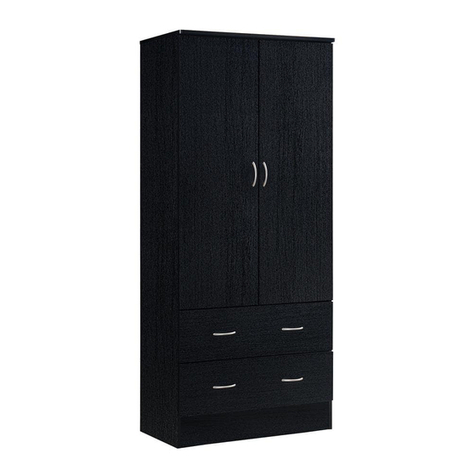
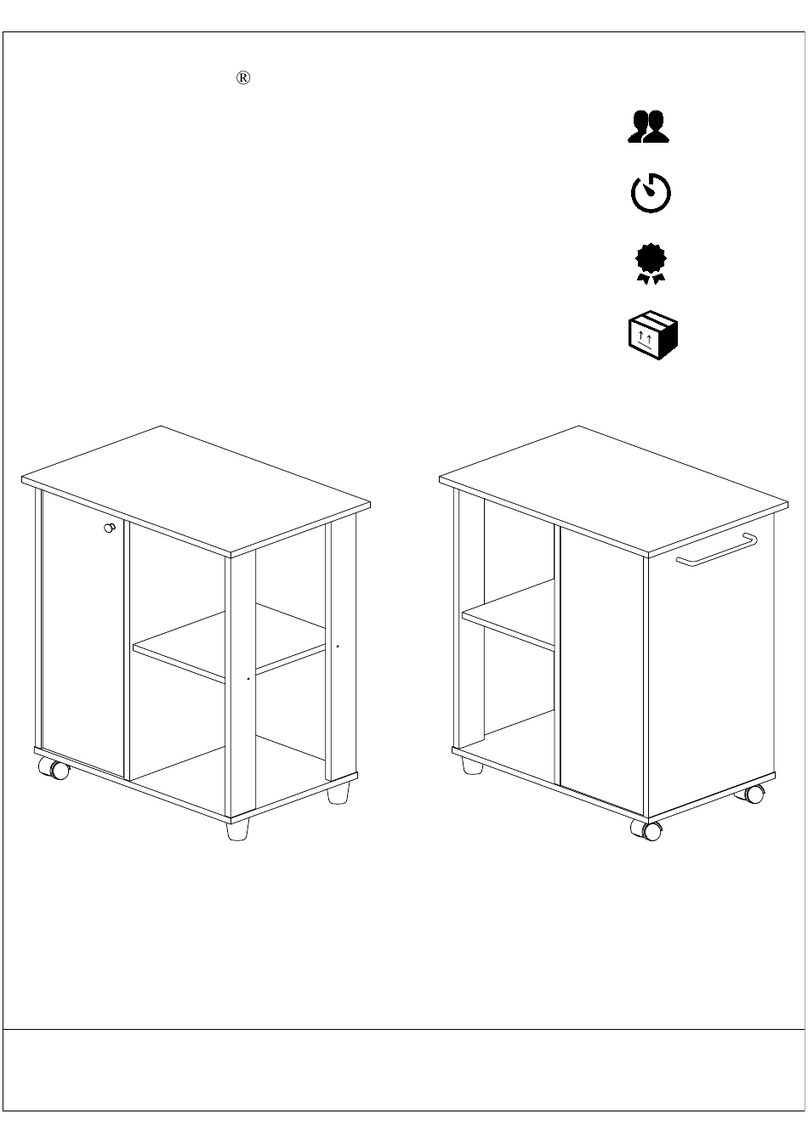
HI 288
L3118'' X D16 68'' X H71 58''
PART & HARDWARE LIST
2
CABINET STOPPER
Hodedah
www.hodedah.com
support @hodedah.com
APLASTIC DOWEL M8 X 25MM 18
B
H
I
J
JCBC W M6 X 40MM 16
POWER NAIL 6/8
2+2
PVC LEG STUD (L & R)
K
90
4+4
4
K1
K2
C
CB SCREW M3.5 X 12MM 28
D
CB SCREW M3.5 X 16MM 17
E
CB SCREW M4 X 25MM 4
F
CB SCREW M4 X 35MM 20
G
1
P/H SCREW M4 X 20MM
DRAWER SLIDE 14"
1
ALLEN KEY
1ALUMINIUM PIPE (787MM)
L
M2
5
8
7
1
3
2
6
9
11
4
10
1314
15
14
12
16
4
HANDLE IP994 (96MM) - PVC
M1
4
P/H SCREW M4 X 36MM
M3
4
HINGES (OUTSIDE) 58"
N
1
H- PROFILE (1670MM)
O
1314
15
14
12
16
3
- This product contains small components, please ensure that they are
kept away from small children.
- THIS INSTRUCTION BOOKLET CONTAINS IMPORTANT SAFETY
INFORMATION. PLEASE READ AND KEEP FOR FUTURE
REFERENCE.
STOP
DO NOT RETURN PRODUCT TO THE STORE.
If a part is missing or damaged, email our customer
service. We will gladly ship your replacement parts
FREE of charge.
email us at
[email protected]
For prompt, reliable service; please have your
assembly manual ready.
Need Parts or Assistance?
Hodedah
www.hodedah.com
support @hodedah.com
4
Thank you for purchasing from Hodedah
To learn more about hodedah and our products visit
www.hodedah.com
READ BEFORE BEGINNING ASSEMBLY
- Read each step carefully. It is very important that each step of instruction is performed in the
correct order. If these steps are not followed in sequence, assembly difficulties will occur.
- Make sure all parts are included. Most parts are labeled or stamped on the raw edge.
- Work in spacious area, preferably on a carpet, near the place the unit will be used.
- Do not use power tools to assemble your furniture. Power tools may strip or damage the parts.
HELPFUL HINTS
- Call us if you need assistance.
- Move your new furniture carefully, with two people lift and carry the unit to it's new location.
- Never push, drag or pull your furniture (especially on carpet).
Warranty Information
Hodedah warrants this product to be free from defects in material and workmanship agrees to
remedy any such defect. This warranty covers one year from the date of original purchase. This is
solely limited to be repair or replacement of defective parts and no assembly labor is included.
This warranty does not apply to any product which has been improperly assembled, subjected to
misuse or abuse or which has been altered or repaired in any way.
To obtain warranty, purchaser must present original bill of sale. Components repaired or
replaced warranted through the remainder of the original warranty period only. The defective
components will be repaired or replaced without charge, subject to the terms and conditions
described above.
For help with assembly, identifying parts, product information or to
order parts, please contact us :
Call us at :
718-456-0505
Monday - Friday
9:00am - 5:00pm
Visit our website :
www.hodedah.com
Hodedah
www.hodedah.com
support @hodedah.com
STEP 1
APLASTIC DOWEL M8 X 25MM 18
5
Hodedah
www.hodedah.com
support @hodedah.com
- Insert 18 x Plastic dowel (A) into Panels (1), (2) (3), (4), (5), (6) & (7) using a plastic hammer.
A
1
2
73
4
6
5
10 11
B
K
C
17
11
10
BACK VIEW
C
N
M2
M1
DRAWER SLIDE 14"
K1 4
STEP 2
6
Hodedah
www.hodedah.com
support @hodedah.com
- Assemble 4 x Drawer slide (K1) to Panel (1) & (7) with 12 x CB Screw M3.5 x 12m (B) using Philips head
screwdriver.
- Insert 4 x Hinges (N) into back side of Panel (10) & (11) with 8 x Cb Screw M3.5 x 16mm (C) by using
Philips head screwdriver.
- Attach 2 x Handle IP994 (M1) to Panel (10) & (11) front with 4 x P/H Screw M4 x 20mm (M2) using a
Philips head screwdriver.
2
C
BHANDLE IP994 (96MM) - PVC
P/H SCREW M4 X 20MM 4
M1
6
4
CB SCREW M3.5 X 16MM M2
CB SCREW M3.5 X 12MM
front VIEW
STEP 5
7
Hodedah
www.hodedah.com
support @hodedah.com
E
D
16
C
4
CB Screw M4 X 25MM
1
- Fixed 1 x Cabinet stopper (J) into panel (8) base, with 1x CB Screw M3.5 x 16mm (C). Tighten using
a Philips head screwdriver.
- Insert 2 x CB Screw M4 x 25mm (D) to Panel (12) back using a Philips head screwdriver.
- Fix 2 x Handle (M1) to Panel (12) front. Insert 4 x P/H Screw M4 x 36mm (M3) & tigthen with
Phillips head screwdriver.
- Attach 2 x Panel (14) to Panel (12). Then attach 1 x Panel (13) to Panel (14) using CB screw
M4 x 35mm (E) using Phillips head screwdriver. Repeat for another Drawer box.
CB Screw M4 X 35MM
1
J
4
M1
P/H SCREW M4X36
M3
M1
8
CJ
12 x 2pcs D
BOTTOM VIEW E
14
13
14
12
M3
HANDLE IP994 (96MM) - PVC 2
CABINET STOPPERCB SCREW M3.5 X 16MM
STEP 6
Hodedah
www.hodedah.com
support @hodedah.com
ALLEN KEY
- Fix 2 x Drawer slide 14" (K2) into both Panel (14) using 6 x CB Screw M3.5 x 12mm (B) & tighten with
Philip head screwdriver. Repeat step for another drawer box.
- Slot 1 x Panel (15) into Panel (14) groove & use 14 x Power nail (H) for fix it. Knock by using a hammer.
Repeat step for the another Drawer box.
- Place the 1 x Panel (16) at the base of drawer box. Use 2 x CB Screw M4 x 35mm (E) & tighten with
Philip head screwdriver. Repeat step for another drawer box.
- Attach Panel (2), (3), (4) & (5) into Panel (1) with 5 x JCBC W M4 x 40mm (F) & tighten with Allen Key (G).
- Slot Aluminium Pipe (L) into Panel (1) hole.
B12
CB SCREW M3.5 X 12MM
DRAWER SLIDE 14" 4
K2
H28
POWER NAIL 68"
8
1
23
L5
4
E
16
K2
B
GF
H
E4
CB SCREW M4 X 35MM
F5JCBC W M6 X 40MM K2
ALUMINIUM PIPE (787M) 1
L
1
G
6
GF
7
G
F
STEP 6
Hodedah
www.hodedah.com
support @hodedah.com
ALLEN KEY
- Attach Panel (6) into Panel (1) with 1 x JCBC W M4 x 40mm (F) & tighten with Allen Key (G).
- Attach Panel (2), (3), (4) & (5) into Panel (7) with 6 x JCBC W M4 x 40mm (F) & tighten with Allen Key (G).
1
G
STEP 6
Hodedah
www.hodedah.com
support @hodedah.com
ALLEN KEY
9
F7
JCBC W M6 X 40MM 1
G
1
B
I
8
F
G
7
STEP 6
Hodedah
www.hodedah.com
support @hodedah.com
PVC LEG STUD (L&R)
- Fix 2+2 x Pvc leg stud (I) into Panel (1) & (7) using 4 x CB Screw M3.5 x 12mm (B) & tighten with
Philip head screwdriver.
- Attach Panel (8) into Panel (1) & (7) with 4 x JCBC W M4 x 40mm (F) & tighten with Allen Key (G).
10
2
I
STEP 6
Hodedah
www.hodedah.com
support @hodedah.com
B4
CB SCREW M3.5 X 12MM
F4JCBC W M6 X 40MM ALLEN KEY 1
G
O
9
9
9
H
9
STEP 6
Hodedah
www.hodedah.com
support @hodedah.com
H- PROFILE (1670mm)
- Slot both Panel (9) into groove at H- profile (O).
- Attach Panel (9) at the back of wardrobe, use 62 x Power nail (H) for fix it. Knock by using a hammer.
1
O
11
H62
POWER NAIL 68"
STEP 7
12
Hodedah
www.hodedah.com
support @hodedah.com
Job Complete !
In the interest of our environment please dispose of all packaging throughtfully.
11
12
10
C
ADJUST
ADJUST
N
- Attach Panel (10) & (11) Hinges (N) with 8 x CB Screw M3.5 x 16mm (C) into Panel (1) & Panel (7)
using Philip screwdriver.

Other Hodedah Indoor Furnishing manuals

Hodedah HI302DR User manual

Hodedah

Hodedah HI302DR User manual

Hodedah HIKF 92-MOP User manual

Hodedah

Hodedah HIKF 92-MOP User manual

Hodedah HIC 7395 User manual

Hodedah

Hodedah HIC 7395 User manual

Hodedah HI 917DM User manual

Hodedah

Hodedah HI 917DM User manual

Hodedah HIK 94 User manual

Hodedah

Hodedah HIK 94 User manual

Hodedah HI70DRWHITE User manual

Hodedah

Hodedah HI70DRWHITE User manual

Hodedah HI5009-Z User manual

Hodedah

Hodedah HI5009-Z User manual

Hodedah HI80DR User manual

Hodedah

Hodedah HI80DR User manual

Hodedah HI803 User manual

Hodedah

Hodedah HI803 User manual

Hodedah HI816 User manual

Hodedah

Hodedah HI816 User manual

Hodedah 98802 User manual

Hodedah

Hodedah 98802 User manual

Hodedah HIBT70-G User manual

Hodedah

Hodedah HIBT70-G User manual

Hodedah HI425WHITE User manual

Hodedah

Hodedah HI425WHITE User manual

Hodedah HI3DR-G User manual

Hodedah

Hodedah HI3DR-G User manual

Hodedah HI404DR User manual

Hodedah

Hodedah HI404DR User manual

Hodedah HI45A-G User manual

Hodedah

Hodedah HI45A-G User manual

Hodedah HI5DR-A User manual

Hodedah

Hodedah HI5DR-A User manual

Hodedah BF-003K User manual

Hodedah

Hodedah BF-003K User manual

Hodedah HIK 69-T User manual

Hodedah

Hodedah HIK 69-T User manual

Hodedah HIK 69-MOP User manual

Hodedah

Hodedah HIK 69-MOP User manual

Hodedah HIK 72-T User manual

Hodedah

Hodedah HIK 72-T User manual

Hodedah HI1115-F User manual

Hodedah

Hodedah HI1115-F User manual

Hodedah HIBT 60-MOPV User manual

Hodedah

Hodedah HIBT 60-MOPV User manual

Hodedah CAROLINA 73302 User manual

Hodedah

Hodedah CAROLINA 73302 User manual

Popular Indoor Furnishing manuals by other brands

U-Line H-6314 Assembly

U-Line

U-Line H-6314 Assembly

VALERA 1235-WCSD Dimensions

VALERA

VALERA 1235-WCSD Dimensions

Next HOVE 652223 Assembly instructions

Next

Next HOVE 652223 Assembly instructions

HOMURY HDT109001WR quick start guide

HOMURY

HOMURY HDT109001WR quick start guide

Quoizel QR2057 Assembly instruction sheet

Quoizel

Quoizel QR2057 Assembly instruction sheet

Ergotron 97-540-053 user guide

Ergotron

Ergotron 97-540-053 user guide

Ameriwood HOME TYLER 4865837COM Instruction booklet

Ameriwood HOME

Ameriwood HOME TYLER 4865837COM Instruction booklet

Atlantic 36835515 Instruction booklet

Atlantic

Atlantic 36835515 Instruction booklet

Sunjoy BARBADOS L-DN1629SAL-TT Assembly instruction

Sunjoy

Sunjoy BARBADOS L-DN1629SAL-TT Assembly instruction

ROOMS TO GO Kids 992-22C manual

ROOMS TO GO

ROOMS TO GO Kids 992-22C manual

Sauder Harvey Park 414986 Assembly instructions

Sauder

Sauder Harvey Park 414986 Assembly instructions

Silva Banni HM 041.45 Assembly instructions

Silva

Silva Banni HM 041.45 Assembly instructions

BROSA Caledonia Rattan Bookcase with Storage Assembly guide

BROSA

BROSA Caledonia Rattan Bookcase with Storage Assembly guide

John Lewis Calia 836 03001 Assembly instructions

John Lewis

John Lewis Calia 836 03001 Assembly instructions

Olivar moveis 1915 125 Series Assembly instructions

Olivar moveis

Olivar moveis 1915 125 Series Assembly instructions

Universal Furniture Paula 932 instruction sheet

Universal Furniture

Universal Furniture Paula 932 instruction sheet

Next CUBE LONG JOHN Assembly instructions

Next

Next CUBE LONG JOHN Assembly instructions

U-Line H-1624 instructions

U-Line

U-Line H-1624 instructions

manuals.online logo
manuals.online logoBrands
  • About & Mission
  • Contact us
  • Privacy Policy
  • Terms and Conditions

Copyright 2025 Manuals.Online. All Rights Reserved.