manuals.online logo
Brands
  1. Home
  2. •
  3. Brands
  4. •
  5. Hongda USA
  6. •
  7. Toy
  8. •
  9. Hongda USA L2121 User manual

Hongda USA L2121 User manual

L2121
L2121
L2121
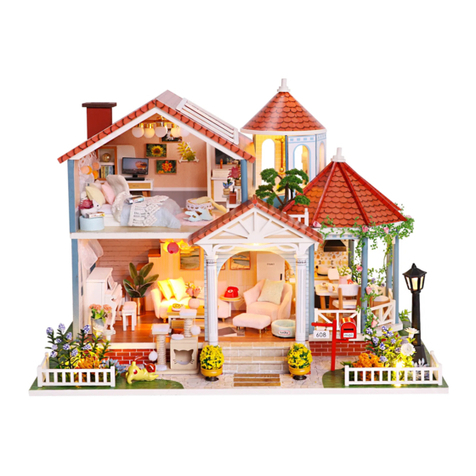
Fairy Castle Fairy Castle
Fairy Castle
L2121 Instruction manualL2121 Instruction manualL2121 Instruction manual
1
12
Tips for assembling
1.Because this product contains small parts, children need to use this product with an adult to avoid accidental ingestion and cause suffocation hazard.
There are sharp objects in the product, be careful not to pierce people to avoid injury.
2.After all the materials are used in the required amount in the operation steps, put the remaining materials back into the original bag until the installation is completed.
(Avoid losing materials during the installation process)
3.The unit of dimension marked in the step diagram is "cm".
4.Tips for making template paper: Put the template on the back of the material, fix it with some small double-sided tape, and then cut out the material to prevent the
cloth or template from moving in the cutting process, or causing errors in the cut material. Or lead to insufficient materials.
5.According to the "Parts Rule Example" at the bottom of this page, refer to the parts on the part number drawing, find the actual product and compare it with the bill
of materials, and then install it after confirming that it is correct. (Wooden parts only)
6.It is not advisable to apply too much glue, so as not to wait for a longer time to dry, and overflow will affect the effect of the finished product.
7.There are unavoidable small deviations in the color of wood, fabric, and beads of different batches, without notice, thanks for understanding.
Tips for Assembling Wood
Find the corresponding block number,
use a knife in the connection point
gently press, you can take out the wood.
Use a knife to
smooth out the burr.
Or use sandpaper to smooth
out the burr
Be sure to test the LED lights before making the lighting,note that the LED
white wire to the negative, gray wire to the positive reference to the
following figure operation test.
Testing on LED function
DO NOT contact the
LED wire end direct
to the battery cell.
Use the provide battery
holder. Make sue the
correct polarity.
How to assemble the battery holder
1.Material and tools needed:
- Battery holder, LED bulb,
tape, screw driver and 2 pieces
AAA size battery(not provided)
2. Use screw driver and
take the lid off from the
battery holder.
3. Insert the battery take
notes on the polarity.
4. Connect the red wire
to grey wire. Connect
the black wire to white
wire.
5.Wrap the exposed wire
with the tapes.
6. Place the box lid and
fastness with screw driver.
“-”negative
“+”positive
A01:The parts are directly in the box: B01: The parts are in the B bag; C01: The parts are in the C bag, and so on (Note: The printing paper is displayed in the step A31-1:
The printing paper is placed directly in the box , The part number is A31-1. In the step, the template paper A31-N01 is displayed, A31 is the template paper,
N01 is the cutting template used for the corresponding material, N01-1, N01-2 are the part numbers for the parts, and the printing paper and template paper
are directly placed in the packaging box.)
Examples of parts rule:
Name of
accessories
Printing paper
&Template
paper
Lifebuoy
Seesaw
Rocking horse
Dish
Round table
Potted plants
Candle
Cat climbing
frame
Dining chair
Children
dining chair
Screen
Wall cabinet
Cooktop
wind vane
Hanging
pictures
Fireplace
Light
Coffee table
Sofa
Double
bed
Cabinet
Parachute
Rocking chair
Bed
Piano
Tub
Bathroom
cabinet
Bed end stool
Swing
Outdoor Light
Coffee cup
Plant 2
Related materials bags
A30,A31 of bag A(All printing paper and
template paper are concentrated on A30,
total 2 sheets of A3 single-sided printing paper
and 2 sheets of A4 single-sided template paper)
Bag G+Bag P+printing paper
Bag G
Bag G+Bag Q+printing paper
Bag P+Bag R+printing paper
Bag N+Bag P+Bag Q+Bag R+printing paper
+template paper
Bag P+Bag Q+printing paper
Bag H+Bag N+Bag Q+template
paper
Bag A+Bag N+Bag P+template paper
Bag A+Bag H+Bag N+template paper
Bag A+Bag H+template paper
Bag A+Bag J+Bag Q+printing paper
Bag A+Bag J+Bag N+Bag P+Bag Q+printing paper
+template paper
Bag A+Bag J+printing paper
Bag A+printing paper
Bag K +printing paper
Bag A+Bag N+Bag P+Bag S+template paper
Bag A+Bag N+printing paper+template paper
Bag A+Bag N+Bag P+template paper
Bag A+Bag K+Bag N+printing paper
+template paper
Bag K+Bag P+Bag Q+Bag R
Bag L+Bag P+Bag Q+printing paper
+template paper
Bag L+Bag N+Bag Q+template paper
Bag A+Bag L+Bag N+printing paper
+template paper
Bag A+Bag L+Bag N+Bag Q+printing paper
+template paper
Bag A+Bag M+Bag N+printing paper+template
paper
Bag M+Bag P+Bag Q+printing paper
Bag A+Bag L+Bag N+template paper
Bag A+Bag N+printing paper+template paper
Bag G+Bag N+printing paper+
template paper
Bag G
Bag Q+printing paper
Page 3
Page 3
Page 3
Page 4
Page 4
Page 4
Page 5
Page 5
Page 6
Page 6
Page 6
Page 7
Page 7
Page 7
Page 8
Page 8,9
Page 9
Page 9
Page 10
Page 10,11
Page 11,12
Page 12,13
Page 13
Page 14
Page 14,15
Page 16
Page 17
Page 17
Name of
accessories
Drum kit
Drumsticks
Telescope
Fan Chandelier
Bathroom
divider
Cat carpet
Steps 1.2
Television
City gate
Large
chandelier
Balloon
Slide
Related materials bags
Bag M+Bag N+template paper
Bag A+Bag Q+printing paper
Bag P+Bag Q+printing paper
Bag N+Bag P+printing paper+template paper
Bag A+Bag P+printing paper+template paper
Bag A+Bag F+printing paper
Bag K+printing paper
Bag F+printing paper
Bag N+template paper
Bag A+Bag N+Bag P+Bag S+template paper
Bag P+Bag Q+Bag R
Bag F+printing paper
Page 18
Page 18,19
Page 19
Page 19
Page 19
Page 20
Page 20
Page 20
Page 20-21
Page 21
Page 21
Catalog
Bag N+Bag P+Bag R+template paper
Page 18
Page 17
Page 10
Page 13,14
Page 15,16
Doghouse
Slippers
Page 22
Page 22
Bag A+Bag N+Bag Q+printing paper
+template paper
Bag A+Bag N+template paper
2
Curtain Bag N+Bag P+Bag Q+template paper Page 22
Plant
Sunflower
Paper lowers
Third floor
roof
Elevator
Elevator
roof
Elevator
bracket
Third floor
Piano room
Kitchen
floor
Daylighting
windows of
third floor
Children
room
Pet room
Chandelier
of first floor
Outer frame
Balcony1,2,3
Battery box
Bag P+Bag Q+printing paper
Bag N+Bag P+Bag Q+Bag R+template paper
Bag N+Bag Q+template paper
Bag A +Bag D+Bag E+Bag N+Bag P+printing paper
+template paper
Bag A+Bag E+printing paper+template paper
Bag A+Bag E+Bag Q+printing paper
Bag A+Bag E+printing paper+template paper
Bag A+Bag D+Bag E+Bag N+printing paper
+template paper
Bag A+Bag D+Bag N+Bag P+printing paper
+template paper
Bag A+printing paper
Bag A+Bag D+template paper
Bag A+Bag B+Bag N+printing paper
+template paper
Bag A+Bag B+Bag N+printing paper
+template paper
Bag K+Bag N+Bag P+template paper
Bag A+Bag B+Bag C+Bag D+Bag N+Bag P
+Bag R+printing paper+template paper
Bag A+Bag C+template paper
Page 23
Page 23
Page 23
Page 23
Page 24
Page 25
Page 26
Page 26,27
Page 28
Page 28
Page 29
Page 38
Page 30-38
Bag S
Page 30
Page 24
Page 27
Page 28,29
Toilet Bag N+Bag Q+template paper Page 22
Thumbnail of material list (reference only)
Thumbnail of printing paper & template paper (reference only)
Symbol description used
A
B
A
B
A
B
A
B
A
B
A
B
A
B
A
B
1
Install parts
in the opposite
direction
Install the same
parts on both
sides
Pay attention to the direction of installation material B stick to
material A
Pay attention to the direction of installation material A stick to
material B
Fold in half
according
to dotted lin
fold double
edge to center
dotted line
Fold four sides
to the middle 123
combination part
according so on.
Lifebuoy
G01 G01
G02
G03
G04
A30-1
P18
1234
5 7
6
Seesaw
1
23456
G05 G06
G06
G07
G08
D06
G09
G09
G10
G04
A30-1
A30-1
A30-1
A30-1
G01 G01
G02
P18
G03
G05
G10
G06
G07
A
B
G08
G06
G09
G09
1cm
1cm
Rocking horse
G11 G12
A30-2-1
A30-3-1 A30-3-2
A30-2-2 A30-2-3
A30-3-3
G13 G13
G14 G14
Q02:16cm
1234
5 7
68 9 10
11 12 13 14 15
G11
A30-2-2
Poke the hole
A30-2-1
G11
Turn it over and stick
the printing paper
Poke the hole
A30-2-3
G14
Q02:8cm D06
Cut out 8cm Q02, and then use D06 to wrap it up
1cm
(Need 2 pieces)
G12
G13
1
11Follow the same method to
make another rocking horse
16
3
Swing
G15
G15
G16
G16
G16
G17
G18
G18
Cut out A27, N04 and N06 according
to the template before making
A30-4
N14-1
N04-1 N04-1
N06-1
N06-1
A27-1
A27-1
Q06:18cm
12
34
G16
G15
G16
G16
0.5cm
G15
N14-1
A30-4
5 7
68 9 10 11
12 13 14 15 16 17 18
19 20 21 22 23 24
N06-1
A27-1
G17
N04-1
G18
(Need 2 pieces) Q06:9cm
Q06:9cm
2
Stick together
Fold in half according to the
dotted line on the picture
Turn the part 3 over and stick it to
N04, cut the excess fabric as shown
in the picture, and then stick it
33
G19 G19 G20
Outdoor Light
Coffee cup
A30-5 A30-5 A30-5
Q10 Q11 Q12
123
Q10 Q11 Q12
A30-5 A30-5 A30-5
G20
G19
G19
Stick the printing paper inside the coffee cup
2
4
N06-2 N06-2 N06-3 N06-3
N06-4
Cat climbing frame
Cut out N06 according to the template
before making
H08
H02 H02
H04
H03
H01
H05 H05
H07H06
N25N25
Q06:36cm Q07:5.5cm
Q07:2.5cm
Q07:2cm
H02
H03
H02
H08
N06-4
H01
H04
Wrap H06 with cotton
rope Q06
Q06:14cm
H06
H07
Q06:22cm
Wrap H07 with 22cm-long
Q06 in the same way
N25
N25
H05
H05
4
54
5
N06-3
N06-3
N06-2
N06-2
Cut out N04 and N06 according to the template before making
N04-2 N04-2
N04-2 N04-2
N04-2 N04-2
Dining chair
N04-3 N04-3 N04-3
N06-5 N06-5 N06-5
A24-1 A24-1 A24-1
P03(12 pieces)
123
456
78 9 10 12 13
11
A24-1
N06-5
Use scissors to cut the position on the picture
Cut off the excess (Need 3 pieces)
Use knife to cut P03 as shown, and the
bevel needs to be polished with sandpaper
1.2cm
(Need 12 pieces)
N04-2
N04-2
(Need 3 pieces)
Stick the back of the stool
as shown
5
Children dining chair
H09 H09
H10 H10
H11
H12
N06-6
N04-4 N04-4
N06-6
A27-2 A27-2
1234
5678
9 10 11
123456
Dish
A30-6
A30-7-1
A30-7-2
P04 P04
P17 P17
A30-7-1
A30-7-2
Cut out a leaf on R07
and paste it
Cut out a leaf in R07
(Need 2 pieces)
Paste the dish as shown
A30-8-1
A30-8-2
cut out N18 according to the template before making
A24-2 N18-1 N18-2
Round table
123
45 7
68 9 10
A24-2
A30-8-1 A30-8-2
N18-1
Bend N18-1 as shown N18-1 N18-2
N18-2
N18-1
N06-6
A27-2 N04-4
H10
H11
H12 H09
(Need 2 pieces)
H09
Cut out N04 and N06 according to the template before making
6
R07
Cut out N18 and N22 according to the template before making
Potted plants
N22-1 N22-1 Q05:1.5cm
Q05:1.5cm N18-3
P27:0.8cm R07
A30-9
P05
P06
P05 P05
P06 P06
Q04:1.5cm
Q04:1.5cm
Q04:1.5cm
A30-10
A30-10
A30-10
Candle
Q04:1.5cm
A30-10
123
Wrap the iron wire with printing paper as shown (Need 3 pieces)
4
5
P05 P05 P05
P06
P06P06
H13
H14
H15
H16
H17
H18
H19
H20
Screen
H15
A26-1
6
Place the parts as shown
1234 5
6
7
8 9
H13
A26-1
H16
H15
H18
H17 H15
H20
H19
Cut out N26 according to the template before making
P27:0.8cm
N18-3
1234R07
Cut out a short section of R07
and plug it in
A30-9
Paper flowers
Q05:1.5cm
N21-1
Roll up and fix
N22-1
N22-1
Q05:1.5cm
Q05:1.5cm
Follow the pink flower method to
make 2 yellow flowers
1234
7
H14
1234
5678
9
12
Wall cabinet
Q02:3.2cm
J01
J01
J02
J02
J03
A24-3
A30-11
A24-3-1
A30-11
J01
J02
Q02:0.8cm
0.2cm 0.2cm
0.6cm
A
B
J03
J01 J02
(need 4 pieces)
10
11
Cooktop
A24-3-2
J04 J04
J05
J06 J07
J08
J09
J09
J10
J10
J11
J12
J13
N19-1 N19-2
N19-3
N19-1 N19-2
P16
Q09:1cm
P05 P08 Q03:1.8cm
Q02:4cm
A30-12-1
A30-12-2
1234567
8 9 10
J07
J05
N19-1
J09
N19-1
J09
N19-1
J09
J10
J10
N19-2 N19-3
J11
N19-2
J09
J10
J11
A30-12-1
A24-3-2
A30-12-2
Cut out N19 according to the template before making
-1
8
Paste N19 on the wood
A30-11
N19-1
J09
J08
15 16 17 18 19 20 21
J06
Q02:0.8cm
0.2cm 0.2cm
0.6cm
(Need 5 pieces)
22 23 24 25 26 27 28 29
P05
Q03:1.8cm
1.2cm
0.4cm
Bend the iron wire
Q03 as shown
P16
Cut Q09 into thin slices with
a thickness of 0.1cm
J12
J13
Wind vane
1234
5678
J14
J15
J16 J16
J16 J16 J17 J17
A24-4 A24-4 A24-5 A24-5
A30-13-2
A30-13-1
A30-13-3
J17
A24-5 A24-5
A30-13-1
J17
A30-13-3 A30-13-2
A24-4
A24-4
J14
J15
J16
J16
J16
9 10 11 12
Hanging pictures
A30-14-1 A30-14-2 A30-14-3
A30-14-4
A24-6 A24-6 A24-6
A24-6
A30-14-4
A30-14-2
(Need 3 pieces)
A30-14-1 A30-14-3
A30-14-2
Follow the same method to make
hanging pictures
12
34 5 6
9
P08
J04
J04
1234
56789
Fireplace
K02
K02
K02
K04
K03 K03
K07
K06
K05
A30-15
K03
K05
K06
A30-15
K04
K03
K06
K05
6
6
K02
K04 6
K02 K07 K02
10 11
Light
P01
Cut out N18 according to the template before making
N18-4 N18-5
A24-7-1
S01
0.3cm(need 6 pieces)
Use knife to cut off P01
0.3cm as shown
(Need 6 pieces)
123
4567
S01 A24-7-1 N18-5
P01
N18-4
Coffee table
A24-7 N18-6
A30-16-1
A30-16-2
A30-17
123
4567
A24-7
A30-16-1
A30-16-2
Poke a hole N18-6
(Test the bulb before making the lamp)
Cut out N18 according to the template before making
10
8 9 10 Light
A30-17
N05-1
N05-2
N05-4 N05-4
N05-3
N05-5
N05-5
N05-6 N05-6
N05-7
N06-7 N06-7
N06-8
A25-1
A25-2
A25-3 A25-3
A25-4
A25-5 A25-5
Cut out N05 and N06 according to the template before making
Sofa
P10(5 pieces)
1
23
456789
10 15
16 17 18 19 20 21 22
N05-1
A25-1
Stick A25-1 to N05-1 as shown
Cut the leather as shown
A25-2
N05-2
N05-3
N05-4
A25-3
7
9
(Need 2 pieces)
N05-5
8
11
N06-7
A25-5
23 24 25 26 27 28 29
31 32 33 34 35 3630
N06-8
A25-4
N05-7
10
11 7
9
8
9
(Need 2 pieces)
10 10
11
P10 P10
P10
P10 P10
Double bed
K09 K09
K10
K14
K15
K11 K12
K13
N06-9 N06-10
N04-5 N04-6
A27-3 A27-4
N10-1 N10-2
N10-3
N03-1
N03-1
12
A27-4
N06-10
N04-6
A30-18
Q01:8cm
3
A30-19
4
5678910
15 16 17
18
19
N03-1
A27-3
N06-9 N04-5
N03-1
A30-18
Fold in half along the middle
first, then cut out
Q01:8cm
Paste the printing paper
14
12
13
Cut out N03, N04, N06 and N10 according to the template before making
12
20 21 22 23 24 25 26
27 28 29 31 3230
K09
K12
K11
K09
K15
N10-3 N10-3 N10-2
K14
N10-1
Follow the same method
to make another
15
16
12
13
14 K10
15
16
K13
Cabinet
Q15 R10
P07(3 pieces)
K16
K16
K17 K17 K17
K18
123
45678
P20
Q04:2.5cm
L01
K17
K16
K18 K17
K17
K16 R10
Q15
P07
Floor umbrella
Cut out N13 according to the template before making
N13-1
A30-20
A30-21
N13-2
1234
5678
Fold along the dotted line
13
A30-20
A30-21
N13
Stick the printing paper to the cloth Cut out according to the template
910 15
P20
Q04:2.5cm L01
Cut out N01 and N09 according to the template before making
Rocking chair
N01-1N01-1N01-1 N09-1
N27
L02
L03
L04 L04 L05 L05
L06
Q04:3cm
1234
5678
L06
L05
L05
L04
L04
N01-1
Paste N01-1 and cut off the
excess as shown
Q04:2cm
Bend the iron wire into the shape
on the picture as shown
L02
L03
Q04:1cm
910
15 16 17
18
Bed end stool
Cut out A27, N05 and N06 according to the template
before making
A27-5
N06-11
N05-8
L08
L08
L09
L10
1234
N06-11
A27-5
N05-8
Apply glue on the red line
Fold inward 0.2cm and
then glue it Fold in half, then paste the pillow
Paste the notch on one side Stuffed with cotton N27 Finally paste the other gap
N27
14
5 7
68 9 10
L08
L09
L10
L08
N09-1 N09-1
N27
N05-9
L07 A24-8
A24-9
A24-9
A24-10
A24-11
N06-12
N06-13
N07-1
N03-2
N02-1
N15-1
A30-22
Cut out N02, N03, N05, N06, N08, N09 and N15 according to the template
before making 12
34
56
78 9 10
14 15 16 17 18 19 20
A24-8
A24-9
A24-9
A
B
A
B
A24-10
A24-11
N06-12
Cut off the excess L07
N06-13
N07-1
N02-1
Spread N02 on N07 Fold back 1cm, then paste it
1cm
N03-2
Make 2 pillows according to
the previous method
N09-1
N09-1
Bed
15
21 22 23 24 25
N15-1
Cut out N15 and make a mark
in the middle
A30-22
Q04:2cm
N05-10
N06-14
A27-6
L11 L12
L13 L14
L15
L15
L16
L17
L18
L19
L21
L20
L20
Cut out A27, N05 and N06 according to thetemplate before making
A30-23
A30-24
A30-25
N06-14
A27-6
N05-10
L12
L13
1234
5678
910 15
16 17 18 19 20
21 22 23 24 25
26
L15
A30-24
L15 A30-23
L16
L16
L16
L18
L17 Q04:2cm
L11
A30-25
L19
L20
L21
L20
Piano
16
N27
Tub
A30-26
A30-27 A26-2
A24-12
A24-13
Cut out A26 according to the template before making
N26
M01
123
5678
4910
A24-12
A24-13
A30-26
A26-2
A30-27
M01 N27
N26
P05 P08 Q03:1.8cm
Q02:3.2cm
Bathroom cabinet
M04
M05
M06
M03
M02
M02
A30-28
Q02:0.8cm
0.2cm
0.6cm
P05
Q03:1.8cm
1.2cm
0.4cm
Bend the iron wire
Q03 as shown
M02
1234
5678
M02
M03
M05
M04
(Need 4 pieces)
A30-28
M06
910 15
N18-3
P27:0.8cm
R07
Cut out N18 according to the template
before making
P27:0.8cm
N18-3
Plant 2
1234R07
Cut out a short section of R07
and plug it in
17
Drum kit
123
M07 M08 M09 N18-7
Cut out N18 according to the template before making
N18-7
A30-29 A30-29 A30-29
A30-30
M10
M10
M11
M12 M12
M13 M13 M13 M14 M15 M16 M17 M18 M19 M19
A30-30
A30-31
A30-32
A30-32
4
5678
910 15
16 17 18 19 20 21 22
A30-29A30-29 A30-29
M13 M13 M13
M07
M08
M09
Grind off
Grind off one corner of M10
with sandpaper as shown
Grind off
Grind off one corner of M10 with
sandpaper, as shown in the figure
M10 M10
(Note that the 2 polished
corners are symmetrical)
M10 M10
M11
M12
M12
N18-7
N18-7
Plug N18-7 into M12
M15
M17
M16
M18
M18
M18
Drumsticks
A30-33
A30-34
Q02:2cm
Q02:2.5cm
A24-14 A24-15
14
235
A24-15
A24-14
A30-34
A30-33
P18
P23
Q04 :2.5 cm
P19
P18
P18
P18
A30-35 A30-36 A30-37
A30-38
Telescope
14
23
A30-35
P23
A30-36
18
M14
0.3cm
2.2cm
5678910 11
A30-37
Q04 :2.5 cm
(Need make 3 pieces) P19
P18
P18
P18
P18
P15 P15
A30-38
A30-39
N18-8
Before making, cut out N18 according to the template
Fan Chandelier
1234
5678910
Fold and glue A30-39 in half
along the middle
P15 P15
A30-39
N18-8
P02 P02 P02
N18-9
N18-10 N18-10 N18-10
S01
S01
S01
A24-7-1
S01 A24-7-1 N18-10
1234
N18-9
P02
P26 P26
R01 R02 R03
R04 R05
Q01:6cm(6 pieces)
Q01:7cm(4 pieces)
1.5cm
1.5cm
R02
R02
12
34
5
Q01:6cm
Insert wire Q01 into R02
67
R05R03 R04R02R01
P26
19
Bend the iron wire as shown in
the picture
Cut it out as shown in the picture Expand P15
(front side) (back side)
Use the chandelier made before,
through the small hole of P15
The chandelier made before
Wrap the wires with N18
Large chandelier
Before making, cut out N18 according to the template paper
(Note, test whether the bulb glows normally before
making the lamp)
(Need make 3 pieces)
Balloon
Knead R02 into a ball with a
diameter of 1.5 cm as shown
in the picture.
Take an appropriate amount and
knead a long strip as the picture
shown
Surround as shown, trim off
the excess
According the same steps to make other
balloon Insert the balloon into
P26 and fix it
As shown in the figure, stick the
printing paper with the expanded P15
(Need make 2pieces)
A24-7-1A24-7-1

Other Hongda USA Toy manuals

Hongda USA Romantic Aegean Sea User manual

Hongda USA

Hongda USA Romantic Aegean Sea User manual

Hongda USA Mermaid tribe User manual

Hongda USA

Hongda USA Mermaid tribe User manual

Hongda USA Cheryl's Room M020 User manual

Hongda USA

Hongda USA Cheryl's Room M020 User manual

Hongda USA S2131 User manual

Hongda USA

Hongda USA S2131 User manual

Hongda USA S2006 User manual

Hongda USA

Hongda USA S2006 User manual

Hongda USA Christmas Eve S2001 User manual

Hongda USA

Hongda USA Christmas Eve S2001 User manual

Hongda USA Gibbon Sushi M2011 User manual

Hongda USA

Hongda USA Gibbon Sushi M2011 User manual

Hongda USA Coloured Glaze Time User manual

Hongda USA

Hongda USA Coloured Glaze Time User manual

Hongda USA BELL'S CAKE SHOP User manual

Hongda USA

Hongda USA BELL'S CAKE SHOP User manual

Hongda USA The Ancient Capital Under Moonlight User manual

Hongda USA

Hongda USA The Ancient Capital Under Moonlight User manual

Hongda USA S2003 User manual

Hongda USA

Hongda USA S2003 User manual

Hongda USA S2007 User manual

Hongda USA

Hongda USA S2007 User manual

Hongda USA S2010 User manual

Hongda USA

Hongda USA S2010 User manual

Hongda USA Rainbow Cafe M906 User manual

Hongda USA

Hongda USA Rainbow Cafe M906 User manual

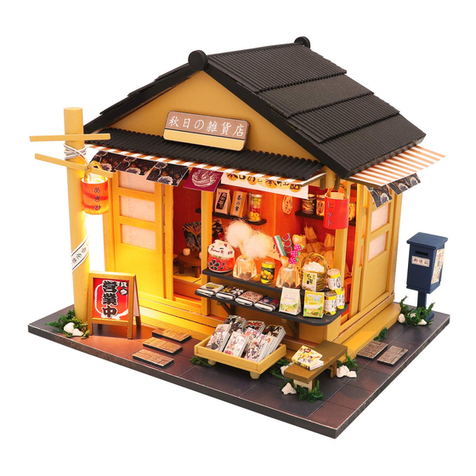
Hongda USA Memories of Autumn Grocery Store M914 User manual

Hongda USA

Hongda USA Memories of Autumn Grocery Store M914 User manual

Hongda USA PC902 User manual

Hongda USA

Hongda USA PC902 User manual

Hongda USA Star Takoyaki User manual

Hongda USA

Hongda USA Star Takoyaki User manual

Hongda USA M2021 User manual

Hongda USA

Hongda USA M2021 User manual

Hongda USA The Sound of the Sea M040 User manual

Hongda USA

Hongda USA The Sound of the Sea M040 User manual

Popular Toy manuals by other brands

IncrediBuilds GHOSTBUSTERS ECTOMOBILE Building instructions

IncrediBuilds

IncrediBuilds GHOSTBUSTERS ECTOMOBILE Building instructions

Amewi F15 EAGLE Assembly instructions

Amewi

Amewi F15 EAGLE Assembly instructions

Fisher-Price W9859 instructions

Fisher-Price

Fisher-Price W9859 instructions

Jamara Ferrari LaFerrari instructions

Jamara

Jamara Ferrari LaFerrari instructions

Eduard Mosquito B Mk.IX interior 1/32 quick start guide

Eduard

Eduard Mosquito B Mk.IX interior 1/32 quick start guide

Flight Model F153 EXTRA 300 125" Assemble manual

Flight Model

Flight Model F153 EXTRA 300 125" Assemble manual

Fisher-Price Power Wheels CFG09 owner's manual

Fisher-Price

Fisher-Price Power Wheels CFG09 owner's manual

Align T-Rex 450SE V2 instruction manual

Align

Align T-Rex 450SE V2 instruction manual

Eduard 53 106 manual

Eduard

Eduard 53 106 manual

Faller 120580 manual

Faller

Faller 120580 manual

Mattel Disney Princess Color Magic X9383 instructions

Mattel

Mattel Disney Princess Color Magic X9383 instructions

Eduard Zoom EA-6B seatbelts STEEL Assembly instructions

Eduard

Eduard Zoom EA-6B seatbelts STEEL Assembly instructions

Mattel 32854-0920G1 owner's manual

Mattel

Mattel 32854-0920G1 owner's manual

TILLIG BAHN 16571 quick start guide

TILLIG BAHN

TILLIG BAHN 16571 quick start guide

Eduard Victor K.2 exterior quick start guide

Eduard

Eduard Victor K.2 exterior quick start guide

Fisher-Price M4046 manual

Fisher-Price

Fisher-Price M4046 manual

Playskool Humbah instructions

Playskool

Playskool Humbah instructions

Eduard Zoom Pz.III Ausf.F manual

Eduard

Eduard Zoom Pz.III Ausf.F manual

manuals.online logo
manuals.online logoBrands
  • About & Mission
  • Contact us
  • Privacy Policy
  • Terms and Conditions

Copyright 2025 Manuals.Online. All Rights Reserved.