manuals.online logo
Brands
  1. Home
  2. •
  3. Brands
  4. •
  5. Hongda USA
  6. •
  7. Toy
  8. •
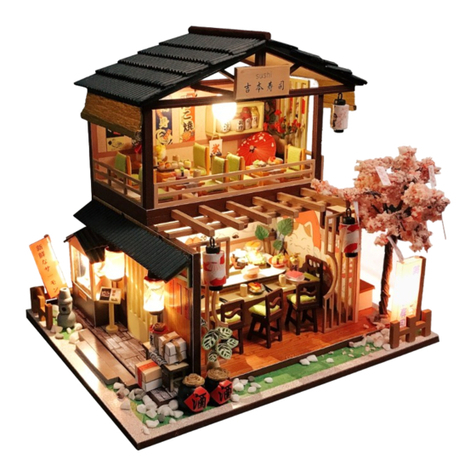
  9. Hongda USA The Ancient Capital Under Moonlight User manual

Hongda USA The Ancient Capital Under Moonlight User manual

L2021 Instruction manual
1.Picures shown on the package may be slightly different from the actual product.
2.All the materials are taken in the operation step, put the remaining materials back into the original pocket until the installation is completed.(Avoid material loss during installation)
3.The dimensions indicated in the step diagram are“cm”.
4.If there have template paper material, please cut the material according to the template to avoid mistakes..
5.According to the part rule example at the bottom of this page, refer to the part on the part number drawing, find the material object and compare with the material list, confirm and
install.(Wooden parts only)
6.Glue should not be applied too much, so as not to dry longer, overflow will affect the effect of the finished product.
7..Part shapes may differ from the photographs depending on he production batch
Tips for assembling
Be sure to test the LED lights before making the lighting,
note that the LED white wire to the negative, gray wire
to the positive reference to the following figure
operation test.
Testing on LED function
DO NOT contact the
LED wire end direct
to the battery cell.
Use the provide battery
holder. Make sue the
correct polarity.
How to assemble the battery holder
1.Material and tools needed:
- Battery holder, LED bulb,
tape, screw driver and 2 piece
AAA size battery(not provided)
2. Use screw driver and
take the lid off from the
battery holder.
3. Insert the battery take
notes on the polarity.
4. Connect the red wire
to grey wire. Connect
the black wire to white
wire.
5.Wrap the exposed wire
with the tapes.
6. Place the box lid and
fastness with screw driver.
A01:The parts are directly in the box: B01: The parts are in the B bag; C01: The parts are in the C bag, and so on (Note: The printing paper is displayed
in the step A28-01: The printing paper is placed directly in the box , The part number is A28-01)
Note: Materials A23, A24, A25 and A26 are placed in the material bag A.
Examples of parts rule:
Tips for Assembling Wood
Find the corresponding block number,
use a knife in the connection point
gently press, you can take out the wood.
Use a knife to smooth out the burr Or use sandpaper to smooth
out the burr
2
cupboard
A bag + B bag + M bag + J bag + printing paper
tea table
dining table
japanese koto
bed
bathroom
accessories
bookcase
writing desk
lights
umbrella
potted plant
door and window
wall&stairs&raft
outer frame
assembly
sundry rack
cabinet
A bag+ B bag + J bag + K bag + L bag + N bag + printging paper
A bag + C bag + K bag + L bag + M bag + pringing paper
A bag + C bag + L bag+ M bag
A bag + C bag + J bag + K bag+ printing paper
A bag + printing paper
A bag + D bag + K bag + L bag + M bag + printing paper
wooden shoe
page 3
page 5-7
page 7-9
page 9-10
page10
page10-12
page 12
page 12-13
page 13-14
page 14-15
page 15-16
page 16-17
page 17-18
page 18
page 18-19
page 19
page 20-21
first floor
assembly
bathroom wall panel
door and window
on the second floor
second floor
assembly
roof tile
window,doors and
lighting on the third floor
hot spring
rockery
E bag + M bag + printing paper
A bag+ G bag + J bag + K bag + P bag
A bag + J bag+ L bag + printing paper
third floor assembly
page 21-22
page 23
page 23
page 23-25
page 26
page 26-27
page 27-29
page 29-30
page 30-31
ground lamp
plants
garden assessories
garden assembly
Installation of
battery box
A bag + H bag+ L bag + printing paper
H bag + L bag + M bag+ N bag + P bag+ printing paper
P bag + printing paper
page 31
page 31
page 32
page32-35
page35-36
kitchen accessories
J bag + K bag + L bag + M bag + N bag + printging paper
page 4-5
B bag + J bag + K bag + L bag + M bag + N bag + printing paper
A bag+ B bag+ J bag + K bag + L bag + M bag + N bag + printging paper
A bag + C bag + K bag + M bag + P bag + printing paper
A bag + C bag + printing paper
A bag+ D bag + L bag + M bag+ P bag + printing paper
J bag + K bag + L bag + P bag+ printing paper
J bag + K bag + L bag + M bag + N bag + printing paper
A bag + D bag + M bag + printing paper
A bag + D bag + printing paper
A bag + E bag + L bag + P bag + printing paper
A bag + D bag + E bag + printing paper
A bag + E bag+ F bag + K bag + L bag + P bag + printing paper
A bag
A bag + F bag + K bag + M bag + P bag + printing paper
A bag + E bag + G bag + K bag + N bag + P bag+ printing paper
H bag+ K bag + P bag
A bag+ H bag+ K bag+ L bag + M bag + N bag + P bag + printing paper
A bag + L bag + N bag + printing paper
Contents
Name Materials Package
Thumbnail of material list (reference only)
Thumbnail of printing paper & template paper (reference only)
A
B
A
B
A
B
A
B
A
B
A
B
A
B
A
B
1
Symbol description used
Install parts
in the opposite
direction
Install the same
parts on both
sides
Pay attention to the direction of installation material B stick to
material A
Pay attention to the direction of installation material A stick to
material B
Fold in half
according
to dotted lin
fold double
edge to center
dotted line
Fold four sides
to the middle 123
combination part
according so on.
A Bag A28、A29、A30(all printing paper and template paper are set in the A28、A29、A31
paper accessories, a total of 9 pieces of A3 single-sided printing Paper + 1 piece
cardboard paper)
Printing paper
Welcome to the DIY world,
now follow me to start.
3
1 2 3
4 5 6
7 8 9 10
13 14 15
19 20 21 22 23 24
25 26 27 28 29 30
Before making, please cut out A23-1, A23-2, A23-3, A23-4,
A23-5, A23-9, A23-11, A23-12, a23-13, a23-16 and a23-18 in A23.
B01
B02
B03 B04B04
B05 B06
B02
B05
A23-13
A23-5 A23-5 A23-18
A23-11
A23-9
A23-12
A28-01
A28-04
A28-03
A28-02
A28-05 A28-06
A23-1 A23-2 A23-3
A23-4
A23-1
A23-2
A23-3
A23-4
Block splice plan
A23-16 A23-16
J10 J10
M11(sink)
28-01
Make a 90 degree right angle
according to the dotted links
A28-02
In the same way, make 2 pieces
J10
J10
A23-16
Glue all four sides together.
M11
M11
B01
B01
A23-9
B02 B02 B03
A23-12
(front view)
B05
B04
B05
B04
B05
Place B04 in the middle of B05
B06
A28-04
A28-03
A23-18
A23-13 A23-5
A23-5
A23-11
A28-05
A28-05
(Left side)
(Right side)
A28-06
11 12
181716
A23-16
A23-2
A23-1
A23-3
A23-4
Cupboard
Cut out the M11according to the template paper
before making this step.
13 14 15 16 17
4
132
7 86
9 10 11 12
23 242221
18
Please cut out M02 and M12 according
to the template before making.
L01
A28-09 A28-13
A28-16 A28-17 A28-18 A28-22
A28-14
(front view)
(back view)
Cut at the dotted line and
bond to the white area
Please bend L08 and L09 with reference
to the template paper before making
2.5CM
4
5
19 20
J04 J04 J04 J04 J04
M02
(pot)
M02
(kitchen towel)
M12(potted plants-1)
J03 J03 J03 J03
J10
J02 J02 J02 J02
J11 J11
J07 J12 J13 J06
K18
J05 L03 L08
L09
M04
J08
N14 N14 N14 N14
J09
N22 N23
A28-13
1CM
Cut L01 to a length of 1cm
L01
A28-22
J04
In that same man,
make the rest of the pot..
J02
A28-09
J03
J10
Make the rest in the same way. Cut L09 out a 2.5cm
L09
Bend according to L09 template,
as shown in the figures
J06
J05
J04
J07
L09
J10
M02锅
L03
N22 N23 M04
Cut out about 0.1cm * 0.5cm * 4 strips of M04
(Be careful not to cut all the M04, which
needs to be used for making sushi later.))
M04 K18
A28-14
Roll up A28-14 as shown in the figures.
A28-14
A28-16
A29-01
0.8CM
1.5CM
Kitchen Gadget
25 26 27 28 29 30
31 34 35
36 37 38 39 40
41 1
42 2
In that same man, make the rest of the
dish. (Note that only one red and one
white dish is needed here)
32
Please cut out A23-14 in A23
before making.
B07 B08
B09
B10
B11
B12
B07
B09
B11
B12
B13
B14 B14
A23-14
A28-19A28-20
A28-21
A28-28
A28-10
5
A28-18
A28-17
A28-18
Roll up M12, as shown in the figures
M12
M12
J08
Insert M12 into J08 round hol
N14
J10
J13
2CM
Cut L08 out a 2cm
L08
Food Jar
Seasoning
flask
Seasoning
flask
plate
Bend according to L08 template,
as shown in the figures
J09 J12 J11
J11 M02 kitchen towel
A29-01
pot
jug
33
K19 L04
L10
L19
K07
J14
N22 N23
A23-14
A28-21
0.8CM
1CM
Sundry Rack
34567 8
910 11 12 13 14
15 16 17 18 19 20
21 22 24 25 26 27
28 29 30 31 32 33
1.6CM
0.7CM
1.5CM
4CM
2CM
6
B07 B08
B07
A23-14
B09
B10
B09
A28-28
Make the rest of the books in the same
way and arrange them as shown. Cut L19 out 2.5cm
1.5CM
0.8CM
Break L19 into 2 strips and cut
one side short
N22
A28-10
K19
potted
plant
wine
bottle
book B11
B12
B12
B11
A28-19
A28-20
A28-20
A28-19
L04
lucky cat
box B13
B14 B14
L10
L10
L10
L19
In that same way, make the other one.
Bending modeling as shown
in the figure
Paste the two together as
shown in the figures
23
J14
Insert L19 into J14 to expose 1.5cm
Tie up L10 with L19.
34 35 1 2
36 37 3 4
56789 10
11 12 13 14 15 16
17 18 19 20 21
Please cut out M02, M03, M04, M08 and M13
according to the template before making.
B15
B16
B19
B15
B17 B17 B17 B17
B18 B18 B18 B18
Cut out width approx. 0.3cm
0.3CM
Then cut out a length of about 0.8cm
0.8CM
0.3CM
Cut out 1.5cm
A28-08
A28-12
J01 J01 J01 J01
L12
7
K07
N23
N23
M03
(yellow
sushi)M04
(orange
sushi)
M08
(wine
bottle)
N22 N23 L19
M02
(table cushion)
*4pieces
A29-13
(4个)
M13
(table cloth)
M13
(table
cushion)
L09
J14 J14
J16 J16 J16
J15 K18 L14 L15
B15
B16
B15
M13
(table cloth)
Fold up 1cm on both sides
back view front view
M13
(table cloth)B17
B18
In the same way, make 4pieces
A29-13
M02
(table cushion)
A29-13
M13
(table cushion)
M02
(yellow
sushi)
M02
(orange
sushi)
A28-11
M04
(orange sushi)
M02
(orange sushi)
A28-08
A28-08
M03
(yellow sushi)
M03
(yellow sushi)
In the same way, make 2pieces
yellow sushi
22
front view
M05
(light
orange
sushi)
Dining table
M13
(table
cushion)
M13
(table
cushion)
M13
(table
cushion)
M02
(table cushion)
In the same way, make 4pieces
M08
(wine
bottle)
23 24 25 26 27 28
29 30 31 32 33 34
35 36 37 38 39 40
41 42 43 44 45 46
47 48 49 50 51 52
0.3CM
3CM
8
B19
N22 J16 N22
Cut a small piece of M03
at random.
M03
L14
Cut a small piece of L14,
about 0.1 cm thick
L14
Cut in half
L14
J16
Feel free to cut up some M02
M05
0.4CM
0.8CM
L14
K18
J16
K18 N22
Cut out one M03 + M02
from the front of the sushi.
M03
M02
And cut it up at random and put it in J15. J15
M04
N22
Cut a small piece of L15,
about 0.1 cm thick
L15
L12
J14
M08
(wine bottle)
Separate L19 by 2pieces
L19
apply the inside with glue
Cut out a small piece of M05.
Feel free to cut up some M02
53 54 55 56 57 58
59 1
23456 7
8910 11 12 13
15 16 17 18 19
1CM
Cut out 8pieces
Please cut out A24-4 in A24 before making.
A24-4
B20
B20
A28-08
A28-16 A28-17 A28-18
A28-36
Please cut out M02, M05, M12
and M14 according to the
template before making.
1.3CM
14
9
J02 J02
In the same way, make 2 (Note that only
one needs to be used here, and the other
one is saved and placed in the back
for use)
A28-12
A28-11
L09
J01 J01
J01
J01
L09
L09
L09 L09
J14
J11 J18
M05
(light
orange
sushi)
M02
(light
orange
sushi)
N22 M12(balcony potted plants)
L14 L15
L13
K03 K04
N11
L09
M14
(balcony
cushion)
M14
(balcony
cushion)
M14
(study
cushion)
M02
(balcony
cushion)
M02
(balcony
cushion)
M02
(study
cushion)
A29-14 A29-14 A29-14
A28-36
Fold up along the dotted line
A24-4
A28-36
B20
B20
J18
K03
K04
L09
Bend according to L09 template,
as shown in the figures
L09
J11
J14
M12
Roll up M12 and put in J14
N11
Trim off a few sprig
N11
Cut L13 into small pieces,
about 0.1 cm thick
Cut to triangulate-shape as shown.
L14 L14
L14 L15
Please refer to the previous steps
for how to make the dish.
Sushi production methods, please
refer to the previous production steps.
M05
(light orange
sushi)
M05
(light orange sushi)
0.5CM
0.7CM
Put it on the white plate.
L15
L14
L13
Tea
table
20 21 24 25
5678 9
10
1CM
Cut out 4 pieces.
C01
C02 C03 C04 C04
Please cut out A24-3 in A24 before making.
A24-3
A28-44
K14 K14
A28-37
K14 K14
Please cut out M02, M13 and M16 according
to the template before making.
7CM
Fold the L17 in half to make 4 lines,
and the length after folding is 7cm
Please cut out A25-1 in A25 before making.
Please cut out M02, M13, M15 and M16 according to
the template before making.
A25-1
M16
(big bed
pillows)M02
(big queen
bed sheets)
5CM
10
N22
Refer to page 7 for the cushion making
method.
(Note that only two are needed here,
and the other one is kept in the back for up)
L09
L09
L09
J02
J02
22 23
1 2 3 4
M16
(balcony
cushion)
M02
(balcony
cushion)A29-14
M13
(balcony
cushion)
A28-37
C01
C02
C03
L17
L17
Trim both ends of L17 and
glue to the sides
C04
C04
Please refer to page 7 for the seat
cushion making method
M13 A28-44
A24-3
K14
K14
K14
K14
11 12 13 14
C05 L18
L21
M17
M16
(big bed
quilt)
M16
(big bed
pillows)
M16
(small bed
pillows)
M16
(small bed
pillows)
M16
(small bed
pillows)
M16
(small bed
pillows)
M16
(small bed
sheet)
M16
(small bed
quilt)
M02
(small bed
quilt)M15
(small bed quilt)
M15
(big bed quilt)
M13
(small bed
pillows)
M13
(small bed
pillows)
M17
1
Put it on the red plate.
M16
(balcony
cushion)
Japanese koto
Bed
23456 7
8910 11 12 13
14 15 16 17 18 19
20 21 22 23 24 25
26 27 28 29 30 31
11
M17
Fold M17 in half and glue
on both sides
L18
Stuff with cotton.
Glue the opening together
In the same way, make 2pieces.
M16
(big bed pillows)
Fold up all three sides and
glue tightly
Combine the 2 pieces and glue
the three sides together
L18
Fold up both sides by 0.5cm.
M16
(big bed quilt)
Fold it in half and glue the
sides together
L18
M02
(big queen bed sheets)
A25-1
C05
M16
(big bed quilt)
M15
(big bed quilt)
L21
M17
1CM
Fold the top inwards 1cm and glue the
bottom to create a fringe effect
M16
(small bed
pillows)
M19
(small bed
pillows)
Glue three sides together.
M13
(small bed pillows)
Stuff with cotton. Glue the opening together.
In the same way, make 2pieces
M16
(small bed sheet)
Fold up both sides by 0.5cm
In the same way, make 2 pieces.
0.5CM
Stuff with cotton. Glue the opening together
Glue the opening together
Stuff with cotton.
32 33 34 35 36 37
38 39 40 41 42
12 3 4
567
8910 11
0.8CM
Please cut out A23-10, A23-17 and A25-2 in A23 and A25 before making.
Please cut out M02 according to the template before making.
A23-10 A23-10 A23-17
A25-2
A28-23
A28-15
A25-2
Please cut out A23-19 and A23-21 in A23 before
making.
Please cut out M09 and M10 according to the
template before making.
C08
C09 C11
C12
C13
C10
C14
A23-19
A23-21 A23-21
A28-47
P01 P01
C06
C07 C07
12
Fold it in half and glue
the sides together Stuff with cotton. Glue the opening together.Fold up all four sides and
glue tightly.
M02
(small bed quilt)
L21
L21
M16
(small bed sheet)
M16
(small bed quilt)
M16
(small bed quilt)
M15
(small
bed quilt)
M02(spa towel)
J10
J13
K09
K10
C07
C06
C07
A28-15
K10 J10
J13
A23-17
A25-2
A23-10 A28-23
M02(spa towel)
K09
In the same way, make 2pieces.
M09
M10K11 K11
Wooden chair
Bathroom bucket
Spa bucket
Fold in half and glue
(Pillows don't need to be glued
to the bed for a while.)
Bathroom
Accessories
Cabinet
12345
678910 11
12 13 14 15 16 17
18 1 2
3 4
C16 C17
C18
C19
C16
C16
C17
C19
C19
C19
C19
C20
Please cut out A23-20 in A23 before making.
A23-20
A28-24
A28-25 A28-26
A28-38
A28-40
A28-54
A28-55 A28-42
A28-41
A28-51
A28-53
A13
13
M09
A23-21
M10
And make another one in that same way.
A23-19
A28-47
C08
A23-21
C10
C09
C11
C12
C13 A23-19 P01
P01
K11 K11
C14
A28-53
A28-51 A28-26
See page 6 for how to
make the book
A28-42
Paste each set of books together
C15
C15
A
B
A
B
A
B
A
B
Crop as directed by the templates.
Bookcase
56789 10
23 24 1 2
25 26 3 4
D01
D02
Please cut out A24-2 in A24 before making.
A24-2
D01
D02
A28-79
A28-46
1CM
1.5CM
1.5CM
14
A28-38 A28-54 A28-41 A28-53 A28-40 A28-55 C15
C15
A28-25
A23-20(back view)Spacing 1.1cm each
A13
M12(study potted plants)
N23
L09
K08 K13
L09
L09
L09 K08
Roll up M12 as shown.
A28-38
A28-54
A28-53 A28-40
A28-41
A28-51
A28-42 A28-26 A28-25
A28-55
Please cut out M12 according to the template
before making.
Writing Desk
11 12 13 14 15 16
17 18 19 21 22
A28-24
A23-20
C18
C19
C16
Bookcase plan
C17
C17
C16C16
C20
C19 C19 C19
C19C19
C16
C19
C19
C20
C19
C19
20
C16
(front view)
C17
C17
Paste C17 in the center
C18
A23-20
C16
A
B
567
8910
11 12 13 12 3
45678 9
10 11 12 13 14 15
D03
D04 D05
Before making, please cut out A23-6, A23-7,
A24-5 and A26-2 in A23, A24 and A26.
Please cut out M07 according to the template before making.
A23-6 A23-6 A23-6 A23-6
A23-7 A23-7 A23-7 A23-7
A26-2 A26-2
A24-5 D04
D06 D07D06 D07
D08 D09 D10 D10
D11 D11 D12 D12
M07
(hand lamp)
M07
(floor lamp
shade)
M07
(kitchen light)
M07
(wall lamp)
L05 L05 L05 L05
L05 L05 L05 L05
L06 L06 L06 L06
L09
P01
P01
P02 P02
A28-58
A28-59
A28-60 A28-62
A29-09
15
K13
N22
A24-2
A28-79
D01
D01
A28-46
D02D02
M07
(wall lamp)
M07
(hand lamp) Glue all four sides together.
M07
(kitchen light)
M07
(wall lamp)M07
(wall lamp)
M07
(floor lamp shade)
M07
(kitchen light)
A24-5 D10
M07
(wall lamp)
In the same way, make 2pieces.
D05
P01 M07
(hand lamp)
D04
D04
D03
D09
P01
D07
D06
D06
D07
D08
A
B
A
M07
(floor lamp shade)D11
D11
In that same way, make the rest.
Lighting
16 17 18 19 20 21
22 23 24 25 26 27
28 29 30 31 32 33
34 35 36 37 38 39
123 4
P02
P02
L02 J20
P01
A28-34
A28-35
16
L09
bend L09 as shown.
A29-09
A28-59 A29-09
L05
L05
L09
In the same way, make 2pieces.
L05
L05
A28-58
L06
D12
D12
L09L09
A28-60
A28-62
Fold up along the dotted line.
A23-6
A23-7 A23-7
A23-6
A28-62
A28-60
A26-2
(front view)
In the same way, make 2pieces.
A28-34
Fold a trace along each
dotted line.
Flip to the back and fold the creased
middle (red dotted line). Refer to the
previous step
K12
P02
1.3CM*4pieces
L09
L06
(side view)
(front view)
Roll A28-59 around the
edge of A29-09.
lantern lantern
Umbrella
56
78
910 123 4
11 12 567 8
910 11 12 13 14
1CM
Please cut out M08 and M12 according to the template before making.
D13 A28-63
Trim 2pieces, approx. 3.5cm high.
About 4.5cm ~ 3cm,
3piecesin total. Truncated 2 ~ 3 fascicles
Refer to the gray line and cut
the effect as shown.
A28-61
17
L02 (8CM)
Make a small cut at the top, about 1 cm.
P01
Thread P01 into L02 and
fix it as shown.
A28-35
K12
J20
M12(hight potted plants)
M12(potted plant-2)
M08(vase)
M08(vase) J19
K17
K16 K16 J08
L01
L10
N10
N12
N18
N11 N03
N10
M12(hight
potted plants)
K16
M12(potted plants-2)
J08
N12
J19
N18
K17
A28-63
Fold in half along the dotted
line and glue. Cut out each leaf.
Potted plant
15 16 17 18 19 20
21 22 2
23 24 3 4
56
12345 6
6CM
5CM
4CM 2CM
D15
D14 D14 D14
D16
A28-52
A28-77
M07(first
floor door)
Center Paste
Please cut out A26-1 in A26 before making.
A26-1
D17 D17 D17 D17
D18 D18 D18 D18 D18 D19 D19 D19 D19 A28-69
A29-07
A29-08
18
L10
L10
L10
L10(6CM) L10(5CM) L10(4CM)
K16
L01
A28-61
M08
M08
N03
N11
D13 A11
D14
A28-52
In the same way,
make 3pieces
M07(first floor door)
D15
(front view)
A11
A28-77 D16
1
7 8
D18
D17
D18
In the same way, make 2pieces
A29-07
A29-07
D19
D19
D17
Door and
window
Wooden
shoe
892
10 11 3 4
56789 10
11 12 13 14 15 16
17 18 19 20 21
A07
A08
A09
A10
E01
E02
E03
E03
E03
E03
E03
E03
E04
E04
E04
E04
E04
A28-67
A28-68
A15
E05
E05
A28-66
20CM
20CM*2pieces
13CM*2pieces
19
A29-08
A28-69
A29-08
A26-1
Men's Shoes Lady's Shoes
A28-67
A07
A08
L20
L19
A09
A10
A28-68
A09
A10
E01
Paste stair to reference links
E02
E03
E04
E03
A11
L19
L20
L20
Refer to the previous steps to
make L20, and place it for later up
In the same way, make 3pieces
A28-66
A15
E05
E05
L19
L19
L19
(A11 wall panels have been
made in the previous page 18)
D10
(D10 wall lamp has been made
in the previous page 15)
22
P01
P01
Fold A28-67 along the dotted line
and bond with A07 + A08
Fold A28-68 along the dotted line
and bond with A09 + A10
1
2
Wall &Stairs&Raft
1
A07
A08
Stick A08 on the long side
5.3CM
6CM(long)

This manual suits for next models

1

Other Hongda USA Toy manuals

Hongda USA S2007 User manual

Hongda USA

Hongda USA S2007 User manual

Hongda USA S2010 User manual

Hongda USA

Hongda USA S2010 User manual

Hongda USA Christmas Eve S2001 User manual

Hongda USA

Hongda USA Christmas Eve S2001 User manual

Hongda USA Cheryl's Room M020 User manual

Hongda USA

Hongda USA Cheryl's Room M020 User manual

Hongda USA S2006 User manual

Hongda USA

Hongda USA S2006 User manual

Hongda USA L2121 User manual

Hongda USA

Hongda USA L2121 User manual

Hongda USA Coloured Glaze Time User manual

Hongda USA

Hongda USA Coloured Glaze Time User manual

Hongda USA Rainbow Cafe M906 User manual

Hongda USA

Hongda USA Rainbow Cafe M906 User manual

Hongda USA Gibbon Sushi M2011 User manual

Hongda USA

Hongda USA Gibbon Sushi M2011 User manual

Hongda USA The Sound of the Sea M040 User manual

Hongda USA

Hongda USA The Sound of the Sea M040 User manual

Hongda USA Mermaid tribe User manual

Hongda USA

Hongda USA Mermaid tribe User manual

Hongda USA S2003 User manual

Hongda USA

Hongda USA S2003 User manual

Hongda USA Memories of Autumn Grocery Store M914 User manual

Hongda USA

Hongda USA Memories of Autumn Grocery Store M914 User manual

Hongda USA PC902 User manual

Hongda USA

Hongda USA PC902 User manual

Hongda USA BELL'S CAKE SHOP User manual

Hongda USA

Hongda USA BELL'S CAKE SHOP User manual

Hongda USA S2131 User manual

Hongda USA

Hongda USA S2131 User manual

Hongda USA Romantic Aegean Sea User manual

Hongda USA

Hongda USA Romantic Aegean Sea User manual

Hongda USA M2021 User manual

Hongda USA

Hongda USA M2021 User manual

Hongda USA Star Takoyaki User manual

Hongda USA

Hongda USA Star Takoyaki User manual

Popular Toy manuals by other brands

Eduard Typhoon Mk.Ib Car Door landing flaps manual

Eduard

Eduard Typhoon Mk.Ib Car Door landing flaps manual

Fisher-Price BGC55 instructions

Fisher-Price

Fisher-Price BGC55 instructions

LeapFrog leapland Adventures Parents' guide

LeapFrog

LeapFrog leapland Adventures Parents' guide

Elenco Electronics Teach Tech Solar Rover TTG-684 Assembly & instruction manual

Elenco Electronics

Elenco Electronics Teach Tech Solar Rover TTG-684 Assembly & instruction manual

Little Tikes Learn & Play Roll Arounds Assembly instructions

Little Tikes

Little Tikes Learn & Play Roll Arounds Assembly instructions

NOCH Sound Scene instruction manual

NOCH

NOCH Sound Scene instruction manual

LGB 24266 instruction manual

LGB

LGB 24266 instruction manual

Eduard H-21C cockpit seatbelts STEEL manual

Eduard

Eduard H-21C cockpit seatbelts STEEL manual

Fisher-Price digital Studio Arts & Crafts manual

Fisher-Price

Fisher-Price digital Studio Arts & Crafts manual

3d-printz Nice 2000 manual

3d-printz

3d-printz Nice 2000 manual

REVELL Control HOT SHOT HELICOPTER instructions

REVELL

REVELL Control HOT SHOT HELICOPTER instructions

Eduard Hs-129 quick start guide

Eduard

Eduard Hs-129 quick start guide

marklin 39050 instruction manual

marklin

marklin 39050 instruction manual

Viessmann 4101 Operation manual

Viessmann

Viessmann 4101 Operation manual

Agora Models Bismarck Build instructions

Agora Models

Agora Models Bismarck Build instructions

Eduard F-15E exterior Assembly instructions

Eduard

Eduard F-15E exterior Assembly instructions

Hornby LimaExpert Pendolino ETR 610 manual

Hornby

Hornby LimaExpert Pendolino ETR 610 manual

Eduard F-86F-40 manual

Eduard

Eduard F-86F-40 manual

manuals.online logo
manuals.online logoBrands
  • About & Mission
  • Contact us
  • Privacy Policy
  • Terms and Conditions

Copyright 2025 Manuals.Online. All Rights Reserved.