manuals.online logo
Brands
  1. Home
  2. •
  3. Brands
  4. •
  5. Hongda USA
  6. •
  7. Toy
  8. •
  9. Hongda USA Memories of Autumn Grocery Store M914 User manual

Hongda USA Memories of Autumn Grocery Store M914 User manual

Other Hongda USA Toy manuals

Hongda USA Gibbon Sushi M2011 User manual

Hongda USA

Hongda USA Gibbon Sushi M2011 User manual

Hongda USA Coloured Glaze Time User manual

Hongda USA

Hongda USA Coloured Glaze Time User manual

Hongda USA S2131 User manual

Hongda USA

Hongda USA S2131 User manual

Hongda USA PC902 User manual

Hongda USA

Hongda USA PC902 User manual

Hongda USA M2021 User manual

Hongda USA

Hongda USA M2021 User manual

Hongda USA Star Takoyaki User manual

Hongda USA

Hongda USA Star Takoyaki User manual

Hongda USA S2010 User manual

Hongda USA

Hongda USA S2010 User manual

Hongda USA The Sound of the Sea M040 User manual

Hongda USA

Hongda USA The Sound of the Sea M040 User manual

Hongda USA S2007 User manual

Hongda USA

Hongda USA S2007 User manual

Hongda USA Rainbow Cafe M906 User manual

Hongda USA

Hongda USA Rainbow Cafe M906 User manual

Hongda USA Christmas Eve S2001 User manual

Hongda USA

Hongda USA Christmas Eve S2001 User manual

Hongda USA BELL'S CAKE SHOP User manual

Hongda USA

Hongda USA BELL'S CAKE SHOP User manual

Hongda USA The Ancient Capital Under Moonlight User manual

Hongda USA

Hongda USA The Ancient Capital Under Moonlight User manual

Hongda USA Romantic Aegean Sea User manual

Hongda USA

Hongda USA Romantic Aegean Sea User manual

Hongda USA S2006 User manual

Hongda USA

Hongda USA S2006 User manual

Hongda USA Cheryl's Room M020 User manual

Hongda USA

Hongda USA Cheryl's Room M020 User manual

Hongda USA S2003 User manual

Hongda USA

Hongda USA S2003 User manual

Hongda USA L2121 User manual

Hongda USA

Hongda USA L2121 User manual

Hongda USA Mermaid tribe User manual

Hongda USA

Hongda USA Mermaid tribe User manual

Popular Toy manuals by other brands

FUTABA GY470 instruction manual

FUTABA

FUTABA GY470 instruction manual

LEGO 41116 manual

LEGO

LEGO 41116 manual

Fisher-Price ColorMe Flowerz Bouquet Maker P9692 instruction sheet

Fisher-Price

Fisher-Price ColorMe Flowerz Bouquet Maker P9692 instruction sheet

Little Tikes LITTLE HANDIWORKER 0920 Assembly instructions

Little Tikes

Little Tikes LITTLE HANDIWORKER 0920 Assembly instructions

Eduard EF-2000 Two-seater exterior Assembly instructions

Eduard

Eduard EF-2000 Two-seater exterior Assembly instructions

USA Trains EXTENDED VISION CABOOSE instructions

USA Trains

USA Trains EXTENDED VISION CABOOSE instructions

Modellbau Laffont Z1601 Assembly instructions

Modellbau Laffont

Modellbau Laffont Z1601 Assembly instructions

NOCH 12905 instruction manual

NOCH

NOCH 12905 instruction manual

Eduard Ki-61-Id quick start guide

Eduard

Eduard Ki-61-Id quick start guide

Viessmann Vollmer 45616 Mounting instruction

Viessmann

Viessmann Vollmer 45616 Mounting instruction

Vollmer 42004 Mounting instruction

Vollmer

Vollmer 42004 Mounting instruction

Phoenix Model CLASSIC-EP instruction manual

Phoenix Model

Phoenix Model CLASSIC-EP instruction manual

H-KING Sopwith Camel British WW1 Fighter instruction manual

H-KING

H-KING Sopwith Camel British WW1 Fighter instruction manual

MODSTER Predator 4x4 Crawler user manual

MODSTER

MODSTER Predator 4x4 Crawler user manual

DHK Hobby 8136 User instruction manual

DHK Hobby

DHK Hobby 8136 User instruction manual

THUNDER TIGER Raptor 50 V2 kit manual

THUNDER TIGER

THUNDER TIGER Raptor 50 V2 kit manual

Timberkits Skateboarder instructions

Timberkits

Timberkits Skateboarder instructions

Hangar 9 Funtana 125 Assembly manual

Hangar 9

Hangar 9 Funtana 125 Assembly manual

manuals.online logo
manuals.online logoBrands
  • About & Mission
  • Contact us
  • Privacy Policy
  • Terms and Conditions

Copyright 2025 Manuals.Online. All Rights Reserved.

1 2 3 2
1 2
45 6 7 1
Tips for assembling
1.Picures shown on the package may be slightly different from the actual product.
2.All the materials are taken in the operation step, put the remaining materials back into
the original pocket until the installation is completed.(Avoid material loss during installation)
3.The dimensions indicated in the step diagram are“cm”.
4.If there have template paper material, please cut the material according to the template
to avoid mistakes..
5.According to the part rule example at the bottom of this page, refer to the part on the part
number drawing, find the material object and compare with the material list, confirm and
install.(Wooden parts only)
6.Glue should not be applied too much, so as not to dry longer, overflow will affect the effect
of the finished product.
7.Part shapes may differ from the photographs depending on the production batch.
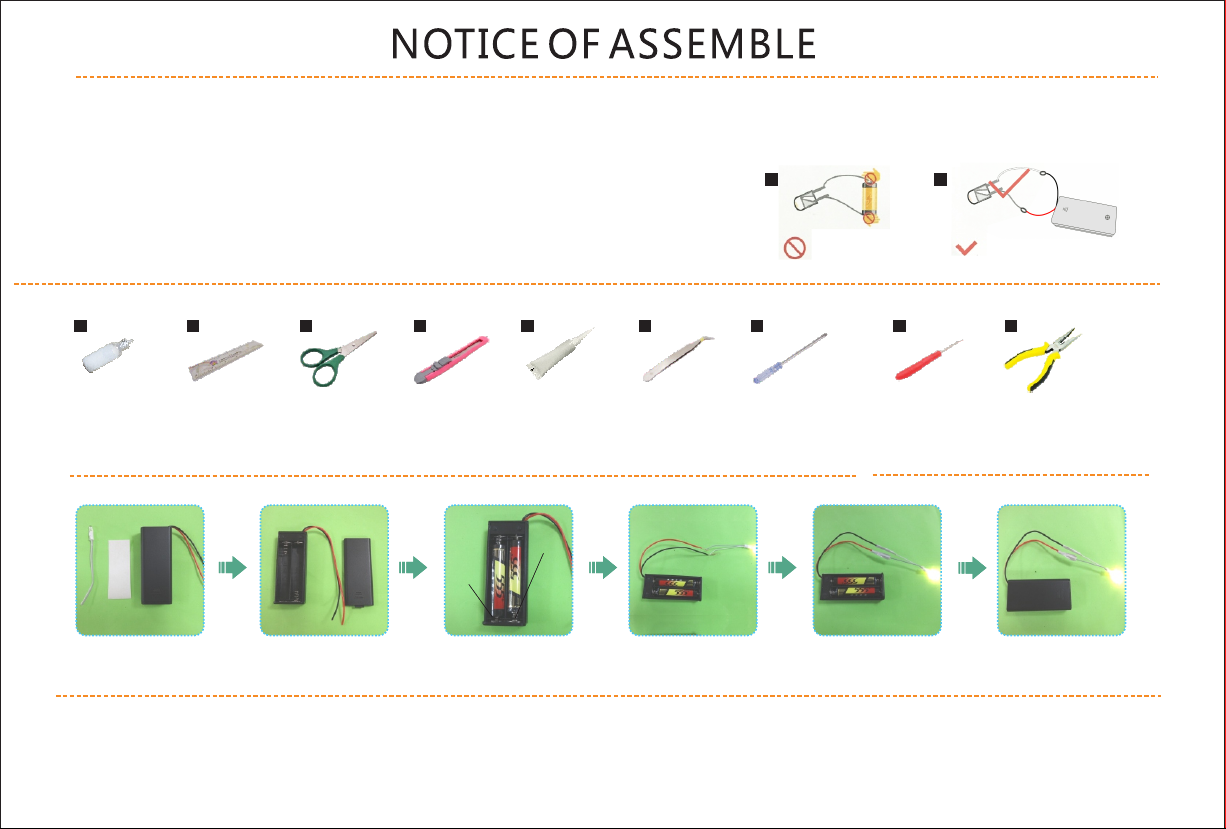
Testing on LED function
Be sure to test the LED lights before making the lighting,
note that the LED white wire to the negative, gray wire
to the positive reference to the following figure
operation test.
DO NOT contact the
LED wire end direct
to the battery cell.
Use the provide battery
holder. Make sue the
correct polarity.
Product comes with tool:
Bring your own tools:
White glue:
It dries slowly and
can paste materials
firmly without trace.
Can be used to paste
wallpaper and
printed paper.
Ruler:
For measuring
materials to identify
the number of
materials so as to
enhance
work efficiency.
Scissors:
Can be used to
cut printed
paper,cloth,etc.
Cutter kinfe:
For peeling off power
wire skin and cutting
off materials.
Alcohol gel:
It dries fast and can paste
materials firmly,but may
leave some trace. Can
be used to paste small
metal materials and
small components of
furniture.
Tweezers:
For holding small
materials and
rolling up iron
wire.
Screw Driver:
For fixing screws,
mostly can be used
to install doors and
music components.
Drill:
Can be used to
drill holes in timbers,
roll up hard iron
wire or fix screws.
Needle-nose pliers:
For cutting, bending wire,
folding harder material
How to assemble the battery holder
1.Material and tools needed:
- Battery holder, LED bulb,
tape, screw driver and 2 piece
AAA size battery(not provided)
2. Use screw driver
and take the lid off
from the battery holder.
3. Insert the battery take
notes on the polarity.
4. Connect the red wire
to grey wire. Connect
the black wire to white wire.
5.Wrap the exposed
wire with the tapes.
6. Place the box lid and
fastness with screw driver.
“-”negative
“+”positive
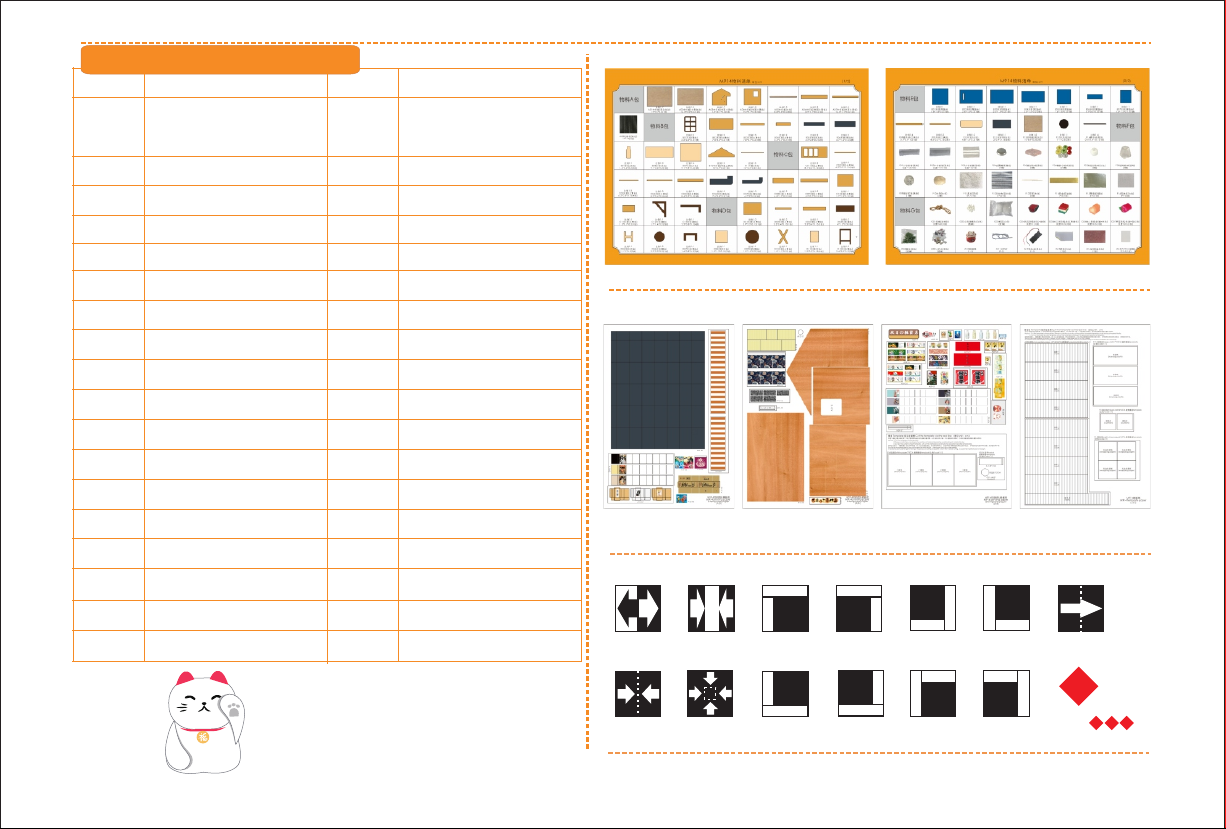
Example of parts rule:
A01:The parts are directly in the box.;B01:parts in bag B;C01:part in bag C,and so on.
(Note: display the printing paper A09-01 in the step: the printing paper is placed directly in the box, part number is A09-01)
1 2 3 2
1 2
45 6 7 1
printing
paper
bubble
bottle
tea bag
candy jar
rice bag
box
mask
seat
cushion
round
stool
sweets
rice basket
gift box
cookie bag
book
business
card
postbox
tube
electric
pole and
lantern
floor tile
B bag + printing paper
printing paper
F bag + G bag + printing paper
G bag + printing paper
D bag + F bag
D bag + F bag + G bag
D bag
F bag + G bag
G bag + printing paper
+template paper
D bag + F bag + printing paper
D bag + printing paper
E bag + printing paper
C bag + printing paper
food pot F bag + printing paper
F bag + printing paper
printing paper
tea table
printing paper
E bag + F bag
+ printing paper
signboard E bag + printing paper
sunshade
door C bag + F bag
outer
frame
A bag + B bag + G bag
+ printing paper
decoration B bag + printing paper
G bag
battery
holder
details of minature kit
Name Material package
Bag A-A09(All printing and
template papers are shown
on A09 paper,total 4 pieces
of A4 )
Thumbnail of material list( reference only)
Thumbnail of printing paper &template paper( reference only)
A
B
A
B
A
B
A
B
A
B
A
B
A
B
A
B
1
Symbol description used
Install parts
in the opposite
direction
Install the same
parts on both
sides
Pay attention to the direction of installation material B
stick to material A
Pay attention to the direction of installation material A
stick to material B
Fold in half
according
to dotted lin
fold double edge
to center dotted
line
Fold four sides
to the middle
1
123
combination part
according so on.
Welcome to the little DIY
world, now come with me
Name Material package
1
A09-07
A09-10
A09-24 A09-25
A09-22
B07 B07 B07 B07 B07
B07
A09-22
A09-07
F06 some
F02
F02
Cut out F02 by 1.5cm
F02
A09-10 F06
F06
F04
F04
F04*6pieces F05*3pieces
F14
F01 F02
F02
A09-21
Bubble Bottle
Tea Bag Candy Jar
Food Pot
2
F02*6pieces
F01*6pieces F01*
3pieces F02 F02 F02 F02 F02 F02
A09-24 A09-24 A09-24 A09-24 A09-24 A09-24
F04 F04 F04 F04 F04 F04
F01 F01 F01 F01 F01 F01
A09-25 A09-25 A09-25 A09-25 A09-25 A09-25
F14
Cut F14 to 0.2 * 2.2CM
(total12pieces)
F14
F14 F14 F14 F14 F14 F14
F14 F14 F14 F14 F14
F01 F01 F01
A09-21 A09-21 A09-21
F05 F05 F05
Before making, cut out 3 pieces of
F11 according to the template. G01
F11 F11 F11
G03
Fold in half and glue the
left and right sides together. Take out some cotton
and put it into F11.
F11 G03 F11 G01
Cut 5cm * 3 strips out of G01
G01
A09-29
G03
1CM
1.2CM
1.7CM
Rice bag
3
A09-37
A09-29 In the same way,
3 pieces are made.
A09-06
G01 A09-06
G01
Cut 25CM out of G01 and unscrew it into two strips,
leaving one strip at the back to make a rice basket.
G01
G01
G01
G01
A09-36
A09-37
A09-37 A09-36
A09-36
D06
D07 D07
F07
F07
D07
D06
4
A09-37
A09-37
Box Mask Tea table
D07
F07
F07 F07
D07 D08 D08
F12 F12
G03
Before making, cut out 2 pieces
of F12 according to the template.
D08
G03 F12 F12
D09
In the same way,
2 pieces are made.
D10 D10
D10
D10
D09
G03
F08 F08
G04G05 G06 G07
F13
F13
F13
F13
Cut F13 into 2.5cm * 4pieces,
2cm * 2pieces and 1.5cm * 1piece.
G06
G06 G04
G04
G04
G04
G07 G07
G07
G07
G05
G05
G05 F13
G04
F13(2.5CM)
F13(2.5CM)
F13(2.5CM)
F13(2CM)
F13(1.5CM)
G07 G05
G06
G06
5
Take appropriate
amount of G03 and
knead it into a ball.
F08
Seat cushion
Round Stool
Sweets
G01 basket
A09-30
A09-26
G03
F13(2.5CM)
F13(2CM)
F13(2.5CM)
G03
G03
G01 G02
A
B
G01 basket G01 basket
(Use the other strip G01 from
the front packing box here.
G01
G01
G01 basket
G02
Fill the basket with more than half of the G02
(to avoid dropping the G02, you can add some glue inside first)
Cut the remaining G02 into small
pieces and sprinkle on the top.
Cut G01 out by 2.5cm.
G01
G02
A09-30
Before making, cut out 4 pieces
of F15 according to the template.
D11 D11 D11 D11
F15 F15
F15F15
F15
D11
F15
F15
A09-26 A09-26 A09-26 A09-26
A
B
6
F08
In the same way,
2 pieces are made.
Tear off the backing paper.
Before making, cut out the G01 basket
on the template paper.
Rice Basket
Gift Box
Cookie bag
A09-02
A09-35
A09-34 A09-34
D01
D02
D02
D03
D03
D04
D05
D05
F10*
4pieces
A09-02 A09-02
A09-02
A09-35
A09-35
D01
D03
D02
D02
D03
D01
D02
D02 D03
D03 D01
F10
F10
F10
F10
A09-02
A09-35
7
Book
A09-33
A09-23
A09-32
A09-12
A09-28
A09-27
A09-13
D04
D05
D05 A09-35
D12 D12
D12
A09-33
In the same way, 2 pieces are made.
E01 E02
E03
E04
E04
E05
E06
E07
E02
E04
E04
E03
E01 E06
E05
E07
A09-23
A09-32
E11E11
E11 E11
E11
E11
A09-12
In the same way,
2 pieces are made.
E08
E09
E09 F03
(2CM)
G01
G11
8
D04
Postbox tube
Floor Tile
Electric Pole and Lantern
Business card