manuals.online logo
Brands
  1. Home
  2. •
  3. Brands
  4. •
  5. Hongda USA
  6. •
  7. Toy
  8. •
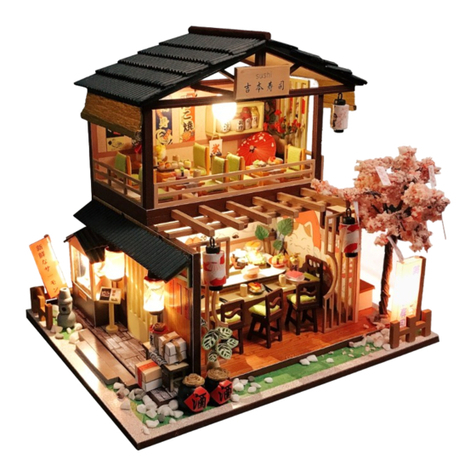
  9. Hongda USA Star Takoyaki User manual

Hongda USA Star Takoyaki User manual

Star Takoyaki Star Takoyaki Star Takoyaki
M913M913M913
DIY mini house kits - DIY mini house kits - DIY mini house kits -
M913 Instruction manualM913 Instruction manualM913 Instruction manual
1 2 3 2
1 2
1
45 6 7 1
Tips for assembling
Be sure to test the LED lights before making the lighting,
note that the LED white wire to the negative, gray wire
to the positive reference to the following figure
operation test.
Use the provide battery
holder. Make sue the
correct polarity.
Product comes with tool:
Bring your own tools:
White glue:
It dries slowly and
can paste materials
firmly without trace.
Can be used to paste
wallpaper and
printed paper.
Ruler:
For measuring
materials to identify
the number of
materials so as to
enhance
work efficiency.
Scissors:
Can be used to
cut printed
paper,cloth,etc.
Cutter kinfe:
For peeling off power
wire skin and cutting
off materials.
Alcohol gel:
It dries fast and can paste
materials firmly,but may
leave some trace. Can
be used to paste small
metal materials and
small components of
furniture.
Tweezers:
For holding small
materials and
rolling up iron
wire.
Screw Driver:
For fixing screws,
mostly can be used
to install doors and
music components.
Drill:
Can be used to
drill holes in timbers,
roll up hard iron
wire or fix screws.
Needle-nose pliers:
For cutting, bending wire,
folding harder material
How to assemble the battery holder
2. Use screw driver
and take the lid off
from the battery holder.
3. Insert the battery take
notes on the polarity.
4. Connect the red wire
to grey wire. Connect
the black wire to white wire.
5.Wrap the exposed
wire with the tapes.
6. Place the box lid and
fastness with screw driver.
“-”negative
“+”positive
Example of parts rule:
A01:The parts are directly in the box.;B01:parts in bag B;C01:part in bag C,and so on.
(Note: display the printing paper A10-01 in the step: the printing paper is placed directly in the box, part number is A10-01)
1 2 3 2
1 2
1
45 6 7 1
White glue:
It dries slowly and
can paste materials
firmly without trace.
Can be used to paste
wallpaper and
printed paper.
B bag +E bag
B bag + F bag + printing paper
B bag +E bag+ printing paper
B bag +E bag+ F bag + printing paper
round stool
B bag +E bag+ printing paper
paper parts
C bag
bicycle
vending
machine
plant
C bag+ F bag
octopus ball
machine
microwave
oven
takoyaki rack
stuff table
food rack
barstool
printing paper
C bag
D bag+ E bag+printing paper
D bag +E bag+ F bag + printing paper
table and
dining table
bar table
lights
outer frame
E bag+ F bag + printing paper
D bag +E bag+ F bag + printing paper
B bag +C bag+ F bag + printing paper
D bag +E bag+ F bag+ printing paper
A bag + printing paper
details of minature kit
Name Material package
Bag A-A11(All printing and template papers are shown
on A11 paper,total 3 pieces of A4 )
Thumbnail of material list( reference only)
Thumbnail of printing paper &template paper( reference only)
2
A
B
A
B
A
B
A
B
A
B
A
B
A
B
A
B
1
Symbol description used
Install parts
in the opposite
direction
Install the same
parts on both
sides
Pay attention to the direction of installation material B
stick to material A
Pay attention to the direction of installation material A
stick to material B
Fold in half
according
to dotted lin
fold double edge
to center dotted
line
Fold four sides
to the middle
1
123
combination part
according so on.
Welcome to the little DIY
world, now come with me
B01
B02 A11-01
B03 B03
E08 (11pieces)
B01
B02
A11-01
B03
B03
E08
E20
(takoyaki
rack 2)
E20
(takoyaki
rack 2)
E20
(takoyaki rack1)
E20
(takoyaki
rack3)
B04 B04 B05
B06
B05
B04
B04
B05
B06
E20
(takoyaki
rack 2)
E20
(takoyaki
rack 2)
E20
(takoyaki
rack 1)
E20
(takoyaki
rack 3)
3
A
B
A
B
A
B
B16
B14 B15
B15
B14
A11-03
Octopus Ball Machine
Takoyaki Rack
Cut out the material E20 according to the template paper before making.
Microwave Oven
A11-02 A11-03
B16
B15 B14
B14
B15
B15
B14
F06(1cm)
B17
B19
F06(3 .5cm)
A11-05-01 A11-05-02
E15
B12
B13
A11-05-01
B11 B11
E08
(10pieces)
B18
A11-06
E15
A11-05-01
B12
B11
B11
A11-06
B13
4
A
B
A
B
0.5cm
A11-02
F06(1cm)
F06=3.5cm
E08 (10pieces)
Stuff Table
B19
B17
B18
A11-05-02 2pieces
microwave oven
B09 B09
B08 B07
B10 B10
A11-04
E01(rice)E01(rice)E01(rice)E01(rice)E01(rice)E01(rice)
E06
(nori roll)
E01
(sushi )
E02
(sashimi)
E02
(sashimi)
E05
(sashimi)
E05
(sashimi)
E03
(sashimi)
E03
(sashimi)
E06
(nori strip)
E06
(nori strip)
E20
(food rack)
E01(rice)
E01(rice)
E05
(sashimi)
E06
(nori strip)
E01(rice)
E01(rice)
E02
(sashimi)
E03
(sashimi)
E06
(nori roll)
E01(sushi)
5
Food Rack
Cut out the material E01,E02,E03,E04,E05,E06 and E20 according to the template paper before making.
B08
B09
B07
B09 B09
A11-04
B10
E20
(food rack)
C03
C04 C04
C02
C01
C03
C04
C04
C03
C05 C05 C05
C06
C06
C06 C07(9pieces)C07
C07
C07
C07
6
A
B
A
B
C02
C01
C06
2pieces
E20
(food rack)
Use a knife in the red line. (Note:The dotted line of the template paper),
lightly draw a straight line, and fold and paste the line.
Barstool
Round Stool
C05
A11-07
E16 (1 6cm )
E17
E18
A11-08 A11-09
A11-10
A11-11
A11-12
A11-13-01
A11-14-01
A11-15 A11-16
A11-17
A11-14-02
D03
A11-10
E18
A11-08
A11-09
A11-13-02
A11-07
E16 E17
A11-15
A11-16
A11-12
A11-11
A11-13-01
A11-17 A11-13-02
3pieces
7
Paper Parts
A11-14-01
A11-14-02
D03
C09
C10
C11
C13
C14
C12
C16 C16
C15
C17
C18
C18
F06
(1 4cm)
F05(3 cm)
C18
F06=6cm
C16
C11
C10
C09
C15
C13
C12
C14
C17
2pieces
F05=1.5cm
The way of sticking the wire on
both sides is shown in the picture.
8
2pieces
Bicycle
F06=1.3cm
D09 D09 D08
D07
A11-20-02
Picking Port
D10
D12(5pieces)
D11 D11
A11-20-01
A11-18-01
A11-18-02
A11-18-03
A11-18-04
A11-18-05
A11-19-01
A11-19-02
A11-19-03
A11-19-04
A11-19-05
A11-19-06
A11-20-03
F01
E20
(vending
machine)E21
(vending
machine)
Buy Buy Buy Buy Buy
$1
Buy Buy Buy Buy Buy
A11-20-04
A11-18-04
A11-18-03
A11-18-01
A11-18-02
A11-18-05
D12
A11-19-01 A11-19-06
A11-19-04
A11-19-03
A11-19-05
A11-19-02
D08
D09
D09
D10
D11
D11 E21
(vending machine)
3pieces
9
A
B
A
B
Vending Machine
E21
(vending
machine)
E20
(vending
machine)E21
(vending
machine)
Cut out the material E20 and E21 according to
the template paper before making.
D07
A11-20-01
F01
E21
(vending machine)A11-20-04
A11-20-02
Picking Port
E20(vending machine)
A11-20-03
E16 (8 cm )
E10
E14
E13
F07
E11
2pieces
A11-23 F07=1.5cm
E10
E14
E11(2 branches)
2pieces
E11(1/4 branch)
plant
E13
E16(Winding, cut out the excess.)
A11-23
cherry tree
E08 (6pieces)
D01
D02 D01
E05
(kanto
cooking 5)
E02
(kanto
cooking1)
E02
(kanto
cooking2)
E05
(kanto
cooking6)
E05
(kanto
cooking4)
E02
(kanto
cooking4)
D04
F05
A11-24
E05
(kanto
cooking5)
E05
(kanto
cooking5)
F05=0.5cm
2pieces 2pieces
2pieces
The making steps refer to the previous, two-two paste.
A11-09
Sushi made in front.
10
E02
(kanto
cooking 1)
E05
(kanto
cooking 6)
E02
(kanto
cooking 2)
E02
(kanto
cooking 4)
E05
(kanto
cooking 4)
E08
Plant
Cut out the material E02 and E05 according
to the template paper before making.
Table and Dining Table
A11-24 D01
D02
D01
2pieces
A11-24
E07
food rack
octopus ball
machine
takoyaki rack
D04
A11-17
dining table
B12 B12
C08
E09 (0 .8cm )
F06(5 cm )
A11-25-01
A11-25-02
A11-25-01
C08
B12
B12
4pieces
1.2cm
E09 =0.8cm
A11-25-02
Roll up the printing paper A11-25-02
and put it into the rubber hose.
11
A
B
0.5cm
A
B
Bar Table
D14
A11-21-01 A11-21-02 A11-22-02
A11-22-01
E19
E09 (5 cm )
D13
D16
D15
F01
A11-21
A11-21
F01
E19
E19 lantern
D14
E09 =1.5cm
F01
Use a knife to cut out
a position in the middle
to allow the wire to pass
through, so as to facilitate
the subsequent wiring.
A11-21-01
A11-21-02
D16
D15 light box
D13
Please refer to the previous steps for
making the signboard lights.
D14
A11-22-02
A11-22-01
signboard
12
Lights
Outer frame
Tidy up the lamp wire and stick it inside the wire slot.
Put the wire through the hole in
the printed paper.
A11-26
A01
light box
1
A11-27
A03 A03
E20(window)
D17
2
If D17 fails to engage in A03, rub the edges with sand paper.
A04
A11-28
13
Music machine core manual guide
G01 Music
machine core
1piece
G03
Music machine
core handle
1piece
G02 Screw
3pieces
Vending Machine
A05
A11-29
A11-30
A07
5
6
Use a knife to cut out a small angle to facilitate
the passage of subsequent wires.
A11-31
A08
Use a knife to cut a small corner on the top of the printed paper without protruding.
E21(roof)
lantern
7
1
5
14
A02
A02
A11-33
A06 4
3
F01
0.7cm
1cm
5.1cm
8
1cm
0.7cm
signboard
674
A11-12
A11-08
A11-15
A11-16
stuff table
barstool
dining table
table
2
A11-10
A11-32-01 A11-32-02
A11-32-03
15
A
B
A
B
8
3
A
B
bar table
A11-34
round stool
bicycle
A11-11
E12
E11
D05 D06 plant
A11-32-04
16
How to assemble the battery holder
Statement: the lamp wires cannot be
inserted into the output socket.
– – Can use two 7 batteries
– – Please notice the place of anode
and cathode when pit in the batteries
– – Rechargeable batteries are not blunt electricity
– – Rechargeable batteries can only be charged
under adult supervision
– – Rechargeable batteries should be
removed from the toy before charging
– – Different types of batteries cannot mix;
Do not mix new batteries in use with semi-used
batteries.
– – Run out of battery should be removed from the toy
– – The power shall not be short circuit
Use a craft blade to carefully skim
over the plastic to bare the copper wire.
Twist the same color wire together.
cherry tree
F03
17
black wire
from battery
box
white wire
from LED lamp
red wire from
battery box
grey wire
from LED
lamp
Roll and seal the duly twist copper with
the white tape F03 provided.
G06
G04
G05
G04
G05
G06
G04
G05
18
Installation of dust proof cover
(For updated version, the parts need to be purchased separately)
scale 1:4
G04 Transparent cover
20*15*0.18cm
2pieces
1. Tear off kraft paper of each piece of transparent cover.
2.Paste G04,G05 and G06 together to
complete the dust proof cover as shown.
scale 1:4
G05 Transparent cover
15*13.64*0.18cm
2pieces
scale 1:4
G06 Transparent cover
20*14*0.18cm
1piece
Attention: Please keep the instruction for future enquires after installation.
Photo of Dust proof cover

This manual suits for next models

1

Other Hongda USA Toy manuals

Hongda USA Mermaid tribe User manual

Hongda USA

Hongda USA Mermaid tribe User manual

Hongda USA Rainbow Cafe M906 User manual

Hongda USA

Hongda USA Rainbow Cafe M906 User manual

Hongda USA Memories of Autumn Grocery Store M914 User manual

Hongda USA

Hongda USA Memories of Autumn Grocery Store M914 User manual

Hongda USA S2006 User manual

Hongda USA

Hongda USA S2006 User manual

Hongda USA Cheryl's Room M020 User manual

Hongda USA

Hongda USA Cheryl's Room M020 User manual

Hongda USA PC902 User manual

Hongda USA

Hongda USA PC902 User manual

Hongda USA S2007 User manual

Hongda USA

Hongda USA S2007 User manual

Hongda USA Romantic Aegean Sea User manual

Hongda USA

Hongda USA Romantic Aegean Sea User manual

Hongda USA Gibbon Sushi M2011 User manual

Hongda USA

Hongda USA Gibbon Sushi M2011 User manual

Hongda USA The Ancient Capital Under Moonlight User manual

Hongda USA

Hongda USA The Ancient Capital Under Moonlight User manual

Hongda USA S2131 User manual

Hongda USA

Hongda USA S2131 User manual

Hongda USA S2003 User manual

Hongda USA

Hongda USA S2003 User manual

Hongda USA The Sound of the Sea M040 User manual

Hongda USA

Hongda USA The Sound of the Sea M040 User manual

Hongda USA S2010 User manual

Hongda USA

Hongda USA S2010 User manual

Hongda USA M2021 User manual

Hongda USA

Hongda USA M2021 User manual

Hongda USA Christmas Eve S2001 User manual

Hongda USA

Hongda USA Christmas Eve S2001 User manual

Hongda USA Coloured Glaze Time User manual

Hongda USA

Hongda USA Coloured Glaze Time User manual

Hongda USA BELL'S CAKE SHOP User manual

Hongda USA

Hongda USA BELL'S CAKE SHOP User manual

Hongda USA L2121 User manual

Hongda USA

Hongda USA L2121 User manual

Popular Toy manuals by other brands

De Agostini Model Space H.M.S. Bounty Admiralty Assembly instructions

De Agostini

De Agostini Model Space H.M.S. Bounty Admiralty Assembly instructions

Step 2 Sand-Tastic Activity Center Assembly instructions

Step 2

Step 2 Sand-Tastic Activity Center Assembly instructions

Hobby King 12A BEC manual

Hobby King

Hobby King 12A BEC manual

KNEX Education Simple Machines Deluxe GEARS Teachers guide

KNEX

KNEX Education Simple Machines Deluxe GEARS Teachers guide

Step 2 Splish Splash Seas Water Table 8507 manual

Step 2

Step 2 Splish Splash Seas Water Table 8507 manual

PRO-DESIGN L-39 Albatros 68mm EDF Assembly instructions

PRO-DESIGN

PRO-DESIGN L-39 Albatros 68mm EDF Assembly instructions

Stevens Aero Model FreDe 2X Build instructions

Stevens Aero Model

Stevens Aero Model FreDe 2X Build instructions

Spinmaster Etch A Sketch FreeStyle instruction sheet

Spinmaster

Spinmaster Etch A Sketch FreeStyle instruction sheet

V-tech V.Smile: SpiderMan & Friends II Doc Ock s... user manual

V-tech

V-tech V.Smile: SpiderMan & Friends II Doc Ock s... user manual

guide craft Texo Guide

guide craft

guide craft Texo Guide

V-tech LUDO BLUEY GAME TIME LAPTOP instruction manual

V-tech

V-tech LUDO BLUEY GAME TIME LAPTOP instruction manual

TopNotch Products SPUNKY Assembly manual

TopNotch Products

TopNotch Products SPUNKY Assembly manual

De Agostini Model Space MiG-29 manual

De Agostini

De Agostini Model Space MiG-29 manual

ACE RC Seamaster ACE4527 Assembly manual

ACE RC

ACE RC Seamaster ACE4527 Assembly manual

ThinkGizmos TG725 user manual

ThinkGizmos

ThinkGizmos TG725 user manual

De Agostini Model Space C57 manual

De Agostini

De Agostini Model Space C57 manual

V-tech Grip 'n Go Driver user manual

V-tech

V-tech Grip 'n Go Driver user manual

V-tech Pop 'n Sing Apple user manual

V-tech

V-tech Pop 'n Sing Apple user manual

manuals.online logo
manuals.online logoBrands
  • About & Mission
  • Contact us
  • Privacy Policy
  • Terms and Conditions

Copyright 2025 Manuals.Online. All Rights Reserved.