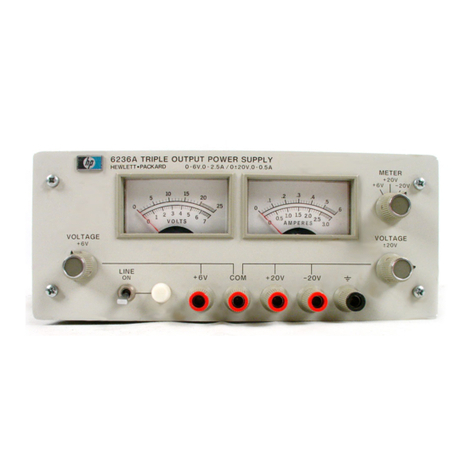
HP E3633A User manual

User’s Guide
3DUW#1XPEHU=#(69670<3334
-DQXDU\#4<<<1
)RU#6DIHW\#LQIRUPDWLRQ/#:DUUDQWLHV/#DQG#5HJXODWRU\#LQIRUPDWLRQ/
VHH#WKH#SDJHV#EHKLQG#WKH#,QGH[1
‹#&RS\ULJKW#+HZOHWW03DFNDUG#&RPSDQ\#4<<<
$OO#5LJKWV#5HVHUYHG1
+3#(6966$#DQG#(6967$
'RZHU#6XSSOLHV

7KH#+3#(6966$#DQG#+3#(6967$#DUH#KLJK#SHUIRUPDQFH#533#ZDWW#VLQJOH0RXWSXW#
GXDO#UDQJH#SURJUDPPDEOH#'&#SRZHU#VXSSOLHV#ZLWK#ERWK#+30,%#DQG#560565#
LQWHUIDFHV1#7KH#FRPELQDWLRQ#RI#EHQFK0WRS#DQG#V\VWHP#IHDWXUHV#LQ#WKHVH#SRZHU#
VXSSOLHV#SURYLGHV#YHUVDWLOH#VROXWLRQV#IRU#\RXU#GHVLJQ#DQG#WHVW#UHTXLUHPHQWV1
&RQYHQLHQW#EHQFK0WRS#IHDWXUHV
‡6LQJOH0RXWSXW#GXDO#UDQJH
‡(DV\0WR0XVH#NQRE#FRQWURO#VHWWLQJV
‡+LJKO\#YLVLEOH#YDFXXP0IOXRUHVFHQW#GLVSOD\#PHWHUV
‡+LJK#DFFXUDF\#DQG#KLJK#UHVROXWLRQ
‡5HPRWH#YROWDJH#VHQVLQJ
‡ 2YHUYROWDJH#DQG#RYHUFXUUHQW#SURWHFWLRQ
‡ 2XWSXW#RQ2RII
‡ ([FHOOHQW#ORDG#DQG#OLQH#UHJXODWLRQ#DQG#ORZ#ULSSOH#DQG#QRLVH
‡ 2SHUDWLQJ#VWDWHV#VWRUDJH
‡ 3RUWDEOH/#UXJJHGL]HG#FDVH#ZLWK#QRQ0VNLG#IHHW
‡)URQW#DQG#5HDU#RXWSXW#WHUPLQDOV
‡ 5HWULHYLQJ26FUROOLQJ#HUURU#PHVVDJHV#RQ#WKH#GLVSOD\
)OH[LEOH#V\VWHP#IHDWXUHV
‡+30,%#+,(((07;;,#DQG#560565#LQWHUIDFHV#DUH#VWDQGDUG
‡6&3,#+6WDQGDUG#&RPPDQGV#IRU#3URJUDPPDEOH#,QVWUXPHQWV,#FRPSDWLELOLW\
‡,22#VHWXS#HDVLO\#GRQH#IURP#IURQW0SDQHO
‡ 6RIWZDUH#FDOLEUDWLRQ/#QR#LQWHUQDO#DGMXVWPHQWV#UHTXLUHG
+3#(6966$#DQG#(6967$
'RZHU#6XSSOLHV

2
The Front Panel at a Glance
1 8V/20A range selection key (E3633A)
25V/7A range selection key (E3634A)
220V/10A range selection key (E3633A)
50V/4A range selection key (E3634A)
3Overvoltage protection key
4Overcurrent protection key
5Display limit key
6Recall operating state key
7 Store operating state/Local key
8Error/Calibrate key
9I/O Configuration/Secure key
10 Output On/Off key
11 Control knob
12 Resolution selection keys
13 Voltage/current adjust selection key

3
1 8V/20A* or 25V/7A** range selection key Selects the 8V/20A or 25V/7A
range and allows the full rated output to 8V/20A or 25V/7A.
2 20V/10A* or 50V/4A** range selection key Selects the 20V/10A or
50V/4A range and allows the full rated output to 20V/10A or 50V/4A.
3 Overvoltage protection key Enables or disables the overvoltage protection
function, sets trip voltage level, and clears the overvoltage condition.
4 Overcurrent protection key Enables or disables the overcurrent protection
function, sets trip current level, and clears the overcurrent condition.
5 Display limit key Shows voltage and current limit values on the display and
allows knob adjustment for setting limit values.
6 Recall operating state key Recalls a previously stored operating state from
location ‘‘1’’, ‘‘2’’, or ‘‘3’’.
7 Store operating state / Local key1Stores an operating state in location ‘‘1’’,
‘‘2’’, or ‘‘3’’ / or returns the power supply to local mode from remote interface
mode.
8 Error / Calibrate key2Displays error codes generated during operation, self-
test and calibration / or enables calibration mode (the power supply must be
unsecured before performing calibration). See
Service Guide
for more details
on calibration.
9 I/O Configuration / Secure key3Configures the power supply for remote
interfaces / or secure or unsecure the power supply for calibration. See
ServiceGuide
formoredetailsonhowtosecureorunsecurethepowersupply.
10 Output On/Off key Enables or disables the power supply output. This key
toggles between on and off.
11 Controlknob Increases ordecreasesthevalueoftheblinkingdigitbyturning
clockwise or counter clockwise.
12 Resolution selection keys Move the blinking digit to the right or left.
13 Voltage/current adjust selection key Selects the knob control function for
voltage or current adjustment.
17KH#NH\#FDQ#EH#XVHG#DV#WKH#©©Localªª#NH\#ZKHQ#WKH#SRZHU#VXSSO\#LV#LQ#WKH#UHPRWH#
LQWHUIDFH#PRGH1
2<RX#FDQ#HQDEOH#WKH#©©FDOLEUDWLRQ#PRGHªª#E\#KROGLQJ#GRZQ#WKLV#NH\#ZKHQ#\RX#
WXUQ#RQ#WKH#SRZHU#VXSSO\1
3<RX#FDQ#XVH#LW#DV#WKH#©©6HFXUHªª#RU#©©8QVHFXUHªª#NH\#ZKHQ#WKH#SRZHU#VXSSO\#LV#
LQ#WKH#FDOLEUDWLRQ#PRGH1
*For HP E3633A Model **For HP E3634A Model

4
Front-Panel Voltage and Current Limit Settings
You can set the voltage and current limit values from the front panel using the
following method.
1Select the desired range using the range selection keys after turning on the
power supply.
2Press the #key to show the limit values on the display.
3Move the blinking digit to the appropriate position using the resolution
selection keys and change the blinking digit value to the desired voltage limit
by turning the control knob. If the display limit times out, press the key
again.
4Set the knob to current control mode by pressing the key.
5Move the blinking digit to the appropriate position using the resolution
selection keys and change the blinking digit value to the desired current limit
by turning the control knob.
6Press the #key to enable the output. After about 5 seconds, the display
will go to output monitoring mode automatically to display the voltage and
current at the output or the display will go to output monitoring mode
immediately by pressing the #key again.
Note All front panel keys and controls can be disabled with remote interface commands.
The HP E3633A and HP E3634A must be in "Local" mode for the front panel keys
and controls to function.
Use thevoltage/current adjustselection key,the resolution selectionkeys,
and the control knob to change the voltage and current limit values.
Display
Limit
Display
Limit
Voltage
Current
Output
On/Off
Output
On/Off

5
Display Annunciators
Adrs Power supply is addressed to listen or talk over a remote interface.
Rmt Power supply is in remote interface mode.
8V Shows the 8V/20A range is selected. (HP E3633A model)
20V Shows the 20V/10A range is selected. (HP E3633A model)
25V Shows the 25V/7A range is selected. (HP E3634A model)
50V Shows the 50V/4A range is selected. (HP E3634A model)
OVP The overvoltage protection function is enabled when the
annunciator turns on or the overvoltage protection circuit has
caused the power supply to shutdown when the annunciator blinks.
OCP The overcurrent protection function is enabled when the
annunciator turns on or the overcurrent protection circuit has
caused the power supply to shutdown when the annunciator blinks.
CAL The power supply is in calibration mode.
Limit The display shows the limit values of voltage and current.
ERROR Hardware or remote interface command errors are detected and
the error bit has not been cleared.
OFF The output of the power supply is disabled (See page 52 for more
information).
Unreg The output of the power supply is unregulated (output is neither CV
nor CC).
CV The power supply is in constant voltage mode.
CC The power supply is in constant current mode.
To review the display annunciators, hold down key as you turn on
the power supply.
Display
Limit

6
The Rear Panel at a Glance
Use the front-panel key to:
• Select the HP-IB or RS-232 interface (see chapter 3).
• Set the HP-IB bus address (see chapter 3).
• Set the RS-232 baud rate and parity (see chapter 3).
1Power-line voltage setting
2Power-line fuse-holder assembly
3AC inlet
4Power-line module
5HP-IB (IEEE-488) interface connector
6RS-232 interface connector
7Rear output terminals
I/O
Config

7
In This Book
*HQHUDO#,QIRUPDWLRQ####&KDSWHU#4#FRQWDLQV#D#JHQHUDO#GHVFULSWLRQ#RI#\RXU#
SRZHU#VXSSO\1#7KLV#FKDSWHU#DOVR##SURYLGHV#LQVWUXFWLRQV#IRU#FKHFNLQJ#\RXU#SRZHU#
VXSSO\/#FRQQHFWLQJ#WR#DF#SRZHU/#DQG#VHOHFWLQJ#SRZHU0OLQH#YROWDJH1
,QLWLDO#2SHUDWLRQ####&KDSWHU#5#HQVXUHV#WKDW#WKH#SRZHU#VXSSO\#GHYHORSV#LWV#UDWHG#
RXWSXWV#DQG#SURSHUO\#UHVSRQGV#WR#RSHUDWLRQ#IURP#WKH#IURQW#SDQHO1
)URQW03DQHO#2SHUDWLRQ####&KDSWHU#6#GHVFULEHV#LQ#GHWDLO#WKH#XVH#RI#IURQW0SDQHO#
NH\V#DQG#KRZ#WKH\#DUH#XVHG#WR#RSHUDWH#WKH#SRZHU#VXSSO\#IURP#WKH#IURQW#SDQHO1#
7KLV#FKDSWHU#DOVR#VKRZV#KRZ#WR#FRQILJXUH#WKH#SRZHU#VXSSO\#IRU#WKH#UHPRWH#
LQWHUIDFH#DQG#JLYHV#D#EULHI#LQWURGXFWLRQ#WR#WKH#FDOLEUDWLRQ#IHDWXUHV1
5HPRWH#,QWHUIDFH#5HIHUHQFH###&KDSWHU#7#FRQWDLQV#UHIHUHQFH#LQIRUPDWLRQ#WR#
KHOS#\RX#SURJUDP#WKH#SRZHU#VXSSO\#RYHU#WKH#UHPRWH#LQWHUIDFH1#7KLV#FKDSWHU#
DOVR#H[SODLQV#KRZ#WR#SURJUDP#IRU#VWDWXV#UHSRUWLQJ1
(UURU#0HVVDJHV###&KDSWHU#8#OLVWV#WKH#HUURU#PHVVDJHV#WKDW#PD\#DSSHDU#DV#\RX#
DUH#ZRUNLQJ#ZLWK#WKH#SRZHU#VXSSO\1#(DFK#OLVWLQJ#FRQWDLQV#LQIRUPDWLRQ#WR#KHOS#
\RX#GLDJQRVH#DQG#VROYH#WKH#SUREOHP1
$SSOLFDWLRQ#3URJUDPV####&KDSWHU#9#FRQWDLQV#VRPH#UHPRWH#LQWHUIDFH#
DSSOLFDWLRQV#WR#KHOS#\RX#GHYHORS#SURJUDPV#IRU#\RXU#DSSOLFDWLRQ1
7XWRULDO#####&KDSWHU#:#GHVFULEHV#EDVLF#RSHUDWLRQ#RI#OLQHDU#SRZHU#VXSSOLHV#DQG#
JLYHV#VSHFLILF#GHWDLOV#RQ#WKH#RSHUDWLRQ#DQG#XVH#RI#WKH#+3#(6966$#DQG#+3#
(6967$#SRZHU#VXSSOLHV1
6SHFLILFDWLRQV#####&KDSWHU#;#OLVWV#WKH#SRZHU#VXSSO\ªV#VSHFLILFDWLRQV1
If you have questions relating to the operation of the power supply, call
1-800-452-4844 in the United States, or contact your nearest Hewlett-Packard
Sales Office.
If your HP E3633A or HP E3634A fails within three years of purchase, HP will
repair or replace it free of charge. Call 1-800-258-5165 ("Express Exchange")
in the United States, or contact your nearest Hewlett-Packard Sales Office.

8

9
Contents
Contents
&KDSWHU#4##*HQHUDO#,QIRUPDWLRQ
6DIHW\#&RQVLGHUDWLRQV0#0#0#0#0#0#0#0#0#0#0#0#0#0#0#0#0#0#0#0#0#0#0#0#0#0#0#0#0#0#0#0#0#0 #47
6DIHW\#DQG#(0HTXLUHPHQWV 0#0#0#0#0#0#0#0#0#0#0#0#0#0#0#0#0#0#0#0#0#0#0#0 #47
2SWLRQV#DQG#$FFHVVRULHV #0#0#0#0#0#0#0#0#0#0#0#0#0#0#0#0#0#0#0#0#0#0#0#0#0#0#0#0#0#0#0 #48
2SWLRQV0#0#0#0#0#0#0#0#0#0#0#0#0#0#0#0#0#0#0#0#0#0#0#0#0#0#0#0#0#0#0#0#0#0#0#0#0#0#0#0#0#0#0 #48
$FFHVVRULHV#0#0#0#0#0#0#0#0#0#0#0#0#0#0#0#0#0#0#0#0#0#0#0#0#0#0#0#0#0#0#0#0#0#0#0#0#0#0#0 #48
'HVFULSWLRQ#0#0#0#0#0#0#0#0#0#0#0#0#0#0#0#0#0#0#0#0#0#0#0#0#0#0#0#0#0#0#0#0#0#0#0#0#0#0#0#0#0#0 #49
,QVWDOODWLRQ #0#0#0#0#0#0#0#0#0#0#0#0#0#0#0#0#0#0#0#0#0#0#0#0#0#0#0#0#0#0#0#0#0#0#0#0#0#0#0#0#0#0 #4<
,QLWLDO#,QVSHFWLRQ#0#0#0#0#0#0#0#0#0#0#0#0#0#0#0#0#0#0#0#0#0#0#0#0#0#0#0#0#0#0#0#0#0#0#0 #4<
&RROLQJ#DQG#/RFDWLRQ #0#0#0#0#0#0#0#0#0#0#0#0#0#0#0#0#0#0#0#0#0#0#0#0#0#0#0#0#0#0#0 #4<
,QSXW#3RZHU#5HTXLUHPHQWV0#0#0#0#0#0#0#0#0#0#0#0#0#0#0#0#0#0#0#0#0#0#0#0#0#0#0#0#0#0 #55
3RZHU0/LQH#&RUG#0#0#0#0#0#0#0#0#0#0#0#0#0#0#0#0#0#0#0#0#0#0#0#0#0#0#0#0#0#0#0#0#0#0#0 #55
3RZHU0/LQH#9ROWDJH#6HOHFWLRQ 0#0#0#0#0#0#0#0#0#0#0#0#0#0#0#0#0#0#0#0#0#0#0#0#0 #55
&KDSWHU#5##,QLWLDO#2SHUDWLRQ
3UHOLPLQDU\#&KHFNRXW0#0#0#0#0#0#0#0#0#0#0#0#0#0#0#0#0#0#0#0#0#0#0#0#0#0#0#0#0#0#0#0#0#0 #5:
3RZHU02Q#&KHFNRXW#0#0#0#0#0#0#0#0#0#0#0#0#0#0#0#0#0#0#0#0#0#0#0#0#0#0#0#0#0#0#0#0#0#0#0 #5;
2XWSXW#&KHFNRXW0#0#0#0#0#0#0#0#0#0#0#0#0#0#0#0#0#0#0#0#0#0#0#0#0#0#0#0#0#0#0#0#0#0#0#0#0#0 #5<
9ROWDJH#2XWSXW#&KHFNRXW#0#0#0#0#0#0#0#0#0#0#0#0#0#0#0#0#0#0#0#0#0#0#0#0#0#0#0#0 #5<
&XUUHQW#2XWSXW#&KHFNRXW 0#0#0#0#0#0#0#0#0#0#0#0#0#0#0#0#0#0#0#0#0#0#0#0#0#0#0#0 #63
&KDSWHU#6##)URQW03DQHO#2SHUDWLRQ
)URQW03DQHO#2SHUDWLRQ#2YHUYLHZ 0#0#0#0#0#0#0#0#0#0#0#0#0#0#0#0#0#0#0#0#0#0#0#0#0 #68
&RQVWDQW#9ROWDJH#2SHUDWLRQ 0#0#0#0#0#0#0#0#0#0#0#0#0#0#0#0#0#0#0#0#0#0#0#0#0#0#0#0#0 #69
&RQVWDQW#&XUUHQW#2SHUDWLRQ0#0#0#0#0#0#0#0#0#0#0#0#0#0#0#0#0#0#0#0#0#0#0#0#0#0#0#0#0 #6;
6WRULQJ#DQG#5HFDOOLQJ#2SHUDWLQJ#6WDWHV 0#0#0#0#0#0#0#0#0#0#0#0#0#0#0#0#0#0#0#0 #73
3URJUDPPLQJ#2YHUYROWDJH#3URWHFWLRQ 0#0#0#0#0#0#0#0#0#0#0#0#0#0#0#0#0#0#0#0#0 #75
6HWWLQJ#WKH#293#/HYHO#DQG#(QDEOH#WKH#293#&LUFXLW 0#0#0#0#0#0#0#0 #75
&KHFNLQJ#293#2SHUDWLRQ #0#0#0#0#0#0#0#0#0#0#0#0#0#0#0#0#0#0#0#0#0#0#0#0#0#0#0#0 #76
&OHDULQJ#WKH#2YHUYROWDJH#&RQGLWLRQ 0#0#0#0#0#0#0#0#0#0#0#0#0#0#0#0#0#0#0#0 #76
3URJUDPPLQJ#2YHUFXUUHQW#3URWHFWLRQ 0#0#0#0#0#0#0#0#0#0#0#0#0#0#0#0#0#0#0#0#0 #79
6HWWLQJ#WKH#2&3#/HYHO#DQG#(QDEOH#WKH#2&3#&LUFXLW0#0#0#0#0#0#0#0 #79
&KHFNLQJ#2&3#2SHUDWLRQ #0#0#0#0#0#0#0#0#0#0#0#0#0#0#0#0#0#0#0#0#0#0#0#0#0#0#0#0 #7:
&OHDULQJ#WKH#2YHUFXUUHQW#&RQGLWLRQ 0#0#0#0#0#0#0#0#0#0#0#0#0#0#0#0#0#0#0#0 #7:
5HPRWH#9ROWDJH#6HQVLQJ#DW#WKH#)URQW#DQG#5HDU#7HUPLQDOV 0#0#0#0#0 #7<
&9#5HJXODWLRQ #0#0#0#0#0#0#0#0#0#0#0#0#0#0#0#0#0#0#0#0#0#0#0#0#0#0#0#0#0#0#0#0#0#0#0#0#0 #7<
2XWSXW#5DWLQJ #0#0#0#0#0#0#0#0#0#0#0#0#0#0#0#0#0#0#0#0#0#0#0#0#0#0#0#0#0#0#0#0#0#0#0#0#0 #7<
2XWSXW#1RLVH#0#0#0#0#0#0#0#0#0#0#0#0#0#0#0#0#0#0#0#0#0#0#0#0#0#0#0#0#0#0#0#0#0#0#0#0#0#0 #7<
6WDELOLW\ #0#0#0#0#0#0#0#0#0#0#0#0#0#0#0#0#0#0#0#0#0#0#0#0#0#0#0#0#0#0#0#0#0#0#0#0#0#0#0#0#0#0 #83
5HPRWH#9ROWDJH#6HQVLQJ#&RQQHFWLRQV #0#0#0#0#0#0#0#0#0#0#0#0#0#0#0#0#0#0 #83
5HPRWH#9ROWDJH#6HQVLQJ#DW#WKH#5HDU#3DQHO #0#0#0#0#0#0#0#0#0#0#0#0#0#0 #84
10
Contents
Contents
'LVDEOLQJ#WKH#2XWSXW 0#0#0#0#0#0#0#0#0#0#0#0#0#0#0#0#0#0#0#0#0#0#0#0#0#0#0#0#0#0#0#0#0#0#0#85
'LVDEOLQJ#WKH#2XWSXW#8VLQJ#DQ#([WHUQDO#5HOD\0#0#0#0#0#0#0#0#0#0#0#0#0#0#0#86
.QRE#/RFNLQJ0#0#0#0#0#0#0#0#0#0#0#0#0#0#0#0#0#0#0#0#0#0#0#0#0#0#0#0#0#0#0#0#0#0#0#0#0#0#0#0#0#86
6\VWHP05HODWHG#2SHUDWLRQV0#0#0#0#0#0#0#0#0#0#0#0#0#0#0#0#0#0#0#0#0#0#0#0#0#0#0#0#0#0#87
6HOI07HVW#0#0#0#0#0#0#0#0#0#0#0#0#0#0#0#0#0#0#0#0#0#0#0#0#0#0#0#0#0#0#0#0#0#0#0#0#0#0#0#0#0#0#87
(UURU#&RQGLWLRQV #0#0#0#0#0#0#0#0#0#0#0#0#0#0#0#0#0#0#0#0#0#0#0#0#0#0#0#0#0#0#0#0#0#0#0#88
'LVSOD\#&RQWURO #0#0#0#0#0#0#0#0#0#0#0#0#0#0#0#0#0#0#0#0#0#0#0#0#0#0#0#0#0#0#0#0#0#0#0#0#89
)LUPZDUH#5HYLVLRQ#4XHU\#0#0#0#0#0#0#0#0#0#0#0#0#0#0#0#0#0#0#0#0#0#0#0#0#0#0#0#0#8:
6&3,#/DQJXDJH#9HUVLRQ#0#0#0#0#0#0#0#0#0#0#0#0#0#0#0#0#0#0#0#0#0#0#0#0#0#0#0#0#0#0#8:
5HPRWH#,QWHUIDFH#&RQILJXUDWLRQ 0#0#0#0#0#0#0#0#0#0#0#0#0#0#0#0#0#0#0#0#0#0#0#0#0#0#8;
5HPRWH#,QWHUIDFH#6HOHFWLRQ 0#0#0#0#0#0#0#0#0#0#0#0#0#0#0#0#0#0#0#0#0#0#0#0#0#0#0#8;
+30,%#$GGUHVV #0#0#0#0#0#0#0#0#0#0#0#0#0#0#0#0#0#0#0#0#0#0#0#0#0#0#0#0#0#0#0#0#0#0#0#0#0#8<
%DXG#5DWH#6HOHFWLRQ#+560565,#0#0#0#0#0#0#0#0#0#0#0#0#0#0#0#0#0#0#0#0#0#0#0#0#0#8<
3DULW\#6HOHFWLRQ#+560565,0#0#0#0#0#0#0#0#0#0#0#0#0#0#0#0#0#0#0#0#0#0#0#0#0#0#0#0#0#8<
7R#6HW#WKH#+30,%#$GGUHVV #0#0#0#0#0#0#0#0#0#0#0#0#0#0#0#0#0#0#0#0#0#0#0#0#0#0#0#0#93
7R#6HW#WKH#%DXG#5DWH#DQG#3DULW\#+560565, #0#0#0#0#0#0#0#0#0#0#0#0#0#0#0#94
+30,%#,QWHUIDFH#&RQILJXUDWLRQ #0#0#0#0#0#0#0#0#0#0#0#0#0#0#0#0#0#0#0#0#0#0#0#0#0#0#0#96
560565#,QWHUIDFH#&RQILJXUDWLRQ0#0#0#0#0#0#0#0#0#0#0#0#0#0#0#0#0#0#0#0#0#0#0#0#0#0#0#97
560565#&RQILJXUDWLRQ#2YHUYLHZ #0#0#0#0#0#0#0#0#0#0#0#0#0#0#0#0#0#0#0#0#0#0#0#97
560565#'DWD#)UDPH#)RUPDW 0#0#0#0#0#0#0#0#0#0#0#0#0#0#0#0#0#0#0#0#0#0#0#0#0#0#0#97
&RQQHFWLRQ#WR#D#&RPSXWHU#RU#7HUPLQDO #0#0#0#0#0#0#0#0#0#0#0#0#0#0#0#0#0#98
'75#2#'65#+DQGVKDNH#3URWRFRO#0#0#0#0#0#0#0#0#0#0#0#0#0#0#0#0#0#0#0#0#0#0#0#99
560565#7URXEOHVKRRWLQJ0#0#0#0#0#0#0#0#0#0#0#0#0#0#0#0#0#0#0#0#0#0#0#0#0#0#0#0#0#0#9:
&DOLEUDWLRQ#2YHUYLHZ #0#0#0#0#0#0#0#0#0#0#0#0#0#0#0#0#0#0#0#0#0#0#0#0#0#0#0#0#0#0#0#0#0#0#9;
&DOLEUDWLRQ#6HFXULW\ 0#0#0#0#0#0#0#0#0#0#0#0#0#0#0#0#0#0#0#0#0#0#0#0#0#0#0#0#0#0#0#0#0#9;
&DOLEUDWLRQ#&RXQW0#0#0#0#0#0#0#0#0#0#0#0#0#0#0#0#0#0#0#0#0#0#0#0#0#0#0#0#0#0#0#0#0#0#0#:5
&DOLEUDWLRQ#0HVVDJH0#0#0#0#0#0#0#0#0#0#0#0#0#0#0#0#0#0#0#0#0#0#0#0#0#0#0#0#0#0#0#0#0#:5
&KDSWHU#7##5HPRWH#,QWHUIDFH#5HIHUHQFH
6&3,#&RPPDQG#6XPPDU\0#0#0#0#0#0#0#0#0#0#0#0#0#0#0#0#0#0#0#0#0#0#0#0#0#0#0#0#0#0#0#:8
6LPSOLILHG#3URJUDPPLQJ#2YHUYLHZ0#0#0#0#0#0#0#0#0#0#0#0#0#0#0#0#0#0#0#0#0#0#0#0#;3
8VLQJ#WKH#APPLy#&RPPDQG 0#0#0#0#0#0#0#0#0#0#0#0#0#0#0#0#0#0#0#0#0#0#0#0#0#0#;3
8VLQJ#WKH#/RZ0/HYHO#&RPPDQGV 0#0#0#0#0#0#0#0#0#0#0#0#0#0#0#0#0#0#0#0#0#0#0#;3
5HDGLQJ#D#4XHU\#5HVSRQVH #0#0#0#0#0#0#0#0#0#0#0#0#0#0#0#0#0#0#0#0#0#0#0#0#0#0#0#;4
6HOHFWLQJ#D#7ULJJHU#6RXUFH0#0#0#0#0#0#0#0#0#0#0#0#0#0#0#0#0#0#0#0#0#0#0#0#0#0#0#0#;4
3RZHU#6XSSO\#3URJUDPPLQJ#5DQJHV0#0#0#0#0#0#0#0#0#0#0#0#0#0#0#0#0#0#0#0#;5
8VLQJ#WKH#APPLy#&RPPDQG0#0#0#0#0#0#0#0#0#0#0#0#0#0#0#0#0#0#0#0#0#0#0#0#0#0#0#0#0#;6
2XWSXW#6HWWLQJ#DQG#2SHUDWLRQ#&RPPDQGV 0#0#0#0#0#0#0#0#0#0#0#0#0#0#0#0#0#0#;7
7ULJJHULQJ#&RPPDQGV0#0#0#0#0#0#0#0#0#0#0#0#0#0#0#0#0#0#0#0#0#0#0#0#0#0#0#0#0#0#0#0#0#0#<4
7ULJJHU#6RXUFH#&KRLFHV#0#0#0#0#0#0#0#0#0#0#0#0#0#0#0#0#0#0#0#0#0#0#0#0#0#0#0#0#0#0#<4
7ULJJHULQJ#&RPPDQGV#0#0#0#0#0#0#0#0#0#0#0#0#0#0#0#0#0#0#0#0#0#0#0#0#0#0#0#0#0#0#0#<6
6\VWHP05HODWHG#&RPPDQGV #0#0#0#0#0#0#0#0#0#0#0#0#0#0#0#0#0#0#0#0#0#0#0#0#0#0#0#0#0#<7

11
Contents
Contents
&DOLEUDWLRQ#&RPPDQGV0#0#0#0#0#0#0#0#0#0#0#0#0#0#0#0#0#0#0#0#0#0#0#0#0#0#0#0#0#0#0#0#0 #<;
560565#,QWHUIDFH#&RPPDQGV #0#0#0#0#0#0#0#0#0#0#0#0#0#0#0#0#0#0#0#0#0#0#0#0#0#0#0 #434
7KH#6&3,#6WDWXV#5HJLVWHUV #0#0#0#0#0#0#0#0#0#0#0#0#0#0#0#0#0#0#0#0#0#0#0#0#0#0#0#0#0 #435
:KDW#LV#DQ#(YHQW#5HJLVWHU"#0#0#0#0#0#0#0#0#0#0#0#0#0#0#0#0#0#0#0#0#0#0#0#0#0#0 #435
:KDW#LV#DQ#(QDEOH#5HJLVWHU"#0#0#0#0#0#0#0#0#0#0#0#0#0#0#0#0#0#0#0#0#0#0#0#0#0 #435
6&3,#6WDWXV#6\VWHP 0#0#0#0#0#0#0#0#0#0#0#0#0#0#0#0#0#0#0#0#0#0#0#0#0#0#0#0#0#0#0#0 #436
7KH#4XHVWLRQDEOH#6WDWXV#5HJLVWHU0#0#0#0#0#0#0#0#0#0#0#0#0#0#0#0#0#0#0#0#0 #437
7KH#6WDQGDUG#(YHQW#5HJLVWHU #0#0#0#0#0#0#0#0#0#0#0#0#0#0#0#0#0#0#0#0#0#0#0#0 #438
7KH#6WDWXV#%\WH#5HJLVWHU0#0#0#0#0#0#0#0#0#0#0#0#0#0#0#0#0#0#0#0#0#0#0#0#0#0#0#0 #439
8VLQJ#6HUYLFH#5HTXHVW#+654,#DQG#6HULDO#32// #0#0#0#0#0#0#0#0#0#0 #43:
8VLQJ#-67%"#WR#5HDG#WKH#6WDWXV#%\WH 0#0#0#0#0#0#0#0#0#0#0#0#0#0#0#0#0#0 #43;
8VLQJ#WKH#0HVVDJH#$YDLODEOH#%LW#+0$9, 0#0#0#0#0#0#0#0#0#0#0#0#0#0#0#0 #43;
7R#,QWHUUXSW#<RXU#%XV#&RQWUROOHU#8VLQJ#654 #0#0#0#0#0#0#0#0#0#0#0 #43;
7R#'HWHUPLQH#:KHQ#D#&RPPDQG#6HTXHQFH#LV#&RPSOHWHG #0 #43<
8VLQJ#-23&#WR#6LJQDO#:KHQ#'DWD#LV#LQ#WKH#2XWSXW#%XIIHU#0#0 #43<
6WDWXV#5HSRUWLQJ#&RPPDQGV#0#0#0#0#0#0#0#0#0#0#0#0#0#0#0#0#0#0#0#0#0#0#0#0#0#0#0 #443
$Q#,QWURGXFWLRQ#WR#WKH#6&3,#/DQJXDJH #0#0#0#0#0#0#0#0#0#0#0#0#0#0#0#0#0#0#0 #446
&RPPDQG#)RUPDW#8VHG#LQ#7KLV#0DQXDO0#0#0#0#0#0#0#0#0#0#0#0#0#0#0#0 #447
&RPPDQG#6HSDUDWRUV#0#0#0#0#0#0#0#0#0#0#0#0#0#0#0#0#0#0#0#0#0#0#0#0#0#0#0#0#0#0 #448
8VLQJ#WKH#0,1#DQG#0$;#3DUDPHWHUV#0#0#0#0#0#0#0#0#0#0#0#0#0#0#0#0#0#0 #448
4XHU\LQJ#3DUDPHWHU#6HWWLQJV #0#0#0#0#0#0#0#0#0#0#0#0#0#0#0#0#0#0#0#0#0#0#0#0 #449
6&3,#&RPPDQG#7HUPLQDWRUV #0#0#0#0#0#0#0#0#0#0#0#0#0#0#0#0#0#0#0#0#0#0#0#0 #449
,(((07;;15#&RPPRQ#&RPPDQGV#0#0#0#0#0#0#0#0#0#0#0#0#0#0#0#0#0#0#0#0#0 #449
6&3,#3DUDPHWHU#7\SHV #0#0#0#0#0#0#0#0#0#0#0#0#0#0#0#0#0#0#0#0#0#0#0#0#0#0#0#0#0 #44:
+DOWLQJ#DQ#2XWSXW#LQ#3URJUHVV #0#0#0#0#0#0#0#0#0#0#0#0#0#0#0#0#0#0#0#0#0#0#0#0#0#0 #44;
6&3,#&RQIRUPDQFH#,QIRUPDWLRQ0#0#0#0#0#0#0#0#0#0#0#0#0#0#0#0#0#0#0#0#0#0#0#0#0 #44<
,(((07;;#&RQIRUPDQFH#,QIRUPDWLRQ 0#0#0#0#0#0#0#0#0#0#0#0#0#0#0#0#0#0#0#0#0 #455
&KDSWHU#8##(UURU#0HVVDJHV
([HFXWLRQ#(UURUV #0#0#0#0#0#0#0#0#0#0#0#0#0#0#0#0#0#0#0#0#0#0#0#0#0#0#0#0#0#0#0#0#0#0#0#0 #458
6HOI07HVW#(UURUV0#0#0#0#0#0#0#0#0#0#0#0#0#0#0#0#0#0#0#0#0#0#0#0#0#0#0#0#0#0#0#0#0#0#0#0#0#0 #463
&DOLEUDWLRQ#(UURUV 0#0#0#0#0#0#0#0#0#0#0#0#0#0#0#0#0#0#0#0#0#0#0#0#0#0#0#0#0#0#0#0#0#0#0#0 #464
&KDSWHU#9##$SSOLFDWLRQ#3URJUDPV
([DPSOH#3URJUDP#IRU#&#DQG#&..0#0#0#0#0#0#0#0#0#0#0#0#0#0#0#0#0#0#0#0#0#0#0#0 #468
([DPSOH#3URJUDP#IRU#([FHO#<: #0#0#0#0#0#0#0#0#0#0#0#0#0#0#0#0#0#0#0#0#0#0#0#0#0 #46<
&KDSWHU#:##7XWRULDO
2YHUYLHZ#RI#+3#(6966$#DQG#+3#(6967$#2SHUDWLRQ 0#0#0#0#0#0#0#0#0 #47:
2XWSXW#&KDUDFWHULVWLFV#0#0#0#0#0#0#0#0#0#0#0#0#0#0#0#0#0#0#0#0#0#0#0#0#0#0#0#0#0#0#0#0 #47<
8QUHJXODWHG#6WDWH #0#0#0#0#0#0#0#0#0#0#0#0#0#0#0#0#0#0#0#0#0#0#0#0#0#0#0#0#0#0#0#0#0 #484
8QZDQWHG#6LJQDOV#0#0#0#0#0#0#0#0#0#0#0#0#0#0#0#0#0#0#0#0#0#0#0#0#0#0#0#0#0#0#0#0#0 #484
&RQQHFWLQJ#WKH#/RDG0#0#0#0#0#0#0#0#0#0#0#0#0#0#0#0#0#0#0#0#0#0#0#0#0#0#0#0#0#0#0#0#0#0 #486

12
Contents
Contents
2XWSXW#,VRODWLRQ 0#0#0#0#0#0#0#0#0#0#0#0#0#0#0#0#0#0#0#0#0#0#0#0#0#0#0#0#0#0#0#0#0#0#0#486
0XOWLSOH#/RDGV#0#0#0#0#0#0#0#0#0#0#0#0#0#0#0#0#0#0#0#0#0#0#0#0#0#0#0#0#0#0#0#0#0#0#0#0#486
5HPRWH#9ROWDJH#6HQVLQJ #0#0#0#0#0#0#0#0#0#0#0#0#0#0#0#0#0#0#0#0#0#0#0#0#0#0#0#0#487
/RDG#&RQVLGHUDWLRQ#0#0#0#0#0#0#0#0#0#0#0#0#0#0#0#0#0#0#0#0#0#0#0#0#0#0#0#0#0#0#0#0#488
([WHQGLQJ#WKH#9ROWDJH#DQG#&XUUHQW#5DQJH 0#0#0#0#0#0#0#0#0#0#0#0#0#0#0#0#0#48:
6HULHV#&RQQHFWLRQV #0#0#0#0#0#0#0#0#0#0#0#0#0#0#0#0#0#0#0#0#0#0#0#0#0#0#0#0#0#0#0#0#48:
3DUDOOHO#&RQQHFWLRQV#0#0#0#0#0#0#0#0#0#0#0#0#0#0#0#0#0#0#0#0#0#0#0#0#0#0#0#0#0#0#0#48:
5HPRWH#3URJUDPPLQJ 0#0#0#0#0#0#0#0#0#0#0#0#0#0#0#0#0#0#0#0#0#0#0#0#0#0#0#0#0#0#0#0#0#48;
5HOLDELOLW\0#0#0#0#0#0#0#0#0#0#0#0#0#0#0#0#0#0#0#0#0#0#0#0#0#0#0#0#0#0#0#0#0#0#0#0#0#0#0#0#0#0#0#493
&KDSWHU#;##6SHFLILFDWLRQV
3HUIRUPDQFH#6SHFLILFDWLRQV #0#0#0#0#0#0#0#0#0#0#0#0#0#0#0#0#0#0#0#0#0#0#0#0#0#0#0#0#496
6XSSOHPHQWDO#&KDUDFWHULVWLFV 0#0#0#0#0#0#0#0#0#0#0#0#0#0#0#0#0#0#0#0#0#0#0#0#0#0#0#498

1
General Information

14
General Information
ThisistheUser’sguideforyourHP E3633AandE3634ADCpowersupplies. Unless
otherwise stated, the information in this manual applies to both two models.
This chapter provides a general description of your power supply. This chapter also
contains instructions for initial inspection, location and cooling for bench and rack
operation, selecting the power-line voltage, and connecting your power supply to ac
power.
Safety Considerations
This power supply is a Safety Class I instrument, which means that it has a protective
earth terminal. That terminal must be connected to earth ground through a power
source with a 3-wire ground receptacle.
Before installation or operation, check the power supply and review this manual for
safetymarkingsandinstructions.Safetyinformationforspecificproceduresislocated
at the appropriate places in this manual. See also ‘‘Safety’’ at the beginning of this
manual for general safety information.
Safety and EMC Requirements
This power supply is designed to comply with the following safety and EMC
(Electromagnetic Compatibility) requirements:
• IEC 1010-1(1990)/EN 61010-1(1993) + A2 (1995): Safety Requirements for
Electrical Equipment for Measurement, Control, and Laboratory Use
• CSA C22.2 No.1010.1-92: Safety Requirements for Electrical Equipment for
Measurement, Control, and Laboratory Use
• EN50082-1(1992):
IEC 1000-4-2(1995): Electrostatic Discharge Requirements
IEC 1000-4-3(1995): Radiated Electromagnetic Field Requirements
IEC 1000-4-4(1995): Electrical Fast Transient/Burst Requirements
EN61000-4-5(1995): Surge Requirements
EN61000-4-6(1995): Conducted Radio Frequency Immunity Requirements
EN61000-4-8(1993): Magnetic Field Requirements
EN61000-4-11(1994): Voltage dips, short, interruption and var Requirement
• Low Voltage Directive 73/23/EEC
• EMC Directive 89/336/EEC

Chapter 1 General Information
Options and Accessories
15
1
• EN55011(1991) Group1,ClassA/CISPR11(1990):LimitsandMethodsofRadio
Interference Characteristics of Industrial, Scientific, and Medical (ISM) Radio -
Frequency Equipment
Options and Accessories
Options
Option ‘‘0E3’’ and ‘‘0E9’’ determine which power-line voltage is selected at the
factory. The standard unit is configured for 115 Vac ± 10%, 47-63 Hz input voltage.
For more information about changing the power-line voltage setting, see ‘‘Power-
Line Voltage Selection’’, starting on page 22 in this chapter.
Option Description
0E3 230 Vac ± 10%, 47-63 Hz input voltage
0E9 100 Vac ± 10%, 47-63 Hz input voltage
1CM Rack mount kit (HP part number 5063-9243)
910 Extra manual set (same language as the selected language manual
set when you order the power supply)*
Accessories
The accessories listed below may be ordered from your local Hewlett-Packard Sales
Office either with the power supply or separately.
HP No. Description
10833A HP-IB cable, 1 m (3.3 ft.)
10833B HP-IB cable, 2 m (6.6 ft.)
34398A RS-232, 9 pin (f) to 9 pin (f), 2.5 m (8.2 ft.) cable; plus 9 pin (m) to
25 pin (f) adapter
34399A RS-232 adapter kit (contains 4 adapters):
9 pin (m) to 25 pin (m) for use with PC or printer
9 pin (m) to 25 pin (f) for use with PC or printer
9 pin (m) to 25 pin (m) for use with modem
9 pin (m) to 9 pin (m) for use with modem
*To order a separate set of English User’s guide and Service guide, order
HP part number E3634-90000.

Chapter 1 General Information
Description
16
Description
The HP E3633A and HP E3634A DC power supplies feature a combination of
programmingcapabilitiesandlinear powersupplyperformancethatmakesthemideal
for power systems applications. The power supply is programmable locally from the
front panelor remotely over theHP-IBand RS-232interfaces.Thispower supply has
two ranges, allowing more voltage at a lower current. An output range needed is
selected from the front panel or over the remote interfaces.
Operational features include:
• Dual range of single-output: 8V/20A and 20V/10A (HP E3633A),
25V/7A and 50V/4A (HP E3634A)
• Constant voltage (CV) or constant current (CC) operation
• Overvoltage protection (OVP) and overcurrent protection (OCP)
• Three storage locations (1 to 3) for user-defined operating states
• Automatic turn-on self-test
• Remote sensing for load voltage at the front or rear panel terminals
• User calibration from the front panel or over the remote interfaces
The front panel operation permits:
• Easy-to-use of knob control
• Output range selection
• Enabling or disabling OVP and OCP features
• Setting the OVP and OCP trip levels
• Clearing OVP and OCP conditions
• Setting and displaying the voltage and current limit values
• Saving and recalling operating states
• Returning the power supply to local mode from remote interface mode
• Retrieving/Scrolling error messages on the display
• Calibrating the power supply, including changing the calibration secure code
• Configuring the power supply for remote interfaces
• Enabling or disabling the output

Chapter 1 General Information
Description
17
1
When operated over the remote interface, the powersupply can be both a listener and
a talker. Using an external controller, you can instruct the power supply to set the
output and to send the status data back over the HP-IB or
RS-232. Capabilities include the following features:
• Voltage and current programming
• Voltage and current readback
• Present and stored status readback
• Programming syntax error detection
• Complete self-test
The front-panel VFD (Vacuum-Fluorescent Display) includes:
• Displaying actual values of output voltage and current (meter mode)
• Or displaying the limit values of voltage and current (limit mode)
• Checking the operating status from the annunciators
• Checking the type of error from the error codes (messages)
Connections to the power supply’s output and to chassis ground are made to binding
posts on the front panel and to the rear output terminals.
Warning Floating the power supply output more than ±60 Vdc from the chassis presents an
electric shock hazard to the operator. Do not float the outputs more than ±60 Vdc
when metal shorting bars without insulation are used to connect the (+) output to the
(+) sense and the (-) output to the (-) sense terminals.

Chapter 1 General Information
Description
18
Warning Outputs canbe floated to maximumof ±240 Vdcprovided that the metal shorting bars
without insulationare either replaced with insulated conductorsor they are removed
from the terminals so there is no operator access to the output conductors without
insulation. All field wiring insulation must be adequate for the voltage present.
The power supply is shipped with a detachable, 3-wire grounding type power cord.
The ac line fuse is an extractor type on the rear panel. The power supply can be
calibrated from the front panel directly or with a controller over the HP-IB or RS-232
interface using calibration commands. Correction factors are stored in nonvolatile
memory and are used during output programming. Calibration from the front panel
or a controller eliminate the need to remove the top cover or even the need to remove
the power supply from your system cabinet. You can guard against unauthorized
calibration by using the “Secured” calibration protection function.

Chapter 1 General Information
Installation
19
1
Installation
Initial Inspection
When you receive your power supply, inspect it for any obvious damage that may
have occurred during shipment. If any damage is found, notify the carrier and the
nearest HP Sales Office immediately. Warranty information is shown in the front of
this manual.
Keep the original packing materials in case the power supply has to be returned to
Hewlett-Packard in the future. If you return the power supply for service, attach a tag
identifying the owner and model number. Also include a brief description of the
problem.
Mechanical Check
Thischeck confirms that there are no broken keys or knob, that the cabinet and panel
surfacesarefreeofdentsandscratches,and thatthedisplayis notscratchedorcracked.
Electrical Check
Chapter 2 describes an initial operation procedure which, when successfully
completed, verifies to a high level of confidence that the power supply is operating
in accordance with its specifications. Detailed electrical verification procedures are
included in the Service Guide.
Cooling and Location
Cooling
The power supply can operate without loss of performance within the temperature
range of 0 °C to 40 °C, and with derated output current from
40 °C to 55 °C. A fan cools the power supply by drawing air through the rear panel
andexhaustingit outthesides.UsinganHPrackmountwillnotimpedetheflowof air.
Bench Operation
Your power supply must be installed in a location that allows sufficient space at the
sides and rear of the power supply for adequate air circulation. The rubber bumpers
must be removed for rack mounting.
This manual suits for next models
1
Table of contents
Other HP Power Supply manuals

HP
HP J2962A Installation and operating manual

HP
HP 11900 User manual

HP
HP 6177B Service manual

HP
HP A7502 User manual

HP
HP 710B Parts list manual

HP
HP E3610A Service manual

HP
HP 6960A Service manual

HP
HP StorageWorks SN6000 User manual

HP
HP HPJ3136A Installation and operating manual

HP
HP 6104A Service manual