manuals.online logo
Brands
  1. Home
  2. •
  3. Brands
  4. •
  5. Hughes
  6. •
  7. Modem
  8. •
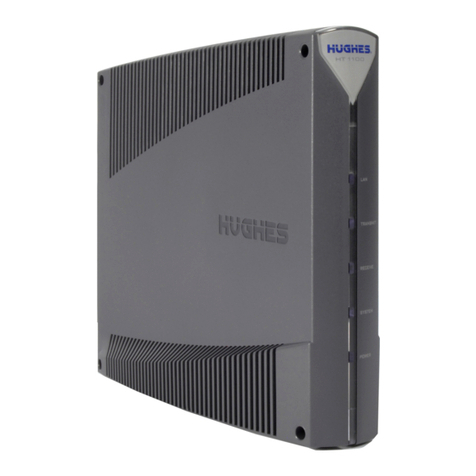
  9. Hughes dishNET HT 1000 Parts list manual

Hughes dishNET HT 1000 Parts list manual

1 2
34
Replacement Guide for the HT1000 Satellite Modem
1039585-0001 Revision A AUGUST 23, 2012
Disconnect the old modem
CAUTION
1. Unplug the power plug from the surge protector or power outlet
This is to avoid static electricity discharges that could shock you and/or
damage the modem.
first (circled
in red).
Note: The modem does not have a power (off-on) switch.
Connect and power up the new modem
Make sure the SAT connector cable threads are
together. Securely hand tighten these connectors; do not use a wrench.
properly aligned so they will fit
NOTICE
5. Connect the DC power cord to the DC IN socket on the modem rear panel.
(See Figure 3.)
6. Plug the AC power cord into the surge protector or power outlet.
4. Refer to Figure 3 and connect the LAN and SAT connectors . When you plug in the power cord, the new modem begins an automatic installation
process. Some of the blue indicator lights on the modem’s front panel blink on and off.
Wait for the modem to become operational
Wait 10 minutes for installation to complete.
During this time you will not be able to use the modem.
NOTICE
This section explains how to make sure the new modem is ready to use. Make sure
you have waited 10 minutes since you plugged in the power cord.
1. Use a browser such as Internet Explorer to go to any Internet web site.
If you see the web page, the new modem is ready to use, and you can skip
the remaining steps in this section.
Check modem operation
Figure 4 Green System Status on System Control Center home page (partial view)–
2. Launch an Internet browser.
3. Type www.systemcontrolcenter.com in the browser address bar, and
press Enter.
The System Control Center home page opens, as shown in Figure 4.
If the System Status button is green, the modem is operating normally, and you
should be able to access the Internet.
If you cannot access a web site...
(Continued on panel 5)
4. Try again to open an Internet web page.
If you can open a web page, the modem is ready to use.
Important: Pay special attention to any information
indicated by or .
CAUTION NOTICE
Follow these instructions to replace an HT1000 satellite modem with a new one. In
these instructions, old modem refers to the satellite modem that needs to be replaced,
and new modem refers to the replacement modem.
You have 30 days from the date the new modem is shipped to you to replace the
old modem. This is because Hughes Customer Care authorizes and enables the
replacement over the satellite network, and this authorization expires after 30 days.
7
You may need a /16 inch wrench (as explained in Figure 2).
Unpack the new modem.
Important—Keep the following items:
Preparing to replace your satellite modem
● Box and packing material to return
the old modem to Hughes.
● UPS return label for pre-paid
shipment of the old modem back to
Hughes.
Modem
rear panel
LAN port
Ethernet
cable
Installer laptop PC
G47380a C
SAT connector
Transmit
cable
DC IN
power connector
DC
power
cord
Power
supply
Surge protector
AC
power
cord
AC
power
outlet
Modem
rear panel
LAN port
Ethernet
cable
Installer laptop PC
G47380a C
SAT connector
Transmit
cable
DC IN
power connector
DC
power
cord
Power
supply
Surge protector
AC
power
cord
AC
power
outlet
2. Unplug all the cables
3. Set the old modem aside.
Panels 6 and 7 explain how to return the old modem to Hughes.
Loosen the SAT
connector cable by hand.
However, if necessary,
use a 7/16 inch wrench.
Figure 2 Disconnecting cables from the old modem–
Figure 3 Connecting cables to the new modem–
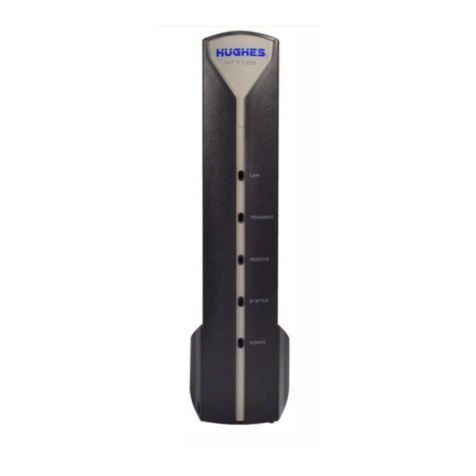
Figure 1 HT1000 satellite modem–
Do not unplug the modem power cord during installation.
CAUTION
Plug the power plug into the surge protector or power outlet
This is to avoid static electricity discharges that could shock you and/or damage the
modem.
last (circled in red).
Why is text for several steps in 1 text
frame, but in other places it’s 1 step per
frame? Usually it’s continuous unless you
need to insert something like a NOTICE
or if a graphic requires nonstandard
spacing. (Usually best if continuous so
spacing between paragraphs is uniform.)
Spacing - Heading
to line below. (But
spacing below the
doc title is more.) Try again to open an Internet web page.
If you can open a web page, the modem is ready to use.
56
78
Copyright © 2012 Hughes Network Systems, LLC
All rights reserved. This publication and its contents are proprietary to Hughes Network Systems, LLC. No part of
this publication may be reproduced in any form or by any means without the written permission of Hughes Network
Systems, LLC, 11717 Exploration Lane, Germantown, Maryland 20876. Hughes Network Systems, LLC has
made every effort to ensure the correctness and completeness of the material in this document. Hughes Network
Systems, LLC shall not be liable for errors contained herein. The information in this document is subject to change
without notice. Hughes Network Systems, LLC makes no warranty of any kind with regard to this material,
including, but not limited to, the implied warranties of merchantability and fitness for a particular purpose.
Trademarks
Hughes, HughesNet, and Hughes Network Systems are trademarks of Hughes Network Systems, LLC. All other
trademarks are the property of their respective owners.
To ship the equipment, take the box to any staffed UPS location or
give the box to any UPS driver.
You can find UPS locations online at www.ups.com/dropoff
1. Enter your address.
2. Select the type of location you want to search for. Staffed UPS locations
include those designated as::
• The UPS store
• UPS customer centers
• UPS Alliance locations
• Authorized shipping outlets
3. Click the Select button and the locations of the preferred centers will be
displayed on a map
Do not take the box to a UPS Drop Box – it will not fit.
If a pickup is required, call UPS at 1-800-742-5877. Say “send a package” and
then “schedule a pickup”. Be prepared to give the full UPS tracking number.
Track the return package
You can track the return package online at with the tracking
number.
www.ups.com
Check return shipment status
You can check the status of your return shipment online at
http://rmastatus.hughesnet.com. You will need your site account number (SAN) or
RMA number. The RMA number appears on the return label, as shown in Figure 5.
If you need assistance
● RMA number from the UPS return label. (See Figure 5.)
● Your site account number (SAN) from your HughesNet bill or statement.
● Serial number of the new modem. (See Figure 4.)
If you have a question or need assistance, call HughesNet Customer Care, toll-free,
at 1-866-347-3292. Please read these instructions before you call.
If you cannot complete the replacement procedure, it may be that the replacement
was not authorized or that the 30-day authorization period has expired.
If you call for assistance, tell the Customer Care representative that you are installing
an HT1000 replacement modem and the problem you are having (for example,
I cannot open an Internet web page.) Please have the following information ready:
New modem
rear panel
Figure 4 Serial number location–
Serial number
(All numbers
that follow SN)
Check modem operation—Continued
If you have followed these instructions and you cannot open an Internet web page or
you cannot open the System Control Center, call Customer Care for assistance. See
the next section for details.
5. If you still cannot access a web site, reboot your computer.
6. Try again to open an Internet web page.
If you can open a web page, the modem is ready to use.
Note: You will need
it for any inquiry. Also record the tracking number if you want to track the
return shipment to Hughes. The RMA number and tracking number both
appear on the UPS return label, as shown in Figure 5.
Record your return material authorization (RMA) number.
Figure 5 - Return label example showing the RMA number and tracking number
Pack the old modem to return it to Hughes
1. Pack the old modem, power supply, and cables in the
box that the new modem was shipped in.
2. Tightly seal the box with packaging tape. (Use only packaging tape.)
3. Place the UPS return label (to Hughes Network Systems) on the box so it
covers the old label with your address on it.
packing material and
To avoid being charged for unreturned equipment, return the old modem to
Hughes within 30 days from the date the new modem is shipped to you. Please
return your old modem, old power supply, and any cables you are not using.
1039585-0001 Revision A AUGUST 23, 2012
Ship the package
Why is text for several steps in 1 text
frame, but in other places it’s 1 step per
frame? Usually it’s continuous unless you
need to insert something like a NOTICE
or if a graphic requires nonstandard
spacing. (Usually best if continuous so
spacing between paragraphs is uniform.)
Spacing - Heading
to line below. (But
spacing below the
doc title is more.) Try again to open an Internet web page.
If you can open a web page, the modem is ready to use.

Other manuals for dishNET HT 1000

1

Other Hughes Modem manuals

Hughes Thuraya IP+ User manual

Hughes

Hughes Thuraya IP+ User manual

Hughes ThurayaIP User manual

Hughes

Hughes ThurayaIP User manual

Hughes DW4020 User manual

Hughes

Hughes DW4020 User manual

Hughes Direcway DW6000 User manual

Hughes

Hughes Direcway DW6000 User manual

Hughes HX200 Operating and maintenance manual

Hughes

Hughes HX200 Operating and maintenance manual

Hughes Satellite IP Modem R-BGAN User manual

Hughes

Hughes Satellite IP Modem R-BGAN User manual

Hughes dishNET HT 1000 User manual

Hughes

Hughes dishNET HT 1000 User manual

Hughes JUPITER System HT2000 User manual

Hughes

Hughes JUPITER System HT2000 User manual

Hughes HughesNet HT1-00 Series User manual

Hughes

Hughes HughesNet HT1-00 Series User manual

Hughes HN9400 User manual

Hughes

Hughes HN9400 User manual

Hughes dishNET HT 1000 User manual

Hughes

Hughes dishNET HT 1000 User manual

Hughes HN9000 User manual

Hughes

Hughes HN9000 User manual

Hughes Direcway DW4000 User manual

Hughes

Hughes Direcway DW4000 User manual

Hughes HX50 User manual

Hughes

Hughes HX50 User manual

Hughes Jupiter HT1100 User manual

Hughes

Hughes Jupiter HT1100 User manual

Hughes HN7000S User manual

Hughes

Hughes HN7000S User manual

Hughes Hylas 2 - freedomsat User manual

Hughes

Hughes Hylas 2 - freedomsat User manual

Hughes 9100 UMOD User manual

Hughes

Hughes 9100 UMOD User manual

Hughes HT2000W Parts list manual

Hughes

Hughes HT2000W Parts list manual

Hughes HN9800 User manual

Hughes

Hughes HN9800 User manual

Hughes HN9200 User manual

Hughes

Hughes HN9200 User manual

Hughes HN Series User manual

Hughes

Hughes HN Series User manual

Hughes HN9000 User manual

Hughes

Hughes HN9000 User manual

Hughes PES 5000 User manual

Hughes

Hughes PES 5000 User manual

Popular Modem manuals by other brands

Alvarion 4M-CPE4000-Si-1D-1V-2.5 user guide

Alvarion

Alvarion 4M-CPE4000-Si-1D-1V-2.5 user guide

TeleWell TW-LTE/4G/3G Quick manual

TeleWell

TeleWell TW-LTE/4G/3G Quick manual

CTC Union SDTU-01 user manual

CTC Union

CTC Union SDTU-01 user manual

Chonghan CH-M1 user manual

Chonghan

Chonghan CH-M1 user manual

Arris SURFboard TM822R quick start guide

Arris

Arris SURFboard TM822R quick start guide

Gogen USBWIFI1 user manual

Gogen

Gogen USBWIFI1 user manual

Ebyte E90-DTU user manual

Ebyte

Ebyte E90-DTU user manual

Zte MF823 quick guide

Zte

Zte MF823 quick guide

Juniper G10 CMTS installation guide

Juniper

Juniper G10 CMTS installation guide

Ebyte MA02-AAC 2220 Series user manual

Ebyte

Ebyte MA02-AAC 2220 Series user manual

REPEATIT SU-100 MIMO quick start guide

REPEATIT

REPEATIT SU-100 MIMO quick start guide

Globalstar 9600 quick start guide

Globalstar

Globalstar 9600 quick start guide

Frontier 5667 Self-installation guide

Frontier

Frontier 5667 Self-installation guide

Arris Touchstone TM608 installation guide

Arris

Arris Touchstone TM608 installation guide

Eaton xComfort CKOZ-00/14 Assembly instructions

Eaton

Eaton xComfort CKOZ-00/14 Assembly instructions

Nokia MobilityPass 3G Settings guide

Nokia

Nokia MobilityPass 3G Settings guide

Patton electronics 1092 quick start guide

Patton electronics

Patton electronics 1092 quick start guide

Motorola VML750 installation guide

Motorola

Motorola VML750 installation guide

manuals.online logo
manuals.online logoBrands
  • About & Mission
  • Contact us
  • Privacy Policy
  • Terms and Conditions

Copyright 2025 Manuals.Online. All Rights Reserved.