5. Wiring Diagram
8. Trouble Shooting
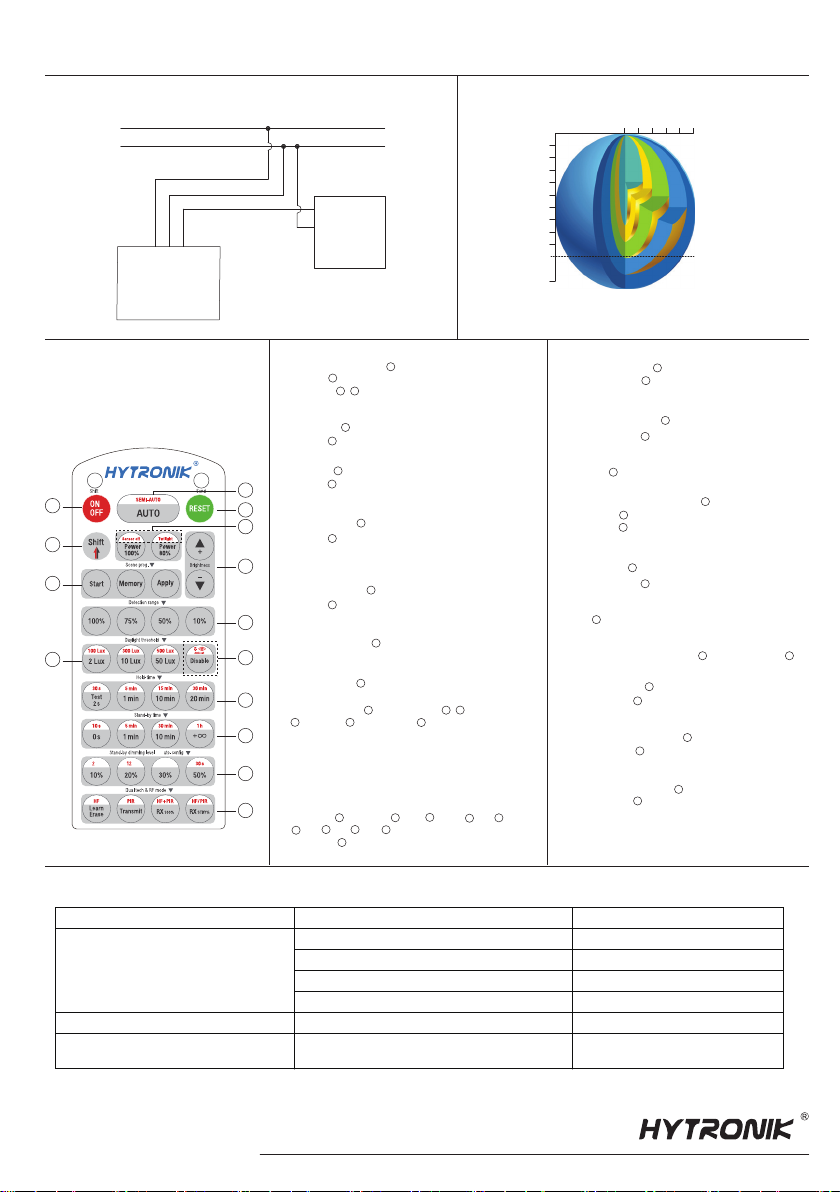
Descriptions of the
Button Functions
(remote control HRC-11)
MALFUNCTION CAUSE REMEDY CAUSE REMEDY
The fixture does not light up
The fixture is always on
Check detection area setting
The fixture is on when it should not
Incorrect daylight threshold setting
Continous movement in the detection zone
Sudden change in temperature due to weather (wind, rain, snow) or air
expelled from fans, open windows
Detection zone not targeted
Faulty fixture
No power supply
Adjust daylight threshold setting
Replace fixture
Check power to sensor
Check detection area setting
Adjust zone, change installation site
7. Permanent ON/OFF [ ]
Press button to select permanent ON or permanent OFF mode.
* Press button / to resume automatic operation.
The mode will change to AUTO Mode after power failure.
Power output [ button ]
Press button , the light output shifts between 80% and 100%.
Note: the function of “Sensor off” and “Twilight” are disabled.
Detection range [ zone ]
Press buttons in zone to set detection range at 100% / 75% /
50% / 10%.
Daylight threshold [ zone ]
Press buttons in zone to set the daylight sensor at 2Lux / 10Lux /
50Lux / 100Lux / 300Lux / 500Lux or Disable.
Note: To set daylight sensor at 100Lux / 300 Lux / 500Lux, press
button Shift at first.
button
Auto Mode [ button ]
Brightness +/- [ button ]
Scene prog. [ zone ] (One-key-commissioning)
Shift [ button ]
RESET [ button ]
Press button , all settings go back to the rotary switch settings.
Press button to initiate automatic mode. The sensor starts working
and all settings remain as before the light was switched ON/OFF.
Note: the function of Semi-auto is disabled.
1. Press button “Start” to program.
2. Select the buttons in “Detection range”, / “Daylight threshold”,
“Hold time”, “Stand-by time”, “Stand-by dimming level” to
set all parameters.
3. Press button “Memory” to save all the settings programmed in the
remote control.
4. Press button “Apply” to set the settings to each sensor unit(s).
For example, to pre-set detection range 100%, daylight threshold
Disable, hold time 5min, stand-by time +∞, stand-by dimming level
30%, the steps should be as follows:
Press button Start, button 100%, Disable, Shift, 5min,
Shift, +∞ , 30%, Memory. By pointing to the sensor unit(s)
and pressing Apply, all settings are passed on the sensor(s).
Press button , the LED on the top left corner is on for indication.
All values / settings in RED are valid for 20 seconds.
18
3
9
Dual tech & RF mode [ zone ]
All buttons in zone are disabled.
14
14
Hold time [ zone ]
2
11
11
11
Ambient daylight threshold [ button ]
1. Press button Shift, the red LED is on for indication.
2. Press button , the ambient lux level is sampled and set as the
new daylight threshold.
3
10
10
9
8
2
2
3
3
4
4
5
6
7
7
7
7
3
3
8
8 9
10
10 11
1312
11 12 13
5
1
2 4
3
HMW30-20180529-A2
Hytronik Industrial Ltd. | www.hytronik.com
3rd Floor, block C, complex building, 155#, Bai'gang road south,
Bo'gang village, Xiao Jin Kou town, Huicheng district, Huizhou 516023
Tel: 86-752-2772020 Fax: 86-752-2777877
HRC-11
&
A
4 hh
4h
1
3
7
9
6
8
10
11
12
13
14
2
4
5
HMW30
Brown
LED driver
L
N
L
N
Blue
Grey
These two buttons are disabled.
Press buttons in zone to set the hold time at 2s / 30s / 1min /
5min / 10min / 15min / 20min / 30min.
Note: 1.To set hold-time at 30s / 5min / 15min / 30min, press button
Shift at first.
2. 2s is for testing purpose only, stand-by period and daylight
sensor settings are disabled in this mode.
*To exit from Test mode, press button or any button in zone .
10%
30%
75%
50%
Ceiling mounted detection pattern (m)
Ceiling mounted height(m)
10
0
20
Detection Pattern6.
* For single person walking across, the detection range is reduced by 1/3.
Stand-by time [ zone ]
12
12
All buttons in zone are disabled.
Stand-by dimming level [ zone ]
13
13
All buttons in zone are disabled.
(forklift)


