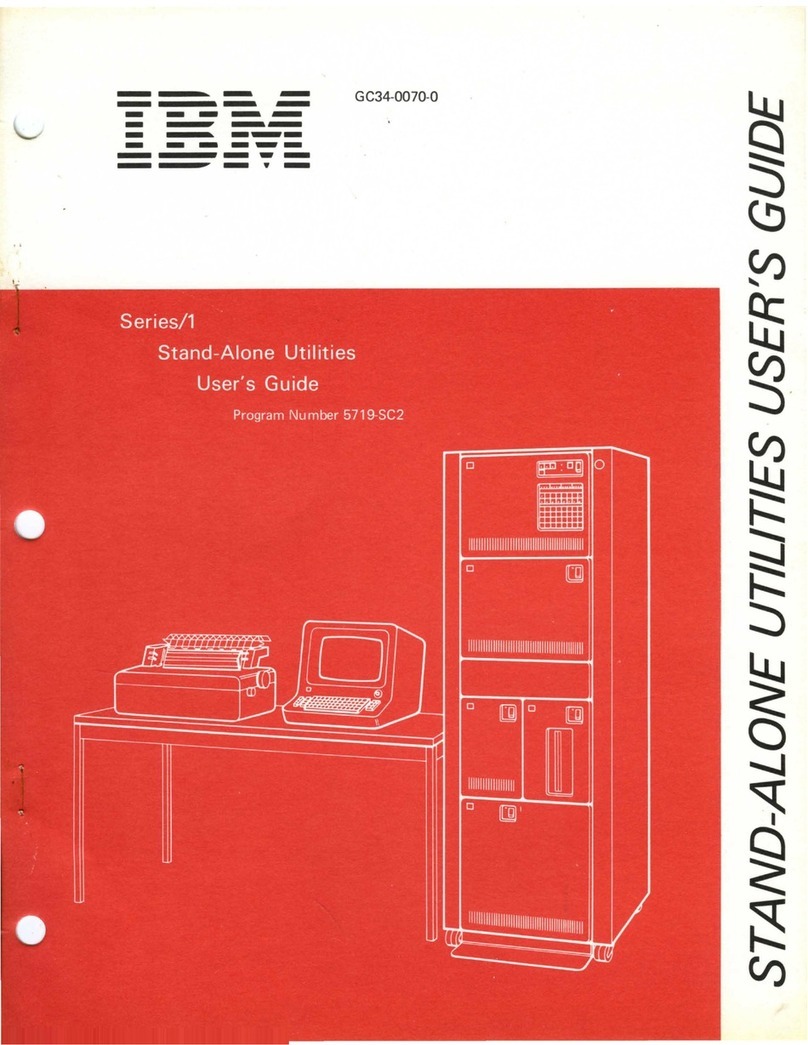
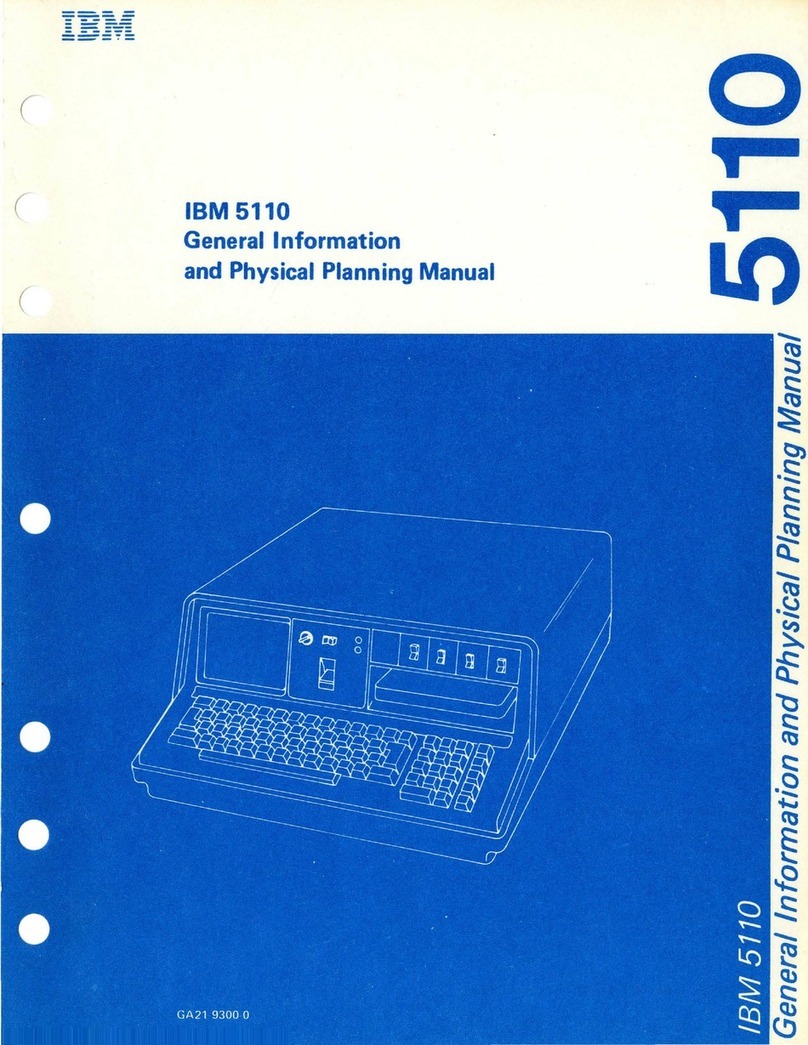
IBM 6580 Installation instructions

IBM
6360
Diskette
Unit
IBM
6580
Display
Station

The
drawings and specifications contained herein
shall
not
be
reproduced
in
whole
or
in
part
without
written
permission.
IBM
has prepared this maintenance manual
for
the
use
of
IBM
Customer Engineers in the installation,
maintenance
and
repair
of
the
specific machines
indicated.
IBM
makes no representations
that
it
is
suitable
for
any
other
purpose.
Information contained in this manual is subject to
change
from
time
to
time.
Any
such change will be
reported
in subsequent revisions or distributed
through Customer Engineering Memorandums
(CEMs) to all subscribers.
Requests for copies
of
IBM publications should be
made
to
your
IBM
representative
or
to
the
IBM
Branch Office servicing
your
locality.
Commentsabout
the
publicationsmay be addressed
to (IBM Corporation,
740
New Circle Road N.W.,
Publications
Department
901,
Lexington, Ky.
40511).
IBM
may
use
or
distribute any
of
the
information
you
supply in
any
way
it
believes
appropriate
without
incurring
any
obligation what-
ever. You may,
of
course, continue to use
the
information
you
supply.
"It
is possible
that
this material
may
contain
reference to,
or
information
about,
IBM
products
(machines and programs), programming,
or
services
that
are
not
announced in
your
country. Such
references
or
information
must
not
be
construed to
mean
that
IBM
intends to
announce
such
IBM
products,programming,
or
services
in
your
country."
"IBM," "Executive," "IBM EXECUTARY," and
"Selectric" are registered trademarks
of
the
IBM
Corporation.
©Copyright International Business Machines
Corporation'1980,
1981
SAFETY
PRECAUTIONS
All
IBM Customer Engineersare expected
to
take every safety precaution possible and observe
the
following
safety practices when servicing IBM equipment.
Mechanical Sa!ety:
1.
Safety glasses
must
be worn.
2.
All
safety devices, such
as
guards, shields, signs,
ground wires, etc.,
must
be restored after main-
tenance. When a guard
or
shield
is
removed to
observe
or
make
an
adjustment, that shield
must
be replaced when
work
in
the
area
is completed.
3.
Watches, rings, necklaces, ID bracelets, etc.,
must
be removed when servicing the machine.
4.
Care
must
be used when working near moving
parts. Keep hair away from moving parts. A void
wearing loose clothing that
might
be caught
in
the machine. Shirt sleeves
must
be
kept
but-
toned or rolled above the elbows. Ties
must
be
tucked in the shirt or have a tie clasp approxi-
mately three inches from the end. Tie chains
are
not
recommended.
Electrical Safety:
1.
The equipment referenced
in
this manual
may
use high voltages. Check voltage labels!
2.
Safety glasses
must
be worn when checking
energized circuits.
3.
If
a circuit is disconnec
ted
for
servicing or parts
replacement,
it
must
be reconnected and tested
before allowing the use
of
the machine.
4.
Power should be removed
f;'Om
the machine for
servicing whenever possible. Remember, when
checking voltages, avoid contacting ground
potential, such
as
metal floor strips, machine
frame, etc.
5.
Meter continuity checks should be used instead
of
voltage checks whenever possible.
6.
Do
not
apply power to any part, component,
or subassembly when
it
is
not
physically
mounted
in the machine,
or
its approved ser-
vice position.
General Safety:
1.
Each Customer Engineer
is
responsible to be
certain
rIO
action
on
his/her part makes the
product unsafe or exposes customer personnel
to hazards.
2.
Store the removed machine covers in a safe,
out
of
the way place where no one can trip
over them.
3.
If
you
must
leave the machine
in
a down condi-
tion, always install the covers and disconnect
the power before
leaVing
the customer's office.
4.
Always place
CE
tool
kit
away from walkareas
where no one
can
trip over
it.
5.
Maintain safe conditions in the area
of
the
machine while performing and after completing
maintenance.
6.
Before starting the eqUipment,
makesurefellow
CEs
andcustomerpersonnel are
not
in a hazard-
ous position.
7.
A
II
the machine covers
must
be in place before
the machine is returned to the customer.
Note:
Refer
to the Safety CEMs relating to this
product(s) for further safety precautions.


PREFACE
This manual is written for use
by
experienced
US
and World Trade service personnel. Refer
to
other
product publications
if
additional information is
needed.
The display formats shown in this manual are
subject
to
minor changes due
to
software improve-
ments. Future versions
of
this manual will reflect
any changes.
Where applicable, component locator drawings,
adjustments, and other service aids are given
by
module. This manual is in seven sections.
The Display, Keyboard, and Diskette sections
contain service information, adjustments, and
removal/replacement procedures.
The System Electronics/Power Supply section
contains service information and removal/replace-
ment procedures.
The Cables, Connectors, and Test Points section
helps locate test points in
the
system. Point
to
point wiring is shown for tracing wires and voltages
through
the
system.
The Diagnostics section gives a summary
of
the
diagnostic package. Charts and flowcharts provide
reference information for operating procedures and
test results.
More detailed descriptions and operating instruc-
tions are provided for
the
diagnostic procedures
that
are
not
self-explanatory. The display formats
that
require interaction, and are
not
self-explana-
tory, are described.
The Intermittent Problem Diagnostic Approach
section is a guide
to
help service personnel solve
intermittent system problems. These procedures
should be used only after
MAPs
have failed
to
isolate the problem.
The Operating Instructions section lists some
of
the basic menu sequences available
to
the operator.
These menus permit the operator
to
perform
tasks and functions that are available in the
IBM
licensed Program Textpack
1.
Since customer
applications, menu sequences, and basic system
operation are a result
of
software programs, the
most current Operator Reference Guide should
always be used
as
a reference source for system
operation or function.


DISPLAY
Page
Service Information
Service
Aid.
. . . . . . . . . . . . . . . . . . . 1
Operator Controls
...................
1
Fonts .
..........................
2
Removals/Replacements
Display
......
....................
3
KEYBOARD
Service Information
Locator
..................
.
Key
Module Operation .
.........
.
Shift-Lock Mechanism
...
.
6
7
Basic Assurance Test
(BAT)
.............
. 7
7
8
Matrix Chart . . . . . . . . . . . . . . . . . . . . . . .
Data Flow .
................
. 9
Keybutton
Position. . . . . . . . .
...
. ·
....
. 10
Keyboard Arrangements
.........
. ·
.....
11
Tools and Equipment . . . .
......
. ·
.....
11
Qeaning Procedures. . . . . . . . . . . . . ·
.....
11
Adjustments
Shift
Lock
Brake
Adjustment
. . . . . . . . .
....
12
Removal/Replacements
Keyboard Cover . . . . . . . . . . . . . . .
..
13
PI11;i
Card
.
........................
13
Key
Module
.......................
14
Fly Plate Replacement
.................
15
Shift-Lock Mechanism . . . . .
.....
16
Spacebar Mechanism . . . . . .
.....
16
SYSTEM
ELECTRONICS POWER SUPPLY
Service Information
Locator.
. . . . . . . . . . . . . . . .
......
18
DC Voltage Distribution
................
19
LEDs "
.........................
19
AC
Voltages
.......................
20
DC Voltages
.......................
20
Fuses .
.........................
.
20
Currents
....
. . . . . . . . . . . . . . . .
.....
20
TABLE
OF
CONTENTS
Printer Sharing Configuration . . . . . . . . .
.20
Removals/Replacements
Cover .
..........................
21
Electronic Cards. . . . . . . . . . . . . . . . . . . . .
21
Distribution Board . . . . .
.....
22
Power Supply . . . . . . . . . . .
....
23
DISKETTE
UNIT
Service Information
~~~
..........................
U
Service
Aid.
. .
..............
26
Diskette Handling .
...................
27
Data Flow . . . . . . . . . . . . . . . . . . . . . . . . 28
Power/Signal Distribution
...............
29
Read/Write Flowchart . . . . . . . . . .
.......
30
Service
Aid
. . . . . . . . . . . . . . . . . . . . . . . .
31
Special Tools
......................
31
Adjustments
Operator Handle Adjustment, Collet/Flat
Spring
Adjustment
Check . . . . . . . .
Solenoid and Bail
Adjustment
.....
.
StepperDrive Band
Adjustment
.
...
.
Head Carriage
Adjustment
.......
.
Removals/Replacements
...
32
...
33
...35
...36
Cover .
..........................
37
Right
Diskette Drive
.......
. . . . . . . . .
..
37
Head LoadBail
.....................
37
Diskette Guide
Assembly.
'.'
. . . . . . . . . .
...
38
Head
Load
Arm
Pad
Replacement.
. . . . . . . .
..
39
Bail Solenoid and Idler . . . . . . . . . .
......
40
LED
and PTX/File Control Card
...........
41
Diskette Adapter Card
..........
......
42
Head/Carriage Assembly
................
42
Pulley and Drive Band
..............
..
43
StepperMotor . . . • . . . . . . . . . . . . . . . . . . 43
Drive Band Replacement . . . . . . . . . . . . . .
..
43
CABLES, CONNECTORS &
TEST
POINTS
Locator Chart (For
Use
With MAPs)
....
. ·
....
46
AC
Voltage Wiring Diagram .
........
. ·
....
53
AC
Voltage Grounding Path Schematic
..
. ·
....
56
Locator Chart (Point To Point Wiring Checks) . ·
...
.
60
DIAGNOSTICS
Basic Assurance Test (BAT)
..........
.
Display Format
....
BA
T Progress Error Codes . . . . . .
...
. . . . 88
..
..
89
....
89
Resident Non·Automatic
(RNA)
Diagnostics .
......
90
Display
Format.
. . . .
.......
91
Diagnostic Tests .
...................
92
Customer Engineer (CE) Loadable Diagnostics . . . . . . 93
Display Format
....................
94
Keyboard Function .
.................
95
MDT
Run
Time Options
...............
95
MDT
Run
Time Options
Menu·
Stop
On
Options.
95
MDI Test Unit Numbering . . . . . . . . . . . . . . 95
MDIPrompt Responses
...............
96
MDI
Prompts
.....
.
..............
97
MDI Display Typing Area orMenu Area
......
99
MDI Trace Display. . . . . . .
...
100
CE Utilities .
.........
.
Error Log
Utili~y
Group
System Error Log . . . .
Error Log
Dump
Procedure
System Exerciser. . . . . . . . . .
LoadProgram Function
..
Diskette Unit (6360) Head
Alignment Compatabiliry Check
....
Field Engineering Service Number/Release
Version Modification (FESN/RVM)
DIAGNOSTICS (Continued)
·
..
. 101
·
...
101
.101
.102
.103
·
..
.
104
....
. 104
....
. 104

DIAGNOSTICS (Continued)
Licensed Program Guidelines
...
.
....
.
104
Memory Card Configuration
................
.
104
INTERMITTENT
PROBLEMDIAGNOSTICAPPROACH
Introduction
.....
. . . . . . . . . . . . . . . . . . .
..
106
Data Coliection . . . . . . . . . . . . . . . . . . . . . . . . . 1U7
Instructions
......................
.
107
Problem Isolation
......................
.
107
Section 1 Keyboard Isolation
...............
.
108
Section 2 Display Isolation. . . . . . . . . . . . . . .
...
109
Section 3 ElectronicModule Isolation
...
.
.......
109
Section 4 Diskette Unitlsolation
.......
.
110
Section 5 5215 Printer Isolation
..............
111
Section 6 5218 Printer Isolation
..............
112
Section 7 Printer Sharing Isolation . . . . . . . . . . .
..
112
Section 8 Power Supply Isolation . . . . . . . . . . . . . . 113
Section 9 Isolation Undetermined
...........
..
113
Section
10
Software/OperatorProcedures .
........
114
Section
11
Environment . . . . . . . . . . .
........
114
Questions. . . . . . . . . . . . . . . . . . . . . . .
..
114
Recommendation _
...................
114
Section 12 History Build . . . . . . . . . . . . . . . . . . .115
Section 13 Service Request Numbers . . . . . . . . . . . .115
Section 14
BAT
Failures . . . . . . . . . . . . . . . .
...
116
Pre-CRTInitialization
BAT
Failures.
.........
116
Post-CRTInitialization
BAT
Failures .
........
116
Section 15 Diskette
RNA
Test Failure Codes
.......
116
Drive
Set
Ready Test (L) .
...............
116
StepperMotor Phase Test (M)
.............
116
Track Step Test (T)
..................
117
Section 16 Guidelines
for
Error
Log
Interpretation
....
117
Section 17 Trace Table
Usage
. . . . . . . . . . .
.....
118
OPERATING INSTRUCTIONS
Menu Sequences
Typing Tasks. . . . . . . . . . . . . . . . . . . . . .
120
Work Diskette Tasks.
.................
121
Program Diskette Tasks. . . . . . . . . . . . . . . . 122
Spelling
Tasks.
. . . . . . . . . . .
....
123
Change Format
Key.
. . . . . . . . . . . . . . . . . 124
Request
Key
.
.....................
125
Instructions
......................
126

CAUTION
Do
not remove the display covers. Operating voltages
np to 14,000 volts are present inside the display.
No
bleeder
resistor is provided.
SERVICE
AIDS
The display Illodule
is
a field replaceable unit (FRU) which
is
not
field serviceable.
The raster
is
a normal background image on
the
display
screen which
is
visible when the brightness control
is
turned
up (clockwise)
all
the way.
A blank screen
or
blank
area
of
the
screen may
not
be a
problem
in
the display module. The problem may be a
change
in
or
a loss
of
the input signals.
NOTE: When a displayed character
is
changed an
"after·
image" will remain for a short time.
I!irO-;;--+----Brightness
Display Raster
DISPLAY -Service Aids, Operator Controls
-1-

-2-
DISPLAY
-
Fonts
1 2
0 1 2 3
I.f
5 6 7 8 9 A B C o E F e 1 2 3 Y 5 6 7 8 9
ABC
0 E F
0 t , + &
!:
"
!a
.u
¢ { }
'\.
e e
~
L (j .i !: n =
ra
!!!
0 { }
'.
0
: If
...
e /
E:
j -
£.
A J 1 1 +
F3
i s
...
~
u
C!
3 1 Q 1
1 J • a
AE L 5 = < =
2
~
. a e b k s ¥ B K 5 2 2 n
~
v c a K 0' 2 .. § r 2
3
~
~
J a At 1 t
~
C L T 3 3 h
:t
z r ->
"j"'W1'3
1¥
Q
..
3
e c
I.f
..
.
..
.
,I
a e AEd m u f 0 M U Y Y § i Z R + R
II
•
41
.u
.~
..
q,
d ::
..
5
tt"
••
a A t e n v § E N V 5 5 ! u c t co l " L € v x 5
........
5
6
..
:.
v a A t f o w
11
F a w6 6
GOt
t
If
:_ <
IT
o 0 Ii
IT
~
t, Ii
7
-I
0 A I
~
G P X 7 7 a e r r Q
/I
>
~
" l
::
7
.!.
a 1 9 P x P X 7
8 : f ¢
~
0;
I; i h q
~
YtHQY8
8 AE
L:
R
..
'lo
+ n y v 8
1r
r T e
9
ttl[4tnB
N r z
~
I R Z 9 9
~
d I S / :
)(
1 8 l; 9 t e
~
9
A
~
1 [ ] « ! i 2 J A
~
0 t $ [ ] . +
..L
-C -
iJ
...
-1 r t1
B H
~
Ii
$
**
»
Si!
i..
6
Ii
0 U B t z n
t:
t i
:!:
t
~
~
..
...
"
C D
[!
< *
~
9
~
l2
0 U 0 0 C T ZN
l'
<
~
• L 1 J
JIJ
J'
..
0 ¢ •
,t
0
..
[&
~
y
..
0
Ii
aU 0 c n 0 ) I
..
-£ -
..
s'
oft . (
,.
'$
E
..
.. +
1:1
IE
Il
6
U.
0 (j E . C N 0
~
..
( )
{):(
'"
r
1t
> = >
F 7 .
)(
~
0 0 F I u a , . J t l J ¥
l)
t:'.
J
:!:
~
"
= Display Fonts

DISPLAY
1.
Turn the system power off.
2.
Disconnect
the
system
AC
power cord.
3. Disconnect the display connector from
the
electronics
module Panel 1.
4.
Lift
the
display module uP. releasing
the
interlock.
5. Pack
the
display
in
a display packing box.
CAUTION
Do not transport the display module unless it is suitably
packed. The display may burst inward
if
broken.
DISPLAY -
Removals/Replacements
·3·
Interlock


TABLE
OF
CONTENTS
KEYBOARD
Service Information
Page
Locator.
..............................
6
Key
Module Operation .
....................
7
Shift-Lock Mechanism .
....................
7
Basic Assurance Test (BAT).
.................
7
Matrix Chart.
...........................
8
DataFlow
.............................
9
Keybutton
Position .
.....................
10
Keyboard Arrangements.
..................
11
Tools andEquipment.
....................
11
Cleaning Procedures.
.....................
11
Adjustments
Shift
Lock
Brake Adjustment
...............
12
Removals/Replacements
Keyboard Cover .
.......................
13
Pad Card .
............................
13
Key
Module .
..........................
14
Fly Plate Replacement.
...................
15
Shift-Lock Mechanism .
...................
16
SpacebarMechanism
.....................
16
-5-

-6-
KEYBOARD -Locator
Key
ModUl~ti
----Speaker
I Speaker Connector
I 30-Pin Edge Connector
I I Pad Card
I
)j
ij'
Keyboard
00--
___
' Connector

Flat
Spring
Fly Plate
~]~~3~-;
Compression Spring
Spring_;~!~~~~~~~~;;
Fly Plate
Normal
FullyP,BIS8d
Pad
Card Capacitor Plate
Stem
Assembly
Key Module Operation
Shift Reset
Bail
Shift-Lock RestoringMechanism
Key Module Operation,
KEYBOARD
-Shift Lock Mechanism,
BAT
-7-
BASIC
ASSURANCE
TEST
(BAT)
A Power on Reset (POR) of
the
system will automatically
start
the
keyboard Basic Assurance Test (BAT) and perform
wrap tests on the keyboard adapter circuits of
the
system
card.
The keyboard
BAT
will
verify the keyboard microproces·
sor, located on the keyboard logic card
is
operating cor·
rectly. The keyboard notifies the system processor of the
keyboard status by transmitting a specified sequence of
two bytes of data. Successful completion of the
BAT
is
necessary for the keyboard
to
proceed with normal sys·
tern
operation.
A third byte containing the keyboard
ID
is
also transmitted
to
provide configuration information.
System Power·On·Reset
BAT
Signal to Keyboard Microprocessor
BAT
Self·test
of
Keyboard Microprocessor
BAT
Completion Codes Transmitted
System Electronics Accepts Data Byte Codes
Keyboard
ID
Transmitted
Keyboard Operational

-8-
KEYBOARD -Matrix
Chart
Edge
CO
......
'J~
POIition
(01) A
(02) B
103)C
(04)
D
(27) E
(28)
F
(29)
G
(3O)H
Drive
Lines
Keyboard
Number
1 Matrix Chart

Key
Pressed
(First)
To
System Electronics
KEYBOARD -Data Flow
-9-

-10-
KEYBOARD
-Keybutton Position
KEY
POSITION
The key positions are shown
in
Figure 10.
Key
positions
marked with a
"T"
are typamatic keys, positions marked
"N-A"
are non-active, and those marked
"M"
are
make/
break keys. The position
of
the typamatic keys are con-
trolled by software and may
be
different for
World
Trade
countries depending on the country layout.
Work Station
Control
Keys
Key
Position
Number
ill
NA
101(
NUII·Ad;ve
Keys
T
ypamat;c
Key
Make/Break
Key
Key Legend
Function
Keys
Cursor Control
Keys
96-Character Keyboard

STRAP
IDs
LANGUAGE
SUPPORT
92 96
Australia/New
Zealand 1
Austria/Germany
29
Belgium (Flemish) 247
Canada-England
37
Canada-F
rance/B
ilinguaJ
39
Czech-Czech
83
Czech-Slovak
85
Denmark 57
Finland
248
France/Belgium
(AZ)
251
Franee
(Qwerty)
252
Greece
(Latin)
75
Hong
Kong
(Latin)
119
Hungary
91
Italy
(S.A.)
41
Japan
(English)
69
Netherlands
43
Norway
55
Poland 93
Portugal 63
Rumania
87
S.
Africa
81
Spain
45
SP
Speak/Puerto Rico
25
Sweden
53
SWitzerland-Germanv
51
Switzerland-France
49
Turkey 79
U.K.llsrael
67
U.S.
1
U.S.
249
U.S.
Dvorak
250
Yugoslavia
(Latin)
95
"X's
Indicate
Jumper
Positions
o
X X X
X X X
X X
X X
X X
X X
X X
X X
X
X X
X X
X X
X X
X X
X X
X X
X X
X X
X X
X X X
X X
X X
X X
X X
X X
X X X
X X
KEYBOARD -Keyboard Arrangements, Tools & Equipment, Cleaning Procedures
-11-
10
JUMPERS'
3 4 5 6
X X X X
X
X
X X X
X X
X X
X X
X X
X X
X X
X X
X X
X X X
X X X
X X
X X
X
X X X
X X
X X
X X
X X
X X X
X
X X X
X X X X
X X
X
X
X
X
The Keyboard Assembly requires no scheduled preventive
maintenance.
TOOLS
AND
EQUIPMENT
The following equipment
is
required
to
service the key-
board:
Keybutton Puller (PIN 9900373)
Alcohol Pad (PIN 9900679)
Lint-free Cloths (PIN 2108930 or PIN 2123106), or
Disposable Cleaning Cloths
(PIN
1650800)
CLEANING
PROCEDURES
Plastic parts and painted covers can be cleaned with
IBM
cover cleaner, PIN 450891,
or
a mild non-abrasive hand
soap.
Other
solvents
or
cleaners are
not
recommended as
damage
or
discoloration
of
plastic
or
painted parts can
result.
Cleanliness
is
important when working on the keyboard.
Any particle between
the
key module fly plate and the pad
card
is
a potential problem.
Before any keyboard disassembly, prepare a smooth, clean
work
area by wiping
contamination
away with an alcohol
pad. Gently tap, brush, and shake
the
keyboard assembly
to
remove any loose particles which could get into
the
pad
card and fly plate area during disassembly and reassembly.
The pad card and key module fly plates are cleaned by
carefully wiping each with an alcohol pad followed by a
lint-free cloth. Care should be taken
not
to
dislodge
or
remove fly plates from key modules.
Some minor liquid spills, such
as
soft drinks or coffee with
sugar, can
be
removed by first washing
the
pad card and
affected fly plates with a lint-free cloth dampened with a
mixture
of water and a mild hand soap. Rinse with a water-
dampened lint-free cloth, then clean with an alcohol pad
and dry with a lint-free cloth.
NOTE: Sticky key modules must be replaced. A severe
liquid spill may necessitate replacement of the entire
keyboard assembly.

-12-
KEYBOARD
-Adjustments
Shift
Lock
Brake
Adjustment
1. Adjust
the
shift lock brake screw
so
the
shift latches and
and locks reliably (clockwise increases brake tension)
.•
Shift Reset Bail /
~
haft
Assembly
\
t:",
~
/
/",
c%~~
,::/:::
/ N
~~0
-(:_
~~/~
d
l
••
Shaft
Assembly

KEYBOARD
COVER
1.
Turn
the
system power off.
2. Remove the
top
cover by loosening the four captive
screws on the bottom of the keyboard assembly
•.
o
\ o
Four
Captive Screws
o
PAD
CARD
1. Turn the system power off.
2. Remove the
top
cover by loosening the four captive
screws on
the
bottom
of
the keyboard assembly (see
Keyboard Cover RemovaL)
3. Remove the two screws holding
the
keyboard logic
card. Disconnect the speaker
cable.
and
the
key-
board cable
.•
Remove the logic card.
KEYBOARD
-Removals/Replacements
-13-
4.
If
a key module
is
to
be
removed, locate
the
position
of
the
key before the keyboard
is
inverted and remove
the
keybutton.
5.
Remove
two mounting
screws
on
each
side
of the
keyboard under
the
contamination shield
.•
6.
Lift
the keyboard
out
of
the
keyboard frame.
7. Invert the keyboard and install it on the frame using a
screw on each side
to
hold the assembly
in
place.
1/
II \
..
,,'
~
::=---=a-=------~v=
_
~\--~~--------------------------------/~

-14-
KEYBOARD -Removals/Replacements
Warning: Removing the pad card with a key
pressed may cause
the
fly plate
to
spring out
of
the
key module.
8. Ensure there
is
no pressure on any keys.
9. Remove
the
screws from the pad card
.•
10. Lift the pad card from
the
keyboard assembly.
• •
Pad Card Screws
11.
To
assemble, reverse the above procedure. Before
inserting the logic card, the pad card should be
cleaned and lubricated
as
follows:
A. Carefully wipe the pad card with
an
alcohol pad
followed by a lint-free cloth.
B.
Use
a light abrasive
(PIN
9900089) or a .pencil
eraser
to
clean the
top
and bottom copper con·
tacts
of
the
30'pin edge connector.
C.
After cleaning the contacts, apply a thin layer of
I
BM
No.
10 oil
to
the
edge connector (top and
bottom) of the pad card. Coverage of about
50%
of
the tab
area
(as
measured from
the
edge of
the
tab)
will
ensure
the
desired protection of
the
contacts.
Warning: Do
not
over-lubricate the edge
connector, as permanent damage
to
the key
modules may occur
if
lubricant gets on the
pad card.
Pad Card Copper Contacts
KEY
MODULE
Removal
1.
Use
the keybutton removal tool (PIN 9900373)
to
lift
the keybutton from
the
key module
to
be
removed.
2. Disassemble the keyboaru
(see
Pad
Card Removai).
3. Reach under the key assembly and push the failing key
module up until it
is
free
.•
Warning: To prevent loosening a fly plate, ensure no
keys are accidentally pressed while the pad card is
removed.
NOr
h •
Spacebar Edge
I.
Retaining Ear
<:!lil!/nW/i!i~/<%
NOTE: The module retaining ears must clear
the
frame.
Installation
1. Insert the key module. Match the opening
in
the key
module with the aligning
lug
in
the mounting hole. The
key stem notch must be positioned toward the space·
bar edge
of
the
keyboard
.•
2. Reinstall the pad card.
3. Turn
the
key assembly over and, if necessary, reposi·
tion
the
contamination shield.
4.
Put
the
keybutton on
the
key module.
5. Reinstall
the
logic card cables and covers.
This manual suits for next models
1
Table of contents
Other IBM Desktop manuals

IBM
IBM NetVista X40 User manual

IBM
IBM ThinkCentre A30 8198 User manual

IBM
IBM RAMAC 305 User manual

IBM
IBM NetWista A60 Type 6838 User manual

IBM
IBM 8863 - eServer xSeries 366 User manual

IBM
IBM NetVista X40 User manual

IBM
IBM Personal Computer XT User manual

IBM
IBM NetVista A30 User manual

IBM
IBM NetVista X40 User manual

IBM
IBM NetVista X40 Guide