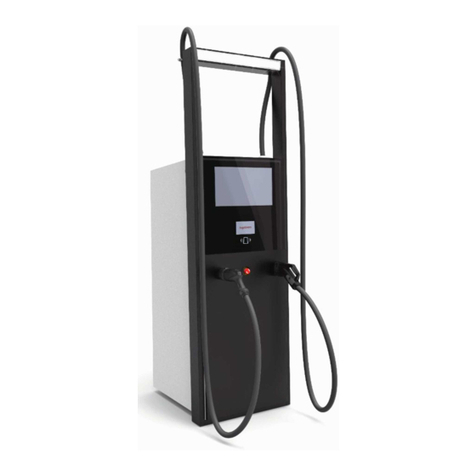
Ingeteam NEO User manual

NEO / NEO Pro
User manual
Manual de usuario
Manuel d’Utilisateur
Manuale dell’Utente

ABV2014IQM01_
07/2022
Ingeteam Power Technology, S.A. - Energy
Avda. Ciudad de la Innovación, 13
31621 SARRIGUREN (Navarra) - Spain
Tel.: +34 948 28 80 00
Fax.: +34 948 28 80 01
e-mail: electricmobility[email protected]
Service Call Center: +34 948 698 715

ABV2014IQM01_
English EN
Español ES
Français FR
Italiano IT
3
Ingeteam

ABV2014IQM01_
The copy, distribution or use of this document or of its content requires written authorisation. Any breach thereof will be reported for
damages. All rights reserved including those of patent rights or design registration.
The conformity of the document content with the hardware described has been checked. However, discrepancies may exist. Liability
will not be assumed for total concordance. The information contained in this document is regularly reviewed and it is possible that
there may be changes in subsequent editions. Other functions may be available which are not covered by this document.
This document may be changed.
La copia, circulación o uso de este documento o de su contenido requiere un permiso por escrito. Su incumplimiento será
denunciado por daños y perjuicios. Todos los derechos están reservados, incluyendo aquellos que resulten de derechos de patentes
o registro del diseño.
La correspondencia del contenido del documento con el hardware ha sido comprobada. Sin embargo, pueden existir discrepancias.
No se asume ninguna responsabilidad por la concordancia total. La información que contiene este documento es revisada
regularmente y es posible que se produzcan cambios en siguientes ediciones.
El presente documento es susceptible de ser modificado.
La copie, distribution ou utilisation de ce document ou de son contenu requiert une autorisation écrite. Toute personne ne respectant
pas cette condition sera passible de poursuites. Tous les droits sont réservés, y compris ceux qui découlent des droits de brevets ou
d’enregistrement des conceptions.
La correspondance entre le contenu du document et le matériel a été vérifiée. Il peut toutefois exister des divergences. Aucune
responsabilité de concordance totale n’est assumée. Les informations contenues dans ce document sont régulièrement révisées et il
est possible que des changements surviennent dans les éditions à venir.
Le présent document est susceptible d’être modifié.
Per copiare, condividere o utilizzare il presente documento o il suo contenuto è necessaria un’autorizzazione scritta. Il mancato
rispetto di quest’obbligo sarà perseguito. Tutti i diritti sono riservati, compresi quelli risultanti da diritti di brevetti o dalla registrazione
del progetto.
La corrispondenza del contenuto del presente documento con l’hardware è stata verificata, tuttavia, possono sussistere discrepanze.
Si declina ogni responsabilità relativamente alla concordanza totale. Le informazioni contenute in questo documento sono
regolarmente sottoposte a revisione ed è possibile che siano inserite delle modifiche nelle prossime edizioni.
Questo documento può essere soggetto a modifiche.
4
Ingeteam

ABV2014IQM01_ - User Manual
EN
ES
FR
IT
5
Contents Ingeteam
Contents
Contents ................................................................................................................................................... 5
1. First Steps............................................................................................................................................. 6
2. Vehicle connection and disconnection...................................................................................................... 7
3. Charger status and color coding............................................................................................................... 8
4. Communications with the charger.......................................................................................................... 10
4.1. Bluetooth Communication ............................................................................................................ 10
4.2. Communication via Internet ......................................................................................................... 10
5. Users and profiles ................................................................................................................................ 11
5.1. Administrator .............................................................................................................................. 11
5.2. Charging User.............................................................................................................................. 11
5.3. Consultation User ........................................................................................................................ 11
6. INGETEAM NEO App ........................................................................................................................... 12
6.1. Chargers .................................................................................................................................... 12
6.2. User ........................................................................................................................................... 12
6.3. Contact....................................................................................................................................... 12
6.4. Terms of Use ............................................................................................................................... 12
6.5. Sign out...................................................................................................................................... 12
7. Charger management from the INGETEAM NEO App ............................................................................... 13
7.1. Settings.............................................................................................................................. 13
7.2. Charging............................................................................................................................. 16
7.2.1. Charge information .............................................................................................................. 16
7.2.2. Charge control wheel............................................................................................................ 16
7.2.3. Actions buttons ................................................................................................................... 17
7.3. Timers ................................................................................................................................ 17
7.4. History ............................................................................................................................... 17
7.4.1. Period information in chart form ........................................................................................... 18
7.4.2. Period information in list form .............................................................................................. 18
7.5. Users................................................................................................................................... 18

ABV2014IQM01_ - User Manual
1. First Steps
Before starting to use your INGEREV NEO charger, verify with your installer that the installation of the
units and
accessories has been completed, and that the electrical installation has the correct dimensioning and
complies with all
electrical and safety regulations.
1. Download the INGETEAM NEO App on your smartphone.
CAUTION
In the next steps, the INGETEAM NEO App will request different authorizations (access to the camera,
Bluetooth, location, notifications, etc.). It is VERY IMPORTANT that you accept all authorization requests for the
correct operation of the INGETEAM NEO App with the charger.
2. Register in the App by creating a new user. To do this, press the Start button, complete the requested
information, accept the Terms of Use, and press the Confirm button.
3. Validate the email you will receive by clicking of the link you will find in the body of the email, and access
the INGETEAM NEO App with your credentials.
4. Associate your charger to your user account. To do this, open the App menu, select the Chargers option,
press the Add Charger button and scan the QR code (ACCESS CODE) that you will find on a label on the
side of the charger. This shows you the characteristics of your charger, and after pressing OK you will be
able to see the charger associated with your account.
CAUTION
If you perform this step in a place without reception or data access, the process will be incomplete, and you will
have to go to a place where your phone has an internet connection to be able to move forward. If your charger
is in an area without reception, you can also associate the charger to your account from another location by
scanning the QR code on the spare label that was supplied with your charger. This is the only step in which your
phone needs to have communication with the internet.
CAUTION
This is the only way to associate a charger to a user account. Do not try to connect the charger to the mobile
phone by searching for devices in the Bluetooth section of the phone settings.
Now all you have to do is configure your charger to start using it. Please see the “7. Charger management from
the INGETEAM NEO App” section of this user guide later. You can see the rest of the functionalities that you have
access to through the INGETEAM NEO App to start enjoying your INGEREV NEO charger.
6
First Steps
Ingeteam

ABV2014IQM01_ - User Manual
EN
ES
FR
IT
2. Vehicle connection and disconnection
• Before connecting the vehicle, make sure that the charging cable and the connector are in perfect
condition and free of damage.
• Connect the electric vehicle to the charger, verifying that the connector is fully inserted into
the outlet. This
will ensure a good connection of the conductive elements, and
will prevent overheating and other errors.
• If the charger does not have an integrated charging cable, you must use your own cable that is compatible
with the charger and the vehicle's power outlets (if you have questions about which charging cable you need,
ask your installer or your vehicle dealer). In this case you can connect or
disconnect the cable to/from the
vehicle first and then the charger, or vice-versa.
• Never use the charging cable with adapters and extension cords, as this can cause dangerous
situations.
• Most
electric
vehicles lock
the charging cable when they
are
connected
to a charger, or at least when they
are charging. Do not use force to disconnect the vehicle while charging, as it can be dangerous. Always
ensure the vehicle is not charging before attempting to remove the charging cable. If you do not know
how to unlock the cable please see your vehicle's manual.
• When you disconnect the charging cable, always try to pick it up and protect the connector (if
you have a
charger with an integrated charging cable, use the connector bracket that comes with
the unit).
7
Vehicle connection and disconnection Ingeteam

ABV2014IQM01_ - User Manual
3. Charger status and color coding
The NEO charger has a LIGHT INDICATOR that indicates the status of the unit with a color code:
COMMON STATUSES
AVAILABLE (Green): The charger is ready for use, and either does not have a
vehicle connected, or it has a vehicle but the charger does not detect it because it
is locked (See section “7. Charger management from the INGETEAM NEO App”
in this user guide for more information on Lock Control).
CONNECTED (Blue): The charger has detected that the vehicle is plugged in, but
is not currently charging. There are two reasons why the charger could be in this
state:
• There is an active timer and the charger is not currently within the daily
charging period.
• The vehicle is not demanding power: this can occur for various reasons, such
as the battery being full, the vehicle having a charging timer, or the charging
is being stopped for technical reasons.
When charging is complete, the charger will remain in this state until the charging
cable is disconnected.
CHARGING (Flashing Blue): The charging process has started and the vehicle
battery is being charged.
TEMPORARY STATUSES
RESTARTING (Green Sweep + Buzz at start): The charger is restarting. This process
will start when the option is selected from the charger CONFIGURATION screen in
the INGETEAM NEO App, when the power supply is restored (or we start it up for
the first time) or after a Firmware update. This process can take between 20 and
30 seconds depending on the charger model.
UPDATING Firmware (Flashing Purple): The charger is updating the Firmware.
This process will take place when the option is selected from the charger
CONFIGURATION screen in the INGETEAM NEO App (or automatically in NEO
Pro chargers that are configured for this). After the process is complete, an
automatic restart will take place. This process can take between 5 and 12 minutes
depending on the charger model.
CONNECTION/DISCONNECTION WITH MOBILE DEVICE VIA BLUETOOTH (One white
flash): When the charger connects/disconnects to a user's mobile device via
Bluetooth, the indicator light will flash white.
Only in NEO Pro
chargers.
CONNECTING TO CURVEx3 (Green Sweep): The charger is looking for the CURVEx3
and trying to connect to it. This process can take up to 6 minutes.
8
Charger status and color coding
Ingeteam

ABV2014IQM01_ - User Manual
EN
ES
FR
IT
ERROR STATUS
Only in NEO Pro
chargers.
CONNECTION LOST WITH CURVEx3 (Flashing Yellow): The charger has lost
communication with the CURVEx3 and is trying to recover it
REQUIRED ACTION:
• Verify that the two CURVEx3 elements (Meter and Gateway) have power.
• Check that the wiring between the CURVEx3 and the charger has not
suffered any damage and is correctly connected at both ends.
• If the charger is connected to the internet via a local network, check that the
router and other elements (switch, etc.) in said network have power and are
working correctly.
• If the charger is still in this state after performing these checks, go to the
charger CONFIGURATION screen and select the NO option in the Dynamic
Power Control section in order to continue using the unit without this
function. And contact the User Support Service to receive specific help for
this problem.
TEMPORARY ERROR (Flashing Red): The charger has detected an abnormal
situation in the vehicle charging process, and has stopped charging for safety
reasons.
REQUIRED ACTION:
• Disconnect the vehicle from the charger. This will make the error disappear,
and the charger will return to the AVAILABLE status.
PERMANENT ERROR (Red): The charger has detected an internal fault and has
stopped charging process for safety reasons.
REQUIRED ACTION:
• Disconnect the vehicle from the charger and restart it.
• If the charger it is still in this status after restarting it, contact the User
Support Service to receive specific help for this problem.
9
Charger status and color coding Ingeteam

ABV2014IQM01_ - User Manual
4. Communications with the charger
The INGETEAM NEO App is the interface for the use, configuration and consultation of the NEO charger. There are
two ways in which the charger can communicate with the INGETEAM NEO App:
4.1. Bluetooth Communication
Once the charger has been associated with a user account (see the “1. First Steps” section of this user guide), the
connection between the charger and the INGETEAM NEO App is automatic as long as you are within the Bluetooth
range (8-10 meters) and the App is at least running in the background on the mobile phone.
Bluetooth communication only allows one user to be connected to the charger at any given time, so that if more
than one user is within Bluetooth range with the INGETEAM NEO App running, only one of them (the first to be
detected by the charger) will be connected to the unit.
If you have problems connecting the INGETEAM NEO App to the charger via Bluetooth (the App will show that the
charger status is OFFLINE), perform the following verifications:
1. Check that the charger is turned on, that you are within Bluetooth range (8-10 meters) and that the
INGETEAM NEO App is not closed (it must be running at least in the background).
2. Check that there are no other users near the charger whose App the device may have connected to.
3. Verify in the mobile phone settings that Bluetooth (and Location on phones with Android operating
system) is activated.
4. Check in the mobile phone settings that the INGETEAM NEO App has Bluetooth access permissions (and
Location on phones with Android operating system) activated and in 'Always' mode (If you select 'Only
when using the App' you may have problems with the App running in the background).
4.2. Communication via Internet(1)
There are three different options for connecting the charger to the internet:
1. WI-FI: Check that the signal of the WI-FI network that you want to connect the charger to is strong
enough at the point where it is installed. See section “7. Charger management from the INGETEAM NEO
App” of this user guide to learn how to configure the communication via WI-FI network.
2. Local network: check if the charger is connected to the network via an Ethernet cable, and that the router
and other elements (switch, etc.) in said network have power and are working correctly. See section “7.
Charger management from the INGETEAM NEO App” of this user guide to learn how to configure the
communication via local network.
3. Mobile data (Only in some models): To be able to connect the charger via mobile data you must have
a charger with an integrated modem (extra charger option), have a SIM card from a network operator
installed, and the signal from said operator must be strong enough at the point where it is installed.
See section “7. Charger management from the INGETEAM NEO App” of this user guide to learn how to
configure the communication via mobile data.
Once the charger is connected to the internet you may operate it or consult any data remotely in real time.
If the WI-FI network or data network signal is weak or intermittent, or the internet service provider fails, the
information that you will see in the INGETEAM NEO App may be incomplete, out of date, or you may not even have
communication with the charger.
In the event that a user is located near the charger and the connection to the unit can be established via Bluetooth
or the Internet, the App will choose to connect via Bluetooth.
CAUTION
For security reasons, the charger configuration can only be modified if you are connected to the device via
Bluetooth communication, never remotely.
(1) Only in NEO Pro chargers.
10
Communications with the charger
Ingeteam

ABV2014IQM01_ - User Manual
EN
ES
FR
IT
5. Users and profiles
NEO chargers can be used by different users, and they also offer the possibility of consulting the information on
the charges carried out by each user.
For this, all users will have one of the following three profiles:
• Administrator
• Charging User
• Consultation User
5.1. Administrator
There is only one ADMINISTRATOR for each charger, and it will always be the first user to link it to their account
when the charger does not have any users. The ADMINISTRATOR profile allows to:
• Use the charger to charge.
• Modify any configuration parameter.
• Create, modify, delete, enable and disable timers.
• View all the charging sessions and the user who has carried them out.
An ADMINISTRATOR can decide to give other users access to the charger. See section “7. Charger management
from the INGETEAM NEO App” below in this user guide for the three options available to manage this control.
In addition, an ADMINISTRATOR can authorize and unauthorize the rest of the changer users, as well as modify
their user profiles in the charger. See further on in section “7. Charger management from the INGETEAM NEO App
– 7.1. Settings” of this user guide find out how to perform all these operations. Keep in mind that if you delete the
charger of which you are an ADMINISTRATOR from your account, you will be able to promote another user to be
the new ADMINISTRATOR.
5.2. Charging User
A charger can have an unlimited number of CHARGING USERS. The CHARGING USER profile allows to:
• Use the charger to charge.
• Create, modify, delete, enable and disable timers.
• View your own chargers on the charger.
You must remember that a CHARGING USER will in no case be able to modify any parameter of the charger
configuration.
5.3. Consultation User
A charger can have an unlimited number of CONSULTATION USERS. The CONSULTATION USER profile allows to:
• View all the charging sessions and the user who has carried them out.
11
Users and profiles Ingeteam

ABV2014IQM01_ - User Manual
6. INGETEAM NEO App
The INGETEAM NEO App allows you to configure, operate and check your charger so that you can intelligently
manage your electric vehicle charging sessions. The menu, which is displayed by clicking on the icon at the top
left of the screen, will allow you to navigate through the different sections in the application:
• Chargers • Terms of Use
• User • Sign out
• Contact
6.1. Chargers
This section shows the chargers that you have associated with your user account. Each charger is represented in
the Chargers list by the name you have assigned to it, its serial number, and a picture. From here you can:
1. Add charger: Press the Add charger button and follow the instructions in the App to associate chargers
to your account. See section “1. First Steps” of this user guide for information on how to carry out this
operation.
2. Delete charger: If you have a charger associated with your account, click on the icon to delete it.
3. Manage charger: By clicking on a charger that you have associated, you can navigate to the screens that
allow you to manage the charger. See section “7. Charger management from the INGETEAM NEO App”
for information about everything you can do with your charger.
6.2. User
In this section you can consult and modify all the data in your user account (with the exception of the email).
Remember to click on the Confirm button so that the changes are saved.
From here you can also change the password of your account by clicking on the Change password button. To do
this, you will first have to enter the current password and then the new password (twice). Remember that here you
must also click on the Confirm button for the changes to be saved.
If you need to change your email address for any reason, you will have to carry out a new user registration process
from the beginning and associate the charger to your new account (do not forget to first delete the chargers from
the account that is no longer to be used). See section “1. First Steps” of this user guide for information on how to
carry out this operation.
6.3. Contact
In this section you can contact the INGETEAM NEO App User Support team to answer your questions or ask for
help if you notice any abnormal behavior in your charger. After pressing the Send button, our team will receive
your communication and contact you by email, WhatsApp or phone in less than 12 hours, and will help you with
whatever you need. It is very important that the user details you have registered in your INGETEAM NEO account
are correct, as they are what we will use to contact you if necessary.
6.4. Terms of Use
You can review the INGETEAM NEO App terms of use from this section.
6.5. Sign out
For your convenience, when you enter the INGETEAM NEO App, the session will always remain open until you
decide to close it. If you want to do this, this section will show you a window where you can confirm your decision
by pressing the OK button.
12
INGETEAM NEO App
Ingeteam

ABV2014IQM01_ - User Manual
EN
ES
FR
IT
7. Charger management from the INGETEAM NEO App
After selecting a charger in the Chargers section ofthe App, you can manage everything related to the charger from
the different screens shown below:
At the top of the screen you will always see the name you have
assigned to the charger.
You can also see the charger status on a band of the same color as the
unit's indicator light. See section “3. Charger status and color coding”
of this user guide to know the meaning of each status. If the status
shown on the App is OFFLINE, check the “4. Communications with
the charger” section of this user guide to identify the issue and how to
solve it.
At the bottom you will see a series of icons that will allow you to move
between the different screens of your charger.
7.1. Settings
CAUTION
Remember that, for security reasons, the charger configuration can only be modified if you are connected to the
device via Bluetooth communication, never remotely.
Charger name Give the charger any name that will make it easy for you to identify it, and press Confirm.
Firmware update Here you can see if there are any pending updates. If this is the case, click on the Update
button to perform the update. In this screen you can see the progress of the update
process. It is VERY IMPORTANT to remain within the range of action of the charger's
Bluetooth (8-10 meters) until the App tells you that the process has been completed. After
the update is finished, the charger will restart automatically. You do not have to restart it
manually. See section “4. Communications with the charger” of this user guide for more
information on this process.
You can also activate the Automatic Updates function, which will allow the charger to update
the Firmware itself in the event a version more recent than the one installed is available.
This process will only take place with the charger in the AVAILABLE status, never with the
vehicle connected or during a charge.
Only in NEO Pro chargers.
13
Charger management from the INGETEAM NEO App Ingeteam

ABV2014IQM01_ - User Manual
User access
Only for
ADMINISTRATOR
users
Choose which other users can associate the charger with their account, and the control you
want to have in that process. Consult the”5. Users and profiles” section of this user guide
for more information about the types of profiles there are, and what each one can do.
There are three different modes you can choose from:
NOBODY: No users will be able to associate the charger to their account.
EVERYBODY: Any user will be able to associate the charger to their account.
AUTHORIZE: When a user tries to pair the charger to their account, you will receive a
notification to authorize it.
Changes to this setting will have no effect on users who already have the charger associated
with their account at the time.
Access control Select how the charger lock works and prevent anyone other than you from using your unit
without permission. There are three Access Control modes:
FREE: The charger will always be unlocked (and can be used by anyone).
PROXIMITY: The charger will be locked until you get near it. In order for the charger to
unlock, you must have your mobile phone with you and the INGETEAM NEO App must
be running at least in the background.
CAUTION
In PROXIMITY mode, the charger is unlocked when the INGETEAM NEO App and the charger
establish communication via Bluetooth when you approach the charger. Review section “4.
Communications with the charger” of this user guide for more information.
MANUAL: The charger will be locked until you press the Unlock button on the
Charging screen.
Installation Data In order to prevent the operation of the charger from posing a risk to the electrical
installation, it is VERY IMPORTANT to correctly define the maximum current allowed by the
electrical installation of the charger. Therefore, you must check the electrical panel that
powers the unit and configure the Intensity of the general protection of the installation.
CAUTION
In case of doubt, please consult the electrical installer who carried out the electrical installation and
assembly of your charger.
Dynamic Power
Control
The Dynamic Power Control balances the load of your electric vehicle based on your home's
consumption at all times, ensuring that the total load (home and vehicle) never exceeds the
contracted/available power.
In order to activate this function you will need to configure the following:
1Measuring device
No Select No if you do not have any measuring device installed for the Dynamic
Power Control, or if you do not want the charger to perform load balancing.
CURVE Select CURVE if you have this device installed and connected to the charger
for single-phase installations.
CURVEx3 Select CURVEx3 if you have this device installed and connected to the charger
for three-phase installations, and follow the on-screen instructions to ensure
correct communication between both elements.
Only in NEO Pro chargers.
14
Charger management from the INGETEAM NEO App
Ingeteam

ABV2014IQM01_ - User Manual
EN
ES
FR
IT
2Location of the measuring device
Home
circuit
Select Home circuit when the measuring device is located in a circuit that
only measures the consumption of the home, but not the consumption of the
charger.
General
circuit
Select General circuit when the measuring device is located in a circuit that
measures the entire consumption, including home and charger.
3Contracted power
Select Contracted power, i.e. what is available in your home. This should never be exceeded
by the combined consumption of the home and the electric vehicle. CURVEx3
Communications
Only in NEO Pro
chargers.
Select the mode that the charger will use to connect to the internet and allow remote
communication in real time with the INGETEAM NEO App:
WI-FI: Press the Connect button and follow the steps below:
1The INGETEAM NEO App will query the charger about the WI-FI networks that are
visible for the unit. To do this, the App will show a window with the message Device
to use with WF_XXXXXXXX. Here, press the CONNECT button.
2Next, the INGETEAM NEO App will show the list of visible WI-FI networks, their
signal level and their protection. Select the WI-FI network that you want the charger
to connect to. If it is protected, enter your password in the window that will open
next and press CONNECT.
3The INGETEAM NEO App will automatically perform the actions required for
connecting to the selected WI-FI network. Once the process is completed, press
Finalize.
Local Network: Slide the selector and, if the charger is on a local network, a few seconds
later the screen will display the IP address that has been assigned to the charger.
Mobile data (optional): Slide the selector, complete the necessary data for the connection
to the mobile network (Access point, Username, Password and SIM card PIN) and press
Confirm.
Restart Pressing the Restart button will make the charger turn off, turn on again, and launch its
operating system again, but without losing the configuration it had up to that moment.
This feature should not be used unless the charger is locked and is not responding to user
commands and actions. In case of doubt, see the User Support Service in the CONTACT
section of the App.
15
Charger management from the INGETEAM NEO App Ingeteam

ABV2014IQM01_ - User Manual
7.2. Charging
This screen will allow you to operate and obtain information in real time during the vehicle charging processes. In
it you will find three different sections:
Charge information
Actions buttons
Charge control wheel
7.2.1. Charge information
• Start: Shows the time the vehicle was connected to the charger.
• Charge: Shows the accumulated consumption of the charge in progress, measured in kWh.
7.2.2. Charge control wheel
• The number in the center of the wheel indicates the power/intensity at which the vehicle is charging in
real time. In single-phase units, pressing this number will display the magnitude and scale of the wheel
in kW or A alternatively.
• The band on the outside of the wheel indicates the range of power/intensity in which you can move the
charge selector. This range will be:
— Minimum: minimum power/intensity allowed by electric vehicles (6 A).
— Maximum: minimum power/intensity between that of the installation and that of the active timer
at any given time, depending on how these parameters are configured in the charger settings and
timer.
• The pointer on the outer band is the charging selector that allows you to select the maximum charging
power/intensity at which the vehicle can be charged.
Charge control wheel (with Dynamic Power Control)
If Dynamic Power Control (CURVE or CURVEx3) is activated in the settings, the charge control wheel will have the
following modifications:
• Under the magnitude you will see the acronym DPC (Dynamic Power Control).
• On the outer band of the wheel the power/intensity range will be:
— Minimum: minimum power/intensity allowed by electric vehicles (6 A).
— Maximum: minimum power/intensity between that of the installation and that of the contracted/
available power, depending on how these parameters are configured in the charger settings.
• The charging selector disappears since the charger itself sets the maximum charging power/intensity at
which the vehicle can be charged based on the consumption of the home at any given time.
16
Charger management from the INGETEAM NEO App
Ingeteam

ABV2014IQM01_ - User Manual
EN
ES
FR
IT
7.2.3. Actions buttons
The following buttons can be available in this section:
Unlock This button will be accessible when the charger is locked and the Access Control is in MANUAL
mode in the charger settings. If the vehicle is currently connected, the charger status will change
from AVAILABLE to CONNECTED or CHARGING.
Charge now This button will be accessible when the charger has the CONNECTED status, and there is an active
timer but at that moment you are in a period with no charge.
Stop This button will be accessible when the charger is in the CHARGING status. Once charging has
stopped, the charger will remain in the CONNECTED status until the vehicle is disconnected.
7.3. Timers
This screen allows you to view and manage the charger's timers. The possible functions are:
1. ACTIVATE/DEACTIVATE TIMER: Use the selector to the right of each timer to activate/deactivate it.
You can have multiple timers active at the same time as long as they are not incompatible. If you
activate a timer that is incompatible with another that was already active, the oldest one will be
automatically deactivated.
2. DELETE TIMER: Click on the icon to delete the timer.
3. ADD TIMER: By clicking on the Add Timer button you will access the screen that allows you to define a
new timer. Proceed as follows:
• Select the days of the week to which the daily charging period will apply.
• Select the daily charging period on the selection wheel, and check the Start and End values. If
the selected period involves a change of day, it will end the following day.
• Select the Maximum Charge Power for that period.
• Press the Confirm button to save the defined timer.
Once you activate a timer, take into account the following aspects about its operation:
• Your vehicle will only charge on the days and daily charging periods that have been defined. If you
need different daily charging periods depending on the day of the week, you will have to create several
timers.
• If the vehicle is connected to the charger at a time outside of the daily charging period, the charger
status will be ON and the vehicle will not charge until the start time, at which point the charger status
will be CHARGING.
• If the vehicle connects to the charger at a time within the daily charging period, the charger status will
be CHARGING, and it will remain in this status (unless the batteries are fully charged) until the end of
that period, at which time the charger status will change back to CONNECTED.
7.4. History
See all the information about the charges made in a chart or in a list. To change from one visualization to another,
press the button See list and See chart.
17
Charger management from the INGETEAM NEO App Ingeteam

ABV2014IQM01_ - User Manual
7.4.1. Period information in chart form
Time period and accumulated consumption in kWh.
Move sideways to change to the previous or next period.
Select the time period for which you want to view the
information graphically.
Bar chart representation of the consumption of a period
in its different units: months for the representation of
the year, days for the representation of the month or
the week, and hours for the representation of the day.
The average consumption of the period is also
displayed.
7.4.2. Period information in list form
The list of charges made shows a record for each charge with the following information:
• Date and time when the charge began.
• Date and time when the charge finished.
• Energy consumed by the vehicle when charging (in kWh).
Remember that the start and end times of a charging process are the connection and disconnection of the vehicle
to the charger.
In addition, by clicking on a specific charge you can view a graphic representation of its consumption in kWh per
15 minutes.
7.5. Users(1)
As an ADMINISTRATOR, from here you can view and manage a list of all the users who have the charger associated
to their account, as well as their profile. Check the USERS AND PROFILES section of this USER GUIDE for more
informative about the different user profiles and their capabilities. For each charger user you can:
ASSIGN CHARGING USER PROFILE: Use this icon to the right of each user to assign them a CHARGING
USER profile.
ASSIGN CONSULTATION USER PROFILE: Use this icon to the right of each user to assign them a
CONSULTATION USER profile.
Remember that each user can only have one of the two profiles, meaning that by selecting one the other
will not be assigned.
DELETE USER: Use this icon to remove a user from the charger. From that moment, the user will no longer
see the charger in their CHARGERS list, and therefore will not be able to use it or consult anything about it.
(1) Only users with an ADMINISTRATOR profile.
18
Charger management from the INGETEAM NEO App
Ingeteam

ABV2014IQM01_ - Manual de usuario
EN
ES
FR
IT
19
Contenidos Ingeteam
Contenidos
Contenidos .............................................................................................................................................. 19
1. Primeros pasos .................................................................................................................................... 20
2. Conexión y desconexión del vehículo...................................................................................................... 21
3. Estados del cargador y código de colores................................................................................................ 22
4. Comunicaciones con el cargador............................................................................................................ 24
4.1. Comunicación por Bluetooth ......................................................................................................... 24
4.2. Comunicación por Internet............................................................................................................ 24
5. Usuarios y perfiles................................................................................................................................ 25
5.1. Administrador.............................................................................................................................. 25
5.2. Usuario Recarga .......................................................................................................................... 25
5.3. Usuario Consulta ......................................................................................................................... 25
6. App INGETEAM NEO ........................................................................................................................... 26
6.1. Cargadores ................................................................................................................................. 26
6.2. Usuario....................................................................................................................................... 26
6.3. Contacto ..................................................................................................................................... 26
6.4. Condiciones de uso ...................................................................................................................... 26
6.5. Cerrar sesión ............................................................................................................................... 26
7. Gestión del cargador desde la App INGETEAM NEO ................................................................................ 27
7.1. Configuración ...................................................................................................................... 27
7.2. Carga ................................................................................................................................. 30
7.2.1. Información de la recarga ..................................................................................................... 30
7.2.2. Rueda de control de carga .................................................................................................... 30
7.2.3. Botones de acción ............................................................................................................... 31
7.3. Programación ...................................................................................................................... 31
7.4. Históricos ........................................................................................................................... 31
7.4.1. Información gráfica de un periodo ......................................................................................... 32
7.4.2. Información en listado de un periodo..................................................................................... 32
7.5. Usuarios .............................................................................................................................. 32

ABV2014IQM01_ - Manual de usuario
1. Primeros pasos
Antes de comenzar a usar tu cargador INGEREV NEO verifica con tu instalador que el montaje del
equipo y sus
accesorios se ha completado, la instalación eléctrica está correctamente dimensionada y
cumple con toda la normativa
eléctrica y de seguridad.
1. Descarga la App INGETEAM NEO a tu teléfono móvil.
ATENCIÓN
En los próximos pasos la App INGETEAM NEO te va a solicitar diferentes autorizaciones (acceso a la cámara,
Bluetooth, ubicación, notificaciones…). Es MUY IMPORTANTE que aceptes todas las solicitudes de autorización
para el correcto funcionamiento de la App INGETEAM NEO con el cargador.
2. Regístrate en la App dando de alta un nuevo usuario. Para ello pulsa el botón Empezar, completa la
información solicitada, acepta las condiciones de uso, y pulsa el botón Confirmar.
3. Valida el email que recibirás pulsando sobre el enlace que encontrarás en el cuerpo del correo, y accede a
la App INGETEAM NEO con tus credenciales.
4. Asocia tu cargador a tu cuenta de usuario. Para esto despliega el menú de la App, selecciona la opción
Cargadores, pulsa el botón Añadir Cargador y escanea el código QR (ACCESS CODE) que encontrarás en
una etiqueta en el lateral del cargador. Esto te mostrará las características de tu cargador, y tras pulsar
Aceptar podrás ver el cargador asociado a tu cuenta.
ATENCIÓN
Si realizas este paso en un lugar sin cobertura o acceso a datos, el proceso quedará incompleto, deberás
situarte con tu teléfono en algún lugar con comunicación a internet para poder avanzar. Si tu cargador está en
una zona sin cobertura también puedes asociar el cargador a tu cuenta desde otro sitio escaneando el código
QR de la etiqueta de repuesto que te suministramos con tu cargador. Éste es el único paso en el que vas a
necesitar que tu teléfono tenga comunicación con internet
ATENCIÓN
Ésta es la única forma de asociar un cargador a una cuenta de usuario. No intentes conectar el cargador al
teléfono móvil a través de la búsqueda de dispositivos en el apartado Bluetooth de los ajustes del teléfono.
Ahora sólo te queda configurar tu cargador para poder empezar a utilizarlo, consulta más adelante el apartado “7.
Gestión del cargador desde la App INGETEAM NEO” de esta guía de usuario. Y revisa el resto de funcionalidades
a las que tienes acceso a través de la App INGETEAM NEO para empezar a disfrutar de tu cargador INGEREV NEO.
20
Primeros pasos
Ingeteam
Other manuals for NEO
2
This manual suits for next models
1
Table of contents
Languages:
Other Ingeteam Batteries Charger manuals

Ingeteam
Ingeteam Ingerev Garage User manual

Ingeteam
Ingeteam Ingerev Garage User manual

Ingeteam
Ingeteam Ingerev City User manual

Ingeteam
Ingeteam NEO User manual

Ingeteam
Ingeteam INGEREV FUSION Street FS1MW User manual

Ingeteam
Ingeteam INGEREV RAPID ST Series User manual

Ingeteam
Ingeteam Ingerev Garage User manual

Ingeteam
Ingeteam INGEREV RAPID 50 Trio User manual

Ingeteam
Ingeteam INGEREV FUSION Installation manual