insize ISHR-D121 User manual

www.insize.com
MN-ISHR-D121-E
OPERATION MANUAL
ISHR-D121
DIGITAL MAGNETIC ROCKWELL
HARDNESS TESTER

1 2
This Instruction Manual shall be carefully read through in prior to use of
the apparatus to clearly understand the detailed operation steps and
special notes, and avoid apparatus damage or personal injury caused
by improper use.
Attention
Digital
and sensor technology, realizing the high-accuracy and intelligence of
portable tester, as well as the possibility of fast and accurate testing the
body hardness of the large parts.
It simplifies the operation steps of Rockwell Hardness Test: directly
load total test force; maintain it for a few seconds; release the total
test force and then the test is finished, with no step of maintaining
the preliminary test force of 10Kg.
It thoroughly follows the Rockwell Hardness Test Principle, and
complies with relevant regulation of ISO6508, and ASTM E18.
Magnetic Rockwell hardness tester applies computer, electric
Description
1
2
3
Principle and Structure
The indenter is pressed (diamond cone or carbide ball ) into the
specimen surface in two steps. After maintaining the pressure for a
predetermined period of time, unload the major test force F1, and
measure the remaining indentation depth h under initial test force F0.
Rockwell hardness value is:
In this equation:
N — a constant related to scales; for A, C scales, N=100; for B scales,
N=130.
S — unit indentation depth, for Rockwell hardness it is 0.002mm.
1
2
1 — indentation depth under initial test force F0;
2 — indentation depth under total test forces F0+F1;
3 — elastic recovery depth when major test force F1 is removed;
4 — remaining indentation depth h;
5 — test piece surface;
6 — datum plane;
7 — position of indenter
The tester consists of 2 magnetic chucks and 1 intelligent hardness test
unit. In testing the magnetic chucks fixes the instrument to iron and
steel part. The operator load test force by hand wheel, and the force
sensor detects the force simultaneously and display it on screen, at the
same time the distance sensor detects the depth which consists of fine
screw and spiral encoder, then after the load force released and
indenter uplifted for a suitable distance, the micro-processor will
calculate the hardness and display it on screen.
3
display panel
screen
button
magnetic
switch
magnet
adapter indenter light adapter
magnet
magnetic
switch
battery box
encoder
handwheel
carrying handle
3 4
Main Technical Parameters
Initial test force: 10kg
Test force: 30, 100, 150kg
Maximum magnetic force: 350kg
Force applying method: by screw
Indenter: 120°diamond cone, Ø1.588mm carbide balls
Testing Items: HRC, HRB, HRA
Resolution: 0.1HR
Accuracy: Meets the requirements of ISO6508/6506
Application: All metals, including steel, forged steel, cast iron, copper,
copper alloy, aluminum, aluminum alloy and carbides etc.
Flat workpiece requirement: length>190mm, width>60mm, thickness>5mm
Cyl i n d er or t ub e wo r k p ie c e re q u ir e m e nt: le n g t h>2 0 0 m m,
diameter>Ø50mm, wall thickness>8mm
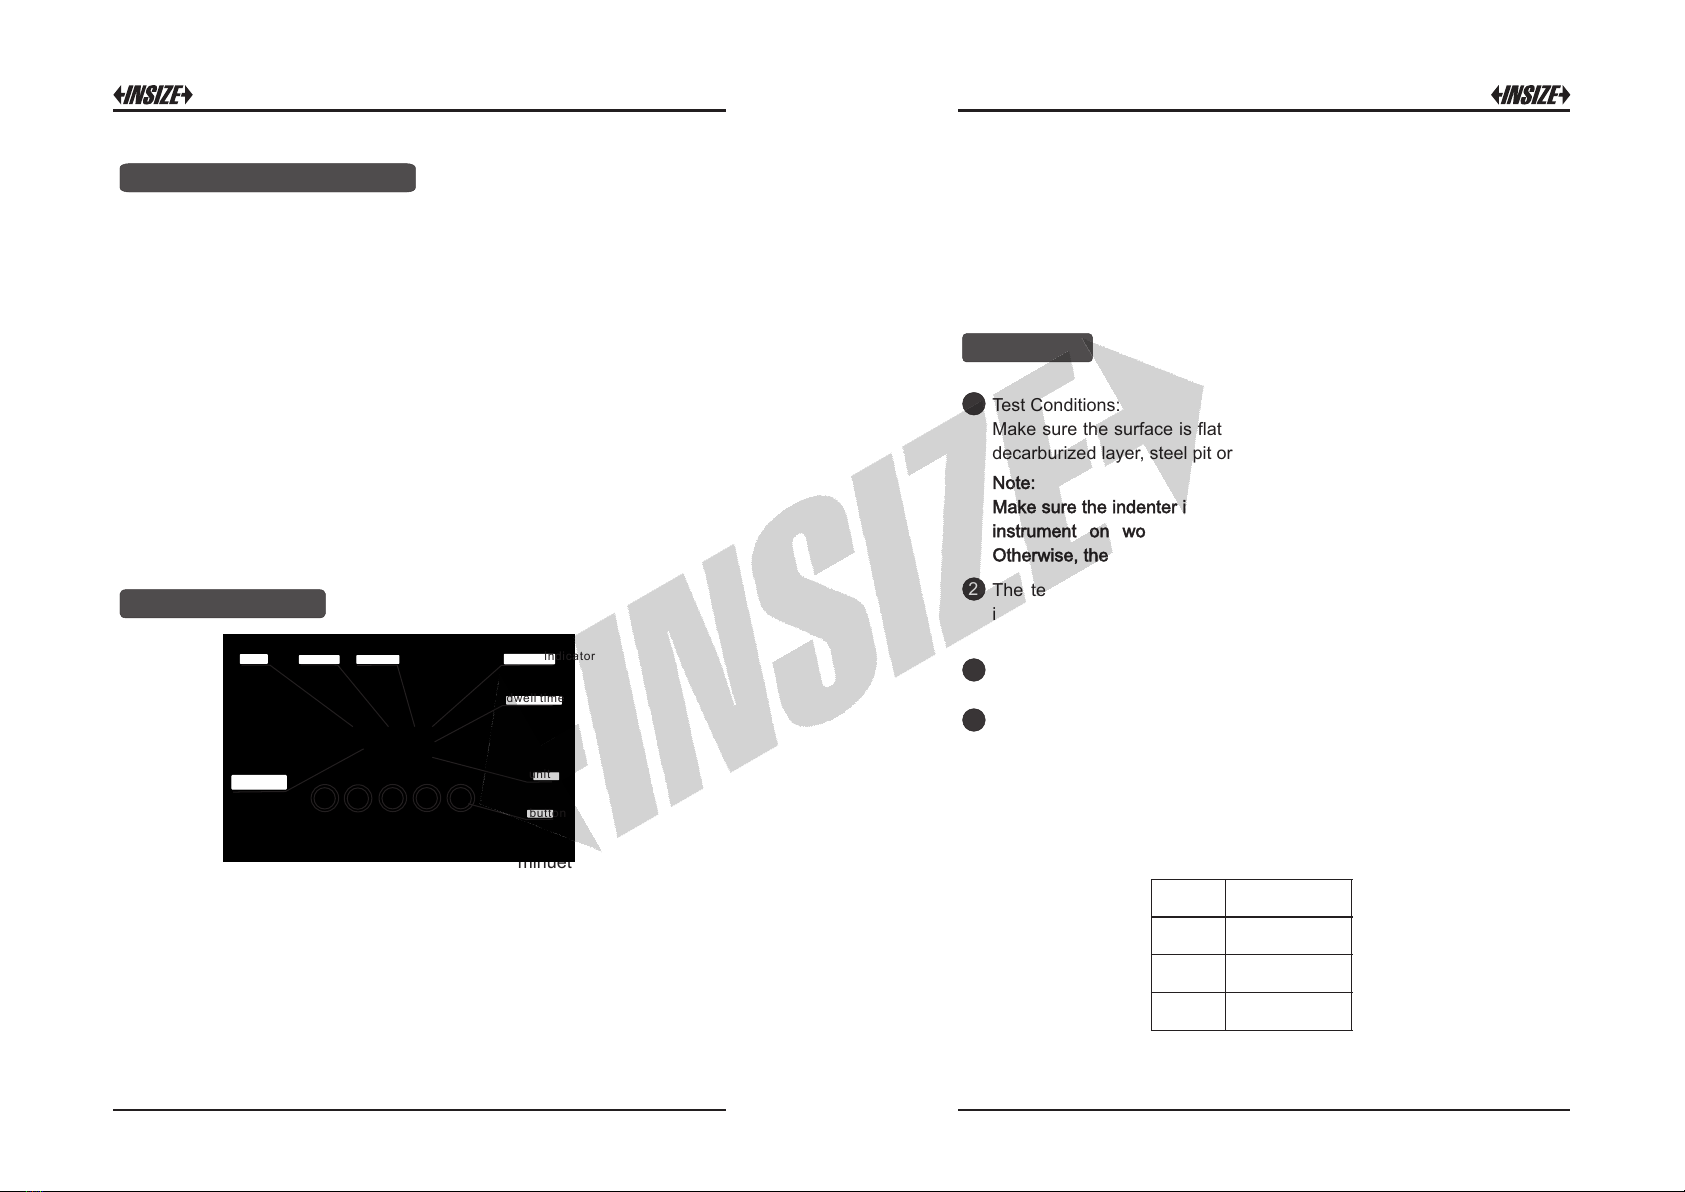
Panel And Screen
Operation
Test Conditions:
Make sure the surface is flat and smooth. It is forbidden to have scale,
decarburized layer, steel pit or dust on the surface of the part.
1
“ ”: Turn on and off the power. After 3 minuets the instruments
without using, the power will be off automatically.
ON
“ ”: After pressing it, the instrument is on status setting and the
menu displaying, then press "Manu" again, it would be on next level
menu.
MENU
“ ”: It’s a multi-functional button. On status of test, press it realizing
the function of counting; on menu setting, it could move the arrow
upward; on the status of calibration, it could increase values.
STAT
“ ”: It’s a multi-functional button. On status of test, press it to see
the conversion value; on menu setting, it could move the arrow down
ward; on the status of calibration, it could decrease values.
CONV
“ ”: It’s a double functional button. On status of test, it could delete
current values; on status menu setting, it could confirm the selection
and back to previous menu.
DEL
Note:
Make sure the indenter is higher than the bottom surface before put the
instrument on workpiece, the indenter can’t touch the test part.
Otherwise, the indenter maybe crash to damaged.
The tester should be attached to test part flatly and steadily with the
indenter erected to the surface of test part. Turn the magnetic switch to
"On", keeping the tester fixed onto the test part.
2
Power on the instrument, set the dwell time and select the test scale
HRA, HRB or HRC. The scale will display on the screen.
3
Rotate the hand wheel to load test force steadily, observe the screen,
stop or add test force extremely slowly when test force is close to the
specified force. Try to keep the test force, now the time counting down
displays on screen. When the time counting down finished, spin hand
wheel reversely to release test force steadily until hardness values
display. Then one full operation is accomplished.
4
Test force
60kg
100kg
150kg
Scale
HRA
HRB
HRC
scale indication calibration battery indicator
test force
dwell time
unit
button

5
Maintenance
Tester should NOT be stocked in carry case for a long time.
The bottom of adapter and iron seat should keep dry and clean,
resistance of rust. Paint a little grease on the surface of adapter and
iron seat if not operating for a long time.
Do not forerake the tester, in case of damage to the screen.
Pull out the battery from box in case of contaminating the tester by its
weeping if it is predicted not to use for some time.
It could be stocked outdoors in long time.
Do not use water or detergent to clean it.
Adapter is restricted to disassemble, except special adapters needed.
Other parts are forbidden to disassemble without instruction and
authority.
Notes:
a. Test force should be held until time values disappeared, otherwise
the screen will display "Hold Not Enough".
b. It is better to load the total test force once, without any pause.
c. In releasing test force, "Go On" will display on screen when test force
arrives at 0.0kg. The indenter should be upward until hardness values
display.
d. Please change another measuring point when overload.
Calibration
Enter calibration mode and test 1st point and get the value, then there
will be a symbol “?” flash 6 times.
1
Now test 2nd point after the
third point.
symbol “?” flash 6 times, then make the
2
The screen will display the average value of this three measurement,
you can press the “STAT” and “CONV” buttons to adjust the value, at
last press “DEL” to finish the calibration.
3
Other insize Test Equipment manuals

insize
insize ISH-RD200 User manual

insize
insize ISH-PHB User manual

insize
insize IST-TT Series User manual

insize
insize ISR-S300 User manual

insize
insize IST-TT Series User manual

insize
insize ISH-PHA User manual

insize
insize ISHW User manual

insize
insize ISH-MRD200 User manual

insize
insize ISH-MR150 User manual

insize
insize ISF-MT1K User manual


