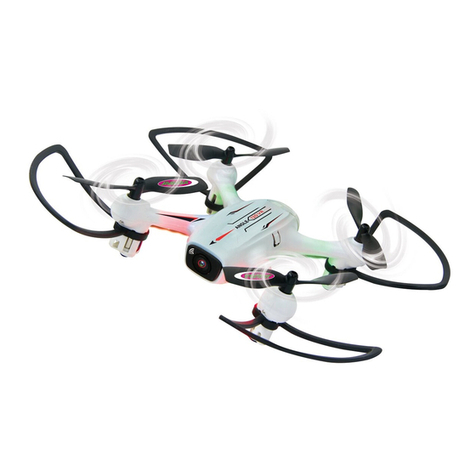
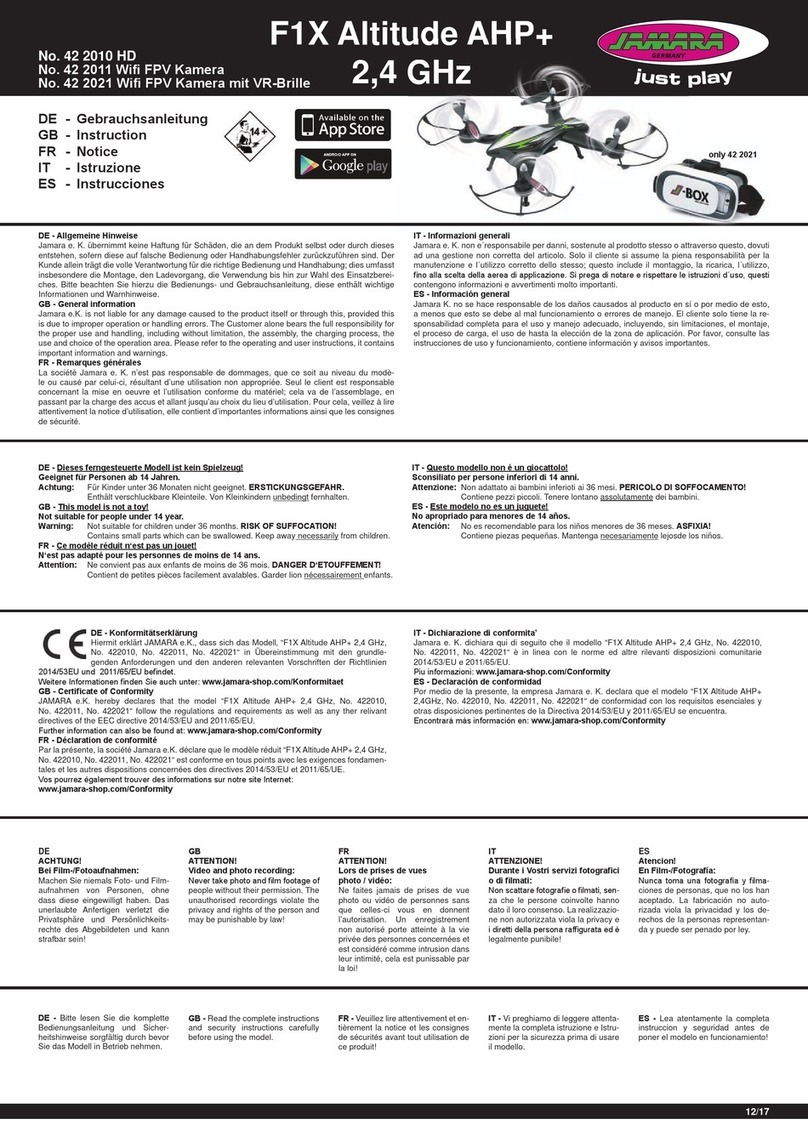
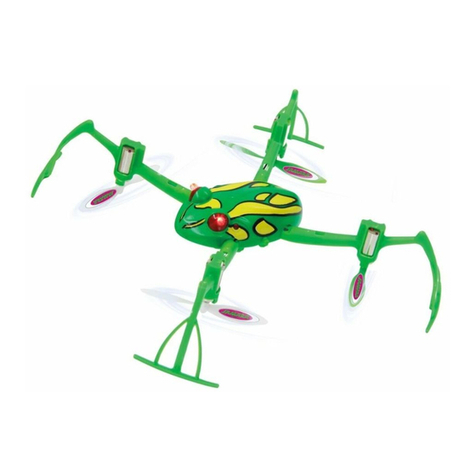
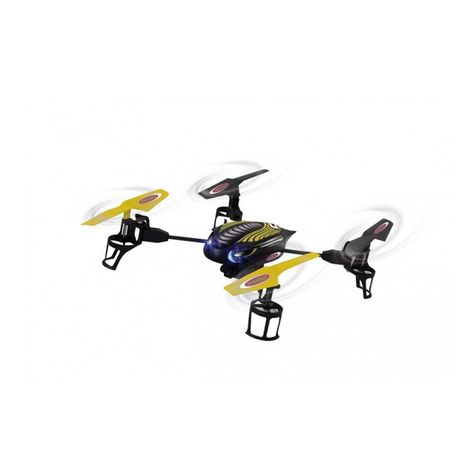
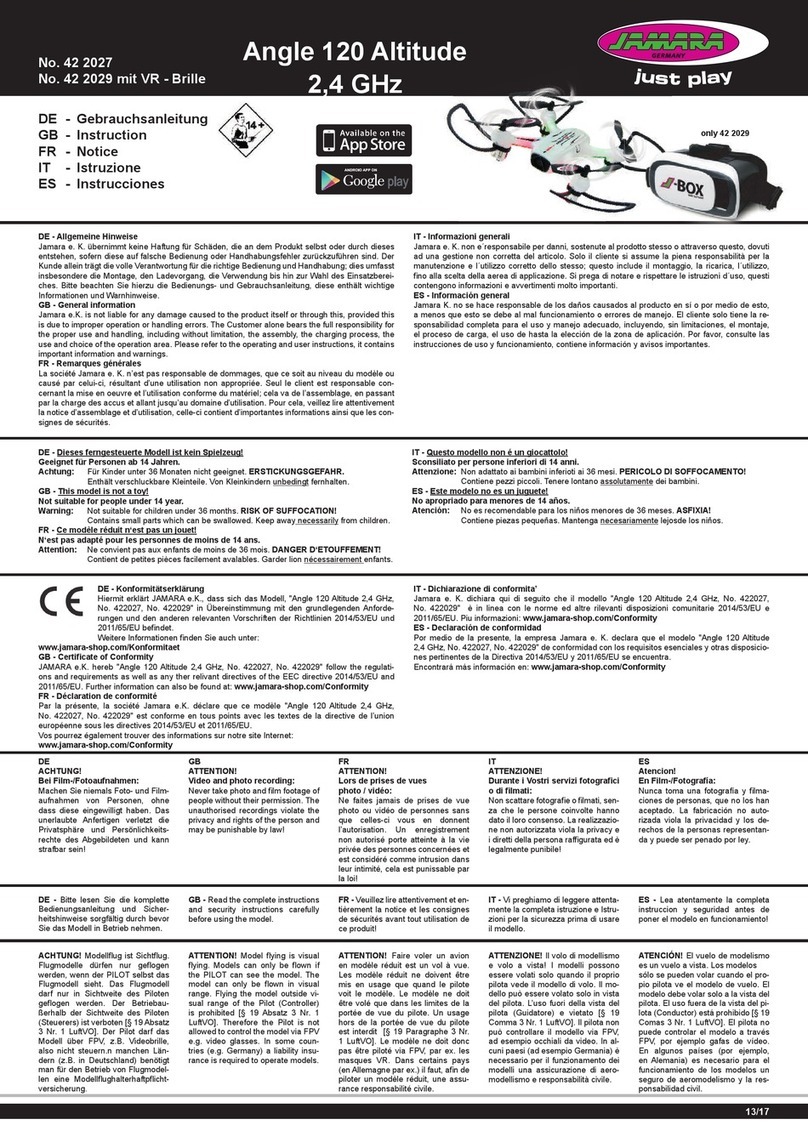
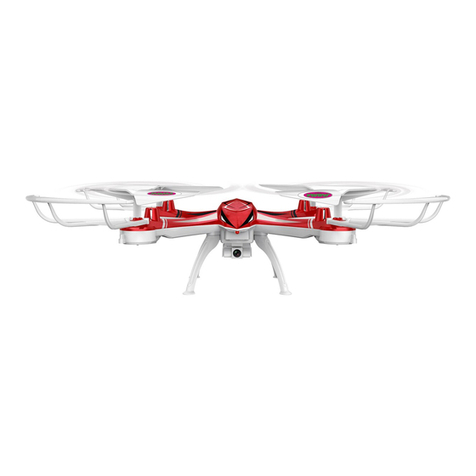
Jamara Camostro HD AHP+ 2,4 GHz User manual

??/15
DE - Allgemeine Hinweise
Jamara e. K. übernimmt keine Haftung für Schäden, die an dem Produkt selbst oder durch dieses
entstehen, sofern diese auf falsche Bedienung oder Handhabungsfehler zurückzuführen sind. Der
Kunde allein trägt die volle Verantwortung für die richtige Bedienung und Handhabung; dies umfasst
insbesondere die Montage, den Ladevorgang, die Verwendung bis hin zur Wahl des Einsatzberei-
ches. Bitte beachten Sie hierzu die Bedienungs- und Gebrauchsanleitung, diese enthält wichtige
Informationen und Warnhinweise.
GB - General information
Jamara e.K. is not liable for any damage caused to the product itself or through this, provided this
is due to improper operation or handling errors. The Customer alone bears the full responsibility for
the proper use and handling, including without limitation, the assembly, the charging process, the
use and choice of the operation area. Please refer to the operating and user instructions, it contains
important information and warnings.
FR - Remarques générales
La société Jamara e. K. n’est pas responsable de dommages, que ce soit au niveau du modèle ou
causé par celui-ci, résultant d’une utilisation non appropriée. Seul le client est responsable con-
cernant la mise en oeuvre et l’utilisation conforme du matériel; cela va de l’assemblage, en passant
par la charge des accus et allant jusqu’au domaine d’utilisation. Pour cela, veillez lire attentivement
la notice d’assemblage et d’utilisation, celle-ci contient d’importantes informations ainsi que les con-
signes de sécurités.
IT - Informazioni generali
Jamara e. K. non e´responsabile per danni, sostenute al prodotto stesso o attraverso questo, dovuti
ad una gestione non corretta del articolo. Solo il cliente si assume la piena responsabilità per la
manutenzione e l´utilizzo corretto dello stesso; questo include il montaggio, la ricarica, l´utilizzo,
noallasceltadellaaereadiapplicazione.Sipregadinotareerispettareleistruzionid´uso,questi
contengono informazioni e avvertimenti molto importanti.
ES - Información general
Jamara K. no se hace responsable de los daños causados al producto en sí o por medio de esto,
a menos que esto se debe al mal funcionamiento o errores de manejo. El cliente solo tiene la re-
sponsabilidad completa para el uso y manejo adecuado, incluyendo, sin limitaciones, el montaje,
el proceso de carga, el uso de hasta la elección de la zona de aplicación. Por favor, consulte las
instrucciones de uso y funcionamiento, contiene información y avisos importantes.
DE - Konformitätserklärung
Hiermit erklärt JAMARA e.K., dass das Modell‚ “Camostro HD AHP+ 2,4 GHz, No. 422017“ in Über-
einstimmung mit den grundlegenden Anforderungen und den anderen relevanten Vorschriften der
Richtlinien2014/53/EUund2011/65/EUbendet.
WeitereInformationenndenSieauchunter:www.jamara-shop.com/Konformitaet
GB - Certi cate of Conformity
JAMARA e.K. hereb “Camostro HD AHP+ 2,4 GHz, No. 422017“ follow the regulations and requi-
rements as well as any ther relivant directives of the EEC directive 2014/53/EU and 2011/65/EU.
Furtherinformationcanalsobefoundat:www.jamara-shop.com/Conformity
FR - Déclaration de conformité
Par la présente, la société Jamara e.K. déclare que ce modèle “Camostro HD AHP+ 2,4 GHz, No.
422017“ est conforme en tous points avec les textes de la directive de l’union européenne sous les
directives 2014/53/EU et 2011/65/EU.
VospourrezégalementtrouverdesinformationssurnotresiteInternet:
www.jamara-shop.com/Conformity
IT - Dichiarazione di conformita’
Jamara e. K. dichiara qui di seguito che il modello “Camostro HD AHP+ 2,4 GHz, No. 422017“ è in
linea con le norme ed altre rilevanti disposizioni comunitarie 2014/53/EU e 2011/65/EU.
Piuinformazioni:www.jamara-shop.com/Conformity
ES - Declaración de conformidad
Por medio de la presente, la empresa Jamara e. K. declara que el modelo “Camostro HD AHP+ 2,4
GHz, No. 422017“ de conformidad con los requisitos esenciales y otras disposiciones pertinentes
de la Directiva 2014/53/EU y 2011/65/EU se encuentra.
Encontrarámásinformaciónen:www.jamara-shop.com/Conformity
DE - Entsorgungshinweise
Bitte sorgen Sie für eine fachgerechte, den gesetzlichen Vorschriften entsprechende
Entsorgung der Batterien und/oder der Akkus. Bitte werfen Sie nur entladene Akkus in
die Sammelboxen beim Handel oder den Kommunen.
GB - Disposal restrictions
Please care for a environmental correct and legal way of disposing the batteries and/
or accus. Please, only throw away empty battery packs into the collect-boxes in your
local shops or commune.
FR - Consignes de recyclage
Veuillez respecter les consignes de recyclage des accus et/ou piles. Veuillez ne jeter que des piles/ac-
cus vides dans les bacs de ramassages que vous trouverez dans différents commerces ou au centre
de recyclage de votre commune.
IT - Istruzioni per lo smaltimento
Si prega di assicurarsi che le batterie (ricaricabili e non) siano smaltite a regola d‘arte, conforme-
mente alla normativa vigente. Gettare soltanto batterie scariche negli appositi contenitori presso i ri-
venditori o gli enti comunali (in genere le batterie sono scariche quando il modello non funziona più).
ES - Notas sobre el reciclado
Respete la normativa vigente sobre la eliminación de residuos, especialmente sobre baterías y
pilas. Lleve a reciclar las baterías solo si están descargadas.
DE - Dieses ferngesteuerte Modell ist kein Spielzeug!
Geeignet für Personen ab 14 Jahren.
Achtung: Für Kinder unter 36 Monaten nicht geeignet. ERSTICKUNGSGEFAHR.
Enthält verschluckbare Kleinteile. Von Kleinkindern unbedingt fernhalten.
GB - This model is not a toy!
Not suitable for people under 14 year.
Warning: Not suitable for children under 36 months. RISK OF SUFFOCATION!
Contains small parts which can be swallowed. Keep away necessarily from children.
FR - Ce modèle réduit n‘est pas un jouet!
N‘est pas adapté pour les personnes de moins de 14 ans.
Attention: Ne convient pas aux enfants de moins de 36 mois. DANGER D‘ETOUFFEMENT!
Contient de petites pièces facilement avalables. Garder lion nécessairement enfants.
IT - Questo modello non é un giocattolo!
Sconsiliato per persone inferiori di 14 anni.
Attenzione: Non adattato ai bambini inferioti ai 36 mesi. PERICOLO DI SOFFOCAMENTO!
Contiene pezzi piccoli. Tenere lontano assolutamente dei bambini.
ES - Este modelo no es un juguete!
No apropriado para menores de 14 años.
Atención: No es recomendable para los niños menores de 36 meses. ASFIXIA!
Contiene piezas pequeñas. Mantenga necesariamente lejosde los niños.
Camostro HD
AHP+ 2,4 GHz
No. 42 2017
K
m/h
K
K
m
K
m
m
K
m
K
m
K
m
K
m
/h
m/h
m
m/h
m
/h
/h
m/h
m
/h
40
5TURBO
DE - Gebrauchsanleitung
GB - Instruction
FR - Notice
IT - Istruzione
ES - Instrucciones
AHP+ 2,4 GHz
AHP+ 2,4 GHz
25/16

2
DE - Achtung!
Vor dem Betrieb:
Erst das Modell und dann den Sender einschalten.
Bei Beendigung:
Erst das Modell und dann den Sender ausschalten.
●Betreiben Sie Ihr Modell niemals in Distanzen die
außerhalb Ihrer Sichtweite liegen. Sowohl die max.
Sichtweite als auch die max. Reichweite Ihres Modells
hängen von vielen Faktoren wie Witterung, Einsatzort
und vorhandenen Störfrequenzen ab. Führen Sie deshalb
vor jedem Einsatz mit einer zweiten Person, die das
Modell während des Tests sicher xiert hält, einen
Reichweitentest durch und prüfen Sie auch wie sich das
Modell während des Betriebs bei einem Signalausfall wie
z.B. bei leeren Senderbatterien oder ausgeschaltetem
bzw. ausgefallenem Sender verhält.
GB - Attention!
Before operating:
Switch the model on rst then the transmitter.
When nished:
First switch off the model then the transmitter.
● Never operate your model beyond sight. Both the
maximum visibility as well as the max. range of your
model will depend on many factors such as weather,
location and interfering frequencies. Therefore,
before each use perform a range test with a second person
securely holding the model and also check how the model
reacts if there is a signal failure e.g. when empty
transmitter batteries are installed.
FR - Attention!
Avant l’utilisation:
Allumez en premier modèle puis seulement votre l’émetteur.
Après utilisation:
Arrêtez le modèle en premier puis votre radiocommande.
●N’utilisez jamais le modèle à une distance hors de votre
visibilité. La visibilité maximale ainsi que la ortée
maximale dépendent de plusieurs facteurs tels
que le temps, le lieu d’utilisation et les présentes
fréquences perturbatrices. Pour cela, avant chaque
usage, veuillez effectuer un test de visibilité et de portée
avec une deuxième personne qui tient le modèle xé et
véri ez les réactions du modèle en usage en cas de pertes
de signal due par exemple à des piles usées ou à un
émetteur éteint.
IT - Attenzione!
Prima dell‘uso:
Accendete prima il modello e poi la trasmittente.
Dopo l‘uso:
Spegnere prima il modello e poi la trasmittente.
●Non utilizzare il suo modello fuori della distanzia di vista.
Sia la visibilità come la portata massima del vostro
modello dipendono da molti fattori, come il tempo,
disturbo di frequenza e il luogo di utilizzo. Eseguire un
test prima di ogni utilizzo del modello con una seconda
persona che tiene ssato il modello. Con questa
procedura potete testare come reagisce il modello
durante la perdita del segnale causato per esempio da una
batterie scarica oppure la radio spenta.
ES - ¡Atención!
Antes del uso:
Encender primero el modelo, y después la emisora.
Después del uso:
Apagar primero el modelo, y después la emisora.
●No utilizar su modelo fuera de la distancias de visibilidad.
Tanto la visibilidad como la capacidad máxima de su
modelo depende de muchos factores, tales como el
tiempo, frecuencia de interferencia y el lugar de
utilización. Realice una prueba antes de cada uso del
modelo con una segunda persona que fija el modelo. Con
este procedimiento se puede comprobar cómo el modelo
reacciona durante la pérdida de señal causada por
ejemplo por una batería descargada o la emisora apagada.
DE
Bezeichnung der Komponenten
1. Rotorblätter vorne (weiß)
2. Rotorblätter hinten (schwarz)
3. Kamera HD 720 P/1280 x 720P
4. Motor
5. Akku
GB
Component Description
1. Front rotor blades (white)
2. Rear rotor blades (black)
3. Camera HD 720 P/1280 x 720P
4. Motor
5. Battery
FR
Désignations des différentes pièces
1. Pales du rotor avant(blanc)
2. Pales du rotor arrière (noir)
3. Caméra HD 720 P/1280 x 720P
4. Moteur
5. Accu
IT
Denominazione dei componenti
1. Pale des rotore anteriore
(bianco)
2. Pale del rotore dietro (nero)
3. Videocamera HD
720 P/1280 x 720P
4. Motore
5. Batteria
ES
Descripción de las diferentes partes
1. Palas rotor delante (blanco)
2. Palas rotor atrás (negro)
3. Cámara HD 720 P/1280 x 720P
4. Motor
5. Batería
1
3
5
4
1
2 3
45
7
8 9
6
1
3
4
DE - ACHTUNG!
Bei Film-/Fotoaufnahmen: Machen Sie niemals Foto- und Film-
aufnahmen von Personen, ohne dass diese eingewilligt haben.
Das unerlaubte Anfertigen verletzt die Privatsphäre und Persön-
lichkeitsrechte des Abgebildeten und kann strafbar sein!
GB - ATTENTION!
Video and photo recording: Nevertakephotoandlmfootage
of people without their permission. The unauthorised recordings
violate the privacy and rights of the person and may be punis-
hable by law!
FR - ATTENTION!
Lors de prises de vues photo / vidéo: Ne faites jamais de
prises de vue photo ou vidéo de personnes sans que celles-ci
vous en donnent l’autorisation. Un enregistrement non autorisé
porte atteinte à la vie privée des personnes concernées et est
considéré comme intrusion dans leur intimité, cela est punissa-
ble par la loi!
IT - ATTENZIONE!
Durante i Vostri servizi fotogra ci o di lmati: Non scattare
fotograeolmati,senzachelepersonecoinvoltehannodatoil
loro consenso. La realizzazione non autorizzata viola la privacy e
idirettidellapersonarafgurataedèlegalmentepunibile!
ES - Atencion!
En Film-/Fotografía: Nuncatomaunafotografíaylmaciones
de personas, que no los han aceptado. La fabricación no auto-
rizada viola la privacidad y los derechos de la personas repre-
sentanda y puede ser penado por ley.
DE
1. LCD-Display
A. Licht
B. Batteriestatus
C. Trimmung
D. Ausschlagsanzeige
E. Photo- / Videoanzeige
2. Turbo
3. Flipmodus
4. Gasknüppel /Gieren
5. Steuerhebel Nick/Roll
6. Power LED
7. Ein-/Ausschalter
8. ▲Photofunktion
◄LEDLichtein/aus
▼Videofunktion
►Kompass-&Flybackfunktion
9. Rolltrimmung◄►
(◄links/►rechts)
Nicktrimmung▲▼
(▲vor/▼zurück)
Batterien einlegen
Auf Polarität achten
GB
1. LCD display
A. Light
B. Power indication
C. Tuning indication
D. Throttle output display
E. Take photo / video
2. Turbo
3. Flip mode
4. Speed control stick / Rudder
5. Nick/Roll control stick
6. Power LED
7. Power switch
8. ▲Photofunction
◄LEDlighton/off
▼Videofunction
►Compass&Flybackfunction
9. Rolltrim◄►
(◄left/►right)
Nicktrim▲▼
(▲forward/▼backward)
Fitting the batteries
Observe the polarity.
FR
1. AfcheurLCD
A. Lumière
B. Etat des piles de l’émetteur
C. Trimmage
D.Afchagedesortiegaz
E. Fonction photo / vidéo
2. Turbo
3. Mode de Flip
4. Gaz-/manche d’anti-couple
5. Manche Roll-/Nick
6. Power LED
7. Interrupteur On/Off
8. ▲Fonctionphoto
◄LEDlumièreon/off
▼Fonctionvidéo
►Fonctionboussole&Flyback
9. TrimRoll◄►
(◄droite/►gauche)
TrimNick▲▼
(▲avant/▼arrière)
Mise en place des piles
Respecter la polarité.
IT
1. Display
A. Luce
B. Stato batteria trasmittente
C. Trim
D. Display di uscita
dell‘acceleratore
E. Funzione foto / video
2. Turbo
3. Flip mode
4. Leva Gas/Coda
5. Leva Roll/Nick
6. Power LED
7. Interruttore ON/OFF
8. ▲Funzionefoto
◄LEDluceon/off
▼Funzionevideo
►FunzioneBussola&Flyback
9. TrimRoll◄►
(◄destra/►sinistra)
TrimNick▲▼
(▲avanti/▼indietro)
Montaggio delle pile
Rispettando la polarità.
ES
1. LCD
A. Luz
B. Estado de la batería en la
emisora
C. Equilibrio
D. Visualización de salida del
acelerador
E. Función de foto / de video
2. Turbo
3. Flip mode
4. Gas / dirección palanqua
5. Roll-/Nick palanqua
6. Power LED
7. Interruptor ON/OFF
8. ▲Funcióndefoto
◄LEDluzon/off
▼Funcióndevídeo
►Funciónbrújula&Flyback
9. EquilibrioRoll◄►
(◄izquierda/►derecha)
EquilibrioNick▲▼
(▲delante/▼atraz)
Instalación de las pilas
Preste atención a la polaridad.
4x AA
A
B
C
C
CD
E

3
DE - Ladevorgang USB
• TrennenSiedieSteckverbindungvomModellzumAkku(aus
Sicherheitsgründen wird empfohlen, den Akku dem Modell zu
entnehmen).
• SteckenSiedenUSB-SteckerdesLadekabelsindieUSB-
Buchse ihres PC`s. Die LED leuchtet auf, sie zeigt
Ladebereitschaft an.
• VerbindenSiedenAkkumitdemUSBStecker.
• ErlischtdieLED,istderLadevorganggestartet.Sobalddie
LED leuchtet, ist der Ladevorgang abgeschlossen.
Nach etwa 40 - 60 min. ist der Ladevorgang abgeschlos-
sen, die Flugzeit bei vollgeladenen Akku beträgt ca. 5 - 10
Min.
Achtung!
Lassen Sie dem Modell nach jedem Einsatz genügend Zeit
um abzukühlen bevor Sie es wieder in Betrieb nehmen. Beim
Verwenden eines etwaigen Tauschakkus muss zwischen je-
dem Akkuwechsel mindestens eine Abkühlphase von 8 Mi-
nuten eingehalten werden bis das Modell wieder betrieben
wird. Bei Überhitzung kann Beschädigung der Elektronik
oder Brandgefahr die Folge sein.
GB - Charging by USB
• Disconnecttheconnectorfromthemodeltothebattery.(for
safety it is recommended to remove the batteryfrom the
model).
• InserttheUSBplugfromtheUSBcableintotheUSBsocket
of your PC. The LED indicator will illuminate indicating that
the charger is ready.
• ConnectthebatterywithUSBcharger.
• The LED light is OFF whilst charging and turns ON when
charging complete.
The charging process should take approx. 40 - 60 min. and
shouldgiveyouapprox.5-10min.yingtime.
Attention!
Let the model cool off suf ciently after each use before put-
ting it back into operation. When using an additional batte-
ries let it cool off for minimum 8 minutes until the model is
operated again. Overheating can damage the electronics or
may result in re.
FR - Processus de charge USB
• Débranchez l’accu du modèle réduit (pour des raisons de
sécurité, il est recommandé d’enlever l’accu du modèle
réduit).
• MettezleconnecteurUSBducâbledechargedanslaprise
USB de votre PC. La LED s’allume, elle indique que le
chargeur est prêt.
• Connectezl’accuauconnecteurUSB.
• LechargementcommencequandlaLEDs’éteint.Dèsquela
LED s’allume, le chargement est terminé.
La charge est complète après environ 40 - 60 minutes et la durée
de vol est alors de l’ordre de 5 - 10 minutes.
Attention!
Après chaque utilisation, avant de remettre le modèle en
marche, laissez-le suf samment le temps de refroidir. Lais-
sez une phase de 8 minutes de refroidissement lorsque
vous utilisez une batterie de rechange pour redémarrer
le modèle de nouveau. En cas de surchauffe, les compo-
sants électroniques peuvent être endommagés ou un risque
d´incendie peut survenir.
IT - Caricamento attraverso USB
• Sconnettereilcollegamento tra la batteria eilmodello(per
motivi di sicurezza)
• CollegareilcavoUSBalcomputer.IlLED(power)indicache
il caricabatteria è alimentato.
• CollegareilcavoUSBconilpaccobatteria
• AppenasiaccendelaluceLED,lacaricaèterminata.
La ricarica é completata in 40 - 60 min‘ e la durata del volo é
mediamente di 5 - 10 min.
Attenzione!
Lasciate che il modello dopo ogni utilizzo il tempo suf ci-
ente per raffreddarsi prima di rimetterlo in funzione. Quando
si utilizza delle batterie per cambio deve essere rispettato
una fase di raffreddamento di 8 minuti tra ogni cambio della
batteria prima di rimetterlo in funzione. Il surriscaldamento
può danneggiare l’elettronica o pericolo d’incendio posso-
no esssere le conseguenze.
ES - Cargamiento a través de USB
• Desconecte el conector desde modelo a la batería (por
razones de seguridad, se recomeinda de sacar la batería del
modelo).
• Inserirel conector USBdel cable decarga en elbuje USB
de su ordenador. Le LED se iluminan, indicando que está
listo para cargar.
• ConectarlabateríaconelconectorUSB.
• Quando el LED se apaga, se inicia el proceso de carga.
QuandoelLEDsebrilla,lacargaestácompleta.
Tempodecarga:40-60min.
Tempodevuelo:5-10min
¡Atención!
Deje que el modelo después de cada uso el tiempo su ci-
ente para enfriarse antes de volver a ponerlo en funciona-
miento. Cuando se utiliza baterías para cambiar se tiene que
respetar una fase de enfriamiento de 8 minutos entre cada
cambio de las baterías antes de ponerlo de nuevo en funcio-
namiento. El sobrecalentamiento puede dañar la electrónica
o peligro de incendio puden ser la consecuencia.
DE - Binden von Sender und Modell
Der Empfänger in Ihrem Modell ist mit einer Einschalt-Sicher-
heitsfunktion versehen. Das garantiert, dass das Modell nur bin-
det wenn es ein gültiges Sendersignal erhält.
Achtung! Erst das Modell und dann den Sender einschalten.
DiekorrekteVorgehensweiseistwiefolgt:
1. Stellen Sie den Gashebel ganz auf die unterste Position
(kein Gas). Der Sender ist ausgeschaltet!
2. PlatzierenSiedasModellaufeinergeradenOberäche.
Schieben Sie den Akku ein und verbinden Sie den Akku mit
dem Modell. Schließen Sie das Akkufach und schalten das
Modell ein. Nun das Modell nicht mehr bewegen, damit der
Gyro sich einstellen kann. Die LEDs am Modell beginnen zu
blinken. Schalten Sie jetzt den Sender ein.
3. Zum initialisieren schieben Sie den Gashebel ganz nach
oben und wieder zurück, dabei ertönt ein akustisches Signal.
Damit sich das Gyrosystem während des Bindens
initialisieren kann, sollte das Modell auf einer ebenen Fläche
stehen. Wenn die LEDs am Modell dauerhaft brennen ist der
Bindevorgang abgeschlossen.
Sollte es nicht funktionieren, wiederholen Sie den
Prozess.
GB - Binding of transmitter and model
Your RC model is tted with a Power-On failsafe. This is de-
signed to ensure that the model’s motor will not start unless it
detects a suitable radio-control signal when the LiPo battery is
connected.
Attention: Switch the model on rst then the transmitter.
ThecorrectStart-Upsequenceisasfollows:
1. Make sure that the throttle stick are at the bottom (no throttle
is given)! The transmitter is off!
2. With the model places on level surface, push the lipo battery
packinthedirectionuntilxedintoposition.Atthistimeavoid
moving the model so the radio and gyro system can initialize.
The LEDs on the model blinking. Turn on the transmitter.
3. For instalation put the gas pedal to the top and back, now an
acoustic voice. The model should stand on a level place, so
that the Gyrosystem during the connection can install. If the
LEDs on the model permanently light, the binding process is
completed.
After the radio binding is done, you don‘t need to re-bind
it anymore.
FR - Synchroniser le modèle avec l‘émetteur.
Le récepteur de votre modèle est équipé d‘une fonction de sécu-
rité. Cela garantit que le modèle se connecte uniquement si les
signaux de l’ émetteur sont valides.
Attention!
Allumez en premier modèle puis seulement votre l’émetteur.
Laprocédureàsuivreestlasuivante:
1. Poussez la manette des gaz jusqu’ à la position la plus basse
(pas de gaz). L‘émetteur est éteint!
2. Placez l’modèle sur une surface horizontale plane. Mettez en
placel’accuetbranchez-le.Nebougezplusl’modélean
que le gyroscope puisse se régler. Les lumières LED à sur le
châssiscommencentàclignoter.Allumezlerécepteur.
3. Pour l’initialisation, poussez le manche des gaz
complètement en avant puis retour, un signal acoustique se
fera entendre. Pendant l’opération le modèle devra se situer
sur une surface plane de sorte que le gyroscope puisse
s’initialiser pendant la synchronisation. Les lumières LEDs
sur le modèle brûlent en permanence. L’modèle est
maintenant utilisable.
Si la LED recommence à clignoter il faut réitérer le
process.
1 2 3

4
forward
left
backward
right
forward
backward
left
1
1 2
2 3
IT - Binding trasmettitore e modello
Èimportantedinontoccare/sorarel’elicotterodurantelafase
del binding.
Attenzione!
Accendete prima il modello e poi la trasmittente.
Altrimenti il Gyro non si può inizializzare.
1. Portare l‘acceleratore nella posizione più bassa (gas a zero).
Il trasmettitore è spento!
2. Il Binding deve avvenire su un tavolo oppure per terra.
Collegare il pacco batteria. I LED del telaio cominciano a
lampeggiare. Accendere il trasmittente.
3. Perinizializzarepremerelalevadelgasnosopraetuttoil
tragitto indietro. Durante questa manovra si sente un
segnale acustico. Per permettere al sistema - giroscopio di
inizializzarsi, il modello deve essere posato su una
superciepiana.SeiLEDsonoaccesisulmodeloè
completato il processo di associazione.
In caso che il LED lampeggia, ripetete la procedura.
ES - Binding del modelo y la emisora
Si el proceso de combinar ambos se viera afectado por interfe-
rencias, empieze de nuevo.
¡Atención!
Encender primero el modelo, y después la emisora.
De lo contrario, el giro no puede inicializar.
1. Baje el stick del acelerador del todo (ninguna aceleración).
El emisora se apaga!
2. Pongaelmodeloenunasupercieplana.Metalabateríaen
su sitio. Ahora no mueva mas el modelo, para que se pueda
inicializar el giróscopo. Los LEDs comienzan a parpadear.
Encienda la emisora.
3. Para iniciar, presione la palanca de gas hacia arriba y nueve
mentehaciaatrás,tevaasuenarunseñalacústico.Para
que el sistema giroscópico durante el binding puede inicia
lizar,elmodelodebeestarenunasupercieplana.Silos
LED del modelo queman de forma permanente el proceso
de unión es completa.
Si el LED vuelve a parpadear o sigue parpadeando,
repita el proceso de combinación.
DE - Trimmen der Fluglage
Lassen Sie das Model ruhig auf einer Stelle schweben und be-
obachten Sie die Veränderungen beim Betätigen der jeweiligen
Trimmregler.
1. Trimmen der Nicklage
2. Trimmen der Roll-Lage
Akkubedingt müssen Sie das Model regelmäßig je nach Ak-
kustand austrimmen um eine stabile Fluglage zu erhalten.
GB - Trimming the model
Let the model hover in one spot and watch the changes in the
respective by pressing the trimm controls.
1. Trimming the pitch
2. Trim the roll position
Depending on the condition of the battery you need to get
the model regularly trimmed to get a stable ight.
FR - Trimmage du vol
Laissez planer le modèle à une certaine hauteur et observez les
changements quand vous actionnez les régulateurs du trimmage
1. Trim nick
2. Trim du roulement
Il faut régulièrement remettre le modèle dans une position
stable en effectuant un nouveau réglage à cause des accus.
IT - Trim del modello
Fare volare il modello ad una certa altezza e osservare i cambi-
amenti quando si preme i regolatori dei trim.
1. Trim nick
2. Trim roll
Tramite i trim e anche possibile regolare il modello così, che
resta praticamente fermo durante il volo. Queste regolazio-
ne sono da effettuare ogni volta che si collega la batteria,
dato che si tratta di regolazioni dipendenti dalla tensione
della batteria.
ES - Trim del modelo
Flotar tranquilamente el modelo y observar los cambios mientras
pulses el regulador de trim.
1. Trim nick
2. Trim roll
A través del trim es posible regular el modelo para obtener
un vuelo estable durante el vuelo. Esta regulación se tiene
que hacer cada vez que se conecta la batería, ya que esta
regulación depende de la tensión de la batería.
forward
backward
forward
backward
DE - Flugübungen
Bevor Sie mit dem Model iegen informieren Sie sich zuerst
über seine Steuerfunktionen und führen einige Übungen durch.
Platzieren Sie das Model mit der Hinterseite zu Ihnen zeigend
aufeinerebenenFläche.ÜbenSiezuerstdenSchwebeugmit
dem Gasknüppel zu kontrollieren. Anschließend versuchen Sie
die Position des Models mit Hilfe des rechten Steuerknüppels zu
verändern (vorwärts, rückwärts und seitwärts) und gegebenen-
falls abzufangen. Zuletzt sollten Sie das Drehen des Models um
die eigene Achse mit dem linken Steuerknüppel üben. Wenn Sie
die Grundfunktionen des Models beherrschen können Sie sich
an Ihren ersten kontrollierten Flug machen.
GB - Practice simulation ight
Beforeyingwiththemodelcheckrstaboutitscontrolfunctions
and perform some exercises. Place the model with the back
fa-cingtoyouonaatsurface.Practiceonlytohoverwiththe
throttle control. Then, you try to change the position of the model
using the right stick (forward, backward, sideways) and possibly
correcttheight.Atlast,youshouldpracticeturningthemodel
around its own axis with the left stick. If you are into the basic
functionsofthemodelyoucanperformyourrstcontrolledight.
FR - Voler dans la pratique
Avant de faire voler le modèle, informez vous de toutes ses fon-
ctions de contrôle et faîtes quelques essais. Placez le modèle
sur une surface platte, placez vous derrière le modèle. Essayez
de le faire planer avec la manette des gaz. Ensuite essayez
de changer la position du modèle à l’aide de la manette droite
(marche avant, marche arrière, sur les cotés). Si vous contrôlez
toutes les fonctions de base du modèle vous pouvez faire les
premiers vols.
turn
right
turn
left
UP
DOWN
forward
backward
left
backward
turn
left
left
forward
321
4

5
IT - La pratica
Prima di volare il modello, consigliamo fare conoscenza con tutte
le funzioni di controllo e di effettuare i primi voli di test. Posiziona-
reilmodellosuunasuperciepiatta,davantialpilota.Leeliche
del modello devono essere in posizione posteriore. Per primo,
provare ad alzare il modello in volo, e tenerlo “fermo” in volo.
Poi provare a cambiare la posizione del modello utilizzando la
levetta destra (per farlo andare in avanti/indietro e destra/sinist-
ra). Appena imparato le funzioni di base, procedere ad effettuare
i primi voli.
ES - Volando en la práctica
Antes de volar con el modelo, se recomienda conocer todas la
funciones de control y hacer el primero vuelo de prueba. Posici-
onarelmodeloenunasupercieplana,enfrentedelpilota.Las
palas del modelo deben estar en la posición trasera. En primo
lugar,pruebeadespegarelmodeloenvuelo,ytenerjoenel
vuelo. A continuación, intente a cambiar la posición del modelo
usando la palanca derecha (para que vas hacia adelante/atrás y
izquierda/derecha). Cuando se ha aprendido las funciones bási-
co, proceda con los primero vuelos.
turn
right
turn
left
UP
DOWN
forward
backward
left
backward
turn
left
left
forward
321
4
DE
1. Kombination von Gas, Gieren, Roll und Nick
Nach dem Sie sich mit den verschiedenen Steuermethoden
des Modells vertraut gemacht haben versuchen Sie nun die
verschiedenen Steuerungen zu kombinieren.
2. Ändern der Flugperspektive
Nach dem Sie das Fliegen des Modells von der Sicht von hin-
ten auf das Modell beherrschen ist es an der Zeit den Flug aus
der seitlich vom Modell stehenden Position und von der vom
Modell zugewandten Seite aus zu üben. Denken Sie daran,
dass Sie zum Teil invertiert (umgekehrt) steuern müssen.
3. 360 Grad Flip Figur
WennSiedieFlipfunktioneingestellthaben,iegenSieinmin.
2 Meter Höhe und bewegen den Steuerknüppel in die jeweili-
ge Richtung in die das Modell den Flip ausführen soll.
Achtung! Der Flipmodus bleibt so lange aktiv bis die Fliptaste
erneut gedrückt wird.
GB
1. Combination of gas, rudder, roll and pitch
After you are into the different control methods of the model
now you can try to combine the various controls.
2. Change of ight perspective
Afteryoumastertheyingofthemodeloftheviewfromthe
rearofthemodelitistimetopracticetheightfromthesideof
the model and from facing towards to the model. Remember,
you need to invert the controls (vice versa).
3. 360 deg ip gure
Ifyousettheipfunction,youyin2metersinheightand
move the joystick in the appropriate direction in which the
modelistoperformtheip.
Attention!Themodelstaysinipmodeuntilyoupresstheip
mode button again.
FR
1. Combinaison entre le gaz, le trim, le roulement et le nick
Si vous contrôlez toutes les différentes fonctions de contrôle,
vous pouvez combiner plusieurs fonctions entre-elles.
2. Changement de la perspective du vol
Après avoir fait des essais de vol en voyant le modèle de
l’arrière, il est maintenant temps de s’exercer en ayant le
modèle sur le coté. Pensez, qu’il faut commander le modèle à
l’inverse.
3. 360° Figure Flip
QuandvousavezactionnerlafonctionFlip,vousvolezàau
moins 2 m de hauteur. vous pouvez alors bouger le manche
de contrôle dans la direction, dans laquelle le modèle devra
faireleip.
Attention! Lemodeipresteactivejusqu‘àcequelatouche
de bascule soit à nouveau appuyée
IT
1. Combinazione dei comandi (gas, rotazione, roll e nick)
Appena imparato i singoli comandi, provate a combinarle l’uno
con l’altro.
2. Cambiare la perspettiva del volo
Dopo i test di volo, avete imparato di comandare il modello
visto da dietro. Adesso fate volare il modello vista dal lato,
oppure davanti. In questo caso cambia il senso di comando ed
ancheilgradodidifcoltà.
3. 360° Effettuare un Flip durante il volo
Attivando il Flip funzione , è mantenere almeno 2 m di altezza,
si possono effettuare dei Flip durante il volo. Basta azionare la
leva.
Attenzione! IlmodeFliprimaneattivatonchesiripremeil
tasto Flip.
ES
1. Combinacion de los controles (gas, rotación, roll y nick)
Después de que haya familiarizado con los diferentes
métodos de control del modelo, probar ahora de combinar los
diversos controles
2. Cambio de la prespectiva de vuelo
Después de los vuelos de pruebas, has aprendido a controlar
el modelo de la vista desde atrás. Ahora hacer volar de la vista
desde el lado del modelo o delante. En esta caso cambia el
sentidodemandoytambienelgradodedicultad.
3. 360° efectuar un Flip durante el vuelo
Activando el Flip función y mantener al modelo 2 m de altura,
se pueden efectuar Flips durante el vuelo. Semplemente
activar la palanca.
Atención! El modo Flip resta activado hasta que presiona de
nuevo el botón Flip.
black blackwhite white
2
3
1
Table of contents
Other Jamara Drone manuals

Jamara
Jamara Loky User manual

Jamara
Jamara QCF-110 User manual

Jamara
Jamara FlyScout AHP+ User manual

Jamara
Jamara Q-Drohne AHP User manual

Jamara
Jamara Q4X User manual

Jamara
Jamara Angle 120 AHP+ User manual

Jamara
Jamara 42 2002 User manual

Jamara
Jamara HL20 User manual

Jamara
Jamara Merlo Altitude HD AHP+ 2,4 GHz User manual

Jamara
Jamara Loony Frog 3D AHP+ User manual