Place the �n on the gears
Your sta�ons is being updated
Do you want to update firmware?
EARTH FUSE F1.25 A
USE ONLY WITH A 250 V FUSE
EARTH FUSE F1.25 A
Place the �n on the gears
Your sta�ons is being updated
Do you want to update firmware?
EARTH FUSE F1.25 A
USE ONLY WITH A 250 V FUSE
EARTH FUSE F1.25 A
Place the �n on the gears
Your sta�ons is being updated
Do you want to update firmware?
EARTH FUSE F1.25 A
USE ONLY WITH A 250 V FUSE
EARTH FUSE F1.25 A
Place the �n on the gears
Your sta�ons is being updated
Do you want to update firmware?
EARTH FUSE F1.25 A
USE ONLYWITH A 250 V FUSE
EARTH FUSE F1.25 A
1
9
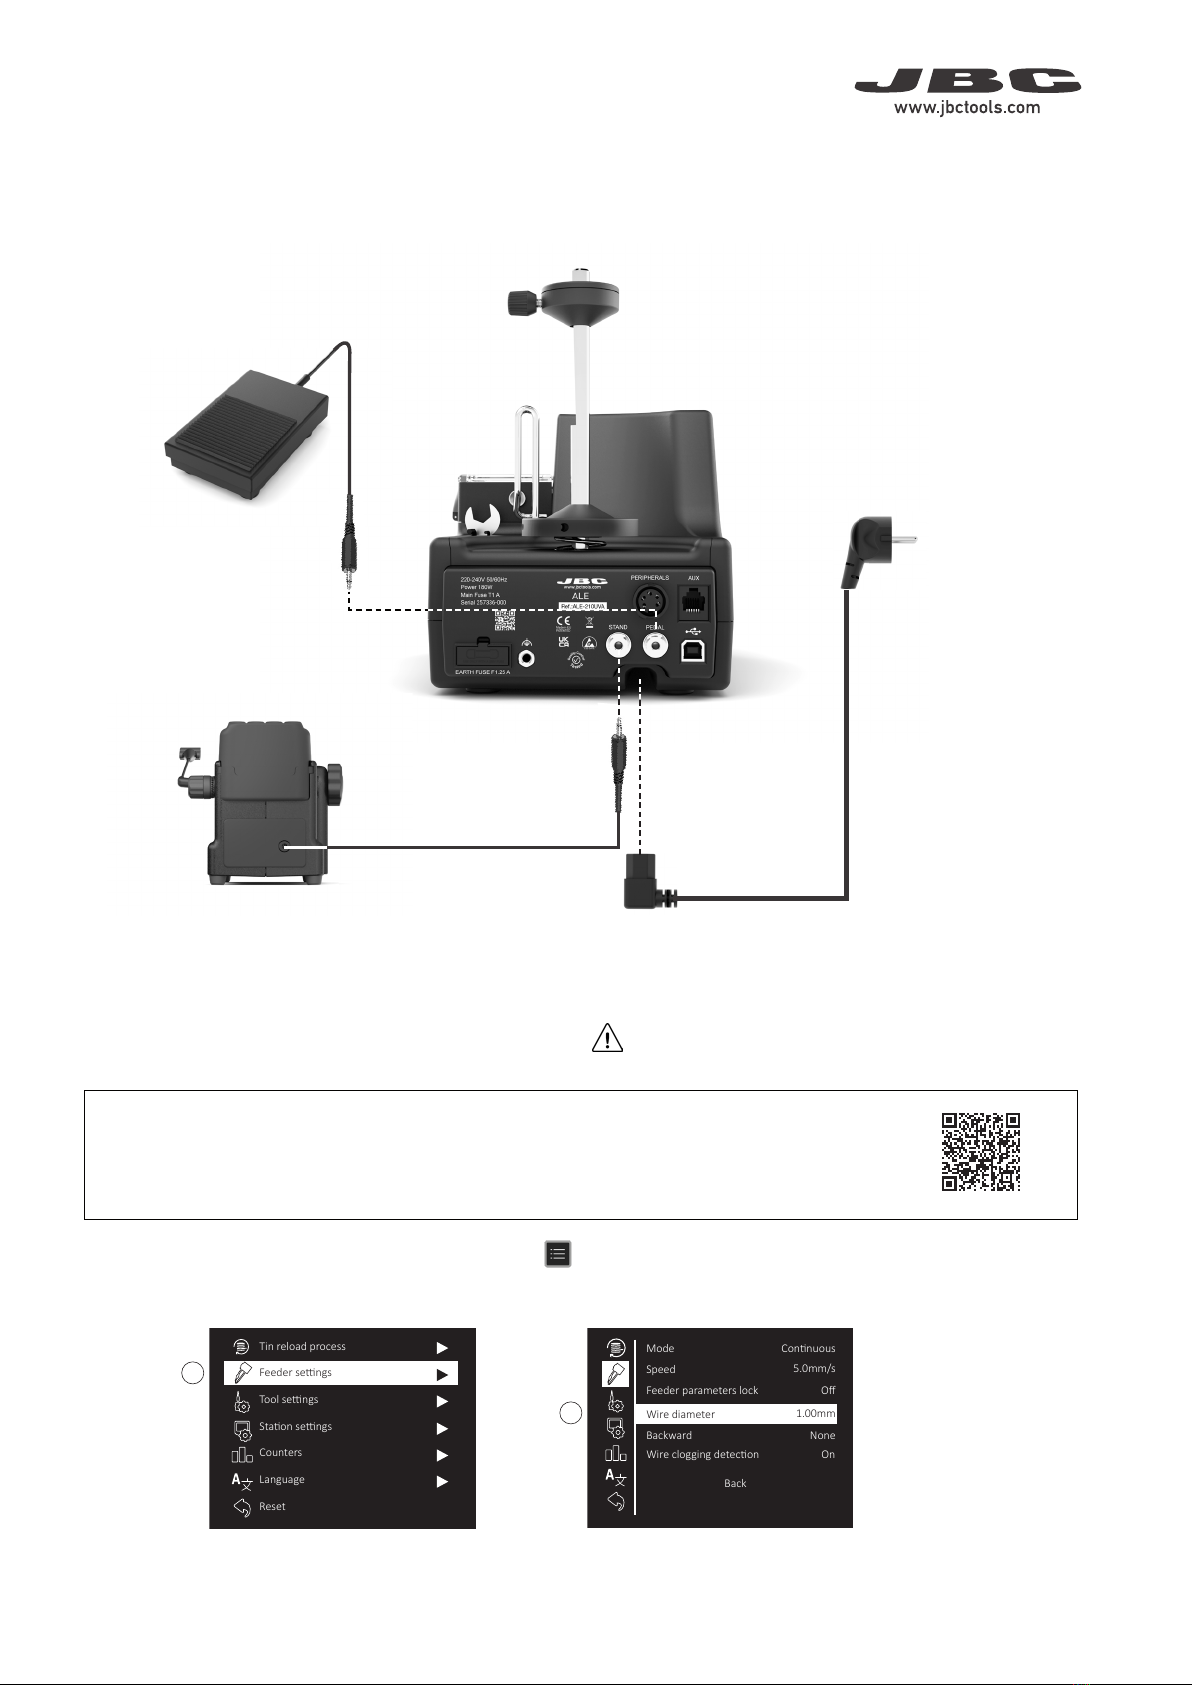
Feeder Setting Modes
Depending on the selected mode, different parameters are available for “Feeder Settings”.
Choose between “continuous”, “discontinuous” and “program” mode. Access to Main Menu by pressing , select “Feeder Settings” (1) and
then “Mode” (2). For mor details see ALE control Unit Manual or JBC Web www.jbctools.com/auto-feed-stations.html
For more details see ALE control unit instruction manual,
download at www.jbctools.com/ale-product-2037.html
Inlet Nozzle
Wire Guidance
Solder Wire
Wire Winding Direction
Solder Reel
With Solder Wire Perforation
To unload perforated solder wire that has already passed through
the guide tube, cut the wire between the wire guidance and the
inlet nozzle (1).
To extract the wire out of the tool and the guide tube, hold the tool
on your hand and press until the wire stops moving forward.
Grasp the wire coming out of the outlet nozzle with a pliers and pull
from it until it is completely out.
Without Solder Wire Perforation
When using a kit without solder wire perforation, press
until the wire is completely wound to unload the solder wire.
It is best to rotate the reel by hand as the wire is being pulled back
in order to keep it neatly arranged on the reel.
Or, if prefered, proceed as described above for perforated solder
wire unloading.
Step 9 Solder Wire Unloading
Step 9 Control Process
Access to ALE
control unit
product page