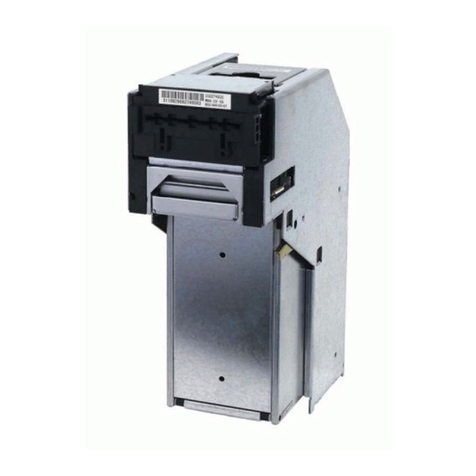
JCM GLOBAL RDM-100 Series Quick setup guide

© 2016, JAPAN CASH MACHINE CO., LTD.
Website: http://www.jcmglobal.com
Issue #4111-IGE-01-00
RDM-100™Series
Retail Deposit Module
Integration Guide
Revision A, Aug 24, 2016
P/N 960-000186R_Rev. A {EDP #253995}

This product document (hereinafter referred to as “Manual”) is fully covered by legal Copyrights owned by the JAPAN
CASH MACHINE CO., LTD. (hereinafter referred to as “JCM”) under Japanese laws and other Foreign Countries.
This Manual contains many copyrighted, patented or properly registered equipment items manufactured by JCM, that
are prohibited and illegal to duplicate, replicate, copy in whole, or in part, without the express authorization by JCM with
the following exceptions:
1. When an authorized JCM agency or distributor duplicates the Manual for sales promotion and/or service
maintenance of the product, or technical service personnel education as required; and
2. When an end user duplicates the Manual to maintain operation of the product or operate the product in general.
JCM retains all rights to amend, alter, change or delete any portion of this Manual in whole, or in part, or add items
thereto without notice regarding the product or its related products.
JCM is a registered trademark of JAPAN CASH MACHINE CO., LTD. All other product names mentioned herein may be
registered trademarks or trademarks of their respective companies. Furthermore, ™, ®and © are not always mentioned
in each case throughout this publication.
Copyright © 2016 By JAPAN CASH MACHINE CO., LTD.
RDM-100™ Series Retail Deposit Module Integration Guide
International Compliance
• RoHS Directives
• UL & c-UL Marks
• CE Mark
• CB Scheme
• FCC & IC Directives
Electrical Current Symbol
Direct Current: indicates Direct Current values on product labels.
REVISION HISTORY
Rev №.Date Reason for Update Comment
A 8-24-16 Initial Document
or or or or
See Below.
Contains Transmitter Module
FCC ID: VZQNRWA3
MODEL NO.: NRWA3
IC: 8285A-NRWA3
This device complies with Part 15 of FCC Rules and RSS-Gen of IC Rules. Operation is subject to the following two conditions:
(1) this device may not cause interference, and (2) this device must accept any interference, including interference that may
cause undesired operation of this device.
FCC WARNING
Changes or modifications not expressly approved by the party responsible for compliance could void the user’s authority to
operate the equipment.
FCC NOTICE
This equipment has been tested and found to comply with the limits for a Class A digital device, pursuant to part 15 of the FCC
Rules. These limits are designed to provide reasonable protection against harmful interference when the equipment is operated
in a commercial environment.
This equipment generates, uses and can radiate radio frequency energy and, if not installed and used in accordance with the
instructions, may cause harmful interference to radio communications. Operation of this equipment in a residential area is likely
to cause harmful interference in which case the user will be required to correct the interference at his own expense.
IC NOTICE
This class A digital apparatus complies with Canadian ICES-003.
Cet appareil numerique de la classe A est conforme a la norme NMB-003 du Canada.
Issue #4111-IGE-01-00

RDM-100™ Series
Retail Deposit Module
Table of Contents
P/N 960-000186R_Rev. A {EDP #253995} © 2016, JAPAN CASH MACHINE CO., LTD.
i
Page
1 GENERAL INFORMATION......................................................................................1
Description.......................................................................................................................... 1
RDM-100 Unit ..................................................................................................................... 1
Model Descriptions ............................................................................................................. 2
Precautions......................................................................................................................... 2
User Cautions ................................................................................................................................. 2
Installation Cautions ..................................................................................................................... 2
Mounting, Dismounting & Transportation...................................................................................... 2
Placing Foreign Objects into the Unit ...........................................................................................2
Preventive Maintenance ............................................................................................................... 2
Banknote Fitness Requirements..................................................................................................... 3
Primary Features ................................................................................................................3
Component Names ............................................................................................................. 4
2 SPECIFICATIONS....................................................................................................5
Technical Specifications...................................................................................................... 5
Environmental Specifications .............................................................................................. 6
Electrical Specifications ...................................................................................................... 6
Structural Specifications...................................................................................................... 6
3 INSTALLATION .......................................................................................................7
Installation Procedure ......................................................................................................... 7
Unit Installation ............................................................................................................................... 7
RDM-100 Installation Dimensions................................................................................................... 9
4 CONNECTOR PIN ASSIGNMENTS ......................................................................10
Power Source Pin Assignments....................................................................................................10
RS232C Interface Pin Assignment ............................................................................................... 10
USB Connector Pin Assignment ................................................................................................... 11
5 PREVENTIVE MAINTENANCE .............................................................................12
Clearing a Banknote Jam.................................................................................................. 12
Option Top Cover Open/Close ...................................................................................................... 12
BNF Assembly Banknote Jam ...................................................................................................... 12
Transport Assembly Banknote Jam .............................................................................................. 13
BAU Banknote Jam....................................................................................................................... 13
Holding Transport Rear Assembly Banknote Jam ........................................................................ 13
Upper and Lower Transport Assembly Banknote Jam.................................................................. 14
RJ Assembly/Cash Box Transport Assembly Banknote Jam........................................................ 15
Cleaning Procedure .......................................................................................................... 16
Sensor and Roller Cleaning Procedure ........................................................................................ 16
Sensor Locations .......................................................................................................................... 17
Sensor Cleaning ............................................................................................................... 18
BNF Assembly Cleaning ............................................................................................................... 18
BNF Remaining Sensor/Start Sensor Cleaning .......................................................................... 18
BNF Stop Sensor 1, 2 Cleaning.................................................................................................. 19
Transport Assembly Top Cover Installation ................................................................................ 20
Transport Assembly Cleaning ....................................................................................................... 20
BAU Assembly Cleaning............................................................................................................... 21
Holding Transport Rear Assembly Cleaning ................................................................................. 21
Holding Transport Assembly Cleaning.......................................................................................... 22
RJ Assembly/Cash Box Transport Assembly Cleaning ................................................................ 23
6 STANDARD INTERFACE CIRCUIT SCHEMATICS..............................................24
Host Communication Interface Schematics .................................................................................. 24

Table of Contents
P/N 960-000186R_Rev. A {EDP #253995} © 2016, JAPAN CASH MACHINE CO., LTD.
ii
Page
RDM-100™ Series Retail Deposit Module
USB Communication Interface Schematics ..................................................................................24
BAU Communication Interface Schematics ..................................................................................25
7 OPERATIONAL FLOWCHART............................................................................. 26
Operational Flowchart (Continued 1).................................................................................27
8 TROUBLESHOOTING...........................................................................................28
Introduction ........................................................................................................................28
Troubleshooting Overview .................................................................................................28
Fault Table Listings ............................................................................................................28
9 UNIT DIMENSIONS...............................................................................................33
Entire Unit Outside Dimensions.....................................................................................................33
Entire Unit with Optional Top Cover Outside Dimensions .............................................................34
RDM-100 Installation/Maintenance Space Requirements .................................................35
10 TECHNICAL CONTACT INFORMATION .............................................................37
Americas .......................................................................................................................................37
JCM American.............................................................................................................................37
Europe, Middle East, Africa & Russia ...........................................................................................37
JCM Europe GmbH.....................................................................................................................37
UK & Ireland ..................................................................................................................................37
JCM Europe (UK Office)..............................................................................................................37
Asia and Oceania ..........................................................................................................................37
JCM Gold (HK) Ltd. .....................................................................................................................37
JAPAN CASH MACHINE CO., LTD (HQ)....................................................................................37
11 INDEX....................................................................................................................39

RDM-100™ Series
Retail Deposit Module
List of Figure
P/N 960-000186R_Rev. A {EDP #253995} © 2016, JAPAN CASH MACHINE CO., LTD.
iii
Page
Figure 1 RDM-100 Unit ..............................................................................................1
Figure 2 Precautionary Symbols ................................................................................2
Figure 3 Unacceptable Banknotes .............................................................................3
Figure 4 RDM-100 Component Names ......................................................................4
Figure 5 Set Up Holes ................................................................................................7
Figure 6 Rail Brackets Confirmation ..........................................................................7
Figure 7 Rail Brackets Holes ......................................................................................7
Figure 8 Unit Withdrawal ............................................................................................7
Figure 9 Top Side Mounting .......................................................................................8
Figure 10 Bottom Side Mounting ..................................................................................8
Figure 11 Home Position ..............................................................................................8
Figure 12 Latch Plate Positioning ................................................................................8
Figure 13 Latch Plate Positioning ................................................................................8
Figure 14 RDM-100 Installation Dimensions ................................................................9
Figure 15 Opening Option Top Cover 1 .....................................................................12
Figure 16 Opening Option Top Cover 2 .....................................................................12
Figure 17 BNF Set Button ..........................................................................................12
Figure 18 BNF Top Cover Open ................................................................................12
Figure 19 BNF Transport Path ...................................................................................12
Figure 20 Transport Assembly Latch .........................................................................13
Figure 21 Transport Path ...........................................................................................13
Figure 22 BAU Latch ..................................................................................................13
Figure 23 BAU Transport Path ...................................................................................13
Figure 24 Holding Transport Rear Cover Latch .........................................................13
Figure 25 Holding Transport Assembly ......................................................................14
Figure 26 Holding Transport Rear Cover Latch .........................................................14
Figure 27 Upper Transport Assembly Open ..............................................................14
Figure 28 Upper and Lower Transport Assembly ......................................................14
Figure 29 RDM-100 Unit Withdraw 1 .........................................................................15
Figure 30 RDM-100 Unit Withdraw 2 .........................................................................15
Figure 31 Cash Box Transport Entrance Area ...........................................................15
Figure 32 Course Cover Open 1 ................................................................................15
Figure 33 Course Cover Open 2 ................................................................................15
Figure 34 General Cleaning Image ............................................................................16
Figure 35 RDM-100 Sensor Locations .......................................................................17
Figure 36 BNF Assembly Sensor/Roller Cleaning Locations .....................................18
Figure 37 Transport Assembly Top Cover Removal ..................................................19
Figure 38 Transport Assembly Sensor/Roller Locations ............................................19
Figure 39 Cutout Location ..........................................................................................20
Figure 40 Transport Assembly Sensor/Roller Locations ............................................20
Figure 41 BAU Assembly Sensor/Roller/Belt Locations .............................................21

Table of Contents
P/N 960-000186R_Rev. A {EDP #253995} © 2016, JAPAN CASH MACHINE CO., LTD.
iv
Page
RDM-100™ Series Retail Deposit Module
Figure 42 Holding Transport Rear Assembly Sensor/Belt Locations ........................ 21
Figure 43 Holding Transport Assembly (Upper) Sensor/Belt Locations .................... 22
Figure 44 Holding Transport Assembly (Lower) Sensor/Belt Locations .................... 22
Figure 45 Cash Box Transport Entrance Location .................................................... 23
Figure 46 Cash Box Transport Assembly Sensor/Belt Locations .............................. 23
Figure 47 RDM-100 Host Communication Interface .................................................. 24
Figure 48 RDM-100 USB Communication Interface .................................................. 24
Figure 49 RDM-100 BAU Communication Interface .................................................. 25
Figure 50 RDM-100 Power ON Status Operational Flowchart .................................. 26
Figure 51 RDM-100 Stand-by Status Operational Flowchart .................................... 27
Figure 52 RDM-100 Error Status Operational Flowchart ........................................... 27
Figure 53 RDM-100 Unit Entire Outside Dimensions ................................................ 33
Figure 54 RDM-100 Unit with Optional Top Cover Entire Outside Dimensions ........ 34
Figure 55 RDM-100 Installation and Maintenance Space Requirement ................... 35
Figure 56 RDM-100 with Optional Top Cover Installation and
Maintenance Space Requirement ............................................................. 35
Figure 57 RDM-100 Each Unit Installation and Maintenance Space Requirement ... 36
Figure 58 RDM-100 Each Unit and Optional Top Cover Installation and
Maintenance Space Requirement ............................................................. 36

P/N 960-000186R_Rev. A {EDP #253995} © 2016, JAPAN CASH MACHINE CO., LTD.
v
RDM-100™ Series
Retail Deposit Module
List of Table Page
Table 1 RDM-100 Model Number Specifications ......................................................2
Table 2 RDM-100 Technical Specifications ..............................................................5
Table 3 RDM-100 Environmental Specifications ......................................................6
Table 4 RDM-100 Electrical Specifications ...............................................................6
Table 5 RDM-100 Structural Specifications ..............................................................6
Table 6 RDM-100 Power Source Pin Assignments ................................................10
Table 7 RDM-100 RS232C Interface Pin Assignments .........................................10
Table 8 RDM-100 USB Connector Pin Assignments .............................................11
Table 9 RDM-100 Sensor Type Cleaning Methods ................................................17
Table 10 General Fault Conditions ...........................................................................28

P/N 960-000186R_Rev. A {EDP #253995} © 2016, JAPAN CASH MACHINE CO., LTD.
1
RDM-100™ Series
Retail Deposit Module
Integration Guide
Revision A
Description
This section provides a general overview of the
RDM™ Series Retail Deposit Module (RDM-100),
pictured in Figure 1. This section is designed to
help the user navigate through this guide with ease.
It includes the following information:
• RDM-100 Unit
• Model Descriptions
• Precautions
• Primary Features
• Component Names
• Specifications
• Installation
• Connector Pin Assignments
• Preventive Maintenance
• Standard Interface Circuit Schematics
• Operational Flowchart
• Troubleshooting
• Unit Dimensions
• Technical Contact Information
In order to make operating this device and navigat-
ing within this manual easier, the following illustra-
tions are used:
• Safety Instructions need to be observed in
order to protect the operators and the
equipment; these are identified with Bold text
and the following pictographs:
• Special Notes affect the use of the Banknote
Validator; these are identified with italic text
and the following pictograph:
• Steps require the operator to perform specific
actions; these are identified with sequential
numbers (1, 2, 3, etc.).
1 GENERAL INFORMATION
Figure 1 RDM-100 Unit
RDM-100 Unit
Figure 1 RDM-100 Unit

P/N 960-000186R_Rev. A {EDP #253995} © 2016, JAPAN CASH MACHINE CO., LTD.
2
RDM-100™ Series Retail Deposit Module
Model Descriptions
Table 1 lists the product model number
descriptions.
Precautions
Symbols in Figure 2 are defined as follows:
1. (Type 1) Do not insert a torn, folded, or wet
Banknote; it may cause a jam inside the unit.
2. (Type 2) Do not expose the unit to water. The unit
contains several precision electronic devices that
can be damaged if water or any liquid is sprayed
or spilled into the unit.
3. (Type 3) Do not install the unit in a dusty
environment. Dust may affect/degrade the sen-
sor’s performance.
U
SER
C
AUTIONS
Careful measures were taken in the design of this
product to ensure its quality; however, the follow-
ing cautions pertain to all users and should be fol-
lowed for safe operation.
Installation Cautions
The Installation Cautions are defined as follows:
1. This unit is not designed for outdoor installation.
Be sure the Host Machine contains enough pro-
tection to avoid wet or dusty conditions when
installing it in both open-air and indoor spaces.
2. Be sure the Host Machine is designed with
careful consideration for retrieving a Banknote
and/or clearing a Banknote jam.
3. Avoid exposing the Banknote Insertion Slot to
direct Sunlight and/or Incandescent Lamp
illumination having a Gradient Angle of 15
Degrees or more, and an illumination index of
3000 Lux or less. Insure that the Host Machine is
also designed to avoid exposing the Banknote
Insertion Slot to direct Sunlight or incandescent
light.
4. Do not allow the Unit to endure a range of tem-
perature and humidity beyond the environmental
limits specified (See “Environmental Specifica-
tions” on page 6).
5. Do not use the Unit in environments that may be
subject to extreme temperature changes.
6. Do not use the Unit where it may be exposed to
airborne evaporated or sporadic chemicals.
7. Clean and maintain the Unit regularly when
located in an excessively smoke filled environ-
ment.
Mounting, Dismounting & Transportation
Methods for mounting, dismounting and transport-
ing the unit:
1. Be sure to turn the Power OFF before mounting
or removing the Unit from its permanent location.
Plugging or unplugging Connector Plugs from
their receptacles while the Power is ON may
cause damage to the Unit.
2. When installing the Unit, ensure that the Unit is
properly replaced in its correct original location
and will not move by pulling.
3. Be sure to carry the Unit by both hands when
transporting. Holding the Unit by one hand may
cause personal injury if the Unit accidentally
becomes disassembled and drops away.
4. Be careful not to use excessive outside pressure
on the Unit, or subject it to excessive vibration
during transportation.
5. Do not throw or pound hard on the Unit. Improper
handling may cause personal injury and/or dam-
age to the equipment.
Placing Foreign Objects into the Unit
Observe the following precautions when placing
foreign objects into the Unit:
1. Do not insert anything except Banknotes into the
Insertion Slot. Inserting Receipts, Stapled Tickets,
Rubber Bands, or Credit Cards into the Unit may
damage the Banknote Transport path.
2. Do not inject liquids into the Banknote Insertion
Slot. Injecting water, oil or cleaning agents may
damage the Sensors within the Banknote Trans-
port path.
Table 1 RDM-100 Model Number Specifications
NoModel: RDM-100 - * * * - * * * * - *- *- *
No(1) (2) (3) (4) (5) (6) (7)
(1) Cover
0 = Yes
1 = No
(2) Cash Box Transport Path
0 = Yes
1 = No
(3) Cable Conveyor
0 = Yes
1 = No
(4) BAU Validation Country Codes
Refer to each country’s software specification
(5) Polymer
0 = Yes
1 = No
(6) Interface
0 = RS232C
1 = USB2.0(Full-Speed)
(7)
Insertion Guide
0 = None
1 = 75mm Guide (Note Maximum Width 70mm)/ for South Africa, Brazil
2 = 70mm Guide (Note Maximum Width 65mm)/ for USA, etc.
3 = 83mm Guide (Note Maximum Width 82mm)/ for Euro, etc.
Figure 2 Precautionary Symbols
Type 1 Type 2 Type 3
Figure 2 Precautionary Symbols
P/N 960-000186R_Rev. A {EDP #253995} © 2016, JAPAN CASH MACHINE CO., LTD.
3
RDM-100™ Series Retail Deposit Module
Preventive Maintenance
The preventive maintenance requirements are
defined as follows:
1. When closing the covers of each Unit, ensure that
it clicks firmly into place.
2. Do not redesign or disassemble the RDM-100.
Unauthorized use by inadequately trained person-
nel, or use outside the original manufacturer’s
intent for operation voids the warranty.
3. Perform routine cleaning and maintenance at least
once a month to keep the Unit’s performance sta-
ble.
4. Use a soft, lint-free cloth, cotton swab or non-
flammable compressed air spray to clean dust and
debris from the Sensors and Rollers.
5. If the Unit is exposed to water or liquids, use a
clean, dry micro-fiber cloth to wipe off and
absorb excess liquids immediately. Any remain-
ing liquids may affect and degrade the Sensors
and Validation component performance.
B
ANKNOTE
F
ITNESS
R
EQUIREMENTS
The following Banknote types may not validate
correctly, or worse, can cause a jam and/or damage
to the unit’s Transport Path. Banknotes exhibiting
the following conditions illustrated in Figure 3
should be avoided:
• torn
• excessive folds or wrinkles
• dirty
• curled
• wet
• containing foreign objects and/or oil
Primary Features
This RDM-100 Series Retail Deposit Module con-
tains the following primary features:
• 250 Note Capacity BNF – Two hundred fifty
Banknotes can be inserted into the BNF
Insertion Slot at one time.
• High-Speed Processing – The deposit
processing speed is 6 Notes per second
(150mm Banknotes).
• Deposit Module featuring the BAU Unit – High-
Speed and High-Performance Banknote
Acceptor Unit; the BAU is featured as the
Validation Unit. The Banknotes validated by
the BAU are stacked into the Cash Box.
Banknotes that can not be validated as
authentic are returned to the Return Tray.
Caution: Be careful to avoid personal
injury to your fingers when closing the
each cover or Transport Assembly.
WARNING: Do not inject water or liquid
agents of any kind into the Unit, as this
may cause extreme damage to the Unit.
WARNING: To minimize risk of damage
to internal printed circuit boards, never
allow excess fluid (e.g., from a wet
cleaning cloth) to drip or leak into the
device. Internal printed circuit boards
may be damaged. Do not use any
alcohol, citrusbased cleaners, solvents
or scouring agents that can damage the
plastic surfaces of the device.
Caution: Make sure Interface Harness
connections to the Host Machine are
shorter than 9.84 Feet (3 Meters) in
length. Cut off all unused portions of
the Interface Harness wiring to avoid
static electrical effects or short circuit
possibilities that could cause damage
to the Unit.
WARNING: This Unit is designed for
use with a Current limiting Power
Source! Design the Host Cabinet space
to meet all local related safety
standards.
Figure 3 Unacceptable Banknotes
Damaged Banknotes
Wrinkled Banknotes
Curled Banknotes
Folded or Partial Banknotes
Figure 3 Unacceptable Banknotes

P/N 960-000186R_Rev. A {EDP #253995} © 2016, JAPAN CASH MACHINE CO., LTD.
4
RDM-100™ Series Retail Deposit Module
Component Names
Figure 4 illustrates the RDM-100 component names and locations.
Figure 4 RDM-100 Component Names
a) BAU Unit
b) Latch Handle (BAU)
c) Latch Lever (Transport Assembly)
d) Transport Top Cover
e) BNF Top Cover
f) BNF Set Button
g) Banknote Insertion Slot
h) Banknote Return Slot
i) Latch Handle
j) Latch Button
k) Upper Transport Assembly
l) Lower Transport Assembly
m) Stay
n) Holding Transport Rear Cover
o) Latch Lever (Holding Transport Assembly)
p) Latch Lever (Cash Box Front Transport Assembly)
q) Course Cover
r) Cash Box Transport Path
s) Top Cover (Option)
t) Top Cover Stay (Option)
ba
g
e
f
j
c
d
h
i
k
l
m
p
q
r
s
n
o
t
Rear View
Bottom ViewWith Top Cover (Option)

P/N 960-000186R_Rev. A {EDP #253995} © 2016, JAPAN CASH MACHINE CO., LTD.
5
RDM-100™ Series Retail Deposit Module
2 SPECIFICATIONS
Technical Specifications
Table 2 RDM-100 Technical Specifications
Acceptance Rate*:
*. Refer to the specific Country’s “Software Information Sheet” for each Country’s particular Banknote acceptance rate.
99% or greater (Accept Priority Mode: 99.9% or greater†)
The following banknote types are excluded:
•Banknotes with excess or poor magnetism or unclear graphics
•Double (dual) Notes
•Worn, dirty, wet, stained, torn or excessively wrinkled Banknotes
•Banknotes having folded corners or edges
•Banknotes having the wrong cut dimensions or printing displacement
•Returned Banknotes because of incorrect or failed insertion.
†. In this case, acceptable country has priority.
Acceptable Denomination: 200 Denomination Maximum
Banknote Types Accepted: •Long side: 110-177mm (4.33-6.97 in.) ‡
•Short side: 60-85mm (2.36-3.35 in.)
‡. Use the other return tray if the Long Side is greater than 160mm.
Insertion Direction: Four-Way
Bulk Feed: Approximately 250 Notes Maximum (US Dollar/New Banknote)
Processing Speed: 6 Notes per second (150mm Banknotes)
Return Tray Capacity: Approximately 20 Notes Maximum
Separate Cash Box** Usable:
**.Separate Cash box is supplied by the OEM.
Cash Box Transport Path guides the Banknote into Cash Box and is
attached with screws from the upper surface or from inside the Cash Box
Validation Method: Refer to “BAU Operation and Maintenance Manual”
Diagnostic Indicators:
LED
Insertion Slot LED: Idle = Green Lit / Insertion = Green Flash
Misaligned = Yellow Flash / Error = Red Flash
Dispense Slot LED: Banknote Detection = Blue Flash
no Banknote = extinguished
Interface††:
††.The Interface Harness connecting to the Host should be less than 3m (9.84 ft).
Host: RS232C, USB 2.0 (Full-Speed)
BAU: USB 2.0 (Full-Speed) (for BAU Template Download)

P/N 960-000186R_Rev. A {EDP #253995} © 2016, JAPAN CASH MACHINE CO., LTD.
6
RDM-100™ Series Retail Deposit Module
Environmental Specifications
Electrical Specifications
Structural Specifications
Table 3 RDM-100 Environmental Specifications
Operating Temperature: +5ºC to +45ºC (41ºF to 113ºF)*
*. Depends on hydrothermal conditions.
Storage Temperature: -20ºC to +60ºC (-4ºF to 140ºF)*
Relative Operating Humidity: 20% to 80% RH (non-condensed)
Relative Storage Humidity: 10% to 90% RH (non-condensed)
Visible Light Sensitivity:
Avoid light on the Banknote Insertion/Return Slots having an Illumination
index of 3000 Lux or less and if warm color incandescent light range
radiant of 0 to 45 degrees from all sides or if light from a Mercury Lamp a
radiant angle between 10 to 85 degrees
Installation: Indoors Only (Built-in)
Fixture material/shape must endure 55kg weight without distortion
Table 4 RDM-100 Electrical Specifications
Supply Voltage*:
*. Use a Current Source Limiting Power Supply
24V DC ±10%
Current Consumption:
24V DC
•Standby = 0.4A
•Operation = 3.2A
•Peak = 4.7A
Table 5 RDM-100 Structural Specifications
Weight: Unit: Approximately 17kg (37.48lbs.)
Mounting: Built-in
Outside Dimensions: See “Entire Unit Outside Dimensions” on page 33 of this Manual
020305040
100
90
80
70
60
50
40
30
20
10
0
10
Hydrothermal Condition Table
Humidity [%RH]
Temperature [ºC]
Allowable
and Humidity Range 45ºC/40RH%
40ºC/80RH%
10ºC/20RH%
5ºC/40RH%
Operating Temperature

P/N 960-000186R_Rev. A {EDP #253995} © 2016, JAPAN CASH MACHINE CO., LTD.
7
RDM-100™ Series Retail Deposit Module
3 INSTALLATION
This section provides installation and operating
instructions for the RDM-100 Banknote Validator
unit. The information within this section contains
the following features:
• Installation Procedure
• RDM-100 Installation Dimensions
Installation Procedure
To prepare the RDM-100 to Cash Box mounting
platform, six (6) holes are required to attached the
Rail Brackets, four (4) holes to install the Cash Box
Transport Guide Frame and a 123x42mm rectangle
cutout for placing the Cash Box Transport Assem-
bly (Figure 5).
U
NIT
I
NSTALLATION
Perform the following steps to install the RDM-100
Unit:
1. Confirm that the Rail Brackets (Figure 6 a) were
installed on both sides of RDM-100 Unit.
2. Position the RDM-100 Unit to align the Rail
Bracket Installation Holes on the Cash Box Ceil-
ing to the Rail Brackets Holes. Attach the Rail
Brackets to the Cash Box Ceiling with the six (6)
M4x8 (or greater) Screws with Washers (Figure 7
a1to a6).
3. Withdraw the RDM-100 Unit from the home
position on the Cash Box Ceiling.
Figure 5 Set Up Holes
4xM4 Tapping Hole
(or 4xØ4.5 Hole)
6xM4 Tapping Hole
Cash Box
Ceiling
Rectangle Hole
(123mm x 42mm)
Figure 6 Rail Brackets Confirmation
a
NOTE: There are three (3) Installation
Holes on each Rail Bracket.
Figure 7 Rail Brackets Holes
a1
a2
a3a6
a5
a4
Cash Box
Ceiling
Figure 8 Unit Withdrawal

P/N 960-000186R_Rev. A {EDP #253995} © 2016, JAPAN CASH MACHINE CO., LTD.
8
RDM-100™ Series Retail Deposit Module
4. Attach the Cash Box Transport Path with the four
(4) M4 Screws.
Top Side Mounting
When the top side mounting is preferred, attach
the Cash Box Transport Path by the four (4) M4
Screws (Figure 9 a1to a4) from the top side of the
Cash Box ceiling.
Bottom Side Mounting
When the bottom side mounting is preferred,
insert the four (4) M4 Screws M4 Screws (Figure
10 b1to b4), of the proper length, from the bottom
side of the Cash Box Ceiling securing the Cash
Box Transport with Nuts (Figure 10 a1to a4) to
the top side.
5. Place the RDM-100 Unit to the home position.
6. Confirm that the RDM-100 Unit is firmly
installed without backlash.
7. Slide the RDM-100 Unit forward and backward
and confirm the movement is smooth.
This completes the RDM-100 Unit Installation.
Figure 9 Top Side Mounting
a1
a2
a3
a4
Figure 10 Bottom Side Mounting
a1a2
a3a4
b1b2
b3
b
4
NOTE: The Screw Length is
considered as the Cash Box Ceiling
thickness + approximately 7mm.
Figure 11 Home Position
Figure 12 Latch Plate Positioning
a
NOTE: Re-adjust the Latch Plate
position in order to eliminate
movement of the Unit by tightening
two (2) Screws (Figure 12 a)
Figure 13 Latch Plate Positioning

P/N 960-000186R_Rev. A {EDP #253995} © 2016, JAPAN CASH MACHINE CO., LTD.
9
RDM-100™ Series Retail Deposit Module
RDM-100 I
NSTALLATION
D
IMENSIONS
Figure 14 illustrates the RDM-100 Installation Dimensions
Figure 14 RDM-100 Installation Dimensions
Cash Box Ceiling
Rectangle Hole
57.9
+0.2
0
41+0.5
0
82+0.2
0
122.3+0.2
0
7
33.3±0.2
55 ±0.2 67.85 ±0.2
150 ±0.2150 ±0.2
214±0.2
4xM4 when retainig from the Front Side6xM4
4xØ4.5 ±0.2
All dimensions in millimeters
Unit
Front
Side
Figure 14 RDM-100 Installation Dimensions

P/N 960-000186R_Rev. A {EDP #253995} © 2016, JAPAN CASH MACHINE CO., LTD.
10
RDM-100™ Series Retail Deposit Module
4 CONNECTOR PIN ASSIGNMENTS
Table 6 through Table 8 list the RDM-100 Unit’s pin assignments.
P
OWER
S
OURCE
P
IN
A
SSIGNMENTS
Table 6 lists the RDM-100 Power Source Pin Assignments.
RS232C I
NTERFACE
P
IN
A
SSIGNMENT
Table 7 lists the RDM-100 RS232C Interface Pin Assignments.
Table 6 RDM-100 Power Source Pin Assignments*
*. Be sure to remove electrical power when connecting/disconnecting the Power Harness.
Pin No. Signal Name I/O†
†. I/O (input/output) is the terminal as viewed from the Banknote Unit’s backside.
Function
1+24V -+24V DC Power Supply
2+24V -+24V DC Power Supply
3GND -GND
4GND -GND
5FG -Host Frame Ground
6NC -Not Connected
Table 7 RDM-100 RS232C Interface Pin Assignments *
*. Be sure to remove electrical power when connecting/disconnecting the Communication Harness.
Pin No. Signal Name I/O†
†. I/O (input/output) is the terminal as viewed from the Banknote Unit’s backside.
Function
1NC -Not Connected
2TXD OSend data from the RDM-100‡
‡. The signal name is considered from the RDM-100 side. Connect to the Host receiver side.
3RXD IReceive data to the RDM-100**
**.The signal name is considered from the RDM-100 side. Connect to the Host driver side.
4NC -Not Connected
5GND -GND
6NC -Not Connected
7NC -Not Connected
8NC -Not Connected
9NC -Not Connected
123
456
Connector: 5559-06P (MOLEX) / UL94V-2
Mating Connector: 5557-06R (MOLEX) / UL94V-2
5557-06R-210 (MOLEX) / UL94V-0
34521
6789
Connector: JEC-9S-3 (JST) / D-SUB 9-Pin Female
Mating Connector: D-SUB 9-Pin Male

P/N 960-000186R_Rev. A {EDP #253995} © 2016, JAPAN CASH MACHINE CO., LTD.
11
RDM-100™ Series Retail Deposit Module
USB C
ONNECTOR
P
IN
A
SSIGNMENT
Table 8 lists the RDM-100 USB Connector Pin Assignments.
Table 8 RDM-100 USB Connector Pin Assignments *
*. Be sure to remove electrical power when connecting/disconnecting the Communication Harness.
Pin No. Signal Name I/O†
†. I/O (input/output) is the terminal as viewed from the Banknote Unit’s backside.
Function
1VBUS -USB VBUS
2D- I/O USB D-
3D+ I/O USB D+
4GND -USB GND‡
‡. The shell part of the GND and the connector is connected inside of the unit.
34
12
Connector: USB Type B Receptacle
Mating Connector: USB Type B Plug

P/N 960-000186R_Rev. A {EDP #253995} © 2016, JAPAN CASH MACHINE CO., LTD.
12
RDM-100™ Series Retail Deposit Module
Clearing a Banknote Jam
To retrieve a jammed Banknote located inside the
RDM-100 Unit, perform the following steps.
O
PTION
T
OP
C
OVER
O
PEN
/C
LOSE
When the Optional Top Cover for the RDM-100
Units is used, the Top Cover needs to be opened to
access the Upper Transport area. When a banknote
jam is suspected, perform the following steps to
open the Top Cover:
1. Hold the right and left side of the Top Cover rear
and lift up.
2. Confirm that the Top Cover Stay is hooked firmly
in the cutout before letting loose of the cover.
BNF A
SSEMBLY
B
ANKNOTE
J
AM
Perform the following steps to clear the Banknote
Jam within the BNF Assembly:
1. Open the BNF Top Cover while pressing the BNF
Set Button located on both sides of the BNF Top
Cover.
2. If a Banknote is detected in the BNF Transport
Path, remove the jammed banknote.
5 PREVENTIVE MAINTENANCE
Figure 15 Opening Option Top Cover 1
Top Cover
Figure 16 Opening Option Top Cover 2
Top Cover
Top C o v er Stay
Cutout
Figure 17 BNF Set Button
BNF
Set Button BNF
Top Cover
Figure 18 BNF Top Cover Open
BNF
Set Button
BNF
Top Cover
Figure 19 BNF Transport Path
BNF
Set Button
BNF
Transport
Path
Table of contents
Other JCM GLOBAL Bank Note Validator manuals

JCM GLOBAL
JCM GLOBAL iVIZION2 Series Quick setup guide

JCM GLOBAL
JCM GLOBAL WBA Series User manual

JCM GLOBAL
JCM GLOBAL UBA Pro Series User manual

JCM GLOBAL
JCM GLOBAL VEGA Series User manual

JCM GLOBAL
JCM GLOBAL DBV Series Quick setup guide

JCM GLOBAL
JCM GLOBAL TBV Series Quick setup guide

JCM GLOBAL
JCM GLOBAL Taiko PUB-7 User manual

JCM GLOBAL
JCM GLOBAL TBV-100 FSH User manual