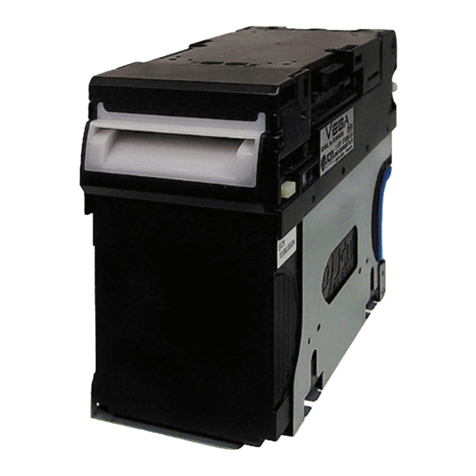
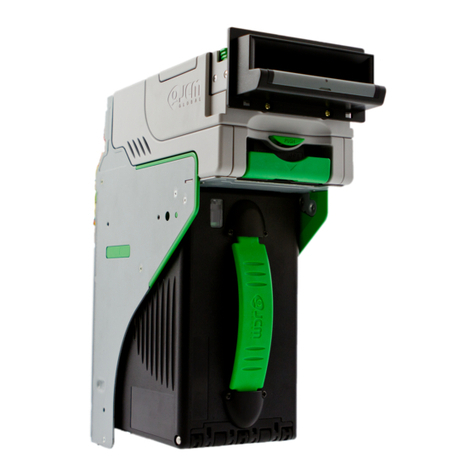
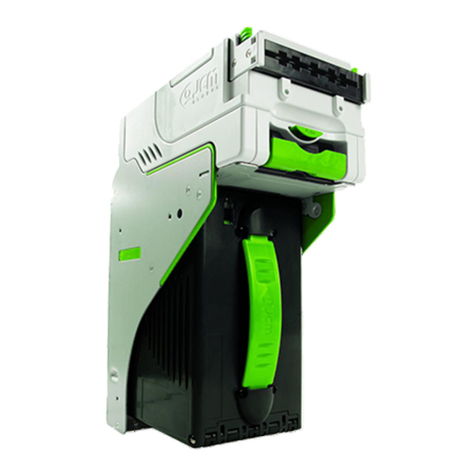
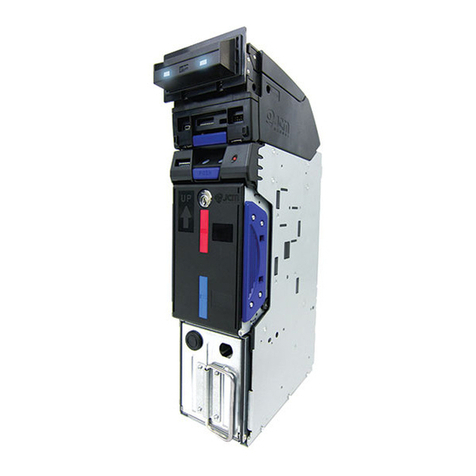
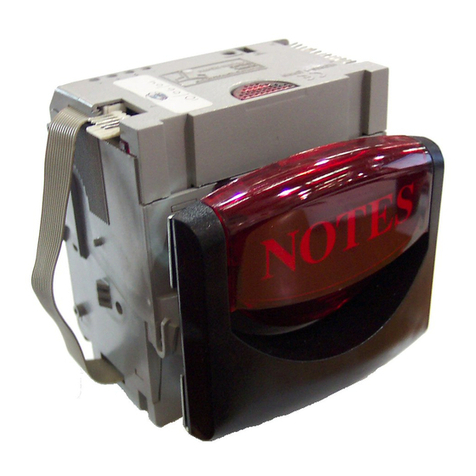
JCM DBV Series User manual

© 2016, JAPAN CASH MACHINE CO., LTD.
Website: http://www.jcmglobal.com
Issue #4107-SME-01-01
DBV®Series
DBV-400
Banknote Validator
Operation and Maintenance
Manual
(Revision 1)
P/N 960-000180R_Rev. 1 {EDP #233427}

This product document (hereinafter referred to as “Manual”) is fully covered by legal Copyrights owned by the JAPAN
CASH MACHINE CO., LTD. (hereinafter referred to as “JCM”) under Japanese laws and other Foreign Countries.
This Manual contains many copyrighted, patented or properly registered equipment items manufactured by JCM, that
are prohibited and illegal to duplicate, replicate, copy in whole, or in part, without the express authorization by JCM with
the following exceptions:
1. When an authorized JCM agency or distributor duplicates the Manual for sales promotion and/or service
maintenance of the product, or technical service personnel education as required; and
2. When an end user duplicates the Manual to maintain operation of the product or operate the product in general.
JCM retains all rights to amend, alter, change or delete any portion of this Manual in whole, or in part, or add items
thereto without notice regarding the product or its related products.
JCM is a registered trademark of JAPAN CASH MACHINE CO., LTD. All other product names mentioned herein may be
registered trademarks or trademarks of their respective companies. Furthermore, ™, ®and © are not always mentioned
in each case throughout this publication.
Copyright © 2016 By JAPAN CASH MACHINE CO., LTD.
DBV® Series DBV-400 Banknote Validator Operation and Maintenance Manual
International Compliance
• RoHS Directives
• UL & c-UL Marks
• CE Mark
• CB Scheme
NOTE: The CB Scheme compliance confirmations are currently being examined for approval.
Electrical Current Symbol
Direct Current: indicates Direct Current values on product labels.
REVISION HISTORY
Rev №.Date Reason for Update Comment
A 1-9-15 Initial Document
1 6-10-16
Added the Rear Access Cash Box and Snack Mask
(Green) Bezel specifications in Section 1 and Section 2,
updated Technical Contact Information in Section 1 and
Section 3, updated Performance Test Procedures in Sec-
tion 6, EDP numbers in Section 7, and updated Reject
Codes in Appendix A.
or or or or
File No. E142330, Subscriber 8578947001, Vo.2
Issue #4107-SME-01-01
2-13-20 Section 7
Parts List updated
for Parts Number
Changes.

P/N 960-000180R_Rev. 1 {EDP #233427} © 2016, JAPAN CASH MACHINE CO., LTD.
i
DBV® Series
DBV-400 Banknote Validator
Table of Contents
Page
1 GENERAL INFORMATION.................................................................................. 1-1
DBV-400 Unit (SU and SD Models)............................................................................. 1-1
Product Descriptions .................................................................................................. 1-2
Model Descriptions ........................................................................................................ 1-2
Type Descriptions .......................................................................................................... 1-2
Software Descriptions.................................................................................................... 1-2
Precautions .................................................................................................................. 1-2
User Cautions................................................................................................................ 1-2
Installation Cautions ..................................................................................................................1-2
Mounting, Dismounting & Transportation ..................................................................................1-3
Placing Foreign Objects into the Unit ........................................................................................1-3
Preventive Maintenance............................................................................................................1-3
Banknote Fitness Requirements ...............................................................................................1-3
Primary Features ......................................................................................................... 1-4
Component Names...................................................................................................... 1-5
Specifications .............................................................................................................. 1-6
Technical Specifications................................................................................................. 1-6
Environmental Specifications......................................................................................... 1-7
Electrical Specifications ................................................................................................. 1-7
Structural Specifications ................................................................................................ 1-7
Unit Dimensions .......................................................................................................... 1-8
Entire Unit Outside Dimensions..................................................................................... 1-8
Entire Unit Outside Dimensions (Continued).............................................................................1-9
Entire Unit Outside Dimensions (Continued)...........................................................................1-10
Technical Contact Information ................................................................................. 1-11
Americas ................................................................................................................................. 1-11
JCM American ...................................................................................................................... 1-11
Europe, Middle East, Africa & Russia ..................................................................................... 1-11
JCM Europe GmbH .............................................................................................................. 1-11
UK & Ireland ............................................................................................................................ 1-11
JCM Europe (UK Office) ....................................................................................................... 1-11
Asia and Oceania .................................................................................................................... 1-11
JCM Gold (HK) Ltd. ..............................................................................................................1-11
Japan Cash Machine Co., LTD. (HQ) ................................................................................... 1-11
2 INSTALLATION ................................................................................................... 2-1
Installation Procedure................................................................................................. 2-1
Entire Unit Installation.................................................................................................... 2-1
DIP Switch Configurations ......................................................................................... 2-1
DIP Switch Block 1 ........................................................................................................ 2-1
DIP Switch Block 2 ........................................................................................................ 2-1
Bezel LED Default Color Settings.................................................................................. 2-2
Connector Pin Assignments ...................................................................................... 2-3
MDB/Photo-Coupler Isolation Connector Pin Assignments........................................... 2-3
RS232 Connector Pin Assignments .............................................................................. 2-4
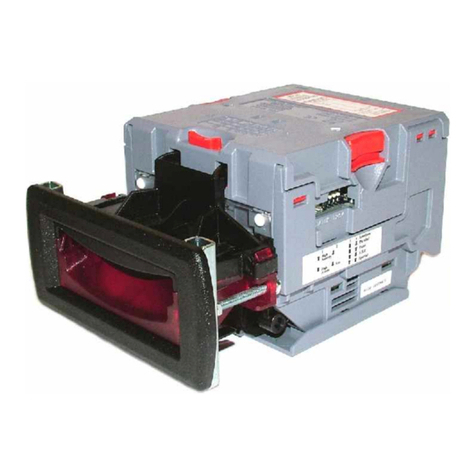
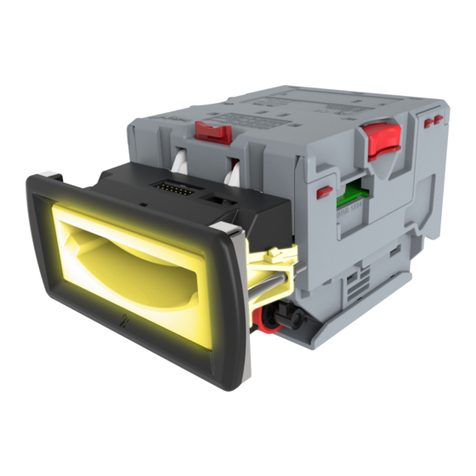
Table of Contents
P/N 960-000180R_Rev. 1 {EDP #233427} © 2016, JAPAN CASH MACHINE CO., LTD.
ii
Page
DBV® Series DBV-400 Banknote Validator
TTL Connector Pin Assignments................................................................................... 2-5
ID-002 Pulse Connector Pin Assignments .................................................................... 2-6
ID-044 Pulse Connector Pin Assignments .................................................................... 2-7
ID-044 Serial Connector Pin Assignments .................................................................... 2-8
USB Interface Connector Pin Assignments................................................................... 2-9
USB Maintenance Interface Connector Pin Assignment ............................................... 2-9
Preventive Maintenance ........................................................................................... 2-10
Retrieving Banknotes .................................................................................................. 2-10
Clearing a Banknote Jam ............................................................................................ 2-10
Cleaning Procedure......................................................................................................2-11
Sensor and Roller Cleaning Procedure ...................................................................................2-11
Sensor and Roller Locations................................................................................................... 2-12
Standard Interface Circuit Schematics.................................................................... 2-13
Standard Interface Circuit Schematics (Continued 1).................................................. 2-14
Standard Interface Circuit Schematics (Continued 2).................................................. 2-15
Standard Interface Circuit Schematics (Continued 3).................................................. 2-16
Standard Interface Circuit Schematics (Continued 4).................................................. 2-17
Standard Interface Circuit Schematics (Continued 5).................................................. 2-18
Standard Interface Circuit Schematics (Continued 6).................................................. 2-19
Operational Flowchart .............................................................................................. 2-21
Operational Flowchart (Continued 1) .......................................................................... 2-22
3 COMMUNICATIONS ............................................................................................ 3-1
Americas................................................................................................................................... 3-1
JCM American........................................................................................................................ 3-1
Europe, Middle East, Africa & Russia ....................................................................................... 3-1
JCM Europe GmbH................................................................................................................ 3-1
UK & Ireland ............................................................................................................................. 3-1
JCM Europe (UK Office)......................................................................................................... 3-1
Asia and Oceania ..................................................................................................................... 3-1
JCM Gold (HK) Ltd. ................................................................................................................ 3-1
Japan Cash Machine Co., Ltd. (HQ) ...................................................................................... 3-1
4 DISASSEMBLY/REASSEMBLY .......................................................................... 4-1
Tool Requirements ...................................................................................................... 4-1
CPU Circuit Board Removal ....................................................................................... 4-1
Side Sensor Removal.................................................................................................. 4-2
Motor Harness Assy. Removal ................................................................................... 4-2
Inside Validation Sensor Board Removal ................................................................. 4-2
Outside Validation Sensor Board Removal............................................................... 4-3
Box Base Assy. Removal............................................................................................ 4-4
5 WIRING DIAGRAMS ............................................................................................ 5-1
System Wiring Diagram .............................................................................................. 5-1
6 CALIBRATION AND TESTING ............................................................................ 6-1
Tool Requirement ........................................................................................................ 6-1
Workbench Tool Requirements With Reference Paper and a PC ................................. 6-1
Workbench Tool Requirements Without a PC ............................................................... 6-1

P/N 960-000180R_Rev. 1 {EDP #233427} © 2016, JAPAN CASH MACHINE CO., LTD.
iii
Page
DBV® Series DBV-400 Banknote Validator
Table of Contents
Power Supply ................................................................................................................ 6-1
Installation Procedures............................................................................................... 6-1
Application Software Installation.................................................................................... 6-1
Driver Installation Procedure ......................................................................................... 6-2
JCM Tool Suite Standard Edition Mode..................................................................... 6-3
Download Procedures................................................................................................. 6-3
Software Program Download......................................................................................... 6-3
Calibration.................................................................................................................... 6-5
When to Calibrate.......................................................................................................... 6-5
Placing the KS-095A Reference Paper ......................................................................... 6-5
Calibration Preparation.................................................................................................. 6-7
Sensor Calibration.....................................................................................................................6-7
Performance Tests..................................................................................................... 6-10
Performance Test Using a PC ..................................................................................... 6-10
Performance Test Preparation.................................................................................................6-10
Feed Motor Test ...................................................................................................................... 6-11
Stacking Test ........................................................................................................................... 6-11
Sensor Test ............................................................................................................................6-12
DIP Switch Test .......................................................................................................................6-13
Bezel LED Test........................................................................................................................6-13
Performance Test Without a PC ................................................................................. 6-14
Aging Test................................................................................................................................6-14
Acceptance Test ......................................................................................................................6-15
Sensor Test .............................................................................................................................6-15
Push Button Test .....................................................................................................................6-16
DIP Switch Test .......................................................................................................................6-16
Other Performance Tests ........................................................................................................6-17
7 EXPLODED VIEWS AND PARTS LISTS ............................................................ 7-1
Entire DBV-400 Unit Exploded View .......................................................................... 7-1
Entire DBV-400 Unit ...................................................................................................... 7-2
DBV-400 Main Unit Exploded View 1 ......................................................................... 7-3
DBV-400 Main Unit Parts List 1 ..................................................................................... 7-4
DBV-400 Main Unit Exploded View 2 ......................................................................... 7-5
DBV-400 Main Unit Parts List 2 ..................................................................................... 7-6
DBV-400 Validation Guide Cover Assy. Exploded View .......................................... 7-7
DBV-400 Validation Guide Cover Assy. Parts List......................................................... 7-7
DBV-400 Validation Guide Exploded View ............................................................... 7-8
DBV-400 Validation Guide Parts List ............................................................................ 7-9
DBV-400 Cash Box Exploded View .......................................................................... 7-10
DBV-400 Cash Box Parts List...................................................................................... 7-11
DBV-400 Bezel Unit Exploded View ......................................................................... 7-13
DBV-400 Bezel Unit Parts List..................................................................................... 7-13
8 INDEX................................................................................................................... 8-1
A TROUBLESHOOTING .........................................................................................A-1
Introduction..................................................................................................................A-1

Table of Contents
P/N 960-000180R_Rev. 1 {EDP #233427} © 2016, JAPAN CASH MACHINE CO., LTD.
iv
Page
DBV® Series DBV-400 Banknote Validator
Troubleshooting Overview .........................................................................................A-1
Fault Table Listings.....................................................................................................A-1
Adjustment Error ........................................................................................................... A-2
Communication Error .................................................................................................... A-3
LED Indication Conditions .........................................................................................A-3
LED Flash Error Code Conditions ................................................................................. A-3
LED Flash Reject Code Conditions...............................................................................A-6
Maintenance Equipment .............................................................................................A-8
DBV-400 Maintenance Equipment ................................................................................A-8
Reference Paper Handling ............................................................................................ A-9
B GLOSSARY ......................................................................................................... B-1

P/N 960-000180R_Rev. 1 {EDP #233427} © 2016, JAPAN CASH MACHINE CO., LTD.
v
DBV® Series
DBV-400 Banknote Validator
List of Figures
Page
Figure 1-1 DBV-400 Unit ................................................................................... 1-1
Figure 1-2 Precautionary Symbols .................................................................... 1-2
Figure 1-3 Unacceptable Banknotes ................................................................. 1-4
Figure 1-4 DBV-400 Component Names .......................................................... 1-5
Figure 1-5 DBV-400 Unit With JCM Standard Bezel Outside Dimensions ....... 1-8
Figure 1-6 DBV-400 Unit With Snack Mask Bezel Outside Dimensions ........... 1-8
Figure 1-7 DBV-400 Unit With TOB Type Bezel Outside Dimensions .............. 1-9
Figure 1-8 DBV-400 Unit With Euro Type Bezel Outside Dimensions .............. 1-9
Figure 1-9 DBV-400 Unit With Compatible Type Bezel Outside Dimensions .. 1-10
Figure 2-1 Threaded Studs Location ................................................................ 2-1
Figure 2-2 Bezel LED Color DIP SW1 Settings ................................................ 2-2
Figure 2-3 Retrieving Banknotes 1 (Standard Cash Box) ............................... 2-10
Figure 2-4 Retrieving Banknotes 1 (Rear-Access Cash Box) ......................... 2-10
Figure 2-5 Retrieving Banknotes 2 ................................................................. 2-10
Figure 2-6 Clearing a Banknote Jam 1 ........................................................... 2-10
Figure 2-7 Clearing a Banknote Jam 2 ........................................................... 2-10
Figure 2-8 Clearing a Banknote Jam 3 ........................................................... 2-10
Figure 2-9 General Cleaning Image ................................................................ 2-11
Figure 2-10 DBV-400 Sensor and Roller Cleaning Locations ........................... 2-12
Figure 2-11 DBV-400 ID-003/MDB Photo-Coupler Isolation Interface
Schematic Diagram ....................................................................... 2-13
Figure 2-12 DBV-400 ID-003 RS232C Interface Schematic Diagram .............. 2-14
Figure 2-13 DBV-400 ID-003 TTL Interface Schematic Diagram ..................... 2-15
Figure 2-14 DBV-400 ID-002 Pulse Interface Schematic Diagram ................... 2-16
Figure 2-15 DBV-400 ID-044 Pulse Interface Schematic Diagram ................... 2-17
Figure 2-16 DBV-400 ID-044 Serial Interface Schematic Diagram ................... 2-18
Figure 2-17 DBV-400 USB Interface Schematic Diagram ................................ 2-19
Figure 2-18 DBV-400 Operational Flowchart (Initializing) ................................. 2-21
Figure 2-19 DBV-400 Operational Flowchart (Validation) ................................. 2-22
Figure 2-20 DBV-400 Operational Flowchart (Stacking) ................................... 2-22
Figure 4-1 Cash Box Removal .......................................................................... 4-1
Figure 4-2 Bezel Unit Removal ......................................................................... 4-1
Figure 4-3 Unplugging Connector ..................................................................... 4-1
Figure 4-4 Main Frame Assy. Removal ............................................................ 4-1
Figure 4-5 Unplugging Connector ..................................................................... 4-2
Figure 4-6 CPU Circuit Board Removal ............................................................ 4-2

List of Figures
P/N 960-000180R_Rev. 1 {EDP #233427} © 2016, JAPAN CASH MACHINE CO., LTD.
vi
Page
DBV® Series DBV-400 Banknote Validator
Figure 4-7 Side Sensor Removal ...................................................................... 4-2
Figure 4-8 Motor Harness Assy. Removal ........................................................ 4-2
Figure 4-9 Validation Guide Removal ............................................................... 4-2
Figure 4-10 Validation Guide Removal ............................................................... 4-3
Figure 4-11 Inside Validation Sensor Board Removal ........................................ 4-3
Figure 4-12 Outside Guide Cover Removal ........................................................ 4-3
Figure 4-13 Outside Validation Sensor Board Removal ...................................... 4-3
Figure 4-14 Box Base Assy. Removal 1 .............................................................. 4-4
Figure 4-15 Box Base Assy. Removal 2 .............................................................. 4-4
Figure 5-1 DBV-400 System Wiring Diagram .................................................... 5-1
Figure 6-1 Tool and Harness Connections 1 ..................................................... 6-1
Figure 6-2 USB Cable Type Requirement ......................................................... 6-1
Figure 6-3 Tool and Harness Connections 2 ..................................................... 6-1
Figure 6-4 Setup.exe File Location ................................................................... 6-2
Figure 6-5 InstallShield Wizard Screen ............................................................. 6-2
Figure 6-6 Destination Folder Screen ............................................................... 6-2
Figure 6-7 Current Settings Confirmation .......................................................... 6-2
Figure 6-8 Installation Completion Screen ........................................................ 6-2
Figure 6-9 Hardware Update Wizard Screen 1 ................................................. 6-3
Figure 6-10 Hardware Update Wizard Screen 2 ................................................. 6-3
Figure 6-11 Normal Mode Selection .................................................................... 6-3
Figure 6-12 Test Mode Selection ........................................................................ 6-3
Figure 6-13 Normal Upgrade Setting .................................................................. 6-3
Figure 6-14 Initial Download Setting ................................................................... 6-3
Figure 6-15 Normal Upgrade Screen .................................................................. 6-4
Figure 6-16 Initial Download Screen ................................................................... 6-4
Figure 6-17 JCM Tool Suite Standard Edition Screen Pull-Down Menu ............. 6-4
Figure 6-18 Browse Screen Button Location ....................................................... 6-4
Figure 6-19 DBV-400 Software Program Selection ............................................. 6-4
Figure 6-20 Download Progress Screen 1 .......................................................... 6-4
Figure 6-21 Download Completed Screen 1 ....................................................... 6-4
Figure 6-22 KS-095A Reference Paper .............................................................. 6-5
Figure 6-23 Placing KS-095A Reference Paper 1 (Standard Cash Box) ............ 6-5
Figure 6-24 Placing KS-095A Reference Paper 1 (Rear-Access Cash Box) ...... 6-5
Figure 6-25 Placing KS-095A Reference Paper 2 ............................................... 6-5
Figure 6-26 Placing KS-095A Reference Paper 3 ............................................... 6-5
Figure 6-27 Placing KS-095A Reference Paper 4 ............................................... 6-6
Figure 6-28 Placing KS-095A Reference Paper 5 ............................................... 6-6
Figure 6-29 Placing KS-095A Reference Paper 6 ............................................... 6-6

P/N 960-000180R_Rev. 1 {EDP #233427} © 2016, JAPAN CASH MACHINE CO., LTD.
vii
Page
DBV® Series DBV-400 Banknote Validator
List of Figures
Figure 6-30 DIP SW1 Setting .............................................................................. 6-7
Figure 6-31 Launching JCM Tool Suite Standard Edition/
Sensor Adjustment Selection .......................................................... 6-7
Figure 6-32 Sensor Calibration Screen 1 ............................................................ 6-7
Figure 6-33 Sensor Calibration Screen 2 ............................................................ 6-7
Figure 6-34 Non-Paper Calibration Screen ......................................................... 6-7
Figure 6-35 Non-Paper Calibration Completion .................................................. 6-7
Figure 6-36 Placing Reference Paper Message ................................................. 6-8
Figure 6-37 Reference Paper Calibration ........................................................... 6-8
Figure 6-38 Removing Reference Paper Message ............................................. 6-8
Figure 6-39 Second Non-Paper Calibration ........................................................ 6-8
Figure 6-40 Serial Number Change Dialogue ..................................................... 6-8
Figure 6-41 Serial Number Setting ..................................................................... 6-8
Figure 6-42 Calibration Succeeded Message ..................................................... 6-9
Figure 6-43 Calibration Result ............................................................................ 6-9
Figure 6-44 Write EEPROM Succeeded ............................................................. 6-9
Figure 6-45 DS1 Switch Settings 1 ................................................................... 6-10
Figure 6-46 JCM Tool Suite Standard Edition Screen/Pull-Down Menu 2 ........ 6-10
Figure 6-47 Main Screen .................................................................................. 6-10
Figure 6-48 Feed Motor Test Selections ........................................................... 6-11
Figure 6-49 Feed Motor Test Screen 1 ............................................................. 6-11
Figure 6-50 Feed Motor Test Screen 2 ............................................................. 6-11
Figure 6-51 Stacking Test Selections ............................................................... 6-11
Figure 6-52 Stacking Test Screen 1 ................................................................. 6-11
Figure 6-53 Stacking Test Screen 2 ................................................................. 6-11
Figure 6-54 Sensor Test Selections .................................................................. 6-12
Figure 6-55 Sensor Test Screen 1 .................................................................... 6-12
Figure 6-56 Sensor Test Screen 2 .................................................................... 6-12
Figure 6-57 DIP Switch Block Test Selections .................................................. 6-13
Figure 6-58 DIP Switch Block Test Screen 1 .................................................... 6-13
Figure 6-59 DIP Switch Block Test Screen 2 .................................................... 6-13
Figure 6-60 LED Test Selections ...................................................................... 6-13
Figure 6-61 LED Test Screen 1 ........................................................................ 6-13
Figure 6-62 LED Test Screen 2 ........................................................................ 6-13
Figure 6-63 Aging Test DIP SW1 Setting ......................................................... 6-14
Figure 6-64 Aging Test DIP SW2 Setting ......................................................... 6-14
Figure 6-65 DIP SW1 #8 OFF ........................................................................... 6-14
Figure 6-66 Acceptance Test DIP SW2 Setting ................................................ 6-15

List of Figures
P/N 960-000180R_Rev. 1 {EDP #233427} © 2016, JAPAN CASH MACHINE CO., LTD.
viii
Page
DBV® Series DBV-400 Banknote Validator
Figure 6-67 DIP SW1 #8 OFF For Acceptance Test With Validation ................ 6-15
Figure 6-68 DIP SW1 #8 OFF For Acceptance Test Without Validation ........... 6-15
Figure 6-69 Sensor Test DIP SW1 Setting ........................................................ 6-15
Figure 6-70 Sensor Test DIP SW2 Setting ........................................................ 6-15
Figure 6-71 DIP SW1 #8 OFF ........................................................................... 6-15
Figure 6-72 Push Button Location ..................................................................... 6-16
Figure 6-73 DIP Switch Test DIP SW2 Setting ................................................. 6-16
Figure 6-74 DIP SW1 #8 OFF for DS1 Testing ................................................. 6-16
Figure 6-75 DIP SW1 #8 OFF for DS2 Testing ................................................. 6-16
Figure 6-76 Other Tests DIP SW2 Setting ........................................................ 6-17
Figure 7-1 Entire DBV-400 Unit Exploded View ................................................ 7-1
Figure 7-2 DBV-400 Main Unit Exploded View 1 .............................................. 7-3
Figure 7-3 DBV-400 Main Unit Exploded View 2 .............................................. 7-5
Figure 7-4 DBV-400 Validation Guide Cover Assy. Exploded View .................. 7-7
Figure 7-5 DBV-400 Validation Guide Exploded View ......................................7-8
Figure 7-6 DBV-400 Cash Box Exploded View ...............................................7-10
Figure 7-7 DBV-400 Bezel Unit Exploded View ..............................................7-13
Figure A-1 Additional Maintenance Equipment Requirements ..........................A-8

P/N 960-000180R_Rev. 1 {EDP #233427} © 2016, JAPAN CASH MACHINE CO., LTD.
ix
DBV® Series
DBV-400 Banknote Validator
List of Tables
Page
Table 1-1 DBV-400 Model Number Specifications .............................................. 1-2
Table 1-2 DBV-400 Type Number Specifications ................................................ 1-2
Table 1-3 DBV-400 Software Number Specifications .......................................... 1-2
Table 1-4 DBV-400 Technical Specifications ...................................................... 1-6
Table 1-5 DBV-400 Environmental Specifications ............................................... 1-7
Table 1-6 DBV-400 Electrical Specifications ....................................................... 1-7
Table 1-7 DBV-400 Structural Specifications ...................................................... 1-7
Table 2-1 DIP Switch Block 1 Settings ................................................................ 2-1
Table 2-2 DIP Switch Block 2 Settings ................................................................ 2-1
Table 2-3 Bezel LED Color DIP SW2 Settings .................................................... 2-2
Table 2-4 DBV-400 ID-003 MDB/Photo-Coupler Isolation Connector
Pin Assignments .................................................................................. 2-3
Table 2-5 DBV-400 ID-003 RS232 Connector Pin Assignments ......................... 2-4
Table 2-6 DBV-400 ID-003 TTL Connector Pin Assignments ............................. 2-5
Table 2-7 DBV-400 ID-002 Pulse Connector Pin Assignments ........................... 2-6
Table 2-8 DBV-400 ID-044 Pulse Connector Pin Assignments ........................... 2-7
Table 2-9 DBV-400 ID-044 Serial Connector Pin Assignments ........................... 2-8
Table 2-10 DBV-400 USB Interface Connector Pin Assignments ......................... 2-9
Table 2-11 DBV-400 USB Maintenance Interface Connector Pin Assignments .... 2-9
Table 2-12 DBV-400 Sensor Type Cleaning Methods ......................................... 2-12
Table 6-1 USB Driver Files .................................................................................. 6-2
Table 6-2 Performance Test Items Using a PC and Test Menu Selections ...... 6-10
Table 6-3 Sensor Test Items ............................................................................. 6-12
Table 6-4 Performance Test Items and DIP Switch 1 Settings .......................... 6-14
Table 6-5 Aging Test Interval Timing Settings ................................................... 6-14
Table 6-6 Sensor Test Procedure and Confirmation ......................................... 6-15
Table 6-7 DIP Switch 1 Test Confirmation ......................................................... 6-16
Table 6-8 DIP Switch 2 Test Confirmation ......................................................... 6-16
Table 6-9 Performance Confirmation ................................................................. 6-17
Table 7-1 Entire DBV-400 Unit Parts List ............................................................ 7-2
Table 7-2 DBV-400 Main Unit Parts List 1 ........................................................... 7-4
Table 7-3 DBV-400 Main Unit Parts List 2 ........................................................... 7-6
Table 7-4 DBV-400 Validation Guide Cover Assy. Parts List .............................. 7-7
Table 7-5 DBV-400 Validation Guide Parts List ................................................... 7-9
Table 7-6 DBV-400 Cash Box Parts List ............................................................ 7-11
Table 7-7 DBV-400 Bezel Unit PartsList ........................................................... 7-13
Table A-1 General Fault Conditions ..................................................................... A-1

List of Tables
P/N 960-000180R_Rev. 1 {EDP #233427} © 2016, JAPAN CASH MACHINE CO., LTD.
x
Page
DBV® Series DBV-400 Banknote Validator
Table A-2 Adjustment Fault Conditions ................................................................A-2
Table A-3 Communication Fault Conditions .........................................................A-3
Table A-4 LED Flash Error Codes ........................................................................A-3
Table A-5 LED Flash Reject Codes ......................................................................A-6
Table A-6 Additional Maintenance Equipment Parts List .....................................A-8

P/N 960-000180R_Rev. 1 {EDP #233427} © 2016, JAPAN CASH MACHINE CO., LTD.
1-1
DBV® Series
DBV-400 Banknote Validator
Section 1
This section provides a general overview of the
DBV®Series DBV-400 Banknote Validator Unit,
pictured in Figure 1-1. This section is designed to
help the user navigate through this guide with ease.
It includes the following information:
• DBV-400 Unit (SU and SD Models)
• Product Descriptions
• Precautions
• Primary Features
• Component Names
• Specifications
• Unit Dimensions
• Technical Contact Information
In order to make operating this device and navigat-
ing within this manual easier, the following illus-
trations are used:
• Safety Instructions need to be observed in order to
protect the operators and the equipment; these are
identified with Bold text and the following
pictographs:
• Special Notes affect the use of the Banknote
Validator; these are identified with italic text and
the following pictograph:
• Steps require the operator to perform specific
actions; these are identified with sequential
numbers (1, 2, 3, etc.).
1 GENERAL INFORMATION
DBV-400 Unit (SU and SD Models)
Figure 1-1 DBV-400 Unit
SU Version SD Version

P/N 960-000180R_Rev. 1 {EDP #233427} © 2016, JAPAN CASH MACHINE CO., LTD.
1-2
Section 1 DBV® Series DBV-400 Banknote Validator General Information
Product Descriptions
Model Descriptions
Table 1-1 lists the product model number
descriptions.
Type Descriptions
Table 1-2 lists the product type number
descriptions.
Software Descriptions
Table 1-3 lists the product software number
descriptions.
Precautions
Symbols in Figure 1-2 are defined as follows:
1. (Type 1) Do not insert a torn, folded, or wet
Banknote; it may cause a jam inside the unit.
2. (Type 2) Do not expose the unit to water. The unit
contains several precision electronic devices that
can be damaged if water or any liquid is sprayed
or spilled into the unit.
3. (Type 3) Do not install the unit in a dusty
environment. Dust may affect/degrade the sen-
sor’s performance.
User Cautions
Careful measures were taken in the design of this
product to ensure its quality; however, the follow-
ing cautions pertain to all users and should be fol-
lowed for safe operation.
Installation Cautions
The Installation Cautions are defined as follows:
1. The Unit is not designed for outdoor installation.
Be sure that the Host Machine contains enough
protection to avoid wet or dusty conditions when
installing it in either an indoor or open-air space.
2. Ensure that the Host Machine is designed for
daily operational access for maintenance and/or
clearing a Banknote jam.
3. Be careful not to use excessive outside pressure
on the Mounting Plate when removing the Cash
Box from the Unit.
4. Avoid exposing the Unit to direct Sunlight and/or
Incandescent Lamp illumination having a
Gradient Angle of 15 Degrees or more, and an
illumination index of 3000 Lux or less. Ensure
that the Host Machine is also designed to avoid
exposing the Banknote Insertion Slot to direct
Sunlight or Incandescent light.
Table 1-1 DBV-400 Model Number Specifications
NoModel: DBV- 4 * * - (*) * *
No(1) (2)(3) (4) (5)
(1) Model Name
(2) Validator Sensor
0 = Standard
1-9 = Reserved
(3) Transport Unit
0 = Standard
1-9 = Reserved
(4) Optional Unit (Banknote Insertion Section)
None = Standard
A-Z = Reserved
(5)
Stacker Type
SU/SD = Standard
SU = Optional Rear-Access Cash Box*
SH = Reserved
UH = Reserved
*. The optional Rear-Access Cash Box supports SU version only.
Table 1-2 DBV-400 Type Number Specifications
NoModel: * * * - * * - * * *
No(1)(2)(3)(4)(5)(6)(7)(8)
(1) Cash Box Capacity*
S = 300 notes (New Banknote)
M = 500 notes (New Banknote)
L= 1000 notes (New Banknote)
*. The number of stacked Notes depends on the Banknote’s condition.
(2) Cash Box Type
0 = Standard
1 = Optional Rear-Access Cash Box
2 - 9 = Reserved
(3) Cash Box Door
0 = Standard
1 - 9 = Reserved
(4)
Bezel (Option)
0 = JCM Standard Bezel (Standard)
1 = Snack Mask
2 = TOB
3 = Euro Bezel
4 = Compatible Type Bezel
5 = Snack Mask (Green)
6 - 9 = Reserved
A - Z = Reserved
(5)
Centering Guide Chip Type
0 = 66mm
1 = Reserved
2 = 72mm
3 - 9 = Reserved
(6) Optional Coating
0 = None (Standard)
1 - 9 = Reserved
(7) Optional Board
0 = None (Standard)
1 - 9 = Reserved
(8)
Interface
0 = None (Standard)
1 = Standard Harness
2 = USB Interface Harness
3 - 9 = Reserved
Table 1-3 DBV-400 Software Number
Specifications
No
Software: DBV-400-* * * * * - * * * - V * .* * - * *
No(A) (B) (C) (D)
(A) Software Model Name
(B) Denomination (Country Code)*
*. The Country Code is indicated following the ISO 3166 Standard.
(C) Interface Protocol Name
(D) Software Version
Figure 1-2 Precautionary Symbols
Type 1 Type 2 Type 3
Figure 1-2 Precautionary Symbols

P/N 960-000180R_Rev. 1 {EDP #233427} © 2016, JAPAN CASH MACHINE CO., LTD.
1-3
General Information DBV® Series DBV-400 Banknote Validator Section 1
5. Do not allow the Unit to endure or operate at a
high temperature, in high humidity, and/or in a
dusty environment (refer to “Environmental
Specifications” on page 1-7 of this Section).
6. Do not install the unit in an area where excessive
vibration or shock is present.
Mounting, Dismounting & Transportation
Methods for mounting, dismounting and transport-
ing the Unit:
1. Be sure to turn the Power Supply to the Unit OFF
before mounting or removing the Unit from its
permanent location. Plugging or unplugging
Connector Plugs from their receptacles while the
Power is ON may cause damage to the Unit.
2. When reassembling a disassembled Unit, ensure
that each component is properly replaced in its
correct original location.
3. Be sure to carry the Unit by both hands when
transporting it. Holding the Unit by one hand
may cause personal injury if the Unit accidentally
becomes disassembled and drops away.
4. Be careful not to use excessive outside pressure
on the Unit, or subject it to excessive vibration
during transportation.
Placing Foreign Objects into the Unit
Observe the following precautions when placing
foreign objects into the Unit:
1. Do not insert anything except Banknotes into the
Insertion Slot. Inserting Receipts, Stapled Tick-
ets, Rubber Bands, or Credit Cards into the Unit
may damage the Banknote Transport Path.
2. Do not inject liquids into the Banknote Insertion
Slot. Injecting water, oil or cleaning agents may
damage the Sensors or plastic parts within the
Banknote Transport Path.
Preventive Maintenance
The preventive maintenance requirements are
defined as follows:
1. Be sure to turn the Power OFF on the Unit
BEFORE beginning a maintenance procedure.
The equipment can produce abnormal operating
signals while in Maintenance Mode that may
cause personal injury.
2. When closing the Validation Guide of the Unit,
make sure that it clicks firmly into place.
3. Do not disassemble the Unit incorrectly or rede-
sign it in any way. Unauthorized use by inade-
quately trained personnel, or use outside the
original manufacturer’s intent for operation voids
the warranty.
4. Perform routine cleaning and maintenance once a
month to keep the Unit’s performance stable.
5. Use a soft, lint-free Micro-fiber cloth, cotton
swab and a vacuum cleaner to clean dust and
debris from the Banknote Path.
6. If the Unit is exposed to water or other liquids,
use a clean, dry Micro-fiber cloth to wipe off and
absorb excess liquids immediately. Any
remaining liquids may affect and degrade the
Sensors and Validation performance.
Banknote Fitness Requirements
The following Banknote types may not validate
correctly, or worse, can cause a Banknote jam
and/or damage to the Unit’s Transport Path.
Banknotes exhibiting the following conditions
illustrated in Figure 1-3 should be avoided:
• torn
• excessive folds or wrinkles
• dirty
• wet
• adhering foreign objects and/or oil
Caution: Be careful to avoid personal
injury to your fingers when closing the
Validation Guide Section.
WARNING: To minimize risk of damage
to internal printed circuit boards, never
allow excess fluid (e.g., from a wet
cleaning cloth) to drip or leak into the
device. Internal printed circuit boards
may be damaged. Do not use any
alcohol, citrus based cleaners, solvents
or scouring agents that can damage the
plastic surfaces of the device.
Caution: Make Interface Harness
connections to the Host Machine
shorter than 9.84 Feet (3 Meters) in
length. Cut off all unused portions of
the Interface Harness wiring to avoid
static electrical effects or short circuit
possibilities that could cause damage
to the Unit.
WARNING: This Unit is designed for
use with a Current limiting Power
Source! Design the Host Cabinet space
to meet all local related safety
standards.
Figure 1-3 Unacceptable Banknotes
Damaged Banknotes
Wrinkled Banknotes
Curled Banknotes
Folded or Partial Banknotes

P/N 960-000180R_Rev. 1 {EDP #233427} © 2016, JAPAN CASH MACHINE CO., LTD.
1-4
Section 1 DBV® Series DBV-400 Banknote Validator General Information
Primary Features
The DBV-400 Banknote Validator Unit supports
the following primary features:
•High-Speed Processing – Validation processing
speed by precision high performance
Validation Sensors is less than 2 seconds, with
a Banknote-to-Banknote processing speed less
than 1.7 seconds.
•High Banknote Acceptance Rates – 98% or
higher using 6 wavelengths of optical sensors.
Accepts Banknote widths up to 72mm.
•Sleep Mode option provides minimal power
consumption in idle status.
•High Impact Cassettes - available in 300/500/
1000 Banknote capacities.
•Field service-friendly design - USB Service Port
and DIP Switches are on the Unit’s rear panel.
•Modified design guards against exposure to
liquids and dust.

P/N 960-000180R_Rev. 1 {EDP #233427} © 2016, JAPAN CASH MACHINE CO., LTD.
1-5
General Information DBV® Series DBV-400 Banknote Validator Section 1
Component Names
Figure 1-4 illustrates the DBV-400 component names and locations.
Figure 1-4 DBV-400 Component Names
a) Transport Unit
b) Bezel (Option)
c) Banknote Insertion Slot
d) Bezel LED
e) Validation Guide
f) Cash Box Release Button
g) Cash Box Door Open/Close Button
h) Cash Box
i) USB Connector (for Maintenance)
j) USB Interface Connector
k) Interface Connector
l) DIP Switch 1
m) DIP Switch 2
n) Cash Box DT Lever
o) Validation Guide Open/Close Latch
p) Status LED
q) Push Button
a
b
c
e
d
g
h
i
j
lm
n
k
f
DBV-400 Unit (Without Cash Box)
o
q
Validation Guide Bottom View
p

P/N 960-000180R_Rev. 1 {EDP #233427} © 2016, JAPAN CASH MACHINE CO., LTD.
1-6
Section 1 DBV® Series DBV-400 Banknote Validator General Information
Specifications
Technical Specifications
Table 1-4 DBV-400 Technical Specifications
Acceptance Rate*:
*. Refer to the specific Country’s “Software Information Sheet” for each Country’s particular Banknote acceptance rate.
98% or greater
Note: The following banknote types are excluded:
•Banknotes with unclear graphics
•Double (dual) Notes
•Worn, dirty, wet, stained, torn or excessively wrinkled Banknotes
•Banknotes having folded corners or edges
•Banknotes having the wrong cut dimensions or printing displacement
•Returned Banknotes because of incorrect or failed insertion.
Banknote Types Accepted: •Long side: 110 - 160mm (4.33 - 6.29 in.)
•Short side: 60 - 72mm (2.36 - 2.83 in.)
Insertion Direction: Four-Way †
†. Refer to the specific Country’s “Software Information Sheet” for each Country’s particular Banknote insertion direction.
Processing Speed‡:
‡. Excluding Host Communication time lag (Power Supply: +12V DC, Temperature: 25º C ±5º C, Humidity: 30%-60%).
Approximately 2 seconds
(from Banknote insertion to next Banknote insertion)
Validation Method: Optical Sensor (Transmissive/Reflection)
Diagnostic Indicators: Bezel LED: Full-Color + Light Amount DA Control
Status LED: Red, Green, Blue, Yellow, Magenta, Cyan, White
Escrow: 1 Note
Anti-stringing Mechanism: Optical Detection and Internal Cash Box Lever
Cash Box Capacity**:
**.The number of Notes stacked depends on the Banknote’s condition.
Approximately 300 notes (new Banknotes)
Approximately 500 notes (new Banknotes)
Approximately 1000 notes (new Banknotes)
Cash Box Access: Rear Access
Sleep Mode††:
††.Both Mode A and Mode B can be available at the same time.
Mode A: Host Wakeup Mode
Mode B: Entrance Sensor Wakeup Mode
Interface‡‡:
‡‡.The Interface Harness connecting to the Host should be less than 3m (9.84 ft).
Photo-Coupler Isolation
TTL
RS232
Pulse Interface
USB (USB Specification Rev. 2.0 Compliance) (Full Speed/12Mbps)

P/N 960-000180R_Rev. 1 {EDP #233427} © 2016, JAPAN CASH MACHINE CO., LTD.
1-7
General Information DBV® Series DBV-400 Banknote Validator Section 1
Environmental Specifications
Electrical Specifications
Structural Specifications
Table 1-5 DBV-400 Environmental Specifications
Operating Temperature: -15ºC to +60ºC (5ºF to 140ºF)*
*. Depends on hydrothermal conditions.
Storage Temperature: -20ºC to +60ºC (-4ºF to 140ºF)*
Relative Operating Humidity: 15% to 90% RH (non-condensed)
Relative Storage Humidity: 30% to 65% RH (non-condensed)
Visible Light Sensitivity: Avoid contact with direct sunlight (Interior lighting must be incandescent with a
Radiant Angle of 15 Degrees or more having an Illumination index of 3000 Lux or less)
Installation: Indoors Only
Table 1-6 DBV-400 Electrical Specifications
Supply Voltage*:
*. Use a Current Source Limiting Power Supply.
12V DC (-5%) - 24V DC (+5%) †
†. The DBV-400 Unit is designed to be connected to a Power Supply having any voltage between 12V DC and 24V DC.
Current Consumption:
Standard Operation ‡
•Inrush = 12V DC = 2.5A, 24V DC = 2.0A
•Standby = 12V DC = 0.12A, 24V DC = 0.07A
•Operation = 12V DC = 1.4A, 24V DC = 0.7A
•Peak = 12V DC = 2.2A, 24V DC = 1.6A
Sleep Mode (Standby) **
•Mode A = 35µA ††
•Mode B = 95µA ††
‡. The Standard Operation indicates the DBV-400 Unit current range.
**. The two Sleep Mode options (Mode A [Host Wakeup Mode]/Mode B [Entrance Sensor Wakeup Mode]) can be used at the same time.
††.A representative value derived from actual and designed values.
Table 1-7 DBV-400 Structural Specifications
Weight:
DBV-400 Unit (with the Bezel): Approximately 0.89kg (1.96lbs.)
DBV-400 with Small Cash Box (300 notes): Approximately 1.34kg (2.95lbs.)
DBV-400 with Medium Cash Box (500 notes): Approximately 1.42kg (3.31lbs.)
DBV-400 with Large Cash Box (1000 notes): Approximately 1.62kg (3.57lbs.)
Mounting: Horizontal
Outside Dimensions: See “Entire Unit Outside Dimensions” on page 1-8 of this Manual
-10-20 10 20 4030
050
060 70
10
20
30
40
50
60
70
80
90
100
Humidity [%RH]
Temperature [ºC]
Allowable Operating Temperature
and Humidity Range
-15ºC/30RH%
40ºC/90RH%
Hydrothermal Condition Table
60ºC/30RH%
10ºC/15RH%

P/N 960-000180R_Rev. 1 {EDP #233427} © 2016, JAPAN CASH MACHINE CO., LTD.
1-8
Section 1 DBV® Series DBV-400 Banknote Validator General Information
Unit Dimensions
Entire Unit Outside Dimensions
Figure 1-5 illustrates the DBV-400 Unit with JCM Standard Bezel outside dimensions.
Figure 1-6 illustrates the DBV-400 Unit with Snack Mask Bezel outside dimensions.
Figure 1-5 DBV-400 Unit With JCM Standard Bezel Outside Dimensions
93
84
50.8
84
98.2
74.7
127
153.3 250
24.9
31.4
34.9
62.4
38.8
8.9
15.1
2x5.4
10.1 116
133.6
4x5.4
61.7
4-R2
249.6
107
14.6 (98.2)
86
93
249.6
71.3
17.6
R8
R8
NOTE: All dimensions in millimeters
Figure 1-6 DBV-400 Unit With Snack Mask Bezel Outside Dimensions
NOTE: All dimensions in millimeters
93
84
50.8
84
98.2
93.8
146.1
172.4
269.1
13
34.5
69.337.5
13.7
2-5.4
10.1 116
133.6
4-5.4
75.5
4-R1
249.6
107.3
18.6
98.2
84.7
93
249.6
71.3
17.6
11.6
27
14.2
79.5
Other manuals for DBV Series
1
This manual suits for next models
3
Table of contents
Other JCM Bank Note Validator manuals