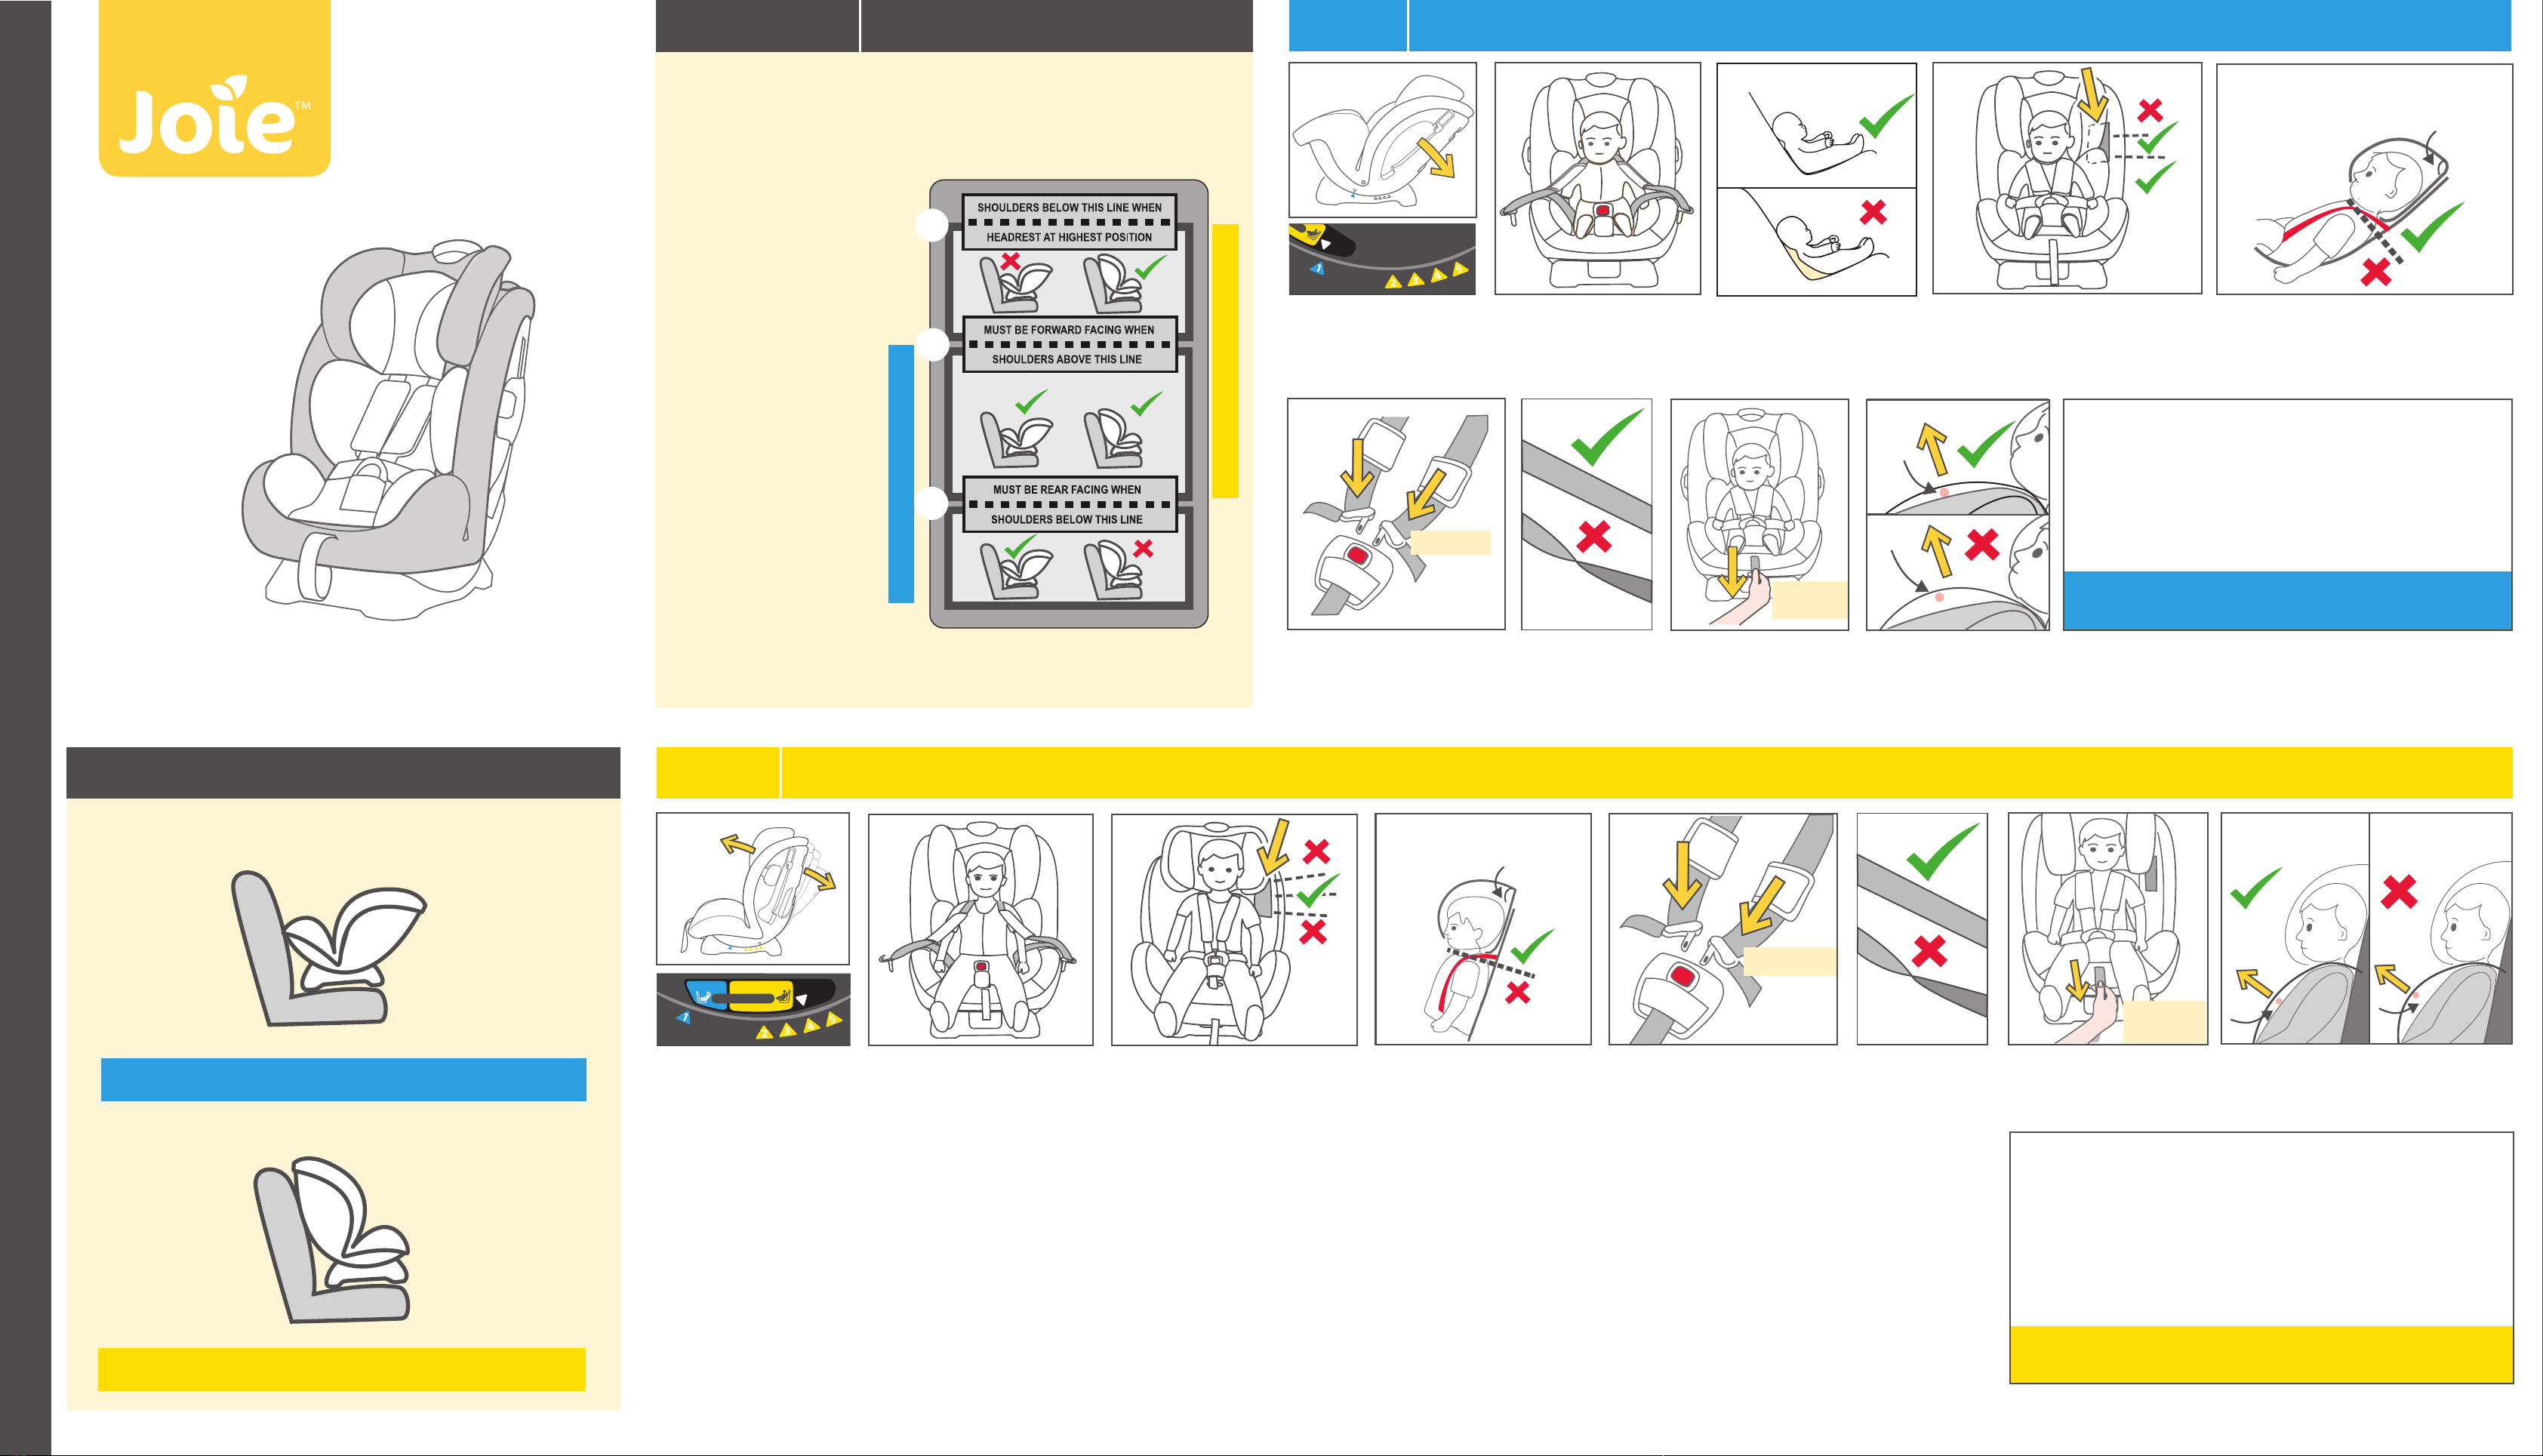
1. Recline restraint to
the REAR FACING
blue number.
7. Straps must
not be twisted.
8. Pull front harness
strap tight.
9. Check strap tension.
Put nger under strap
and pull out.
2. Place child in seat. 3. Child must be placed
rmly against both the
back and bottom of the
seating surface.
QUICK REFERENCE FOR USE
4. Child’s shoulders must
be below middle dotted
line.
5. Adjust headrest up or down until
shoulder straps are just above shoulders.
6. Harness buckle tongues
must be locked in place.
“CLICK”
6
3
3. Child’s shoulders must
be above lower dotted
line.
2. Place child in seat. 5. Harness buckle tongues
must be locked in place.
6. Straps must
not be twisted.
.
7. Pull front harness
strap tight.
8. Check strap tension
for one nger gap.
IMPORTANT: After reading this Quick Reference read the
Instruction Booklet carefully
Pull to tighten
straps
457
quick reference
THESE COLOURS SHOW IF THE INSTRUCTIONS ARE
FOR REARWARD OR FORWARD FACING
9
GAP
NO
GAP
Check
NO
GAP
GAP
8
5Squeeze release handle to
adjust headrest height.
Position bottom of headrest
just above shoulders.
Squeeze release
handle to adjust
headrest height
• Restraint is correctly reclined.
• Child is correct size to be forward facing.
• Headrest and shoulder straps at correct height.
• Harness is latched securely.
• No twists in straps.
• Harness is snug on child.
7
Armour
MODEL C2005B
4
“CLICK”
2
2
1
REAR FACING ONLY FORWARD FACING ONLY
12 3 4 5
INSTRUCTIONS
STORED AT REAR
OF SEAT
1
REAR FACING ONLY FORWARD FACING ONLY
12 3 4 5
INSTRUCTIONS
STORED ATREAR
OF SEAT
3
8
Pull to tighten
straps
READ THIS FIRST
B
A
C
This restraint has a shoulder height level label.
Use this label to decide if the restraint should be rear or forward facing or
if the child is too big for the restraint.
Once your child passes
dotted line Cthey are too
big for this restraint and
need to move to a Boost-
er Seat.
Once your child's shoul-
ders reach the dotted line
Bthe restraint must be
forward facing.
Once your child’s shoul-
ders pass the dotted line
Athey can be either
rearfacing or forward
facing.
If your child’s shoulders
are below the bottom
dotted line Athe restraint
must be rearfacing.
Suitable for forward facing
Suitable for rear facing
USE
Check
• Restraint is fully reclined.
• Child is correct size to be rear facing.
• Headrest and shoulder straps at correct height.
• Harness is latched securely.
• No twists in straps.
• Harness is snug on child.
For complete instructions on how to use this
restraint refer to USE INSTRUCTIONS
BLUE is for rearward facing information
YELLOW is for forward facing information
Quick Reference - using restraint FORWARD FACING
1. Recline restraint to
one of the FORWARD
FACING yellow numbers.
4. Adjust headrest up or
down until shoulder straps
are above shoulders.
6
For complete instructions on how to use this restraint
refer to USE INSTRUCTIONS
Shoulder Height Label Quick Reference - using restraint REAR FACING
USE
IM-000727C


