manuals.online logo
Brands
  1. Home
  2. •
  3. Brands
  4. •
  5. KDK
  6. •
  7. Fan
  8. •
  9. KDK 17CQM User manual

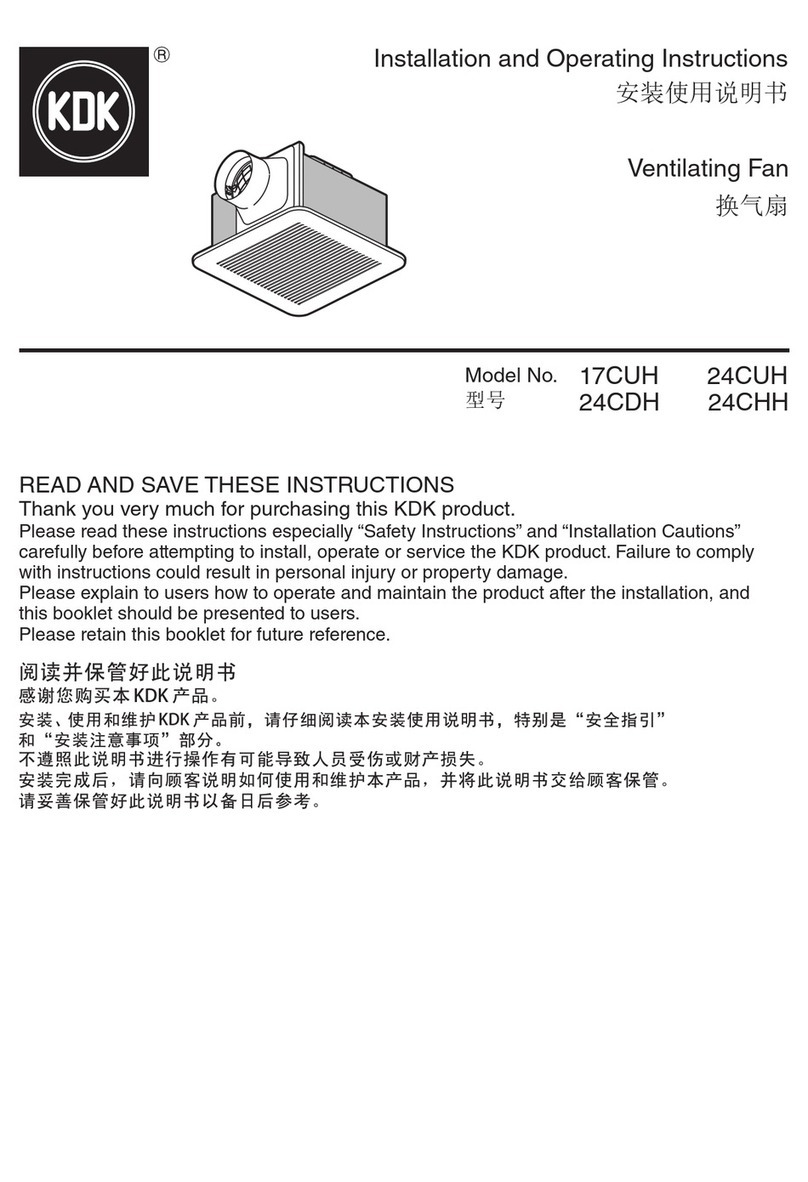
KDK 17CQM User manual

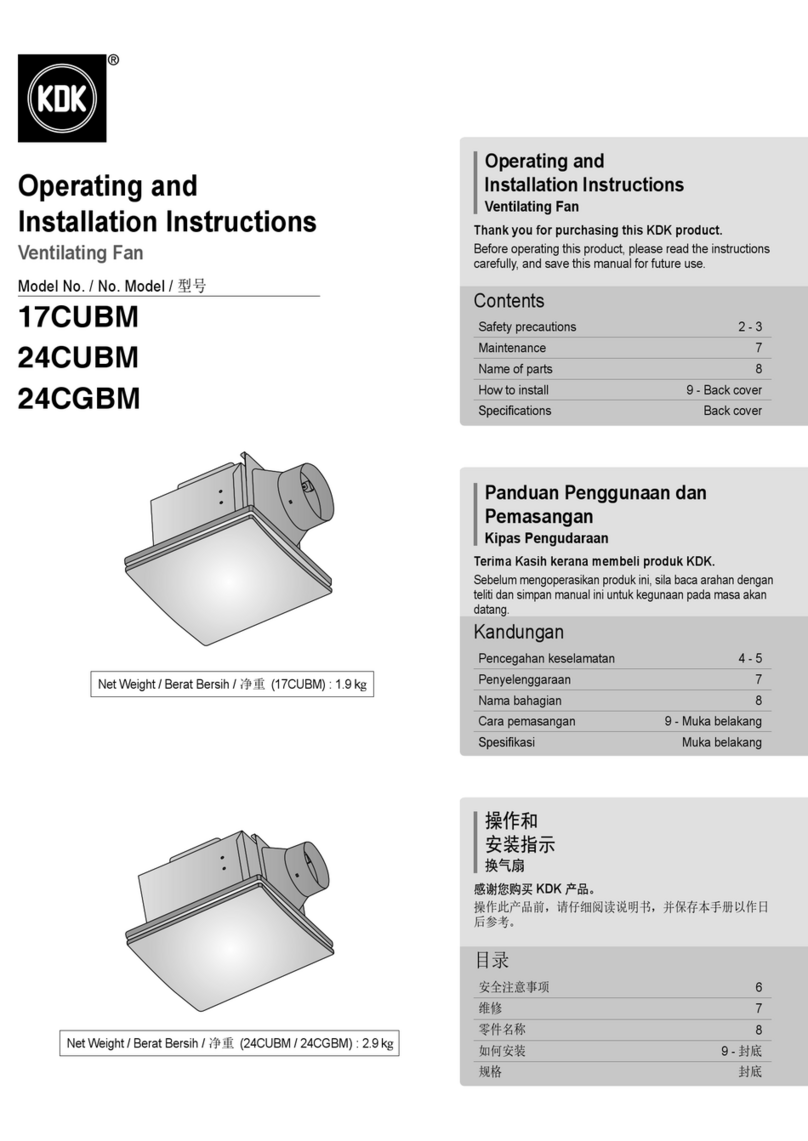
Operating and
Installation Instructions
Ventilating Fan
Model No. / No. Model / 型号
17CQM
24CQM
Operating and
Installation Instructions
Ventilating Fan
Thank you for purchasing this KDK product.
Before operating this product, please read the instructions
carefully, and save this manual for future use.
ᬃ֒ૂ
ᆿ㻻᤽⽰
ᦘ≊᡽
᝕䉘ᛞ䍣Ҧ KDK ӝ૷Ⱦ
操作此产品前,请仔细阅读说明书,并保存本手册以作日
后参考。
安全注意事项 6
维修 7
零件名称 8
如何安装 9 - 封底
规格 封底
目录
Safety precautions 2 - 3
Maintenance 7
Name of parts 8
How to install 9 - Back cover
Specifi cations Back cover
Contents
Panduan Penggunaan dan
Pemasangan
Kipas Pengudaraan
Terima Kasih kerana membeli produk KDK.
Sebelum mengoperasikan produk ini, sila baca arahan dengan
teliti dan simpan manual ini untuk kegunaan pada masa akan
datang.
Pencegahan keselamatan 4 - 5
Penyelenggaraan 7
Nama bahagian 8
Cara pemasangan 9 - Muka belakang
Spesifi kasi Muka belakang
Kandungan
Net Weight / Berat Bersih /
净重

(17CQM) : 1.9
kg
Net Weight / Berat Bersih /
净重

(24CQM) : 2.9
kg
2
Safety precautions
Always follow these instructions
To avoid the possibility of causing injury to users or damage to properties, please follow all the
explanations written below.
This symbol
denotes an
action that is
COMPULSORY.
This symbol
denotes an
action that is
PROHIBITED.
WARNING
A state that may be caused by the mishandling of
products, which, if not avoided, may lead to the
possibility of death or serious injury of users.
Do not disassemble Ventilating Fan
unless stated by this manual.
Must use only supplied parts.
May cause fi re, electrical shock, injury or
Ventilating Fan to drop
.
Do not touch Ventilating Fan while it is
operating.
May cause injury, damage or Ventilating
Fan to drop.
Do not sprinkle water to Ventilating Fan
or do not wet Ventilating Fan.
May cause fi re or electrical shock due to
short circuit.
CAUTION
A state that may be caused by the mishandling of
products, which, if not avoided, may result in the
injury of users or property damage.
To avoid the possibility of causing
injury to users or damage to properties,
please follow all the explanation written
in this manual. The manufacturer will
not be responsible for any accidents or
injuries caused by defective, defi cient
installation or installation which does
not follow the instruction manual.
Be sure to provide an appropriate
opening for air intake.
Install this product securely.
Make sure that a square inspection hole
of at least 45 cm is available.
This Ventilating Fan must be installed by
a qualifi ed technician.
May cause injury if Ventilating Fan drops.
Use a device for disconnection from the
supply, having a contact separation of at
least 3 mm in double poles switch, which
must be incorporated in the fi xed wiring
in accordance with the local electrical
wiring rules.
Ventilating Fan must be mounted above
2.5 m from the fl oor.
Follow strictly all the instructions given
in this manual for installation.
Electrical and installation work need to
be performed by a qualifi ed individual.
Installation error may cause fi re, electrical
shock, injury or Ventilating Fan to drop.
This appliance is not intended for use
by persons (including children) with
reduced physical, sensory or mental
capabilities, or lack of experience and
knowledge, unless they have been given
supervision or instruction concerning
the use of the appliance by a person
responsible for their safety. Children
should be supervised to ensure that they
do not play with the appliance.
Means for disconnection must be
incorporated in the fi xed wiring in
accordance with the wiring rules.
Switch off the power supply and wait
until the Blades are fully static, before
cleaning or doing any maintenance jobs.
May cause injury or electrical shock if
Ventilating Fan moves suddenly.
Kindly refer to your authorized dealer for
repairing or maintenance.
This product must be properly and
reliably grounded.
When this product is no longer be used,
it must not be left in place but removed
to prevent it from possibly dropping.
Do not switch on or off in case of gas
leakage.
May cause fi re or explosion due to electric
spark.
Do not use power supply other than
rated voltage mentioned.
Overheating may cause electrical shock or
fi re.
3
Safety precautions
Always follow these instructions
This product must be install on to the
ceiling which is enough strong, if the
ceiling is not enough strong it must be
reinforced for it to be strong enough.
This fan should be installed so that the
metal parts of the product and mounting
screw do not contact any metallic
members in the ceiling, such as metal
laths, wire laths and metal plate, it is
possible to cause fi re hazards in case of
leak.
Routine maintenance is required every
year. Disconnect the power source
before you conduct any maintenance.
lf the supply cord is damaged, it must
be replaced by the manufacturer or its
service agent or a similarly qualifi ed
person in order to avoid a hazard.
This product is for in house use only and
is applicable to living rooms, washrooms
and other places where the humidity is
not too high.
Can cause rust, discolour, damage or injury.
Do not install this product in places with
high temperature.
Do not install this product in places with
excessive oil fume.
Do not install this product in places with
steam.
Do not form the duct as shown below.
Adaptor
assembly Corrugated
pipe
For this fan, precautions must be taken
to avoid the back-fl ow of gases into the
room from the open-fl ue of gas or other
fuel-burning appliances.
Do not install the power switch in the
bathroom.
Do not install the Ventilating Fan outside
of the window or the wall.
Never use petrol, benzene, thinner or
any other such chemicals for cleaning
the Ventilating Fan.
Do not allow water to contact electrical
part such as motors or switches.
Do not immerse blade or other resin
parts in hot water over 60 °C.
4
Pencegahan keselamatan
Sentiasa mengikuti arahan berikut
Untuk mengelakkan kemungkinan berlakunya kecederaan kepada pengguna atau kerosakan harta
benda, sila patuhi semua penerangan yang dinyatakan di bawah.
Simbol ini
menunjukkan
perbuatan yang
WAJIB DILAKUKAN.
Simbol ini
menunjukkan
perbuatan yang
DILARANG.
AMARAN
Keadaan yang mungkin disebabkan oleh
kecuaian dalam mengendalikan produk, yang
mana, jika tidak dielakkan, boleh mengakibatkan
kematian atau kecederaan parah kepada
pengguna.
Apabila produk ini tidak lagi digunakan,
ia tidak boleh dibiarkan begitu sahaja,
tanggalkan ia untuk mengelakkan
daripada terjatuh.
Jangan hidupkan atau matikan suis jika
berlaku kebocoran gas.
Kebakaran atau letupan mungkin berlaku
disebabkan oleh percikan elektrik.
Jangan gunakan bekalan kuasa selain
dari voltan yang telah ditetapkan.
Pemanasan yang terlampau boleh
menyebabkan kejutan elektrik atau
kebakaran.
Jangan buka sebarang bahagian-
bahagian Kipas Pengudaraan melainkan
dinyatakan di dalam panduan ini.
Hendaklah menggunakan bahagian-
bahagian yang dibekalkan sahaja.
Boleh menyebabkan kebakaran,
kejutan elektrik, kecederaan atau Kipas
Pengudaraan terjatuh.
Jangan sentuh Kipas Pengudaraan
ketika ia sedang beroperasi.
Boleh menyebabkan kecederaan,
kerosakan atau Kipas Pengudaraan
terjatuh.
Jangan percikkan air ke Kipas
Pengudaraan atau, jangan basahkan
Kipas Pengudaraan.
Boleh menyebabkan kebakaran, atau
kejutan elektrik akibat litar pintas.
AWAS
Keadaan yang mungkin disebabkan oleh salah
pengendalian produk yang jika tidak dielakkan,
boleh mengakibatkan kecederaan kepada
pengguna atau kerosakan harta benda.
Untuk mengelakkan kemungkinan
berlaku kecederaan kepada pengguna
atau kerosakan harta benda, sila patuhi
semua arahan yang dinyatakan dalam
panduan ini. Pengilang tidak akan
bertanggungjawab sekiranya berlaku
sebarang kemalangan atau kecederaan
yang disebabkan oleh kesilapan
pemasangan atau pemasangan yang
tidak mengikut buku panduan.
Sila rujuk kepada semua arahan yang
diberikan dalam panduan ini untuk
pemasangan.
Kerja elektrikal dan kerja pemasangan
mesti dilakukan oleh orang yang
bertauliah.
Kesilapan pemasangan boleh
menyebabkan kebakaran, kejutan
elektrik, Kipas Pengudaraan terjatuh atau
kecederaan.
Peralatan ini tidak direka untuk
digunakan oleh individu (termasuk
kanak-kanak) yang mempunyai
kecacatan anggota, deria atau kebolehan
mental, atau kurang pengalaman dan
pengetahuan, melainkan mereka telah
diberikan pemerhatian atau panduan
mengenai penggunaan peralatan ini
oleh individu yang bertanggungjawab
mengenai keselamatan mereka. Kanak-
kanak mestilah diberi pemerhatian
untuk memastikan mereka tidak bermain
dengan peralatan ini.
Kaedah untuk memutuskan bekalan
mesti dipasangkan pada pendawaian
tetap mengikut peraturan pendawaian.
Putuskan bekalan kuasa dan tunggu
sehingga Bilah Kipas berhenti
sepenuhnya, sebelum membersihkan
atau membuat kerja penyelenggaraan.
Boleh menyebabkan kecederaan atau
kejutan elektrik jika Kipas Pengudaraan
bergerak secara tiba-tiba.
Sila rujuk pada wakil penjual anda untuk
membaiki atau penyelenggaraan.
Produk ini mestilah diletakkan dengan
betul dan kukuh.
5
Pastikan anda menyediakan pembukaan
yang sesuai untuk salur masuk udara.
Pasang produk ini dengan betul.
Pastikan sekurang-kurangnya 45 cm
lubang pemeriksaan segi empat
disediakan.
Kipas Pengudaraan ini mestilah
dipasang oleh juruteknik yang
berkelayakan.
Boleh menyebabkan kecederaan, jika Kipas
Pengudaraan terjatuh.
Gunakan peranti untuk pemutusan dari
bekalan, sekurang-kurangnya 3 mm
jauh daripada suis dua kutub yang mesti
digabungkan dalam pendawaian tetap
yang mengikut peraturan pendawaian
elektrik tempatan.
Kipas Pengudaraan mestilah dipasang
dengan ketinggian 2.5 m dari lantai.
Produk ini mesti dipasang pada siling
yang kukuh, jika siling tidak cukup
kukuh, ia mestilah dikukuhkan untuk
menjadi lebih kukuh.
Kipas ini mestilah dipasang agar
bahagian logam produk dan skru
pemasang tidak tersentuh mana-mana
bahagian berlogam pada siling seperti
logam halus, wayar halus dan plat
logam, ia mungkin menyebabkan bahaya
kebakaran jika berlaku kebocoran.
Penyelenggaraan rutin diperlukan
setiap tahun. Putuskan sumber kuasa
sebelum anda melakukan apa-apa
penyelenggaraan.
Jika kord kuasa rosak, ia mesti
digantikan oleh pengilang atau
ejen servisnya atau individu yang
berkelayakan sama untuk mengelakkan
bahaya.
Produk ini untuk kegunaan dalam rumah
sahaja dan
boleh diguna di ruang
tamu, bilik air dan tempat lain yang
kelembapannya tidak terlalu tinggi
.
Boleh menyebabkan karat, berubah warna,
kerosakan atau kecederaan.
Jangan pasang produk ini di tempat
bersuhu tinggi.
Pencegahan keselamatan
Sentiasa mengikuti arahan berikut
Jangan pasang produk ini di tempat
yang dipenuhi asap berminyak.
Jangan pasang produk ini di tempat
yang berwap.
Jangan membentuk salur seperti yang
ditunjukkan di bawah.
Penyambung
penyesuai. Paip
beralun.
Untuk kipas ini, langkah berhati-hati
mesti diambil untuk mengelakkan
pengaliran balik gas ke dalam bilik dari
serombong terbuka gas atau peralatan
pembakaran bahan api yang lain.
Jangan pasang suis kuasa di dalam bilik
air.
Jangan pasang Kipas Pengudaraan di
luar tingkap atau dinding.
Jangan gunakan petrol, benzena, bahan
pencair atau apa-apa bahan kimia
yang lain untuk membersihkan Kipas
Pengudaraan.
Jangan biarkan air terkena bahagian
elektrik seperti motor atau suis.
Jangan rendam bilah atau bahagian
resin lain di dalam air panas yang
melebihi 60 °C.
6
ᆿޞ⌞ᝅӁ亯
ᆿޞ⌞ᝅӁ亯
为避免导致用户受伤或财物损坏的可能性,请遵守以下所述的所有指示。
此符号表示有关行
为是
ᕭ࡬ᙝ
ᕭ࡬ᙝ的。
此符号表示有关行
为是
㻡⾷↘
㻡⾷↘的。
ឌ֙
错误操作产品造成的结果,若不避免可能导致用
户死亡或严重受伤。
⢘ര൦ᆿ㻻ᵢӝ૷Ⱦ
⢘ര൦ᆿ㻻ᵢӝ૷Ⱦ
⺤ؓ⮏ᴿжѠ㠩ቇ
⺤ؓ⮏ᴿжѠ㠩ቇ45 cm
ཝⲺᯯᖘᕅỶḛ
ཝⲺᯯᖘᕅỶḛ
ᆊȾ
ᆊȾ
↚ᦘ≊᡽ᗻ亱
↚ᦘ≊᡽ᗻ亱
⭧ᴿ䍺ṲⲺщѐӰ઎ᆿ㻻
⭧ᴿ䍺ṲⲺщѐӰ઎ᆿ㻻
Ⱦ
若换气扇掉落会导致受伤。
൞ᆿ㻻ᰬθ䴶൞ב⭫㓵䐥ѣᆿ㻻ެ䀜⛯ᔶ䐓
൞ᆿ㻻ᰬθ䴶൞ב⭫㓵䐥ѣᆿ㻻ެ䀜⛯ᔶ䐓
уቅӄ
уቅӄ3 mm
Ⲻᶷᯣᔶ㻻㖤θᗻ亱᤿➝
Ⲻᶷᯣᔶ㻻㖤θᗻ亱᤿➝
ᖉ൦Ⲻ⭫≊䞃㓵Ⲻ㿺ᇐ䘑㺂䘔᧛Ⱦ
ᖉ൦Ⲻ⭫≊䞃㓵Ⲻ㿺ᇐ䘑㺂䘔᧛Ⱦ
ᦘ≊᡽ᗻ亱ᆿ㻻൞⿱൦
ᦘ≊᡽ᗻ亱ᆿ㻻൞⿱൦2.5 m
ԛрⲺ儎ᓜփ
ԛрⲺ儎ᓜփ
㖤рȾ
㖤рȾ
ӝ૷ᗻ亱ᆿ㻻൞䏩ཕᕰ⺢Ⲻཟ㣧ᶵрθྸ󰵳
ӝ૷ᗻ亱ᆿ㻻൞䏩ཕᕰ⺢Ⲻཟ㣧ᶵрθྸ󰵳
ཟ㣧ᶵуཕᕰ⺢θ൞ᆿ㻻ҁࢃᗻ亱ݾሼᆹᕰ
ཟ㣧ᶵуཕᕰ⺢θ൞ᆿ㻻ҁࢃᗻ亱ݾሼᆹᕰ
Ⱦ
Ⱦ
ᆿ㻻ᦘ≊᡽ᰬθᆿ㻻㷰䪿ㅿ䠇ኔ䜞Ԭ⾷↘ٕ
ᆿ㻻ᦘ≊᡽ᰬθᆿ㻻㷰䪿ㅿ䠇ኔ䜞Ԭ⾷↘ٕ
ࣟӄཟ㣧ᶵѣⲺ䠇ኔᶗȽ㓵″ᡌ䠇ኔᶵㅿ䠇
ࣟӄཟ㣧ᶵѣⲺ䠇ኔᶗȽ㓵″ᡌ䠇ኔᶵㅿ䠇
ኔ䜞Ԭᶆᯏ䘑㺂᧛൦θԛ䱨↘⭕╅⭫⧦䊗
ኔ䜞Ԭᶆᯏ䘑㺂᧛൦θԛ䱨↘⭕╅⭫⧦䊗
㙂ሲ㠪⚡⚴Ⱦ
㙂ሲ㠪⚡⚴Ⱦ
∅ᒪ䴶㾷䘑㺂ׁ㺂㔪ᣚȾ൞ᛞ䘑㺂Ա֋㔪ᣚ
∅ᒪ䴶㾷䘑㺂ׁ㺂㔪ᣚȾ൞ᛞ䘑㺂Ա֋㔪ᣚ
ҁࢃ䈭ᯣᔶ⭫ⓆȾ
ҁࢃ䈭ᯣᔶ⭫ⓆȾ
ྸ󰵳⭫㓵ᦕඅθᗻ亱⭧࡬䙖୼ᡌެᵃࣗԙ⨼
ྸ󰵳⭫㓵ᦕඅθᗻ亱⭧࡬䙖୼ᡌެᵃࣗԙ⨼
ᡌᴿ䍺ṲⲺщѐ
ᡌᴿ䍺ṲⲺщѐ
Ӱ઎ᴪᦘθԛ䚵ރধ䲟
Ӱ઎ᴪᦘθԛ䚵ރধ䲟
ᵢӝ૷ӻבᇚ޻ֵ⭞ૂ䘸⭞ӄᇘ঻Ƚ⍍ᢁ䰪
ᵢӝ૷ӻבᇚ޻ֵ⭞ૂ䘸⭞ӄᇘ঻Ƚ⍍ᢁ䰪
ㅿжӑ⒵ᓜуའ儎Ⲻ൰ᡶȾ
ㅿжӑ⒵ᓜуའ儎Ⲻ൰ᡶȾ
可能会导致锈蚀,变色,损坏或受损。
䈭ሼᵢӝ૷ᆿ㻻൞儎⑟Ⲻ൦ᯯȾ
䈭ሼᵢӝ૷ᆿ㻻൞儎⑟Ⲻ൦ᯯȾ
䈭ሼᵢӝ૷ᆿ㻻൞ᴿ䗽ཐ⋯✕Ⲻ൦ᯯȾ
䈭ሼᵢӝ૷ᆿ㻻൞ᴿ䗽ཐ⋯✕Ⲻ൦ᯯȾ
䈭ሼᵢӝ૷ᆿ㻻൞ᴿ㫮⊳Ⲻ൦ᯯȾ
䈭ሼᵢӝ૷ᆿ㻻൞ᴿ㫮⊳Ⲻ൦ᯯȾ
䈭ᖘᡆྸсᡶ⽰Ⲻ㇗䚉Ⱦ
䈭ᖘᡆྸсᡶ⽰Ⲻ㇗䚉Ⱦ
᧛ཪ䱱ԬȾ ⌘㓯㇗Ⱦ
ֵ⭞ᵢᦘ≊᡽θᗻ亱䟽人䱨᧠᯳θԛ䚵ރ
ֵ⭞ᵢᦘ≊᡽θᗻ亱䟽人䱨᧠᯳θԛ䚵ރ
≊։ԄᮔᔶⲺ≊䚉ᡌެᆹⲺ᱄⚡䇴༽ഔ⍷䘑
≊։ԄᮔᔶⲺ≊䚉ᡌެᆹⲺ᱄⚡䇴༽ഔ⍷䘑
ᇚ޻Ⱦ
ᇚ޻Ⱦ
䈭൞⎪ᇚѣᆿ㻻⭫ⓆᔶީȾ
䈭൞⎪ᇚѣᆿ㻻⭫ⓆᔶީȾ
䈭ሼᦘ≊᡽ᆿ㻻൞ネᡭᡌ໏໷Ⲻཌ䶘Ⱦ
䈭ሼᦘ≊᡽ᆿ㻻൞ネᡭᡌ໏໷Ⲻཌ䶘Ⱦ
࠽ֵ⭞⊳⋯Ƚ㤥Ƚཟ䛙≪θᡌԱ֋ެᆹ↚
࠽ֵ⭞⊳⋯Ƚ㤥Ƚཟ䛙≪θᡌԱ֋ެᆹ↚
㊱ᆜ૷ᶛ␻⌷ᦘ≊᡽Ⱦ
㊱ᆜ૷ᶛ␻⌷ᦘ≊᡽Ⱦ
䈭䇟≪᧛䀜⭫≊䜞Ԭθׁྸ傢䗴ᡌᔶީȾ
䈭䇟≪᧛䀜⭫≊䜞Ԭθׁྸ傢䗴ᡌᔶީȾ
䈭ሼ⡽ᡌެԌṇ㜸䜞Ԭ⎮ޛ
䈭ሼ⡽ᡌެԌṇ㜸䜞Ԭ⎮ޛ 60 °C
ԛр
ԛр
Ⲻ✣≪ѣȾ
Ⲻ✣≪ѣȾ
ᆿ㻻ᰬ䈭ћṲ൦䚫ᆾᵢᢁ߂޻ᡶ㔏Ⲻᡶᴿ᤽⽰Ⱦ
⭫㓵䞃㓵ૂᆿ㻻ᐛ֒ᗻ亱
⭫㓵䞃㓵ૂᆿ㻻ᐛ֒ᗻ亱
⭧ᴿ䍺ṲⲺщѐ
⭧ᴿ䍺ṲⲺщѐ
Ӱ઎
Ӱ઎
䘑㺂Ⱦ
䘑㺂Ⱦ
安装错误可能导致火灾、触电、受伤或换气
扇掉落。
䲚䶔⭧ᆿޞⴇᣚӰቧᵢӝ૷䘑㺂ⴇ⶙ᡌ᤽
䲚䶔⭧ᆿޞⴇᣚӰቧᵢӝ૷䘑㺂ⴇ⶙ᡌ᤽
ሲθࡏ䓡։Ƚ᝕ᇎᡌᲰ࣑ᴿࣕ㜳䳒⻃㘻θ
ሲθࡏ䓡։Ƚ᝕ᇎᡌᲰ࣑ᴿࣕ㜳䳒⻃㘻θ
ᡌ㘻㕰҅⴮ީ㔅僂ૂ⸛䇼ⲺӰ༡δᤢݵ
ᡌ㘻㕰҅⴮ީ㔅僂ૂ⸛䇼ⲺӰ༡δᤢݵ
ㄛε䈭ֵ⭞
ㄛε䈭ֵ⭞
ᵢӝ૷
ᵢӝ૷
Ⱦᓊ⺤ؓݵㄛу㾷ᣀᵢ
ᓊ⺤ؓݵㄛу㾷ᣀᵢ
ӝ૷ᖉ֒⧟ޭ⧟Ⱦ
ӝ૷ᖉ֒⧟ޭ⧟Ⱦ
ᯣᔶ䘔᧛Ⲻᯯᕅᗻ亱
ᯣᔶ䘔᧛Ⲻᯯᕅᗻ亱
᤿➝
᤿➝
രᇐᐹ㓵䠂Ⲻ᧛㓵
രᇐᐹ㓵䠂Ⲻ᧛㓵
㿺ࡏȾ
㿺ࡏȾ
␻ᢡᡌ䘑㺂Ա֋㔪ؤᐛ֒ࢃθީ䰣ᡶᴿ⭫Ⓠ
␻ᢡᡌ䘑㺂Ա֋㔪ؤᐛ֒ࢃθީ䰣ᡶᴿ⭫Ⓠ
ᒬㅿᖻ᡽㘲ᇂޞ䶏↘Ⱦ
ᒬㅿᖻ᡽㘲ᇂޞ䶏↘Ⱦ
若换气扇突然运转,可
能
致受伤或触电。
请向您的经销商咨询有关修理或维修的详情。
ᵢӝ૷ᗻ亱ԛ↙⺤фᆿޞⲺᯯᕅ
ᵢӝ૷ᗻ亱ԛ↙⺤фᆿޞⲺᯯᕅ
᧛൦Ⱦ
൦Ⱦ
䮵ᰬ䰪уֵ⭞ᵢӝ૷ᰬθ࠽䇦уᗍሼҁ⮏൞
䮵ᰬ䰪уֵ⭞ᵢӝ૷ᰬθ࠽䇦уᗍሼҁ⮏൞
৕փθᓊሼᆹсԛ䱨↘ެᦿ㩳Ⱦ
৕փθᓊሼᆹсԛ䱨↘ެᦿ㩳Ⱦ
䈭൞➚≊⋺╅Ⲻ᛻߫с
䈭൞➚≊⋺╅Ⲻ᛻߫с
ᔶީᵢӝ૷
ᔶީᵢӝ૷
Ⱦ
电火花可能导致起火或爆炸。
࠽ֵ⭞ᵢᮽ᤽ᇐⲺ仓ᇐ⭫ুԛཌⲺ⭫ⓆȾ
࠽ֵ⭞ᵢᮽ᤽ᇐⲺ仓ᇐ⭫ুԛཌⲺ⭫ⓆȾ
过热可导致触电或火灾。
䈭᣼䲚ᦘ≊᡽θ䲚䶔↚䈪᱄Ҝ᤽⽰Ⱦ
䈭᣼䲚ᦘ≊᡽θ䲚䶔↚䈪᱄Ҝ᤽⽰Ⱦ
务必只使用附带的零件。
可
能
导致火灾、触电、受伤或换气扇掉落。
䈭൞ᦘ≊᡽↙൞䘆䖢Ⲻᰬُ䀜᪮ᦘ≊᡽
䈭൞ᦘ≊᡽↙൞䘆䖢Ⲻᰬُ䀜᪮ᦘ≊᡽
Ⱦ
可能导致受伤、损坏或换气扇掉落。
࠽ᦘ≊᡽⍈≪Ⱦᡌ㘻θ࠽ᔺ⒵ᦘ≊᡽Ⱦ
可能导致火灾或电源短路而触电。
ݧཎ
错误操作产品造成的结果,若不避免可能导致用
户受伤或财物损失。
Ѱ䚵ރሲ㠪⭞ᡭ՚ᡌ䍘⢟ᦕඅⲺ㜳ᙝθ䈭
䚫ᆾᵢ䈪᱄ҜޝⲺᡶᴿ᤽⽰Ⱦ࡬䙖୼ሯԱ֋ഖ
у↙⺤Ⲻᆿ㻻ᡌу᤿➝䈪᱄Ҝ᤽⽰Ⲻᆿ㻻ᡶ䙖
ᡆⲺԱ֋ᝅཌૂᦕ՚ሼу䍕Ա֋䍙ԱȾ
ᡆⲺԱ֋ᝅཌૂᦕ՚ሼу䍕Ա֋䍙ԱȾ
⺤ؓᨆב䘸ᖉⲺ䘑≊Ⱦ
⺤ؓᨆב䘸ᖉⲺ䘑≊Ⱦ
ࣗᗻ䚫ᗠԛс᤽⽰
ࣗᗻ䚫ᗠԛс᤽⽰
7
Maintenance 㔪ؤ
Penyelenggaraan
Make sure that the power
supply is turned off , then
remove Louver
B
by pressing
the spring and pull out in
direction .
■ Note:
• Do not dismantle Louver
B
into two pieces.
Rinse Louver
B
with water
and then dry it with a soft dry
cloth or leave it air dry. (Do not
dry by direct sunlight or heat.)
Clean the dirt off Fan Body
A
with a suction cleaner
q
.
Wipe the dust off Fan Body
A
with a soft cloth moistened with
kitchen detergent, and then
clear it with a clean soft cloth.
Finally, install Louver
B
.
(Refer Step 4 - on page 12.)
B
B
A
A
q
Pastikan bekalan kuasa
telah diputuskan, kemudian
tanggalkan Ram
B
dengan
memampatkan spring dan
tarik keluar ke arah .
■ Nota:
• Jangan pisahkan Ram
B
kepada dua bahagian.
Bilas Ram
B
dengan air
dan kemudian keringkannya
dengan kain kering yang
lembut atau biarkannya kering.
(Jangan keringkan di bawah
sinaran matahari atau haba.)
Bersihkan kotoran pada Badan
Kipas
A
dengan pembersih
hampagas
q
.
Lap habuk pada Badan Kipas
A
dengan kain lembut yang
dilembapkan dengan pencuci
dapur dan kemudian bersihkannya
dengan kain lembut yang bersih.
Akhir sekali, pasang Ram
B
.
(Rujuk Langkah 4 -
pada muka
surat 12.
)
确保电源已关闭,然后按下弹
簧 并拉出方向 以拆下百
叶窗
B
。


■
■
༽⌞
༽⌞:
• 切勿将百叶窗
B 拆分成两块。
用水冲洗百叶窗
B
,然后用柔
软的干布将其擦干或将其风干。
(请勿采用阳光直射或直接加热
的方式进行干燥。)
使用吸尘器
q
清洁扇体
A
。
将柔软的布弄湿后沾上厨房洗
涤剂,擦掉扇体
A
上的灰尘,
然后用干净的软布将其清除。
最后,装上百叶窗
B
。
(请参步驟 4 -
,第 12 页
)
Dimension / Dimensi /
ተሮ
ተሮ
8
Parts piece(s)
A
Fan Body ………………… 1
B
Louver …………………… 1
C
Tapping Screw ………… 6
Name of parts
Nama bahagian
䴬Ԭ〦
■ Attention:
• Do not place Ventilating Fan
directly on the fl oor. It may cause
scratches to the product.
■ Note:
• The illustrations in this manual are
for explanation purposes only and
may diff er from the actual unit.
■ Perhatian:
• Jangan letak Kipas Pengudaraan
di atas lantai. Ia boleh
menyebabkan kesan calar pada
produk.
■ Nota:
• Ilustrasi pada buku panduan ini
adalah untuk tujuan penerangan
sahaja dan mungkin berbeza dari
unit asal.


■
■
⮏ᝅ
⮏ᝅ:
• 请勿将换气扇直接摆放在地板上。
否则可能会划伤产品。


■
■
༽⌞
༽⌞:
• 本手册中的插图仅用于说明,可能与实
际组件有所不同。
Model /
Model /
型号
Measurement / Ukuran / 测量 (mm)
A
(Square /
Persegi /
正万形)
BCDEFG
(Square /
Persegi /
正万形)
IDuct Size /
Saiz Salur /
管道尺寸
17CQM 170 164 34 84 194 214 240 10 Ø100
24CQM 233 180 38 140 255 278 300 10 Ø100
Bahagian-bahagian unit
A
Badan Kipas …………… 1
B
Ram ……………………… 1
C
Skru Tetapan …………… 6
䴬Ԭ
䴬Ԭ
Ԭ
A
᡽։
᡽։ ……………………… 1
B
Ⲵネ
Ⲵネ …………………… 1
C
᭱ѓ㷰ѓ
᭱ѓ㷰ѓ ………………… 6
Unit: mm /
Unit: mm /
单位: mm
A
B
C
A
B
C
Condenser Box /
Kotak
Pemeluwapan /
冷凝器盒
6 - 5 × 9 hole /
6 - 5 × 9 lubang /
6 - 5 × 9 洞孔
Blade /
Bilah Kipas/
叶片
D
EFG Ø98
Slot /
Slot /
插槽
Motor /
Motor /
马达
Adaptor assembly /
Penyambung
penyesuai /
接头阻件
B
A
I
9
How to install
Cara pemasangan
ྸ֋ᆿ㻻
Follow the methods shown
below to install Fan Body.
1-A
Fan Body Installation (with a
wooden keel)
Remove the screw bag
a
and
the tape attached to it from
the adaptor assembly before
installation.
Build a wooden frame
c
horizontally from the wooden
keel
b
. Note that the distance
between the top of Fan Body
A
and the roof (attic) should
be at least 20 mm.
Firmly secure Fan Body
A
with 6 Tapping Screws
C
.
Ikuti kaedah yang ditunjukkan di
bawah untuk memasang Badan
Kipas.
1-A
Pemasangan Badan Kipas
(dengan lunas kayu)
Keluarkan beg skru
a
dan
pita yang dilekatkan padanya
dari penyambung penyesuai
sebelum pemasangan.
Bina rangka kayu
c
secara
mendatar dari lunas kayu
b
.
Jarak di antara bahagian atas
Badan Kipas
A
dan bumbung
(loteng) memerlukan sekurang-
kurangnya 20 mm.
Ketatkan Badan Kipas
A
dengan 6 Skru Tetapan
C
.
䈭᤿➝ԛсᯯ⌋ᆿ㻻伄᡽։Ⱦ
䈭᤿➝ԛсᯯ⌋ᆿ㻻伄᡽։Ⱦ
1-A
᡽։ᆿ㻻δᑜᵞ࡬嗏僞ε
᡽։ᆿ㻻δᑜᵞ࡬嗏僞ε
在安装之前,从适接头阻件中
卸下螺丝袋
a
和粘贴在其上
的胶带。
用木框
b
横向建立一个木制
框架
c
。注意,扇体
A
和
屋顶(阁楼)应该至少距离
20 mm。
用 6 个攻丝螺丝
C
将扇体
A
牢牢固定。
1-B
Fan Body Installation (install
the adaptor assembly fi rst)
First remove the hexagon
screw
h
attaching the adaptor
assembly to Fan Body
A
.
Remove the adaptor assembly
by pushing up and pulling to
the direction . Then remove
the screw bag
a
from the
adaptor assembly before
installation.
Build a wooden frame
c
horizontally from the wooden
keel
b
. Note that the distance
between the top of the fan
body and the ceiling should be
at least 20 mm.
1-B
Pemasangan Badan Kipas
(pasang penyambung
penyesuai terlebih dahulu)
Tanggalkan skru heksagon
h
yang menyambungkan
penyambung penyesuai ke
Badan Kipas
A
dahulu.
Tanggalkan penyambung
penyesuai dengan menekan
ke atas dan tarik ke arah .
Kemudian keluarkan beg
skru
a
dari penyambung
penyesuai sebelum
pemasangan.
Bina rangka kayu
c
secara
mendatar dari lunas kayu
b
.
Jarak di antara bahagian atas
badan kipas dan siling perlulah
sekurang-kurangnya 20 mm.
1-B
᡽։ᆿ㻻δݾᆿ㻻᧛ཪ䱱Ԭε
᡽։ᆿ㻻δݾᆿ㻻᧛ཪ䱱Ԭε
先取下在扇体
A
上附接着接头
阻件的六角螺钉
h
。
向上推动 并拉到方位
拆下接头阻件。然后在安装之
前,从适接头阻件中卸下螺丝
袋
a
。
用木框
b
横向建立一个木制框
架
c
。注意,扇体和天花板应
该至少距离 20 mm。
1
Model /
Model /
型号
AB
17CQM 177 275
24CQM 240 335
Unit / Unit / 单位: mm
A
C
These installation holes are not applicable in
Malaysia market /
Lubang pemasangan ini tidak boleh
digunakan di pasaran Malaysia /
这些安装孔不适用于马来西亚市场
a25 ~ 30 mm
Approximate 30 mm /
Kira-kira 30 mm /
大约为 30 mm
A
B
c
b
10
How to install ྸ֋ᆿ㻻
Cara pemasangan
Pasang penyambung
penyesuai pada rangka kayu
c
seperti yang ditunjukkan di
dalam gambar.
Masukkan Badan Kipas
A
ke
dalam rangka kayu
c
, dan
sambungkannya ke
penyambung penyesuai.
Ketatkan Badan Kipas
A
dengan 4 Skru Tetapan
C
dan
satu skru heksagon
h
.
将接头阻件如图所示般安装到
到木框一边
c
。
在木框
c
里置入扇体
A
,并
将其连接到接头阻件。
使用 4 个攻丝螺丝
C
以及六
角螺钉
h
将扇体
A
牢牢固
定。
Attach the adaptor assembly
to the wooden frame
c
as
shown in the fi gure.
Insert Fan Body
A
in the
wooden frame
c
, and connect
it to the adaptor assembly.
Firmly secure Fan Body
A
with 4 Tapping Screws
C
and
a hexagon screw
h
.
h
AThese installation holes are not applicable in
Malaysia market /
Lubang pemasangan ini tidak boleh
digunakan di pasaran Malaysia /
这些安装孔不适用于马来西亚市场
Model /
Model /
型号
A
(Square / Persegi /
正万形)
17CQM 177
24CQM 240
Unit / Unit / 单位: mm
c
c
c
A
Ch
Correct Position /
Posisi Betul /
正确位置
Wrong Position /
Posisi Salah /
错误位置
Hook is fully insert /
Cangkuk masuk sepenuhnya /
钩子完全插入
Screw is in center /
Skru berada di tengah /
螺丝在中心
Hook is not fully insert /
Cangkuk tidak masuk sepenuhnya /
钩子没有完全插入
Screw is overlapped with
Fan Body /
Skru bertindih dengan
Badan Kipas /
螺丝与扇体重合
c
A
Hook securely /
Disangkut kemas /
钩环保护
a
Correct Position /
Posisi Betul /
正确位置
17CQM
Wrong Position /
Posisi Salah /
错误位置
Correct Position /
Posisi Betul /
正确位置
24CQM
Wrong Position /
Posisi Salah /
错误位置
A
25 ~ 30 mm
Approximate 30 mm /
Kira-kira 30 mm /
大约为 30 mm
bc
11
How to install ྸ֋ᆿ㻻
Cara pemasangan
Power Cord Connection.
• Make sure all connections are
fastened fi rmly after wiring is
fi nished.
• It is required to use terminal
(not included) that complies IEC
60998.
• All connections should be
accommodated in a suitable
compartment.
Sambungan Kord Kuasa.
• Pastikan semua sambungan
diketatkan selepas pendawaian
selesai.
• Penggunaan terminal (tidak
dibekalkan) yang mematuhi
IEC 60998 adalah diperlukan.
• Semua sambungan perlu
ditempatkan di ruang yang
sesuai.
⭫㓵䘔᧛Ⱦ
⭫㓵䘔᧛Ⱦ
• 接线完成后,确保所有连接牢固。
• 需要使用符合 IEC 60998 的线接
头。(自备)
• 所有连接都应放置在合适的隔间中。
2
Thermal Fuse (In motor) /
Fius Haba (Dalam Motor) /
热熔丝 (马达内)
114 °C
White / Putih / 白色 Brown / Coklat / 棕色
Black / Hitam / 黑色 Blue / Biru / 蓝色
Black / Hitam / 黑色
Red /
Merah /
红色
Green•Yellow /
Hijau•Kuning /
绿色•黄色
Double poles switch
(not included) /
Suis dwikutub
(tidak termasuk) /
双极单投开关
(自备)
Capacitor /
Kapasitor /
电容器
Black /
Hitam /
黑色
Fan Body /
Badan Kipas /
扇体
Power supply /
Bekalan kuasa /
电源
Terminal / Terminal / 终端
Brown (Live) /
Coklat (Hidup) /
棕色(火线)
Blue (Neutral) /
Biru (Neutral) /
蓝色(零线)
Green•Yellow (Earth) /
Hijau•Kuning (Bumi) /
绿色•黄色(地线)
Duct Connection and Ceiling
Plate Installation.
Insert the duct
i
into the
adaptor assembly, and tighten
it with adhesive tape (not
supplied).
(Suspend the duct
i
from the
ceiling to prevent any external
force onto Fan Body
A
.)
lnstall the ceiling plate
j
.
Note that the gap
k
between
the fl ange
l
and the ceiling
plate
j
should be 2 to 3 mm.
Slope the duct
i
downward
and guide it through the wall
to the outside. Be sure to
prevent rainwater from falling
in the duct
i
from its outlet.
(The minimum size of the hole
opening on the wall is Ø116
mm)
Install the pipe hood or vent
cap (optional accessories) on
the outer wall.
■ Note:
• Optional accessories and
duct
i
are not provided by
manufacturer.
• Pipe hood (model number:
MGX100K) can be purchased
at KDK authorised dealer
shop.
3
Sambungan Salur dan
Pemasangan Plat Siling.
Masukkan salur
i
ke dalam
penyambung penyesuai dan
ketatkannya dengan pita
pelekat (tidak dibekalkan).
(Gantung salur
i
dari siling
bagi mencegah sebarang daya
luar pada Badan Kipas
A
.)
Pasang plat siling
j
.
Pastikan jarak
k
di antara
bebibir
l
dan plat siling
j
mestilah 2 hingga 3 mm.
Condongkan salur
i
ke
bawah dan salurkannya
melalui dinding ke bahagian
luar. Elakkan air hujan dari
jatuh ke dalam salur
i
dari salur keluarnya. (Saiz
minimum pembukaan lubang
pada dinding ialah Ø116 mm)
Pasang hud paip atau penutup
lubang (aksesori pilihan) pada
dinding luar.
■ Nota:
• Aksesori pilihan dan salur
i
tidak disertakan oleh
pengilang.
• Hud paip (nombor model:
MGX100K) boleh dibeli di
kedai wakil penjual KDK.
㇗䚉䘔᧛ૂཟ㣧ᶵᆿ㻻Ⱦ
㇗䚉䘔᧛ૂཟ㣧ᶵᆿ㻻Ⱦ
将管道
i
置入接头阻件中并用
胶带(自备)将其紧固。
(挂起天花板中的管道
i
,
以防止任何外力施加到扇体
A
上。)
安装天花板嵌板
j
。
注意,凸缘
l
和天花板嵌
板
j
的间隙
k
应为 2 至 3
mm。
将管道
i
向下倾斜,并引导它
通过墙壁到外面。必须防止雨
水从其出口落入管道
i
。
(壁上开孔的最小尺寸为
Ø116 mm)
将管罩和管盖(可选配件)安装
到墙外。


■
■
༽⌞
༽⌞:
• 可选配件和管道
i
不由制造商
提供。
• 管罩(型号
: MGX100K
)可以在
KDK
授权经销商商店购买。
Thermal Fuse (In motor) /
Fius Haba (Dalam Motor) /
热熔丝 (马达内)
134 °C
White / Putih / 白色 Brown / Coklat / 棕色
Black / Hitam / 黑色 Blue / Biru / 蓝色
Black / Hitam / 黑色
Red / Merah / 红色
Green•Yellow /
Hijau•Kuning /
绿色•黄色
Double poles switch
(not included) /
Suis dwikutub
(tidak termasuk) /
双极单投开关
(自备)
Capacitor /
Kapasitor /
电容器
Black / Hitam / 黑色
Brown / Coklat / 棕色
17CQM 24CQM
Model Model ශ 17CQM 24CQM
Voltage (V) Voltan (V) ⭫ু (V) 240 240
Frequency (Hz) Frekuensi (Hz) 仇⦽ (Hz) 50 50
Power Consumption (W) Penggunaan Kuasa (W) ࣕ⦽ (W) 9.5 12.0
Air Delivery (m3/h) Sebaran Angin (m3/h) ᧈ≊䠅 (m3/h) 90 160
Noise (dB) Hingar (dB) ಠ丩 (dB) 24 26
Static Pressure (Pa) Tekanan Statik (Pa) 䶏ু (Pa) 110 100
Insulation class E IP code:IPX2 Type of Insulation: Functional Insulation
Penebat kelas E Kod IP:IPX2 Jenis Penebat: Penebat Berfungsi
E
㓝㔓㕎
㓝㔓㕎
䱨≪ㅿ㓝
䱨≪ㅿ㓝:IPX2
㔓㕎〃㊱
㔓㕎〃㊱:
ᵰ㜳㔓㕎
ᵰ㜳㔓㕎
Specifi cations 㿺Ṳ
Spesifi kasi
Manufactured for:-
KDK FANS (M) SDN. BHD. (200201001186)
15, Jalan Tandang (3rd Floor),
46050 Petaling Jaya, Selangor Darul Ehsan.
Made in MalaysiaPrinted in Malaysia
17CQM4200AM
M0521-10921
⎁䈋䘆㺂ૂⲴネᆿ㻻
⎁䈋䘆㺂ૂⲴネᆿ㻻
当电源开启时,检查以下故障:
• 扇叶是否正确旋转?
• 扇叶是否逆时针旋转?
• 是否有异常声音或振动?
按住弹簧 插入安装弹簧
n
,
将方位 插入插槽
m
。然后
将百叶窗
B
安装到扇体
A
。
(安装时请戴上手套。)
Test Run and Louver Installation
When the power is turned
on, check for malfunctions as
follow:
• Does the fan rotate correctly?
• Does the fan rotate anti-
clockwise?
• Is there any abnomal sound
or vibration?
Insert the mounting spring
n
by pressing the spring and
put in direction into the slots
m
. Then mount Louver
B
to
Fan Body
A
. (Please wear
gloves during installation.)
Ujian Operasi dan Pemasangan
Ram
Apabila kuasa dihidupkan,
periksa kerosakan seperti yang
berikut:
• Adakah kipas berputar
dengan betul?
• Adakah kipas berputar
melawan arah jam?
• Adakah terdapat bunyi yang
luar biasa atau getaran?
Masukkan spring pendakap
n
dengan memampatkan spring
dan letakkan ke arah ke
dalam slot
m
. Kemudian
pasangkan Ram
B
ke Badan
Kipas
A
. (Sila pakai sarung
tangan semasa pemasangan.)
Switch /
Suis /
开关
n
m
B
A
How to install ྸ֋ᆿ㻻
Cara pemasangan
4
i
j
lk
Inside /
Dalam /
内侧
Outside /
Luar /
外侧
Wall /
Dinding /
墙壁
i
Slope /
Condong /
科度
1
100
1
50
i
A
Vent cap /
Penutup lubang /
管盖
Pipe hood /
Hud paip /
管罩
MGX100K
Optional Accessories /
Aksesori Pilihan /
可选配件

This manual suits for next models

1

Other KDK Fan manuals

KDK F-M14D5 User manual

KDK

KDK F-M14D5 User manual

KDK F-M14DZ User manual

KDK

KDK F-M14DZ User manual

KDK M56PR User manual

KDK

KDK M56PR User manual

KDK N30NH User manual

KDK

KDK N30NH User manual

KDK K14XF User manual

KDK

KDK K14XF User manual

KDK M56XG User manual

KDK

KDK M56XG User manual

KDK SC30X User manual

KDK

KDK SC30X User manual

KDK 20TGQF User manual

KDK

KDK 20TGQF User manual

KDK K15V0 User manual

KDK

KDK K15V0 User manual

KDK 25TGQ7 Supplement

KDK

KDK 25TGQ7 Supplement

KDK 15WUF 07 User manual

KDK

KDK 15WUF 07 User manual

KDK F-M15H5 User manual

KDK

KDK F-M15H5 User manual

KDK N48LG User manual

KDK

KDK N48LG User manual

KDK T60AW User manual

KDK

KDK T60AW User manual

KDK 25GSC User manual

KDK

KDK 25GSC User manual

KDK K12UX User manual

KDK

KDK K12UX User manual

KDK 20AUH User manual

KDK

KDK 20AUH User manual

KDK SM30H User manual

KDK

KDK SM30H User manual

KDK F-M14C5 User manual

KDK

KDK F-M14C5 User manual

KDK 40BECH User manual

KDK

KDK 40BECH User manual

KDK K14YZ User manual

KDK

KDK K14YZ User manual

KDK KX405 User manual

KDK

KDK KX405 User manual

KDK 24CURB User manual

KDK

KDK 24CURB User manual

KDK M56XR User manual

KDK

KDK M56XR User manual

Popular Fan manuals by other brands

inVENTer Aviant installation instructions

inVENTer

inVENTer Aviant installation instructions

Arctic Cove MODF001 Operator's manual

Arctic Cove

Arctic Cove MODF001 Operator's manual

Raydan Home 23039 operating instructions

Raydan Home

Raydan Home 23039 operating instructions

NSA FFRDC-24RC manual

NSA

NSA FFRDC-24RC manual

Exodraft RSHG manual

Exodraft

Exodraft RSHG manual

HTW CIRCLE R32 Owners and installation manual

HTW

HTW CIRCLE R32 Owners and installation manual

Flex-a-Lite 675 installation instructions

Flex-a-Lite

Flex-a-Lite 675 installation instructions

Trust RB01-TFB36 Series manual

Trust

Trust RB01-TFB36 Series manual

Maico ESQ 25/4 Mounting and operating instructions

Maico

Maico ESQ 25/4 Mounting and operating instructions

Casablanca Panama 59510 Owner's guide and installation manual

Casablanca

Casablanca Panama 59510 Owner's guide and installation manual

Xpelair Premier DX200 Installation and maintenance instructions

Xpelair Premier

Xpelair Premier DX200 Installation and maintenance instructions

Draper FAN2C instructions

Draper

Draper FAN2C instructions

Nordic Home FT-532 user manual

Nordic Home

Nordic Home FT-532 user manual

NuTone 788CHNTC Instructions for use

NuTone

NuTone 788CHNTC Instructions for use

Vents VS 355 4E user manual

Vents

Vents VS 355 4E user manual

Sulion NOA manual

Sulion

Sulion NOA manual

Brandson 305057 user manual

Brandson

Brandson 305057 user manual

AC Infinity CLOUDRAY user manual

AC Infinity

AC Infinity CLOUDRAY user manual

manuals.online logo
manuals.online logoBrands
  • About & Mission
  • Contact us
  • Privacy Policy
  • Terms and Conditions

Copyright 2025 Manuals.Online. All Rights Reserved.