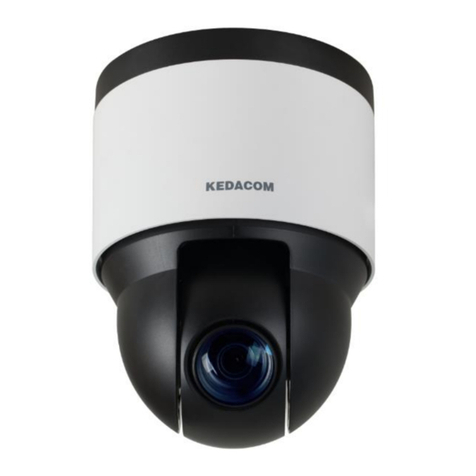
Kedacom IPC2255-Gi4N Series User manual

KEDACOM
User Manual for Intelligent Camera
V1R1
Jan., 2018

Trademark
Kedacom™ and are trademarks of Suzhou Keda Technology Co., Ltd. in
China and various other countries. All other trademarks mentioned in this document are
the property of their respective holders.
Suzhou Keda Technology Co., Ltd.
131 Jinshan Road
New District, Suzhou, 215011
People's Republic of China
http://www.kedacom.com/en
Tel: +86-512-68418188
Fax: +86-512-68412699
© 2018 Suzhou Keda Technology Co., Ltd. All rights reserved.
Without the prior written permission of Suzhou Keda Technology Co., Ltd., any
reproduction, translation or retransmission of all or any part of this document for any
purpose in either electronic or mechanical form is not allowed.
Note
The information in this document is subject to change without notice. Every effort has
been made in the preparation of this document to ensure accuracy of the contents, but all
statements, information, and recommendations in this document do not constitute a

warranty of any kind, express or implied. Suzhou Keda Technology Co., Ltd. is not
responsible for printing or clerical errors.
Target Audience
Administrators and Operators of Video Surveillance Products
Document Version
V1R1
Applicable Models
IPC2255-Gi4N series
IPC2231-Gi4N series
IPC2252-Gi4N series
Related Document
Quick Start Guide
Convention
Icon
Convention
Notes
italic
Book or document name;
Filling content
>
Connector between menus of different level
BOLD
Menu; Button; Option

Contents
1. Product Brief...................................................................................................................................1
2. Start Up............................................................................................................................................3
2.1 Client Installation Conditions................................................................................................3
2.2 Initial Configuration ..............................................................................................................3
2.2.1 Modify Parameter.......................................................................................................3
2.2.2 Login to Web Client....................................................................................................5
2.2.3 Password Reset.........................................................................................................6
2.2.4 Login to the Web Client Interface...............................................................................8
2.3 Live View..............................................................................................................................8
2.3.1 Tool Bar Buttons on Main Interface............................................................................9
2.4 Installation..........................................................................................................................12
2.4.1 Outdoor Installation ..................................................................................................12
2.4.2 Indoor Installation.....................................................................................................15
2.4.3 Calibration................................................................................................................17
3. Intelligent Configuration..............................................................................................................20
3.1 Intelligent Display...............................................................................................................20
3.1.1 Select Target Filter...................................................................................................21
3.1.2 Toolbar buttons ........................................................................................................21
3.2 Guard Area ........................................................................................................................24
3.3 Parameters ........................................................................................................................26
3.4 Arming................................................................................................................................28
3.5 Access to DPSS.................................................................................................................29
4. Basic Configurations....................................................................................................................30
4.1 Image Adjustment..............................................................................................................30
4.1.1 Brightness ................................................................................................................30

4.1.2 White Balance..........................................................................................................31
4.1.3 Night Cut ..................................................................................................................31
4.1.4 Noise Reduction.......................................................................................................32
4.1.5 *Wiper.......................................................................................................................32
4.2 Motion Detection................................................................................................................35
4.3 Alarm Linkage....................................................................................................................37
4.3.1 Motion Detection Alarm Linkage...............................................................................38
4.3.2 Alarm Input Linkage .................................................................................................38
4.3.3 Abnormality Linkage.................................................................................................40
4.4 Video Encoding..................................................................................................................40
4.5 Snapshot............................................................................................................................41
4.6 Video Recording.................................................................................................................42
4.6.1 Configuration............................................................................................................42
4.6.2 Management ............................................................................................................43
4.6.3 Playback...................................................................................................................43
4.6.4 Download .................................................................................................................44
4.6.5 Clipping ....................................................................................................................45
4.7 Upgrade.............................................................................................................................45
4.7.1 Firmware Upgrade....................................................................................................45
4.7.2 Web Client Upgrade.................................................................................................46
4.7.1 Restoration...............................................................................................................48
5. Settings .........................................................................................................................................49
5.1 Network Access .................................................................................................................49
5.1.1 Ethernet....................................................................................................................49
5.1.2 PPPoE......................................................................................................................50
5.2 Register to VMS.................................................................................................................50

5.3 User Security......................................................................................................................52
5.3.1 User Management....................................................................................................52
5.3.2 IP Filter.....................................................................................................................53
5.3.3 Security Service .......................................................................................................54
5.4 Text Overlay.......................................................................................................................55
6. Appendix: Glossary of Terms......................................................................................................57

Intelligent Camera User Manual
1
1. Product Brief
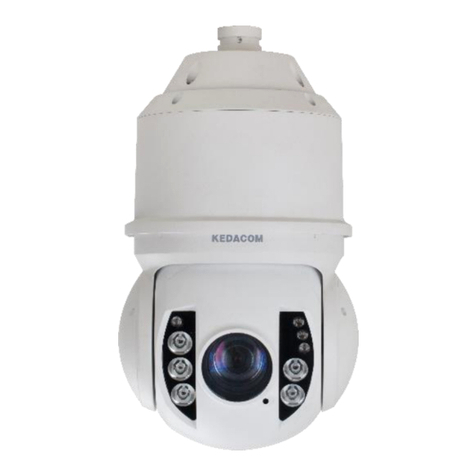
IPC2231-Gi4N-SIR40-Z7022, IPC2252-Gi4N-SIR50-Z7022 and IPC2255-Gi4N series (hereinafter
referred to as intelligent camera) are remote video surveillance cameras based on IP network
technology. It supports max resolution of 1920x1080, snapshot people in the scene. It captures
optimum head-shoulder and whole-body pictures of every person, and analyzes their direction and
speed. Meanwhile, it counts people heads. It realizes HD video encoding and transferring of moving
targets via public or exclusive network and can be used in the network surveillance system.
Picture 1-1 Topology
Main functions of the camera:
2.0 MP progressive scanning image sensor
Support star-light imaging at 0.0001Lux
SVAC 1.0 / H.265/ H.264 video encoding, 1080P@25fps HD live image
Support auto Iris, HLC, backlight compensation, auto shutter and etc.
Support TF card local storage, support ANR (automatic network replenishment)
Support electric focus
Support image flip, 3D noise reduction, motion detection, video freeze, abnormality linkage and
etc.
Support intelligent switch between day and night by IR-CUT
IP-67-rated protection level (applicable to IPC2255-Gi4N only)

Intelligent Camera User Manual
2
Support Beidou/ GPS dual-mode positioning (applicable to IPC2255-Gi4N only)
Support WiFi probe
Built-in human checkpoint intelligent analysis function
Support optimum human face snapshot
Support optimum whole body snapshot
Support human attribute analysis, direction and speed
Applicable to places where human control is necessary such as finance, telecommunication,
government, school, airport, public security, judicial office and safe city

Intelligent Camera User Manual
3
2. Start Up
Please refer to the Quick Start Guide in the packing for device installation and wiring.
2.1 Client Installation Conditions
Requirements of PC for installing the client:
Operating System: Windows 7 or later versions
Browser: IE8.0 and later versions, Firefox, Google Chrome (41 and below)
Processor: 3.3 GHz CORE®i3 series or other equivalent processors
RAM Memory: 4GB or above
DirectX:9.0c
We will take IE8.0 as an example.
2.2 Initial Configuration
2.2.1 Modify Parameter
1) Get IPCSearch from the attached CD.
Picture 2-1 IPCSearch
Notice: Camera name is subject to the search result.
2) Run IPCSearch: it will search devices in LAN automatically and display the list as shown
in Picture 2-1.
3) When login to a non-activated camera for the first time, activate it first. Select the device
and click “Batch processing”. In the popup interface, set admin user’s password and
the email address to find back the password. Click“Activate”and wait for rebooting, as
shown in Picture 2-2.

Intelligent Camera User Manual
4
Picture 2-2 Batch processing
4) Select a camera to be configured, click “Modify Params”or right click the mouse.
Interface is shown in Picture 2-3. Modify parameters and fill admin user name (admin)
and the password set when activating the device.
Picture 2-3 Modify Parameter

Intelligent Camera User Manual
5
5) Click “OK”and in the popup window click “OK”. Wait for rebooting.
Picture 2-4 Reboot device
2.2.2 Login to Web Client
1) After modification, the device will reboot automatically and please wait patiently. After
reboot, the button will be enabled again. Please select this device again and click “Login”
or double click device name to enter web client. Interface is shown in Picture 2-5.
Picture 2-5 Web Client Login Interface
Notice: If logging in the non-activated device through web client for the first time, user
can set admin password and activate the device in the login interface, as shown below.

Intelligent Camera User Manual
6
Picture 2-6 First login through web client
Notice:
1) To ensure the safety of device on internet, it is strongly recommended that you set a
strong password which is composed of at least 2 kinds of the following, digits,
case-sensitive letters or specific symbols, and whose length ranges from 8 to 16 bits.
2) Please modify the password periodically and once every 3 months is recommended. If the
device is used in highly risky environment, suggest modifying the password monthly or
weekly.
3) Please keep your user name and password safe.
2) Input user name and password, and click “Login” to enter the web client.
2.2.3 Password Reset
If user enters a wrong user name or password for certain times (the default is 6 times,
refer to the part of Security Service), the camera IP will be locked up for a certain period
of time (the default Illegal Login Lock Time is 10 minutes), during which user cannot login
to the camera. If user forgets the password, reset the password. Before resetting the
password, obtain the command code through PC or mobile clients.

Intelligent Camera User Manual
7
1) Click “Password Reset“on IPCSearch and a window will pop up, as shown below. Click
“Copy” behind Serial No. and click the password reset link or scan the QR code to enter
the link.
Picture 2-7 Password Reset
2) On the interface of Restore Password, paste the Serial Number and fill in Email address.
Input the Verification Code and click “Get Security Code”.
Picture 2-8 Password Reset
3) Login to the email address to get a security code and fill in the “Command”blank in
Picture 2-7 and click “OK”.
4) Please remember the new password (admin123 by default) shown in the popup window
and click “OK”. The device will reboot.

Intelligent Camera User Manual
8
5) After resetting the password, re-login the web client and configure the device. To improve
system safety, go to Settings > System > User Security > User, and edit password.
Please refer to the part of User Management.
2.2.4 Login to the Web Client Interface
Enter user name and password: when login successfully for the first time, download and
install the plug-in. Close browser when installing. After finishing, double-click the device
in IPCSearch to open browser and enter user name and password. Interface after login is
shown below.
Picture 2-9 Web Client Interface
2.3 Live View
After logging in, the default interface is the live view, or click “Live View” to enter the interface.
You can adjust field of view through Install Inside and Install Outside, as shown in Picture
2-10.

Intelligent Camera User Manual
9
Picture 2-10 Live View Interface
2.3.1 Tool Bar Buttons on Main Interface
Picture 2-11 Toolbar Buttons
Play/Pause /
Click this button to play or pause a viewing.
Stop
Click this button to stop live view.
Call
Click this button to call camera, and click again to stop calling.
Snapshot

Intelligent Camera User Manual
10
Click this button to capture an image.
Snapshot includes Camera Snapshot and Local Snapshot . User can set
snapshot save path in Settings > Local Setting.
Recording
Click this button to start recording and click again to stop recording. Recording is saved
on local PC. User can set or modify save path in Settings > Local Setting > Local
Setting.
Notice:
1) Camera Snapshot: Camera snapshots an image and sends it to local client. The
image quality is good, but there is some time delay caused by network.
2) Local Snapshot: Client snapshots an image and save it locally. The image quality is
ordinary, but there isn’t any time delay.

Intelligent Camera User Manual
11
Picture 2-12 Snapshot Setting
ePTZ
Click this button to enable the ePTZ function. Left click and drag toward lower right to
draw an area. The pixels of this area will be amplified and will cover the whole screen.
Left click and drag toward upper left to draw an area, then image will recover.
PTZ
Click the button to zoom. Left click and drag toward lower right to draw an area. The
pixels of this area will be amplified and will cover the whole screen. Left click and drag
toward upper left to draw an area, then the image will recover. Double click a point in the
image and the point will be centered.

Intelligent Camera User Manual
12
Video Freeze
Click video freeze button and the live video will not change any more; click again to
recover live view.
Full Screen
Click this button to display full screen. Double click or press Esc to exit.
2.4 Installation
2.4.1 Outdoor Installation
Go to Intelligent > Intel Config > Install Outside, and the configuration steps are as
follows:
1) Click “Installation Diagram”, and a window pops up.
2) Firstly, comparing to the installation diagram, select Installation Height (options
include 2.5m, 3m, 3.5m, 4m, 4.5m, 5m, 5.5m and 6m only) according to the actual
installation environment, and the range of Horizontal Distance is in the brackets.
Secondly, measure and input the horizontal distance between people and the camera,
which must be in the range. Afterwards, input Person Height, ranging 1.60~1.80m.
Table 2-1 Parameters for installing outdoor
Camera
Height: H
Surveillance
Distance: L
Camera
Angle: a
Optimum
Surveilance
Distance: L
Optimum
Camera
Angle: a
Surveillance
Width
2.5m
7m-11m
12.5°-8°
8m-10m
11°-8.5°
3m
3m
10m-15m
12.5°-8.2°
11m-14m
11.5°-9°
3m
3.5m
12m-19m
12.5°-8°
14m-17m
10.8°-8.5°
3m
4m
14m-22m
12.5°-8.2°
16m-20m
11°-8.8°
3m
4.5m
16m-23m
12.5°-8.8°
19m-23m
10.8°-8.8°
3m
5m
18m-23m
13°-10.2°
20m-23m
11.8°-10.2°
3m
5.5m
20m-23m
13.2°-11.7°
22m-23m
12.2°-11.7°
3m
5.9m
22m-23m
13.2°-12.5°
23m
12.5°
3m

Intelligent Camera User Manual
13
Picture 2-13 Schematic diagram for installing outdoor
3) Select color for the horizontal line. Click Show Line and the horizontal line will show
on the top of the image in the selected color.
4) Adjust the slant angle of camera housing and lens zooming to make sure that the top
of human head in the image aligns to the horizontal line while his tiptoe aligns to the
bottom of the image.
Picture 2-14 Adjustment of field of view

Intelligent Camera User Manual
14
5) Click “Open Clarity Adjust”and a red frame will display in the image, in which shows
the clarity coefficient. The larger the coefficient is, the higher the clarity is. Adjust camera
lens focusing and the clarity coefficient changes with it. When the coefficient comes to its
max, it means the camera has reached the best focusing position.
Notice: (Also applicable for “Install Inside”)
1) Currently, the clarity display function is available when the encoding format is H.264 or
H.265. Please confirm the set encoding format at the part of Video Encoding. When
adjusting image clarity, suggest using an object with rich texture as the adjustment board,
such as newspaper.
2) After finishing configuration of Install Outside, click “Save” to make settings effective and
meanwhile the camera focal length is locked. If configuring focal length on other
interfaces, the camera will restore to the locking status automatically in 5 minutes.
3) After finishing configuration of Install Outside, you must configure Calibration.
4) After finishing lens adjustment, to avoid misoperation, lock the lens parameters by going
to Settings > Camera > Image > Focus > Focus Mode and select “Camera Lock” from
the dropdown list. If you want to re-adjust the lens, select another mode from the
dropdown list to unlock lens parameters.
This manual suits for next models
2
Table of contents
Other Kedacom Security Camera manuals

Kedacom
Kedacom IPC425 User manual

Kedacom
Kedacom IPC427-D120-N User manual

Kedacom
Kedacom IPC981 User manual

Kedacom
Kedacom IPC2452-HN-SIR User manual

Kedacom
Kedacom IPC2251-AN User manual

Kedacom
Kedacom IPC4X1 Series User manual

Kedacom
Kedacom IPC411 User manual

Kedacom
Kedacom IPC Series User manual

Kedacom
Kedacom IPC2240-HN-SIR30 User manual

Kedacom
Kedacom IPC425 User manual