manuals.online logo
Brands
  1. Home
  2. •
  3. Brands
  4. •
  5. KING
  6. •
  7. Heater
  8. •
  9. KING PAW Series User manual

KING PAW Series User manual

1. Read all instructions before wiring or using this
heater.
2. WARNING: This heater is hot when in use. To
avoid burns, do not let bare skin t ouch hot sur-
faces. Keep combust ible mat erials, such as f urni-
t ure, pillows, bedding, papers, clot hes, boxes,
et c. , and curt ains at least 3ft (0. 9 m) from t he
front of t he heat er and keep t hem away from t he
sides and rear.
3. CAUTION: Ext reme caut ion is necessary when
any heat er is used by or near children or invalids
and whenever t he heat er is left operat ing and
unat t ended.
4. Do not operat e any heat er af t er it malf unct ions.
Disconnect power at service panel and have
heat er inspect ed by qualif ied elect rician for re-
pair bef ore reusing.
5. Do not use out doors.
6. WARNING: To disconnect heat er,
t urn cont rols t o OFF, and t urn
OFF power t o heat er circuit at
IMPORTANT INSTRUCTIONS
ELECTRIC SHOCK OR FIRE HAZARD
DANGER
! !
WARNING
! !
Read Carefully -These inst ruct ions are writ t en in an effort t o prevent pot ent ial dif ficult ies t hat might arise during
inst allat ion. St udying t he inst ruct ions first may save you considerable t ime and money lat er. Observing t he f ollowing
procedures will keep inst allat ion t ime t o a minimum. Save these instructions for future use.
1
King Elect rical Mfg. Co. 9131 10t h Ave So. Seat t le, WA 98108 206-762-0400 www. king-elect ric. com
IMPORTANT INSTRUCTIONS
When using electrical heating appliances, basic precautions should always be followed to
reduce the risk of fire, electric shock and inj ury to persons, including the following:
main disconnect panel.
7. WARNING: Do not insert or allow foreign obj ect s
t o ent er any vent ilation or exhaust opening as t his
may cause an el ect ric shock, fire, or damage t o
t he heat er.
8. To prevent a possible of fire, do not block air in-
t akes or exhaust in any manner.
9. A heat er has hot and arching or sparking part s
inside. Do not use it in areas where gasoline,
paint , or flammable vapors or liquids are used or
st ored.
10. WARNING: Use t his heat er only as described in t his
manual. Any ot her use is not recommended by t he
manuf act urer and may cause f ire, elect ric shock,
explosion or inj ury t o people and or propert y.
11. Heat er is not int ended f or use in bat hrooms, laun-
dry areas or similar indoor locat ions. Never locat e
heat er where it may fall int o a bat ht ub or ot her
wat er cont ainer.
!
SAVE THESE INSTRUCTIONS
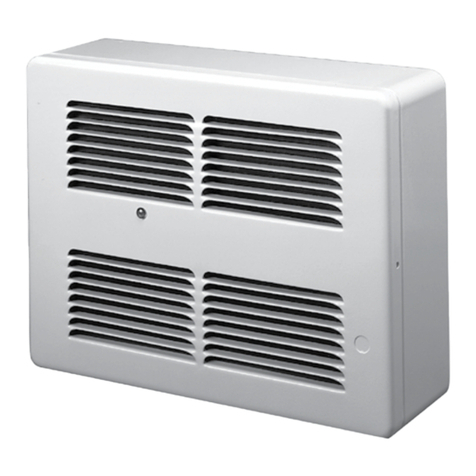
Covers all PAW Series models
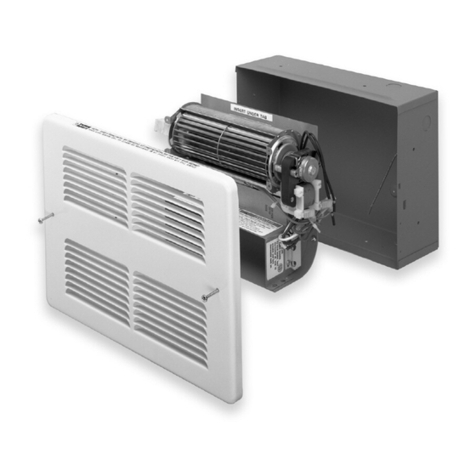
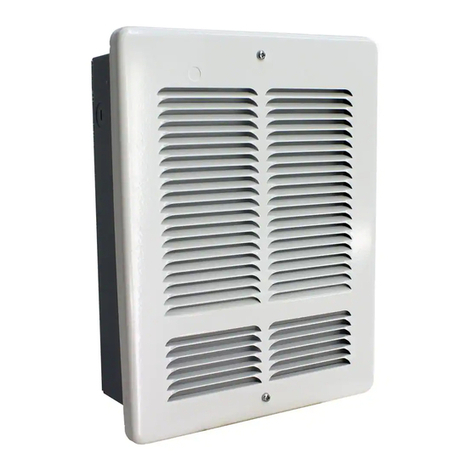
PAW Squirrel Cage
Elect ric Space Heat er
Figure 1
!
!
!
Figure 2
!
ELECTRIC SHOCK OR FIRE HAZARD
! !
Figure 3
PAW INSTALLATION INSTRUCTIONS
CAUTION!
Turn OFF all electrical power
to install heater
Total Amps Minimum AWG. Wire
Size (Copper
Circuit Breaker or
Fuse Size
0 t hr u 12 #14 15 amp
12. 1 t hru 16 #12 20 amp
16. 1 t hru 24 #10 30 amp
Front TOP BOTTOM SIDES
36 in 12 in 4 in 6 in
0.9 m 30. 5 cm 10. 2 cm 15.2 cm
Minimum Clearances for heater: Table 1
Selecting A Location For Your Heater:
DO NOT inst al l less t han 6” (15cm) f rom vert ical side
walls or open edge of door. This heat er must have an
unrest rict ed airf low. DO NOT select a locat ion where it
is l ikely t o be blocked by furnit ure, curt ains, et c. Be
sure t he locat ion select ed allows suf ficient space for t he
heat er as shown by Table 1. DO NOT locat e t his heat er
in an area where combust ible vapors, gases liquids, or
excessive lint , dust or moist ure is present .
The wire and breaker sizing chart will give a general rule
of inst al lat ion size. Consult an elect rician if you are not
knowledgeable about wiring codes.
Wire and Breaker Sizing: Table 2
WIRING: Branch Circuit Connection
1. Connect heat er only t o t he volt age, amperage and
frequency specif ied on t he nameplat e.
2. Wiring procedures and connect ions shall be in ac-
cordance wit h all Nat ional and local codes having
j urisdict ion.
3. Set t he bag cont aining t he grille and packet wit h
t wo (2) grille screws aside.
4. Loosen mount ing screw and remove squirrel cage
heat er assembly.
5. A knockout of 1/ 2 inch conduit size (7/ 8 inch /
2.2cm) is provided in t he back and side of t he heat er
for power t o ent er. Provide proper st rain relief con-
nect ors for your wire ent ering t he wallbox.
6. Inst all
wallbox a
minimum
of 6”
from
vert ical
sidewalls and 4” above f loor. The front edge of
wall can MUST extend 1/ 2” beyond finished wall
surface.
7. Secure wallbox t o t he 2 x 4 st uds using t he t wo (2)
holes on t he side of t he wallbox. Secure t o wall st ud
on opposit e side if required.
8. Connect supply wires, at t ach ground feed wire t o
t he green ground wire wit h wire nut s.
9. Reinst all heat er assembly int o wallbox wit h screw at
t op of int erior.
10. Inst all grille securely wit h screws provided in pack-
et . Do not over t ight en.
11. Test unit by t urning t hermost at up past room t em-
perat ure. You will see a puff of smoke as t he ele-
ment s are energized and t he f an t urns on. This is a
normal burn off of manufact uring lubricant s and will
dissipat e in 5 minut es.
12. Heat er will cont inue t o run unt il t he room t empera-
t ure you set is reached and t hen t urn it self of f unt il
t he t emperat ure drops again.
CAUTION - High temperature. Risk of fire, keep
elect rical cords, drapery, furnishings, and ot her combus-
t ibles at least 3 feet (0. 9 m) from t he f ront of t he heat -
er as well as away from t he side and rear. To reduce t he
risk of f ire, do not st ore or use gasoline or ot her flam-
mable vapors and liquids in t he vicinit y of t he heat er.
2
Figure 2
Zero clearance t o insulat ion.
!
DANGER
Rating Label Location
Note: label under location
Figure 4
Wiring Diagram Figure 5
Table 3
This heat er is equipped wit h a t hermal overload
Smart Limit Prot ect ion which disconnect s ele-
ment s and mot or in t he event normal operat ing
t emperat ures are exceeded. If t hermal overload t rips
due t o abnormal operat ing t emperat ures, t hermal over-
load shall remain open unt il manually reset by t urning
t he heat er OFF for f ift een minut es. Inspect f or any ob-
j ect s on or adj acent t o t he heat er t hat may cause high
t emperat ures. Aft er inspect ing t he heat er, keep t he
power t o t he heat er off f or 15 minut es t o reset t he SLP
t hermal prot ect or. If t he SLP t hermal prot ect or shut s
t he heat er of f again, immediat ely t urn t he heat er OFF
at t he circuit breaker and inspect t he heat er f or possible
fan mot or f ailure or dirt and lint on t he heat ing ele-
ment . Repeat t he st art ing procedure. DO NOT TAMPER
OR REMOVE THIS THIS DEVICE.
General information and Guidelines:
This heat er must be properly inst alled before it is used.
DO NOT t amper wit h or change t he operat ing of t his
heat er. Service Personnel refer t o Maint enance & War-
rant y sect ion f or service of any t ype.
Operation:
1. This heat er must be properly inst alled in accordance
OPERATING INSTRUCTIONS
PAW Series Heater
3
SAVE THESE INSTRUCTIONS
wit h t he Nat ional Elect rical Codes (NEC) & local
elect rical codes before it is used.
2. Af t er t he elect ric heat er has been complet ely in-
st all ed, all t hermost at s should be t urned t o LOW or
NO HEAT. Turn ON breakers, wait 3 t o 5 minut es and
check t o see t hat t he heat ers are not operat ing. If
operat ing, disconnect power and check f or improper
wiring. If none are operat ing t hen t urn t hermost at s
t o highest posit ion and wait 3 t o 5 minut es. Check t o
see t hat all heat ers are operat ing. Should any not be
operat ing, disconnect power and check wiring.
3. Allow ent ire syst em t o operat e st eadily f or 1/ 2 hour.
This should remove oily residue f rom manuf act uring.
(Some smoking may occur).
4. Select t he set t ing f or comf ort on all t hermost at s.
5. A safet y limit cont rol is provided t o t urn of f t he
heat er aut omat ically if it is blocked or ot herwise
overheat s due t o an abnormal condit ion. DO NOT
bypass or remove t his safet y device f rom t he elect ri-
cal circuit -see Warning Figure 3 on page 2. During
normal use, t his saf et y cont rol should not operat e. If
you find t hat t his cont rol is operat ing, make sure t he
heat er is not being blocked. If it cont inues t o cycle
t he heat er of f, disconnect power t o heat er and have
it checked and repaired by a qualified elect rician.
Troubleshoot ing Chart f or Elect ric Heat ers
SYMPTOM PROBLEM SOLUTION
Breaker Trips 1. Short Circuit
2. Overloaded Circuit
3. Improper Volt age
1.
2.
3. Verif y t he heat er volt age mat ches t he supply volt age.
Heat er not working 1. No Power
2. Loose Connect ions
3. Def ect ive Limit
1. Turn Breaker ON, t urn t hermost at ON, check t hat t he breaker is posit ion
properly on panel bus-bar. A 2-Pole breaker must be connect ed t o bot h bus-
bars (A&B phase) t o produce 240V power.
2. Tight en wire connect ions.
3. By-pass t he l imit t o t est . If heat er works, repl ace t he limit .
Heat er Smokes 1. Oil on Element
2. Needs Cleaning
1. It is normal for t he element t o burn off some light finishing oil used in t he
manuf act uring process when f irst energized. Open windows and allow room
t o vent unt il it st ops, usually wit hin a f ew minut es.
2. Remove any dust or dirt accumul at ions.
Room Temperat ure
does not mat ch
t hermost at set t ing
1. Thermost at af fect ed
by anot her heat
source.
2. Improper cal ibrat ion
1. Sunl ight or ot her heat sources can af fect t he t hermost at . Move t he t hermo
st at t o anot her l ocat i on or remove t he heat source.
2. Remove cover and adj ust calibrat ion screw.
Room Temperat ure
swings f rom t oo hot
t o t oo col d
1. Def ect ive or low
qualit y t hermost at
1. Replace wit h a bet t er qualit y t hermost at . Ant icipat ed t hermost at s are f air-
ly accurat e; an elect ronic t hermost at is best .
paw_inst all_2012.pu
b
Maint enance & Warrant y
King El ect rical Mf g. Co. 9131 10t h Ave So. Seat t le, WA 98108 206-762-0400 www. king-elect ric.com
4
Maint enance & Cleaning: Basic maint enance is list ed below and should be perf ormed annually. When necessary, any
required servicing should be perf ormed by qualif ied service personnel. Your heat er will give you years of service and
comfort wit h only minimum care. To assure ef ficient operat ion follow t he simple inst ruct ions below.
Remot e Wall Thermost at
Warrant y Inf ormat ion
King Elect rical Manufact uring Company will repair or repl ace, wit hout charge t o t he original owner, any W Series heat er f ound
t o be defect ive or malf unct ioning wit hin 1 year of inst allat ion. This warrant y requires t he owner or his agent inst all t he equip-
ment in accordance wit h t he Nat ional El ect rical Code, any ot her applicable heat ing or elect rical codes, and t he manufact ur-
er’ s inst allat ion inst ruct ions. It f urt her requires t hat reasonable and necessary maint enance be perf ormed on t he unit . Failure
t o properly maint ain t he unit will result in t he warrant y being voided. The company is not liable f or abuse or misuse of prod-
uct as may be finally det ermined by t he company. The cust omer shall be responsible for all cost s incurred in t he removal or
reinst allat ion of product s, incl uding l abor cost s and shipping cost s incurred t o ret urn product s t o King Manuf act uring. King
Manufact uring will repair or replace, at our opt ion, at no charge t o t he cust omer wit h ret urn f reight paid by King. King Manu-
f act uring shall not be l iable f or consequent ial damages arising wit h respect t o t he product , whet her based upon negligence,
t ort , st rict l iabil it y or cont ract . No ot her writ t en or oral warrant y applies, nor any warrant ies by represent at ives dealers, em-
ployees of King, or any ot her person. All ret urns require a King Ret urn Goods Aut horizat ion (RGA); Unaut horized ret urns will
be refused. Do not ret urn mal funct ioning/ def ect ive product s t o st ore.
1. Bef ore removing grille, t urn t he elect rical power OFF. Circuit breakers are of t en not marked correct ly and t urn-
ing t he wrong breaker of f could mean elect ricit y is f lowing t o t he heat er, even if t he heat er does not appear t o
be working. If you are uncomfort able working wit h elect rical appliances, unable t o follow t hese guidelines, or do
not have t he necessary equipment , consult a qual if i ed elect rician. Once you verif y t he power is of f complet ely,
proceed t o t he next st ep.
2. Remove screws and t ake off grille. Wash grille wit h hot soapy wat er and dry immediat ely
3. Using a hair dryer or vacuum on blow cycle, hold t he squirrel cage in place t o prevent it f rom t urning and blow
debris back t hrough t he element . Do not t ouch element . Vacuum or use a sof t brist le brush such as a paint brush
t o wipe away lose debris wit hout t ouching t he element s.
4. Replace grille and secure wit h screws.
5. Turn t hermost at t o desired set t ing.
6. Turn power back ON at t he elect rical panel board.
Before cleaning this heater, the heating element of the heater must be cool.
Figure 2
Figure 6
Connect ion Diagram f or Wall Mount ed Single Pole Thermost at
1. Red t hermost at wire t o black power supply wire.
2. Black t hermost at wire t o black heat er wire.
3. Whit e power supply wire t o whit e heat er wire.
4. Connect al l bare ground wires t oget her.
Connect ion Diagram f or Wall Mount ed Double Pole Thermost at
1. Connect t he t wo red t hermost at wires t o t he black
and whit e power supply wires.
2. Connect t he t wo black t hermost at wires t o t he black
and whit e heat er wires.
3. Connect all t he bare ground wires t oget her.

Other KING Heater manuals

KING PSH2440TB Instruction Manual

KING

KING PSH2440TB Instruction Manual

KING EKB Series Installation instructions manual

KING

KING EKB Series Installation instructions manual

KING PCK Series Installation instructions manual

KING

KING PCK Series Installation instructions manual

KING K Series Guide

KING

KING K Series Guide

KING PCKW Series Instruction Manual

KING

KING PCKW Series Instruction Manual

KING KBP2406 Instruction Manual

KING

KING KBP2406 Instruction Manual

KING PGH2440TB Instruction Manual

KING

KING PGH2440TB Instruction Manual

KING 2016E User manual

KING

KING 2016E User manual

KING RH Series User manual

KING

KING RH Series User manual

KING CB SERIES User manual

KING

KING CB SERIES User manual

KING KTW1215 Installation instructions manual

KING

KING KTW1215 Installation instructions manual

KING PGH2440TB Instruction Manual

KING

KING PGH2440TB Instruction Manual

KING PAW Series Installation instructions manual

KING

KING PAW Series Installation instructions manual

KING KT Series Installation instructions manual

KING

KING KT Series Installation instructions manual

KING H412 2/3-FS-GW User manual

KING

KING H412 2/3-FS-GW User manual

KING KVC Series User manual

KING

KING KVC Series User manual

KING U2425 User manual

KING

KING U2425 User manual

KING KCV Series User manual

KING

KING KCV Series User manual

KING K series Guide

KING

KING K series Guide

KING W SERIES Service manual

KING

KING W SERIES Service manual

KING U Series User manual

KING

KING U Series User manual

KING WHF Fan Force Electric Space Heater User manual

KING

KING WHF Fan Force Electric Space Heater User manual

KING SL Series User manual

KING

KING SL Series User manual

KING PCKF Series Installation instructions manual

KING

KING PCKF Series Installation instructions manual

Popular Heater manuals by other brands

Alpina LQ003 instruction manual

Alpina

Alpina LQ003 instruction manual

Beper RI-085 use instructions

Beper

Beper RI-085 use instructions

jcb JCB3UF Installation and operating instructions

jcb

jcb JCB3UF Installation and operating instructions

ecofort ecoheat Hybrid-T instruction manual

ecofort

ecofort ecoheat Hybrid-T instruction manual

OC IMP Klima TKV Series Installation and start-up manual

OC IMP Klima

OC IMP Klima TKV Series Installation and start-up manual

Rowenta SO2330 user guide

Rowenta

Rowenta SO2330 user guide

Ayce PH-1903-15 Original instructions

Ayce

Ayce PH-1903-15 Original instructions

Uberhaus HMFD-1500 Operator's manual

Uberhaus

Uberhaus HMFD-1500 Operator's manual

STIEBEL ELTRON ETW 120 Operation and installation

STIEBEL ELTRON

STIEBEL ELTRON ETW 120 Operation and installation

MW TOOLS WD70I manual

MW TOOLS

MW TOOLS WD70I manual

Frico Thermocassette CTS quick start guide

Frico

Frico Thermocassette CTS quick start guide

Taurus CHTA500 manual

Taurus

Taurus CHTA500 manual

MEI HK 3011 instruction manual

MEI

MEI HK 3011 instruction manual

Atlantic Zanzibar Ventilo User and installation manual

Atlantic

Atlantic Zanzibar Ventilo User and installation manual

Mini E-90 Technical documentation operation manual

Mini

Mini E-90 Technical documentation operation manual

EOS P1 W Installation and operation manual

EOS

EOS P1 W Installation and operation manual

RETTIG BAYO Installation & maintenance

RETTIG

RETTIG BAYO Installation & maintenance

S&P EBB-175 User instruction

S&P

S&P EBB-175 User instruction

manuals.online logo
manuals.online logoBrands
  • About & Mission
  • Contact us
  • Privacy Policy
  • Terms and Conditions

Copyright 2025 Manuals.Online. All Rights Reserved.