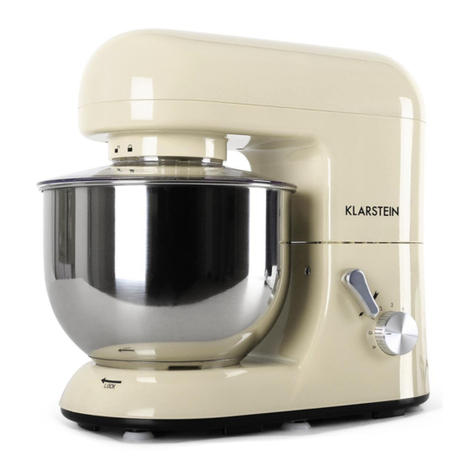
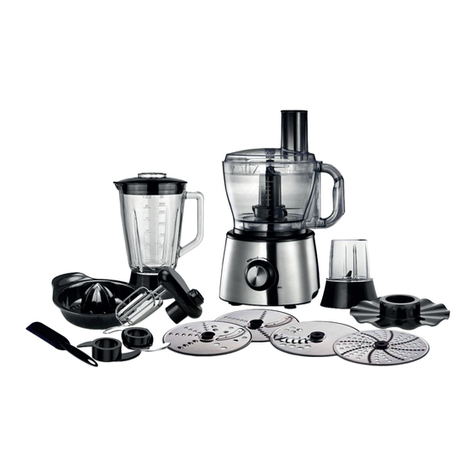
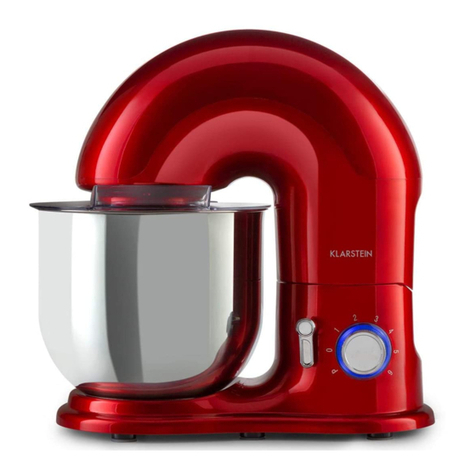
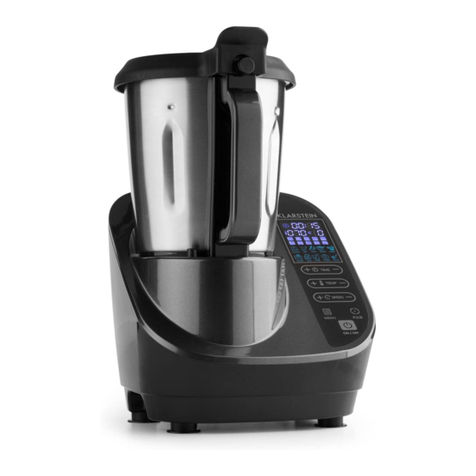
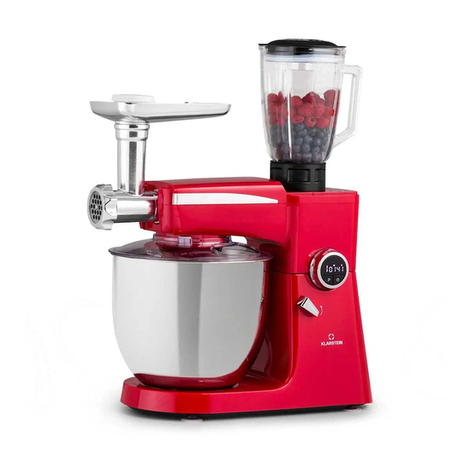
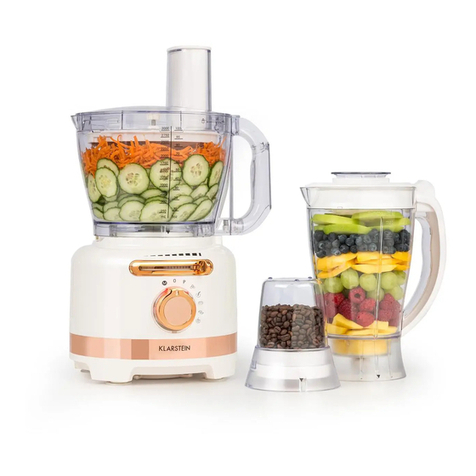
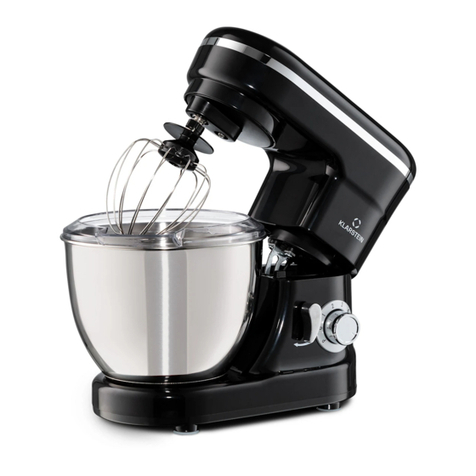
Klarstein 10006255 User manual

10006254 10006255 10008235 10008236 10008237 10031674 10031675
Küchenmaschine
Food Processor
Robot da cucina
Robot de cuisine
Procesador de alimentos


3
DE
Sehr geehrter Kunde,
wir gratulieren Ihnen zum Erwerb Ihres Gerätes. Lesen Sie die folgenden Hinweise
sorgfältig durch und befolgen Sie diese, um möglichen Schäden vorzubeugen. Für
Schäden, die durch Missachtung der Hinweise und unsachgemäßen Gebrauch
entstehen, übernehmen wir keine Haftung.
INHALTSVERZEICHNIS
Technische Daten 3
Konformitätserklärung 3
Sicherheitshinweise4
Hinweise zur Entsorgung4
Geräteübersicht5
Inbetriebnahme und Bedienung6
Reinigung und Pege8
TECHNISCHE DATEN
Artikelnummer
10006254, 10006255, 10008235
10008236, 10008237, 10031674
10031675
Stromversorgung 220-240 V ~ 50-60 Hz
Kapazität Rührschüssel 5 L
Kapazität Glasgefäß 1,5 L
KONFORMITÄTSERKLÄRUNG
Hersteller:
Chal-Tec GmbH, Wallstraße 16, 10179 Berlin, Deutschland.
Dieses Produkt entspricht den folgenden Europäischen
Richtlinien:
2014/30/EU (EMV)
2014/35/EU (LVD)
2011/65/EU (RoHS)
English 9
Italiano 15
Français 21
Español 27

4
DE
SICHERHEITSHINWEISE
• Stellen Sie sicher, dass die Spannung, die auf dem Gerät angezeigt wird, mit Ihrer
Stromversorgung korrespondiert.
• Das Gerät muss immer ausgeschaltet sein, bevor Sie es an die Stromzufuhr
anschließen.
• Verwenden Sie dieses Gerät nicht in der Nähe von Wasser um elektrische Schläge
zu verhindern.
• Falls das Stromkabel beschädigt sein sollte, muss dieses von einem Fachmann
getauscht werden.
• Knicken Sie nicht das Kabel. Stellen Sie das Gerät nicht zu nah an eine Tischkante,
da es herunterfallen könnte.
• Setzen Sie das Gerät keiner offenen Flamme aus.
• Stellen Sie das Gerät auf eine ebene Fläche.
• Das Gerät darf nicht von Kindern bedient werden.
• Überprüfen Sie regelmäßig den Zustand des Stromkabels.
• Verwenden Sie das Gerät nicht im Freien.
• Verwenden Sie das Gerät nicht im leeren Zustand.
• Berühren Sie die beweglichen Teile während des Gebrauchs nicht mit den Fingern.
• Verwenden Sie nur Originalzubehör.
• Trennen Sie die Stromzufuhr, wenn Sie das Gerät nicht verwenden.
• Reparieren Sie das Gerät niemals selbst.
• Die Messer sind sehr scharf. Seien Sie vorsichtig, wenn Sie das Glasgefäß reinigen.
• Verwenden Sie die einzelnen Funktionen des Gerätes nicht gleichzeitig.
HINWEISE ZUR ENTSORGUNG
Bendet sich die linke Abbildung (durchgestrichene Mülltonne
auf Rädern) auf dem Produkt, gilt die Europäische Richtlinie
2012/19/EU. Diese Produkte dürfen nicht mit dem normalen
Hausmüll entsorgt werden. Informieren Sie sich über die
örtlichen Regelungen zur getrennten Sammlung elektrischer
und elektronischer Gerätschaften. Richten Sie sich nach
den örtlichen Regelungen und entsorgen Sie Altgeräte nicht
über den Hausmüll. Durch die regelkonforme Entsorgung
der Altgeräte werden Umwelt und die Gesundheit ihrer
Mitmenschen vor möglichen negativen Konsequenzen
geschützt. Materialrecycling hilft, den Verbrauch von
Rohstoffen zu verringern.
5
DE
1 Trichter
2 Rohr
3 Rührschüssel
4 Knopf
5 Wurst-Halter
6 Abdeckung
7 Wurst-Rohr
8 Drehknopf
9 Hintere Abdeckung
10 Mixer-Messer
11 Quirl
12 Knethaken
13 Mixer-Gefäß
GERÄTEÜBERSICHT
1 Messbecher
2 Deckel
3 Glasgefäß
4 Gefäßsockel
5 Dichtungsring
6 Messersockel

6
DE
INBETRIEBNAHME UND BEDIENUNG
Vor dem ersten Betrieb
• Reinigen Sie alle Teile des Mixers gründlich vor dem ersten Gebrauch.
• Entnehmen Sie die passende Kabellänge aus der Kabelaufbewahrung und
verbinden Sie dieses mit der Steckdose.
Hinweis: Der Deckel bzw. der Glasbehälter muss aus Sicherheitsgründen montiert
sein, damit die Maschine in Betrieb genommen werden kann. Andernfalls kann es
sein, dass das Gerät nicht startet.
Anbringen des Glasgefäßes
1. Befestigen Sie den Dichtungsring auf dem Messersockel und befestigen Sie
diesen am Gefäßsockel.
2. Geben Sie die Zutaten in das Gefäß und verschließen Sie es mit dem Deckel.
3. Stecken Sie den Messbecher auf den Deckel und drehen Sie ihn gegen den
Uhrzeigersinn,
bis er einrastet.
4. Befestigen Sie das Gefäß auf dem Gerät und drehen Sie es gegen den
Uhrzeigersinn,
bis es einrastet.
Probelauf:
1. Drehen Sie den Knopf (4) und heben Sie den Arm der Maschine an.
2. Stellen Sie die Rührschüssel samt Deckel auf das Gerät und verriegeln Sie die
Schüssel.
3. Drehen Sie den Knopf (4) und senken Sie den Arm der Maschine. Drehen Sie den
Knopf um
den Arm zu verriegeln.
4. Stecken Sie das Stromkabel in die Steckdose und stellen Sie den Schalter auf „P“.
Dann probieren Sie alle Geschwindigkeiten für ein paar Sekunden.
5. Danach stellen Sie den Schalter auf „0“.
6. Drehen Sie den Knopf (4) und heben Sie den Arm der Maschine an.
Entnehmen Sie das Mixer-Messer.
7. Nehmen Sie die hintere Abdeckung vom oberen Gehäuse ab.
8. Gießen Sie eine Tasse Wasser in das Glasgefäß und stellen Sie das Glasgefäß auf
die Maschine und wiederholen Sie die Schritte 4-6.
9. Entnehmen Sie das Glasgefäß und decken Sie das Gehäuse wieder mit der hinteren
Abdeckung ab.

7
DE
Teig mixen/kneten
1. Mehl- und Wasserverhältnis 5:3
2. Mischen Sie den Teig auf Stufe 1 für 20 Sekunden, auf Stufe 2 für 20 Sekunden
und auf Stufe 3 für 3 Minuten.
3. Beachten Sie die maximale Füllmenge. Für Mehl ist diese 1500g.
4. Verwenden Sie das Mixer-Messer oder den Knethaken.
5. Verwenden Sie den Knethaken kontinuierlich nicht länger als 20 Sekunden bei
Stufe 1
oder 2 und nicht länger als 4 Minuten bei Stufe 3.
6. Verwenden Sie das Gerät kontinuierlich nicht länger als 4 Minuten.
Eischnee oder Sahne schlagen
1. Schalten Sie das Gerät von Stufe 4 auf Stufe 6 und schlagen Sie den Eischnee
kontinuierlich
für 5 Minuten, bis dieser steif ist.
2. Mischen Sie nicht mehr als 24 Eier.
3. Für Schlagsahne schlagen Sie 250ml frische Sahne bei Stufe 4-6 für 5 Minuten.
4. Beachten Sie die maximale Füllmenge.
5. Bitte verwenden Sie den Quirl.
6. Verwenden Sie das Gerät kontinuierlich nicht länger als 4 Minuten.
Mixer-Funktion
1. Füllen Sie die Lebensmittel, die Sie verarbeiten wollen in das Glasgefäß.
2. Decken Sie das Glasgefäß ab. Setzen Sie den Messbecher auf und verriegeln Sie
diesen.
Stufe 3-4 für leichten Gebrauch (Flüssigkeiten)
Stufe 5-6 für festere Konsistenz (Flüssigkeiten, feste Lebensmittel)
Stufe P Zum Crushen von Eis, oder für kurzes kraftvolles Mixen
Hinweis: Stellen Sie den Schalter nach dem Gebrauch auf Stufe 0.

8
DE
REINIGUNG UND PFLEGE
• Stellen Sie den Bedienknopf auf die Position „0“ und zeihen Sie den Netzstecker.
• Lassen Sie die Maschine nach dem Gebrauch abkühlen.
• Verwenden Sie für die Reinigung des Gehäuses ein feuchtes Tuch mit einem milden
Reinigungsmittel.
• Wenn Sie das Innere der Maschine reinigen, dürfen Sie keine starken
Reinigungsmittel verwenden.
• Stellen Sie das Gerät nicht in Wasser.
• Die Einzelteile sind nicht geeignet für die Geschirrspülmaschine. Diese Teile sollten
nur in warmen
• Wasser mit ein wenige Spülmittel gereinigt werden.
• Die Rührschüssel ist geeignet für die Geschirrspülmaschine, kann aber auch mit
warmen Wasser und Spülmittel gereinigt werden.

9
EN
Dear Customer,
Congratulations on purchasing this equipment. Please read this manual carefully and
take care of the following hints to avoid damages. Any failure caused by ignoring the
mentioned items and cautions mentioned in the instruction manual are not covered by
our warranty and any liability.
CONTENT
Technical Data9
Declaration of Conformity9
Safety Instructions10
Hints on Disposal10
Product Description11
Use and Operation12
Care and Cleaning14
TECHNICAL DATA
Item number
10006254, 10006255, 10008235
10008236, 10008237, 10031674
10031675
Power supply 220-240 V ~ 50-60 Hz
Capacity bowl 5 L
Capacity jar 1,5 L
DECLARATION OF CONFORMITY
Producer:
Chal-Tec GmbH, Wallstraße 16, 10179 Berlin, Germany.
This product is conform to the following European
Directives:
2014/30/EU (EMC)
2014/35/EU (LVD)
2011/65/EU (RoHS)

10
EN
SAFETY INSTRUCTIONS
• Make sure that the voltage displayed on the device corresponds to your power
supply.
• The appliance must always be switched off before connecting it to the power
supply.
• Do not use this device near water to prevent electric shock.
• If the power cord is damaged, it must be replaced by a specialist.
• Do not kink the cable. Do not place the unit too close to a table edge as it may fall.
• Do not expose the device to an open ame.
• Place the device on a at surface.
• The device must not be operated by children.
• Check the condition of the power cord regularly.
• Do not use the device outdoors.
• Do not use the device when it is empty.
• Do not touch the moving parts with your ngers during use.
• Only use original accessories.
• Disconnect the power when you are not using the device.
• Never repair the device yourself.
• The knives are very sharp. Be careful when cleaning the glass jar.
• Do not use the individual functions of the device at the same time.
HINTS ON DISPOSAL
According to the European waste regulation 2012/19/EU this
symbol on the product or on its packaging indicates that this
product may not be treated as household waste. Instead it should
be taken to the appropriate collection point for the recycling of
electrical and electronic equipment. By ensuring this product is
disposed of correctly, you will help prevent potential negative
consequences for the environment and human health, which
could otherwise be caused by inappropriate waste handling of
this product. For more detailled information about recycling of
this product, please contact your local council or your household
waste disposal service.

11
EN
1 Hopper
2 Mincing tube
3 Mixing bowl
4 Shaft knob
5 Sausage Holder
6 Front cover
7 Sausage tube
8 Rotary knob
9 Caudal cover
10 Mixing blade
11 Egg beater
12 Dough blade
13 Blender jar
PRODUCT DESCRIPTION
1 Measuring cup
2 Lid
3 Glass Jar
4 Jar base
5 Sealing ring
6 Blade base

12
EN
USE AND OPERATION
Before rst Use
1. All parts of the food mixer are to be thoroughly cleaned before being used for the
rst time. (See section: Cleaning).
2. Take out the required length of cable from the cable tidy on the base of the food
mixer and connect the device to the mains supply.
Note: The lid or glass container must be mounted for safety reasons so that the
machine can be put into operation. Otherwise, the device may not start.
Assembly of the Glass Jar
1. Mount the jar sealing ring onto the blade base ,and Mount the blade base into the
jar base, and the inside ring of jar base is tighten on jar base as far as xed the
blade base tight.
2. After putting the ingredients in the jar, x the lid onto the jar by pressing down.
3. Insert the Measuring cup into the opening of the lid, and tune it in anticlockwise
direction until it is locked.
4. Mount the jar with jar unit onto the main base, and tune the jar in anticlockwise
direction until the jar is locked.
Trial use:
1. Revolve the Shaft knob, then lift the machine arm.
2. Put the mixing bowl and mixing bowl cover onto the base, and lock it as the
arrowhead denotes.
3. Revolve the Shaft knob, then push the upper cover down and make the arm down.
Make sure the arm is xed together the base, then Revolve the Shaft knob up to
lock the arm solidly.
4. Plug-in the cord, and turn the switch to P, then try every speed for a few seconds.
5. After the trial, turn the switch to Speed 0.
6. Turn the Shaft knob and lift the arm, then take apart the mixing blade from the blade
conector.
7. Take off the back cover from the upper housing.
8. Pure a cup of water into the blender jar, set the blender jar onto the machine, then
repeat step 4, 5 and 6.
9. Take off the blender jar, and set the Caudal cover to the machine.

13
EN
To mix or knead dough
1. Suggestion our and water at a ratio of 5:3.
2. From speed 1 for mix 20 second, and speed 2 for mix 20 second, afterwards
speed 3 for about 3 minutes.
3. When lling the blender jar, please ensure that the maximum quality is not
exceeded.
4. Maximum quantity of our is 1500g.
5. The dough blade or mixer blade should be used.
6. Do not use the dough blade longer than 20 seconds continuously at speed level 1
or 2 and not longer than 4 minutes continuously at speed level 3.
7. Use No longer than 4 minutes continuously at a time.
Whipping egg whites or cream
1. Switch on speed 4 to speed 6, whip the egg whites without stopping for about 5
minutes, according to the size of the eggs, until stiff.
2. Maximum quantity 24 eggs.
3. For whipped cream, whip 250ml fresh cream at speed 4 to 6 for about 5minutes.
4. When lling the glass jar with fresh milk, cream or other ingredients, pleaseensure
that the maximum quality is not exceeded.
5. The egg beater should be used.
6. Use No longer than 4 minutes continuously at a time.
Use Blender function
1. Place the foodstuff you wish to process into the glass jar.
2. Put the lid on the glass jar and close securely. Place the measuring cup into the hole
in the lid and turn clockwise to lock.
Stufe 3-4 For easy use (liquids)
Stufe 5-6 For rmer consistency (liquids, solid foods)
Stufe P For crunching ice, or for a short powerful mixing
Note: Set the switch to 0 after use.

14
EN
CARE AND CLEANING
• Before cleaning, please ensure that the Switch knob is at the “0” position and that
the plug has
been disconnected from the socket.
• After use, allow the device to cool down before you start to clean it.
• To clean the exterior of the device, use a moist cloth and a mild detergent.
• When cleaning the interior and exterior do not use any abrasive detergents or
alcohol.
• To clean the device, never submerge it in water.
• The dough blade, mixing blade are not dishwasher safe. The accessories must be
cleaned only in
warm water and washing-up liquid.
• The plastic accessories, Mixing bowl, egg beater, blender jar and blades inside,
can be cleaned with warm water and washing-up liquid or in dishwasher. Do not
use any abrasive detergents.

15
IT
Gentile cliente,
La ringraziamo per aver acquistato il nostro prodotto. La preghiamo di leggere
attentamente le seguenti istruzioni e di seguirle per evitare eventuali danni. Si declina
ogni responsabilità per danni derivati da una mancata osservazione delle avvertenze di
sicurezza e da un uso improprio del dispositivo.
INDICE
Dati tecnici15
Dichiarazione di conformità15
Avvertenze di sicurezza16
Smaltimento16
Descrizione del prodotto 17
Messa in funzione e uso18
Pulizia e manutenzione20
DATI TECNICI
Codice articolo
10006254, 10006255, 10008235
10008236, 10008237, 10031674
10031675
Voltaggio/frequenza 220-240 V ~ 50-60 Hz
Capacità della recipiente per mescolare 5 L
Capacità del contenitore in vetro 1,5 L
DICHIARAZIONE DI CONFORMITÀ
Produttore:
Chal-Tec GmbH, Wallstraße 16, 10179 Berlino, Germania.
Questo prodotto è conforme alle seguenti direttive
europee:
2014/30/UE (EMC)
2014/35/UE (LVD)
2011/65/UE (RoHS)

16
IT
AVVERTENZE DI SICUREZZA
• Assicurarsi che il voltaggio indicato sul dispositivo corrisponda all´alimentatore di
cui si dispone.
• Il dispositivo deve essere sempre spento prima di collegarlo alla corrente elettrica.
• Tenere lontano il presente dispositivo dall´acqua per evitare scosse elettriche.
• Nel caso in cui il cavo elettrico risulti danneggiato, questo deve essere sostituito da
una persona qualicata.
• Non torcere il cavo. Non posizionare il dispositivo in prossimità del bordo del
tavolo in quanto potrebbe cadere.
• Non esporre il dispositivo a fonti di calore.
• Non posizionare il dispositivo su una supercie piana.
• Tenere il dispositivo lontano dalla portata dei bambini.
• Controllare regolarmente lo stato del cavo di rete.
• Non usare il dispositivo all´aria aperta.
• Non usare il dispositivo senza alcun contenuto all´interno.
• Non toccare con le dita le parti mobili durante l´utilizzo del dispositivo.
• Usare solo accessori originali.
• Staccare la spina quando il dispositivo non viene utilizzato.
• Non tentare mai di riparare il dispositivo autonomamente.
• Le lame sono molto aflate. Prestare la massima attenzione quando si pulisce il
contenitore di vetro.
• Non usare le singole funzioni del dispositivo contemporaneamente.
SMALTIMENTO
Se sul prodotto è presente la gura a sinistra (il cassonetto
dei riuti mobile sbarrato), si applica la direttiva europea
2012/19/UE. Questi prodotti non possono essere smaltiti con
i riuti normali. Informarsi sulle disposizioni vigenti in merito
alla raccolta separata di dispositivi elettrici ed elettronici.
Non smaltire i vecchi dispositivi con i riuti domestici. Grazie
al corretto smaltimento dei vecchi dispositivi, si proteggono
il pianeta e la salute delle persone da possibili conseguenze
negative. Il riciclo di materiali aiuta a ridurre il consumo di
materie prime.

17
IT
1 Imbuto
2 Tubo
3 Recipiente per
mescolare
4 Pomello
5 Supporto per wurstel
6 Coperchio
7 Contenitore per la
cottura del wurstel
8 Manopola
9 Coperchio posteriore
10 Lama del mixer
11 Frullatore
12 Gancio impastatore
13 Recipiente per il mixer
DESCRIZIONE DEL PRODOTTO
1 Misurino
2 Coperchio
3 Contenitore in vetro
4 Base del contenitore
5 Guarnizione
6 Base della lama

18
IT
MESSA IN FUNZIONE E USO
Avvertenze per il primo utilizzo
• Pulire con cura tutte le parti del mixer prima che questo venga usato per la prima
volta.
• Srotolare la quantità di cavo necessaria dalla bobina e collegare il cavo alla
presa.
Nota: il coperchio o il contenitore di vetro devono essere montati per motivi di
sicurezza, in modo che la macchina possa essere messa in funzione. In caso
contrario, il dispositivo potrebbe non avviarsi.
Montaggio del contenitore in vetro
1 Fissare la guarnizione sulla base della lama e ssare quest´ultima alla base del
contenitore.
2 Mettere gli ingredienti nel contenitore e chiudere il coperchio.
3 Posizionare il misurino sul coperchio e girarlo in senso antiorario no al suo
inserimento.
4 Fissare il contenitore in vetro sul robot da cuina e girarlo in senso antiorario no al
suo inserimento.
Collaudo:
1 Girare il pomello (4) e sollevare il braccio del robot.
2 Posizionare la recipiente con il coperchio sul dispositivo e bloccare le chiusure.
3 Girare il pomello (4) e abbassare il braccio del robot. Girare il pomello per
bloccare il braccio del robot.
4 Inserire il cavo nella presa e posizionare l´interruttore su „P“. Provare quindi tutte le
velocità per qualche secondo.
5 Ora posizionare l´interruttore su „O“.
6 Girare il pomello (4) e sollevare il braccio del robot. Togliere la lama del mixer.
7 Togliere il coperchio posteriore dall´alloggiamento.
8 Versare un bicchiere d´acqua nel contenitore di vetro, riporre il contenitore di vetro
nel robot e ripetere i punti 4-6.
9 Togliere il recipiente di vetro e inserire di nuovo il coperchio posteriore
nell’alloggiamento.

19
IT
Mixare/preparare l´impasto
1 Il rapporto farina-acqua deve essere di 5:3
2 Mixare l’impasto per 20 secondi a velocità 1, per 20 secondi a velocità 2 e per 3
minuti a velocità .
3 Prestare attenzione alla quantità massima da riempiere. Per la farina è di 1500 g.
4 Usare o la lama del mixer o il gancio impastatore.
5 Non usare il gancio impastatore per più di 20 secondi consecutivi a velocità 1 o 2
e non più di 4 minuti a velocità 4.
6 Non usare il dispositivo per più di 4 minuti consecutivi.
Montare la panna o l´albume
1 Selezionare una velocità da 4 a 6 e montare l´albume per 5 minuti consecutivi no
a quando è pronto.
2 Non mixare più di 24 uova.
3 Per la panna montare 250 g di panna fresca a velocità 4-6 per 5 minuti.
4 Prestare attenzione alla quantità massima.
5 Usare il frullatore.
6 Non usare il dispositivo per più di 4 minuti consecutivi.
Funzione mixer
1 Mettere l´alimento che si intende mixare nel contenitore in vetro.
2 Coprire il contenitore in vetro. Posizionare il misurino e bloccarlo.
Velocità 3-4 adatto ad un utilizzo semplice (liquidi)
Velocità5-6 adatto ad una consistenza maggiore (liquidi, cibi solidi)
Velocità P adatto a tritare il ghiaccio, o a mixare più energicamente.
Nota: impostare l‘interruttore su 0 dopo l‘uso.

20
IT
PULIZIA E MANUTENZIONE
• Posizionare l’interruttore su „0“ e staccare la spina.
• Far raffreddare il robot dopo l´utilizzo.
• Usare per la pulizia dell´alloggiamento un panno umido e un detergente non
aggressivo.
• Quando si pulisce la parte interna del robot, non usare detergenti troppo
aggressivi.
• Non immergere il dispositivo nell´acqua.
• I singoli componenti non sono adatti al lavaggio in lavastoviglie. I componenti
devono essere lavati solo con acqua tiepida usando poco detersivo.
• Il recipiente per mescolare è adatto al lavaggio con lavastoviglie, ma può essere
anche lavato con acqua tiepida e detersivo.
This manual suits for next models
6
Table of contents
Languages:
Other Klarstein Food Processor manuals

Klarstein
Klarstein 10028591 User manual

Klarstein
Klarstein BELLA User manual

Klarstein
Klarstein 10008232 User manual

Klarstein
Klarstein 10028591 User manual

Klarstein
Klarstein Delfino User manual

Klarstein
Klarstein Bella Pico 2G User manual

Klarstein
Klarstein 10032089 User manual

Klarstein
Klarstein Lucia 10006254 User manual

Klarstein
Klarstein RENATA User manual

Klarstein
Klarstein 10021682 User manual